


Understanding the Basics of Woodworking Plans
When embarking on a woodworking project, it is essential to start with a clear understanding of woodworking plans. These plans serve as a blueprint for your project, outlining the steps you need to follow and the materials required. Whether you are a beginner or an experienced woodworker, taking the time to comprehend and interpret these plans is crucial to the success of your project.
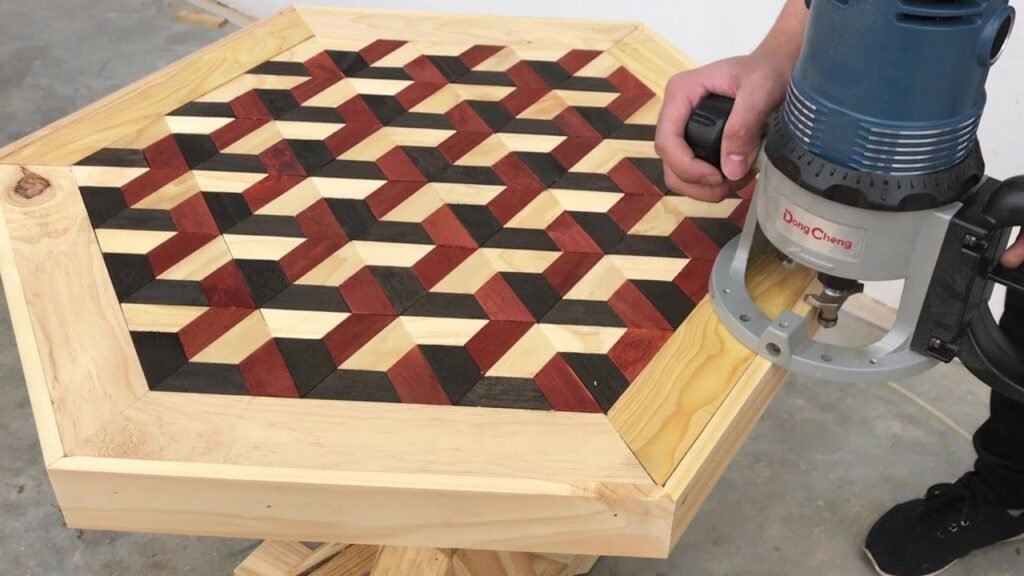
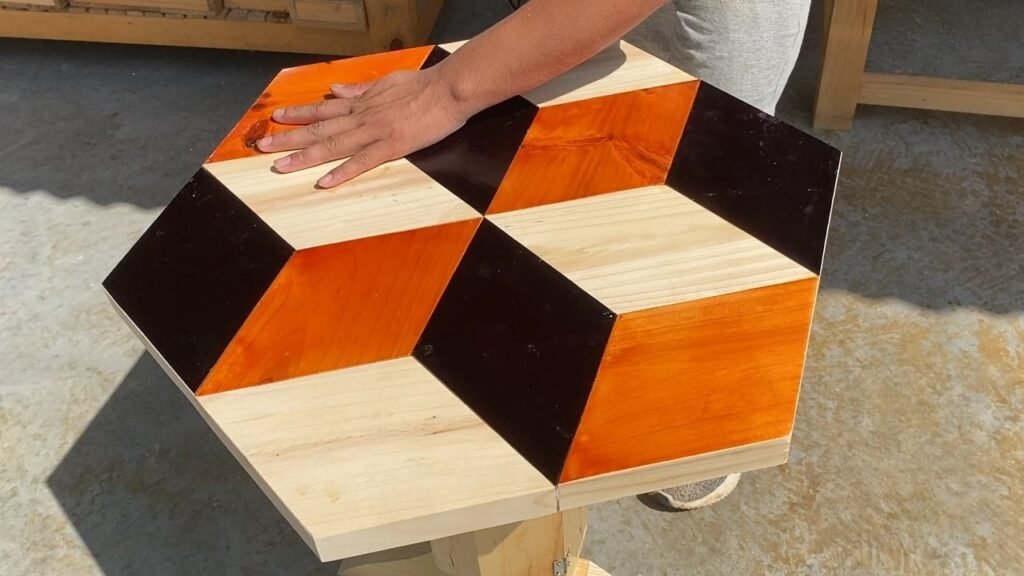
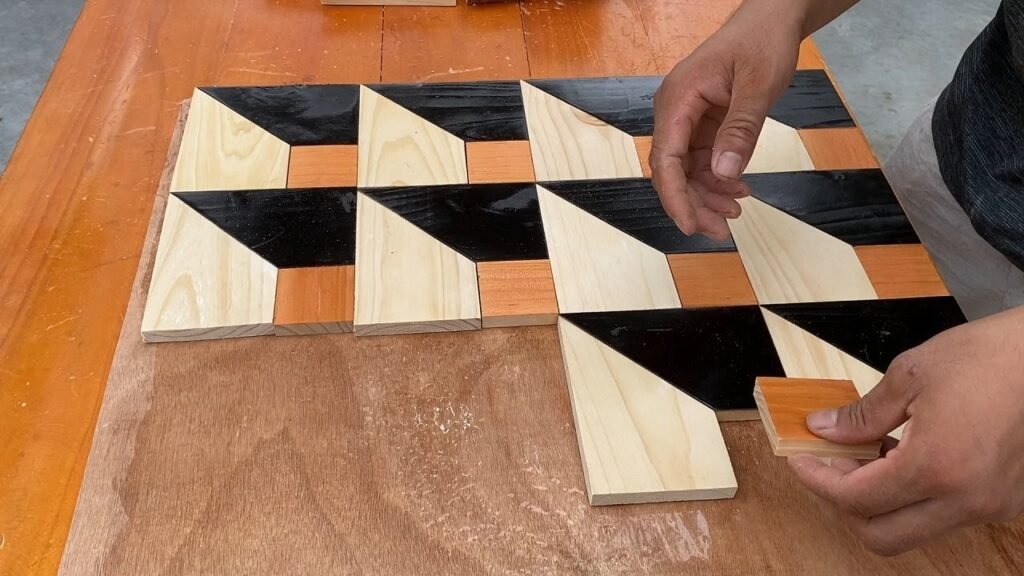
One important aspect to consider when working with woodworking plans is the inclusion of 3D representations. These 3D woodworking plans provide a visual guide to help you envision the final product and understand how different components fit together. This visual representation can be invaluable, especially for more complex projects, as it allows you to see the end result from various angles and better comprehend the intricacies of the design. By studying and analyzing these 3D woodworking plans, you can gain a deeper understanding of the project’s structure and improve your ability to execute it accurately.

Related:-Woodworking Edge Corner Plane
Key Tools and Materials for Woodworking Projects
Woodworking projects require the use of several key tools and materials to ensure successful execution. One of the most essential tools is a saw, which allows you to cut wood into the desired shapes and sizes. There are different types of saws available, such as hand saws, circular saws, and miter saws, each serving a specific purpose in woodworking. Another crucial tool is a chisel, which helps in carving and shaping the wood. Clamps are also indispensable as they hold pieces of wood together tightly, ensuring accurate and secure joinery. Additionally, a tape measure, a marking tool, and a level are essential for precise measurements and alignment. When it comes to materials, wood is, of course, the primary material for woodworking projects. However, it is crucial to choose the right type of wood depending on the project requirements, such as the desired finish, durability, and budget. Common types of wood used in woodworking include pine, oak, walnut, mahogany, and maple.
In addition to the mentioned tools and materials, woodworkers often rely on various other accessories and safety equipment. Sanders and sandpaper are necessary for smoothing and refining the surface of the wood. Power tools, such as drills and routers, are often utilized to make holes, create intricate designs, and shape wood edges. For a detailed and precise finish, woodworkers require a variety of hand planes, scrapers, and files. Safety goggles, dust masks, and ear protection are vital to protect against potential hazards, such as flying debris and loud noises. Overall, having the right tools and materials at hand is essential for a successful and enjoyable woodworking experience.
Exploring Different Types of Wood for 3D Woodworking
When it comes to 3D woodworking, the choice of wood plays a crucial role in determining the final outcome of the project. Different types of wood have distinct characteristics such as color, grain pattern, and durability, which can greatly impact the overall appearance and strength of the finished piece.
One common type of wood used in 3D woodworking is oak. Known for its strength and versatility, oak is a popular choice among woodworkers. It is available in various colors, ranging from light to dark shades, making it suitable for a wide range of projects. Additionally, oak has a prominent grain pattern that adds depth and character to furniture and other woodwork. Its durability and resistance to wear and tear make it ideal for pieces that need to withstand everyday use. Oak is also relatively easy to work with, making it suitable for both beginners and experienced woodworkers alike.
Another popular wood choice for 3D woodworking is maple. Known for its light color and smooth, uniform grain pattern, maple is often used for creating sleek and modern-looking furniture. It is a hardwood that is known for its durability, making it suitable for items that require strength and stability. Maple is also a preferred choice for projects that involve intricate carving or detail work due to its fine and consistent grain. Overall, maple is a versatile wood that can be used in a variety of 3D woodworking projects, offering both aesthetic appeal and strength.
Step-by-Step Guide to Reading and Interpreting Woodworking Plans
Whether you are a beginner or an experienced woodworker, understanding how to read and interpret woodworking plans is essential. It is the foundation upon which successful projects are built. So, let’s dive into the step-by-step guide that will help you unlock the secrets of these blueprints and take your woodworking skills to the next level.
First and foremost, start by familiarizing yourself with the different elements of a woodworking plan. These typically include a title, a materials list, dimensions, and detailed drawings or diagrams. The title provides an overview of the project, while the materials list outlines the tools and materials you will need. Pay close attention to the dimensions, as they determine the size and scale of your project. Lastly, carefully study the drawings and diagrams, as they provide the visual representation of how the pieces fit together.
Essential Techniques for Accurate Measurements in Woodworking
Accurate measurements are crucial in woodworking to ensure precision and achieve a professional finish. One essential technique is using a tape measure with clear and easy-to-read markings. This allows for precise measurements of both length and width. Additionally, a combination square is an invaluable tool for ensuring 90-degree angles. With its adjustable blade and built-in level, it allows for quick and accurate checking and marking of right angles and other angles.
Another technique is employing the use of a marking gauge to create consistent measurements and markings. A marking gauge is adjustable and allows for precise measurements along the edge of a board. By scribing a line with a sharp pencil or knife, it creates a guide for making accurate cuts. Another handy tool is a digital caliper, which provides precise measurements in both inches and millimeters. It is particularly useful when working with smaller, delicate pieces of wood or when working with tight tolerances. By practicing and using these techniques consistently, woodworkers can enhance accuracy and achieve professional results in their projects.
Tips and Tricks for Efficient Woodworking Joinery
When it comes to efficient woodworking joinery, there are several tips and tricks that can help streamline the process and ensure a strong and seamless outcome. One key tip is to always plan and measure carefully before making any cuts or attaching pieces together. This will help avoid any mistakes or misalignments that can lead to wasted time and materials. Additionally, using clamps or other tools to hold pieces in place while joining them can ensure a secure and accurate fit. It is also important to choose the right type of joinery for each project, whether it be a butt joint, dovetail joint, or mortise and tenon joint, depending on the desired strength and aesthetics. Lastly, taking the time to sand and finish the joinery can enhance the overall appearance and durability of the final piece.
Another helpful tip for efficient woodworking joinery is to always use sharp and properly calibrated tools. Dull blades and bits can not only slow down the process but also result in imprecise cuts and ill-fitting joints. Regularly sharpening and maintaining tools such as chisels, saws, and routers will ensure clean and accurate cuts, saving both time and effort. Moreover, practicing proper safety precautions is essential when working with joinery. Wearing safety goggles, gloves, and using appropriate dust collection systems can protect against accidents and health hazards. Lastly, learning from experienced woodworkers and seeking out tutorials or workshops can provide valuable insights and techniques for achieving efficient and high-quality joinery in woodworking projects.
What are some basic woodworking plans that beginners should understand?
Some basic woodworking plans that beginners should understand include simple furniture designs like tables or shelves, basic joinery techniques, and measuring and cutting wood accurately.
What are the key tools and materials required for woodworking projects?
The key tools for woodworking projects include a saw, chisels, a mallet, a drill, a sander, clamps, and a tape measure. The materials required may vary depending on the project but commonly include different types of wood, screws or nails, and wood glue.
Which types of wood are best suited for 3D woodworking projects?
Some types of wood that are well-suited for 3D woodworking projects include cherry, walnut, maple, mahogany, and oak. These woods are known for their durability, strength, and attractive grain patterns.
How can I effectively read and interpret woodworking plans?
To effectively read and interpret woodworking plans, start by understanding the scale and measurements provided. Pay attention to the symbols and abbreviations used, and familiarize yourself with the terminology. Break down the plan into steps and visualize how each component fits together.
How can I ensure accurate measurements in woodworking?
To ensure accurate measurements in woodworking, use a high-quality tape measure and take measurements multiple times to verify consistency. Use marking tools like a pencil or marking knife to clearly mark the measurements on the wood, and consider using jigs or templates to ensure uniformity.
What are some tips for efficient woodworking joinery?
Some tips for efficient woodworking joinery include ensuring precise measurements and cuts, using appropriate clamping techniques to hold the pieces together securely, using wood glue in conjunction with nails or screws for added strength, and practicing patience and caution to avoid mistakes.

