
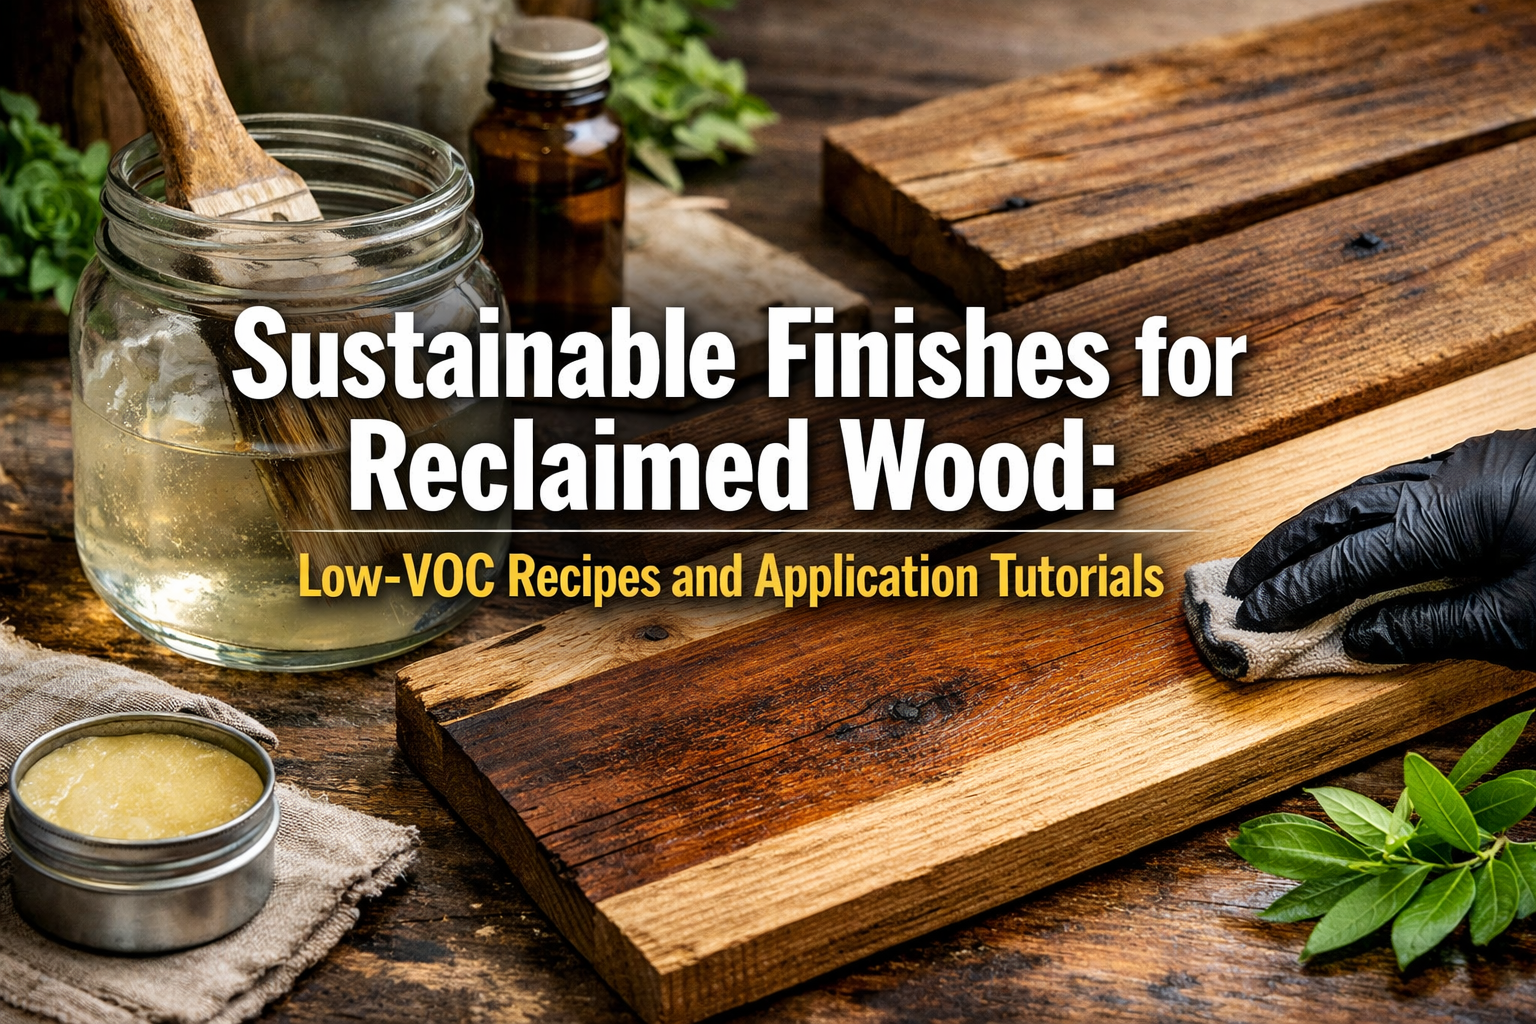

In an era where environmental consciousness is not just a trend but a fundamental aspect of design and craftsmanship, the demand for eco-friendly practices in woodworking has surged. For 2026, the norm embraces plant-based, low-VOC finishes for character-rich reclaimed lumber, transforming urban-harvested wood into enduring heirloom pieces. This comprehensive guide, “Sustainable Finishes for Reclaimed Wood: Low-VOC Recipes and Application Tutorials,” delves deep into the world of environmentally responsible wood finishing, offering practical recipes and hands-on application techniques designed to enhance both the beauty and longevity of your reclaimed wood projects, while ensuring superior adhesion and durability.
Reclaimed wood, with its unique history and inherent imperfections, offers unparalleled character. However, selecting the right finish is crucial not only for aesthetic appeal but also for protecting the wood and ensuring a healthy indoor environment. Traditional finishes often contain high levels of volatile organic compounds (VOCs), which can off-gas harmful chemicals for years. By embracing sustainable, low-VOC alternatives, woodworkers can create stunning, durable pieces without compromising on health or environmental values.

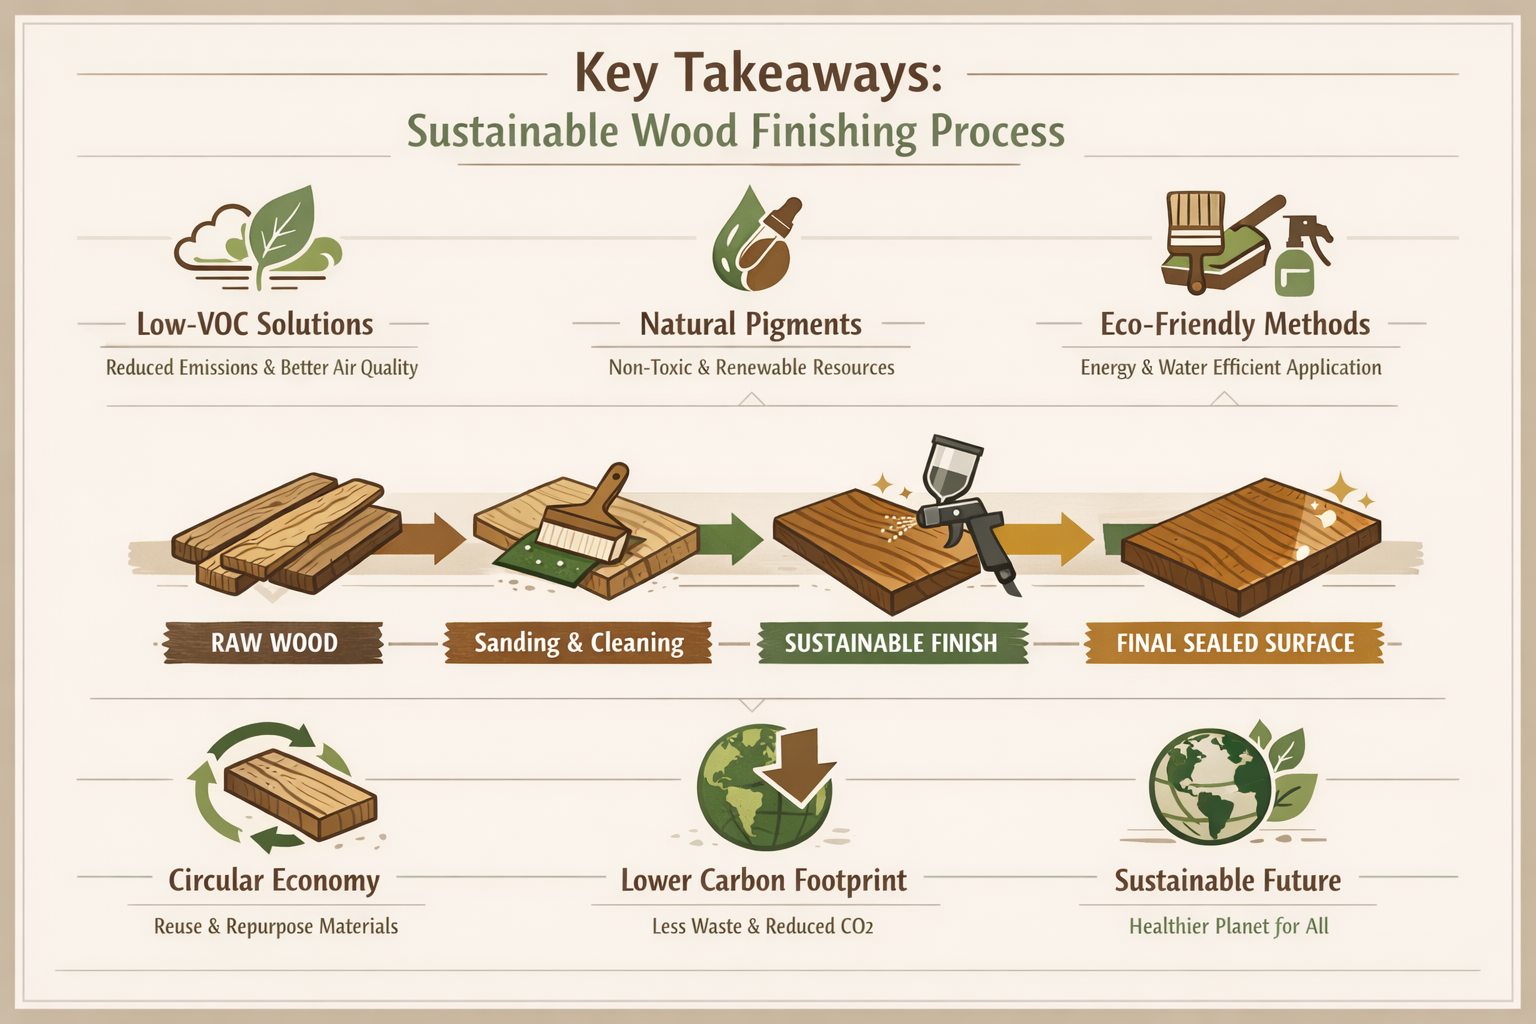
Key Takeaways
- Embrace Low-VOC Finishes: Prioritize natural, plant-based, and water-based finishes with minimal to no VOCs to ensure a healthier environment and reduce ecological impact in 2026.
- Understand Reclaimed Wood’s Needs: Reclaimed wood often requires specific preparation due to its varied history; proper cleaning, sanding, and pore filling are essential for optimal finish adhesion and appearance.
- Explore Diverse Sustainable Options: Beyond traditional polyurethane, a range of eco-friendly finishes like natural oils, waxes, milk paint, and shellac offer unique aesthetic and protective qualities.
- Master Application Techniques: Correct application is paramount for durability and appearance; learn specific methods for each low-VOC finish to achieve professional, long-lasting results.
- Prioritize Durability and Maintenance: Sustainable doesn’t mean fragile. Learn how to test finishes for adhesion and durability, and understand proper maintenance to extend the life of your reclaimed wood pieces.
The Essence of Sustainable Finishes for Reclaimed Wood: Low-VOC Recipes and Application Tutorials
The allure of reclaimed wood lies in its story—the visible marks of its past, its unique grain, and its inherent strength. To truly honor this material, our finishing choices must align with its sustainable origins. In 2026, the focus is squarely on finishes that are both environmentally friendly and effective. This means understanding what constitutes a “low-VOC” product and exploring the natural alternatives that have been used for centuries.
Understanding VOCs and Their Impact
Volatile Organic Compounds (VOCs) are carbon-containing chemicals that easily vaporize at room temperature. Many traditional paints, stains, and clear finishes release VOCs, which can contribute to indoor air pollution, respiratory problems, headaches, and other health issues. They also contribute to outdoor air pollution and smog. A low-VOC finish, conversely, contains significantly reduced levels of these compounds, making it a safer choice for both the user and the environment. Zero-VOC products take this a step further, containing negligible amounts.
Why Choose Eco-Friendly Finishes for Reclaimed Wood?
- Healthier Indoor Air Quality: Reduced VOCs mean fewer harmful fumes, leading to a safer environment for your home or workshop.
- Environmental Responsibility: Minimizing VOC emissions helps reduce smog and ozone depletion, aligning with broader sustainability goals.
- Enhancing Natural Beauty: Many eco-friendly finishes penetrate the wood, enhancing its natural grain and patina rather than creating a plastic-like film on the surface.
- Durability and Longevity: Modern low-VOC and natural finishes are surprisingly robust, offering excellent protection against moisture, wear, and tear, ensuring your reclaimed pieces last for generations.
- Supporting Sustainable Practices: Choosing these finishes encourages manufacturers to develop more environmentally sound products, driving innovation in the industry.
When preparing reclaimed wood for any finish, the process is key. For insights into general finishing principles, one might explore resources like “cool wood finishing techniques – Wood Craft Wiz” which provides a foundational understanding of various approaches.
Types of Sustainable Finishes for Reclaimed Wood
The market for sustainable finishes has expanded significantly, offering a variety of options to suit different aesthetic preferences and functional requirements. Here’s a breakdown of popular choices:
- Natural Oils (Tung Oil, Linseed Oil):
- Description: These oils penetrate deep into the wood fibers, hardening within the wood itself rather than forming a surface film. They bring out the natural warmth and grain of the wood.
- Benefits: Excellent natural look, repairable, non-toxic once cured, enhances patina over time.
- Drawbacks: Slower drying times, requires multiple coats, not as water-resistant as some film finishes.
- Application: Wiped on with a rag, allowed to penetrate, then excess wiped off. Multiple thin coats are crucial. For more on oil finishes, see “Danish Oil vs Linseed: The Ultimate Wood Finishing Guide”.
- Waxes (Beeswax, Carnauba Wax):
- Description: Waxes provide a soft, low-sheen finish that offers a degree of water resistance and a wonderful tactile feel. Often used as a topcoat over oil or shellac.
- Benefits: Easy to apply and repair, non-toxic, beautiful natural luster.
- Drawbacks: Less durable than oils or varnishes, requires reapplication over time, not suitable for high-wear surfaces on its own.
- Application: Applied with a soft cloth, allowed to haze, then buffed to a sheen.
- Shellac:
- Description: A natural resin secreted by the lac bug, dissolved in alcohol. It’s an excellent sealer and a beautiful topcoat. Available in various hues, from clear to dark amber.
- Benefits: Fast-drying, non-toxic when dry, excellent sealer, easy to repair, good moisture resistance.
- Drawbacks: Not heat or alcohol-resistant, can be susceptible to scratches.
- Application: Applied with a brush or pad in multiple thin coats. For specific application examples, exploring options like “garnet shellac on pine – Wood Craft Wiz” can be beneficial for understanding color effects.
- Water-Based Polyurethane/Varnishes:
- Description: Modern water-based polyurethanes offer good durability and water resistance with significantly lower VOCs than their oil-based counterparts. They form a protective film on the surface.
- Benefits: Durable, good moisture and scratch resistance, clear finish (won’t yellow), easy cleanup with water.
- Drawbacks: Can sometimes raise the grain, may not penetrate as deeply as oils.
- Application: Brushed or sprayed on. Multiple thin coats are recommended with light sanding between coats. For more on water-based options, check out “spray water-based polyurethane – Wood Craft Wiz”.
- Milk Paint:
- Description: An ancient finish made from milk protein (casein), lime, clay, and natural pigments. It creates a beautiful, matte, often distressed look.
- Benefits: All-natural, zero-VOC, breathable, durable, creates unique antique aesthetic.
- Drawbacks: Can be tricky to mix, porous (requires a topcoat for protection), limited color palette for true historical milk paints.
- Application: Brushed on. Often requires a topcoat of oil or wax for enhanced durability and water resistance.
| Finish Type | Primary Ingredients | VOC Level | Durability | Aesthetic | Best Use Case |
|---|---|---|---|---|---|
| Natural Oils (Tung, Linseed) | Plant oils | Very Low/Zero | Medium | Natural, enhances grain | Furniture, countertops (with reapplication) |
| Waxes (Beeswax, Carnauba) | Natural waxes | Very Low/Zero | Low-Medium | Soft, matte sheen | Decorative items, topcoat for other finishes |
| Shellac | Lac resin, denatured alcohol | Low (alcohol evaporates) | Medium | Clear to amber, satin-gloss | Sealers, antique reproductions, light-use furniture |
| Water-Based Polyurethane | Acrylics, urethanes, water | Low | High | Clear, satin to gloss | Tabletops, flooring, high-traffic furniture |
| Milk Paint | Casein, lime, pigments | Zero | Medium (with topcoat) | Matte, distressed, opaque | Decorative furniture, wall paneling |
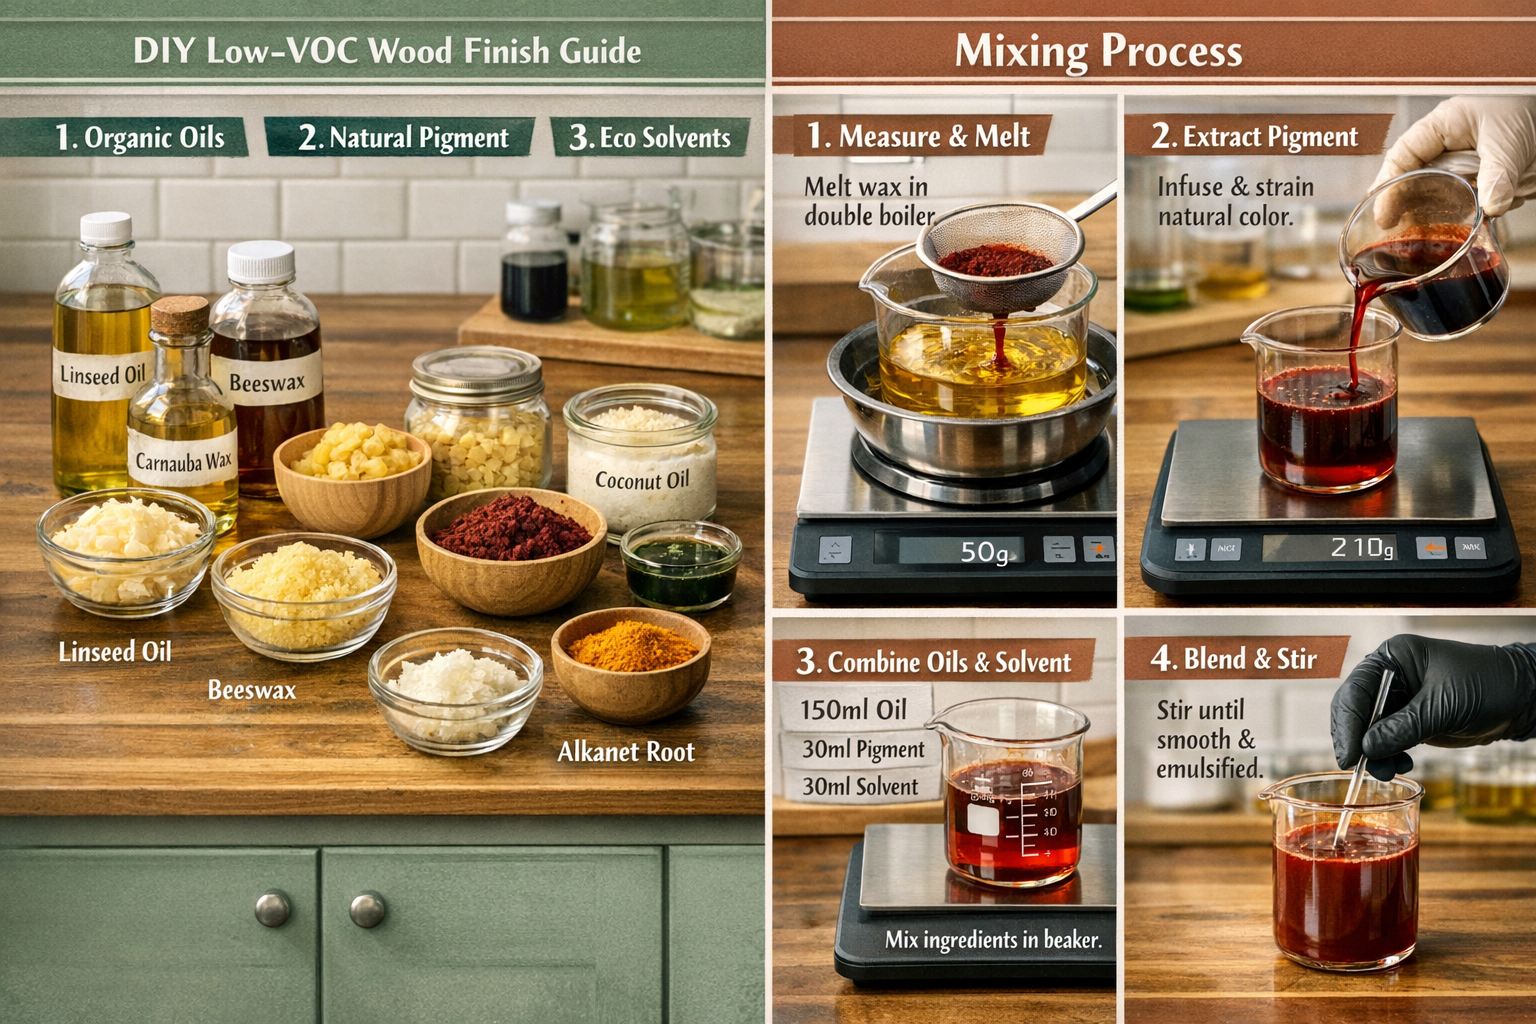
Low-VOC Recipes for Sustainable Finishes for Reclaimed Wood: A DIY Approach
Crafting your own low-VOC finishes not only saves money but also gives you complete control over the ingredients, ensuring a truly sustainable and non-toxic product. Here are a few simple recipes perfect for reclaimed wood.
1. Homemade Beeswax & Linseed Oil Finish
This recipe offers a beautiful, soft sheen and nourishes the wood. It’s excellent for furniture, decorative items, and anything that doesn’t endure heavy abuse.
Ingredients:
- 1 part pure beeswax (pellets or grated)
- 3 parts raw linseed oil (or tung oil for more water resistance)
- Optional: a few drops of essential oil (e.g., orange, lemon) for scent
Tools:
- Double boiler or heat-safe container (e.g., old can) in a saucepan
- Stirring stick
- Clean glass jar for storage
Instructions:
- Melt the Wax: In a double boiler (or a heat-safe can placed in a saucepan with a few inches of water), gently heat the beeswax until it melts completely. Never heat directly over an open flame. 🔥
- Combine Oils: Once the wax is melted, carefully add the linseed oil (and essential oil, if using). Stir continuously until thoroughly combined.
- Cool and Store: Remove from heat and pour the mixture into a clean glass jar. Let it cool completely; it will solidify into a soft paste.
- Application: Apply a thin layer with a clean, lint-free cloth, rubbing it into the wood grain. Allow it to sit for 15-30 minutes, then buff off any excess with a fresh, clean cloth until you achieve a soft sheen. Repeat as desired for deeper luster and protection.
2. Simple Shellac Sealer
Shellac is a fantastic, natural sealer for reclaimed wood, providing a barrier and enhancing the grain. This recipe creates a 1.5-pound cut, a common dilution.
Ingredients:
- 1.5 ounces shellac flakes (dewaxed for clarity, or orange for warmth)
- 1 cup denatured alcohol (ensure it’s pure, not blended with other solvents)
Tools:
- Glass jar with a tight-fitting lid
- Stirring stick
Instructions:

- Combine: Pour the shellac flakes into the glass jar. Add the denatured alcohol.
- Dissolve: Seal the jar tightly and shake well. The flakes will take several hours to dissolve completely. Shake periodically until no flakes remain. This might take 12-24 hours.
- Strain (Optional): If there are any impurities, strain the shellac through a coffee filter or cheesecloth.
- Application: Apply thin coats with a good quality natural bristle brush or a shellac pad. Allow each coat to dry completely (usually 30-60 minutes) before applying the next. Lightly sand with 320-grit sandpaper between coats for a smoother finish. Typically 2-3 coats are sufficient as a sealer.
- Storage: Store unused shellac in a tightly sealed jar in a cool, dark place. It has a shelf life of about 6-12 months once mixed.
3. Water-Based Whitewash/Color Wash
For a semi-transparent, distressed look often desired with reclaimed wood, a simple water-based wash is ideal.
Ingredients:
- 1 part low-VOC, water-based paint (white, grey, or any desired color)
- 1-3 parts water (adjust for desired transparency)
Tools:
- Mixing container
- Stirring stick
- Brush
- Clean rags
Instructions:
- Mix: In a container, thoroughly mix 1 part paint with 1 part water. Test on a scrap piece of wood. If you want more transparency, add more water.
- Apply: Brush the mixture onto the reclaimed wood, working in sections.
- Wipe Back: Immediately, or within a minute or two (depending on desired effect), use a clean rag to wipe off the excess paint. Wipe with the grain to emphasize the wood texture. The longer you leave it, the more opaque the finish will be.
- Dry and Repeat: Allow to dry completely. Apply additional coats if a more opaque look is desired, repeating the wipe-back process.
- Seal (Optional): For added durability and protection, especially on high-traffic items, consider a topcoat of water-based polyurethane or a beeswax finish.
These recipes for Sustainable Finishes for Reclaimed Wood: Low-VOC Recipes and Application Tutorials are excellent starting points for eco-conscious woodworkers. Remember to always test your chosen finish on a hidden area or scrap piece of your specific reclaimed wood before applying it to the entire project. This helps ensure you achieve the desired look and adhesion. For guidance on achieving different aesthetic outcomes, explore “natural wood finishing techniques – Wood Craft Wiz” or even “distressed wood finishing techniques – Wood Craft Wiz” if that aligns with your vision.
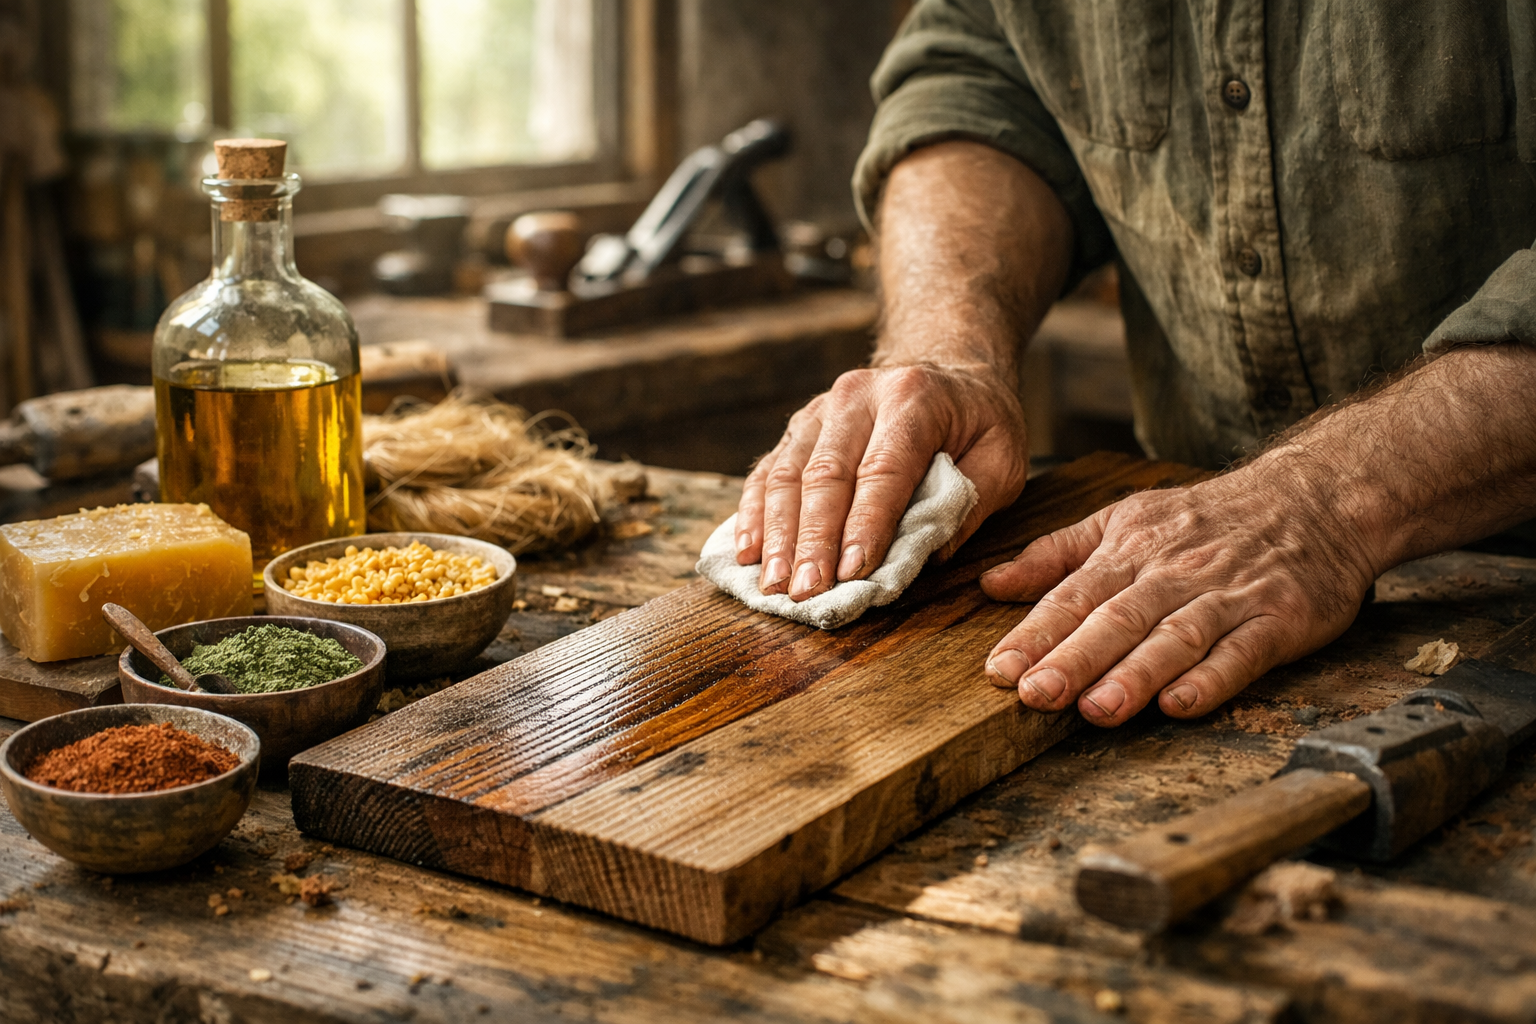
Application Tutorials for Sustainable Finishes for Reclaimed Wood: Achieving Professional Results
Proper application is just as important as choosing the right sustainable finish. Reclaimed wood, with its varied history and often unique porosity, can react differently to finishes compared to new lumber. This section provides detailed application tutorials for achieving professional, long-lasting results with your low-VOC finishes.
Step 1: Essential Preparation for Reclaimed Wood
The key to any successful finish lies in thorough preparation. Reclaimed wood often carries dirt, old finishes, and sometimes even metal fragments, so a meticulous approach is crucial.
- Cleaning: Begin by thoroughly cleaning the wood. Use a stiff brush to remove loose dirt and debris. For stubborn grime, a gentle solution of mild soap and water (or a specialized wood cleaner for heavily soiled pieces) can be used. Allow the wood to dry completely.
- Inspection and Repair: Inspect the wood for any loose splinters, cracks, or nail holes. Fill holes with an eco-friendly wood filler if desired. For structural repairs, use a strong, low-VOC adhesive. For example, when creating a woodworking mirror, ensuring the frame is solid before finishing is paramount.
- Sanding: This is perhaps the most critical step. Start with a coarser grit sandpaper (e.g., 80-100 grit) to remove any remaining imperfections, old finishes, or mill marks. Gradually work your way up to finer grits (e.g., 180-220 grit) to achieve a smooth surface. For pieces intended for heavy use, sanding up to 320 or even 400 grit can be beneficial. Always sand with the grain.
- Dust Removal: After sanding, remove all sanding dust. Use a shop vacuum, followed by a tack cloth, or simply a clean, damp cloth (allowed to dry fully). Any remaining dust can compromise finish adhesion and create a rough texture.
Step 2: Applying Natural Oil Finishes (e.g., Linseed, Tung Oil)
Natural oils are forgiving and ideal for accentuating the character of reclaimed wood.
- First Coat – Saturation: Apply a generous amount of oil with a clean, lint-free rag or a foam brush. Ensure the entire surface is saturated. Let the oil soak in for 15-30 minutes, or longer for very porous wood.
- Wipe Off Excess: This step is crucial! Using a clean, dry rag, thoroughly wipe off all excess oil from the surface. Any oil left to dry on the surface will become sticky and tacky. Change rags frequently.
- Drying Time: Allow the first coat to cure completely. This can take 24-72 hours, depending on the oil, humidity, and temperature.
- Subsequent Coats: For added protection and depth, apply 2-4 more thin coats, following the same saturation and wipe-off procedure. Lightly abrade the surface with a fine sanding pad (e.g., 400-grit) or a piece of brown paper bag between coats after drying, then clean thoroughly before applying the next coat.
- Curing: The finish will take several weeks to fully cure and harden. Handle gently during this period.
- ⚠️ Important Safety Note for Oil Finishes: Rags soaked in linseed or tung oil can spontaneously combust if not disposed of properly. Always lay them flat to dry outside, hang them, or store them in a water-filled, sealed metal container before disposal.
Step 3: Applying Wax Finishes (as a Topcoat or Standalone)
Waxes provide a lovely, soft luster.
- Preparation: Ensure the wood is clean and dry. If applying over another finish (like shellac or a cured oil), ensure that finish is fully dry.
- Application: Using a clean, soft cloth (old t-shirts work well), apply a thin, even layer of wax. Rub it into the wood in circular motions, working in small sections.
- Hazing and Buffing: Allow the wax to haze over (usually 5-15 minutes). Then, with a fresh, clean, lint-free cloth, buff the surface vigorously until you achieve a smooth, desired sheen.
- Multiple Coats (Optional): For increased protection and deeper luster, apply 2-3 thin coats, buffing between each.
- Maintenance: Reapply wax periodically (e.g., every 6-12 months for high-use items) to maintain protection and shine.
Step 4: Applying Shellac (as a Sealer or Finish)
Shellac is a versatile, fast-drying finish.
- Preparation: Ensure the wood is thoroughly sanded and dust-free.
- Application: Use a good quality natural bristle brush. Dip the brush no more than halfway into the shellac and apply in long, even strokes, working with the grain. Shellac dries very quickly, so work efficiently and avoid over-brushing.
- Drying Time: Shellac is typically dry to the touch in 30-60 minutes.
- Sanding Between Coats: Lightly sand with 320-400 grit sandpaper between coats to smooth out any brush marks or raised grain. Wipe clean with a tack cloth.
- Subsequent Coats: Apply 2-3 coats as a sealer, or 4-6 coats for a more durable topcoat.
- Curing: Shellac cures relatively quickly, usually within a few days.
Step 5: Applying Water-Based Polyurethane/Varnish
For maximum durability with low VOCs, water-based polys are excellent.
- Preparation: Ensure the wood is exceptionally clean, smooth, and dust-free.
- First Coat: Apply a thin, even coat using a high-quality synthetic brush, foam brush, or sprayer. Work with the grain, avoiding drips and puddles.
- Drying Time: Water-based polys dry relatively quickly, typically 2-4 hours. Refer to the manufacturer’s instructions for specific times.
- Sanding Between Coats: Once dry, lightly sand the entire surface with 220-320 grit sandpaper to ensure good adhesion for subsequent coats and to smooth out any raised grain. Remove all dust with a vacuum and tack cloth.
- Subsequent Coats: Apply 2-3 more thin coats, allowing adequate drying time and light sanding between each.
- Curing: While dry to the touch in hours, water-based polyurethanes can take 1-3 weeks to fully cure and reach maximum hardness. Use the item gently during this period.
Mastering these application techniques will ensure that your “Sustainable Finishes for Reclaimed Wood: Low-VOC Recipes and Application Tutorials” yield beautiful, lasting results. For further exploration of advanced techniques, consider diving into “high gloss wood finishing techniques – Wood Craft Wiz” or “mahogany wood finishing techniques – Wood Craft Wiz” to see how principles can be adapted.

Durability, Adhesion, and Long-Term Care for Reclaimed Wood with Sustainable Finishes
Creating beautiful pieces from reclaimed wood with sustainable, low-VOC finishes is only half the journey. Ensuring their long-term durability, optimal adhesion, and knowing how to care for them properly completes the cycle. In 2026, where sustainability meets longevity, these aspects are paramount.
Testing for Adhesion and Durability
Before committing to a finish on a large project, always perform tests on a scrap piece of the same reclaimed wood.
- Adhesion Test (Cross-Hatch Test):
- Apply your chosen finish to a scrap piece and let it fully cure (wait the recommended time).
- Using a sharp utility knife, score a cross-hatch pattern into the finish. Make 5-6 parallel cuts about 1/8 inch apart, then make another 5-6 parallel cuts perpendicular to the first set, forming a grid.
- Apply a piece of strong masking tape over the grid, pressing down firmly.
- Quickly pull the tape off at a 45-degree angle.
- Inspect the grid. If squares of the finish peel off, adhesion is poor. If the finish remains largely intact, adhesion is good.
- Scratch Test: Use a fingernail or the edge of a plastic card to try and scratch the cured finish. A good finish should resist light scratching.
- Water Beading Test: Apply a few drops of water to the cured finish. A durable finish should cause water to bead up, indicating good moisture resistance. If the water soaks in or leaves a dark spot, the finish may need more coats or a different type of protection for that specific application.
Enhancing Durability for Sustainable Finishes
While natural finishes might not always offer the same extreme hardness as some industrial synthetics, their durability can be significantly enhanced.
- Multiple Thin Coats: This is key for all finishes. Many thin coats build up protection more effectively than a few thick coats, reducing the risk of cracking or peeling.
- Proper Curing: Allow finishes to fully cure according to manufacturer or recipe guidelines. Rushing this process compromises durability.
- Layering Finishes: Combining finishes can offer synergistic benefits. For instance, a shellac sealer followed by several coats of oil or a water-based polyurethane can provide both deep penetration and surface protection. A wax topcoat over a cured oil offers enhanced water resistance and a softer feel.
- Consider Application Method: For water-based polyurethanes, spraying can sometimes achieve a thinner, more even, and harder film than brushing. Explore options for applying finishes like those found in “spray vs brush polyurethane – Wood Craft Wiz.”
Long-Term Care and Maintenance
Even the most durable finishes require a degree of care to maintain their beauty and protective qualities.
- Regular Cleaning: For most finished reclaimed wood pieces, a simple wipe-down with a damp, soft cloth is sufficient. Avoid harsh chemical cleaners, as they can strip natural finishes or damage synthetic ones.
- Spill Management: Wipe up spills immediately, especially water or alcohol, to prevent staining or damage to the finish.
- Protection from Heat and Moisture: Use coasters under drinks and trivets under hot dishes, particularly for dining tables or coffee tables.
- Reapplication of Natural Finishes: Oil and wax finishes may require periodic reapplication (e.g., annually or every few years, depending on use) to refresh their protective qualities and luster. This is a simple process of cleaning the surface and applying a fresh, thin coat.
- Repairing Damage: One of the great advantages of many natural and low-VOC finishes is their ease of repair. Small scratches or worn areas in oil or wax finishes can often be spot-repaired by cleaning the area, lightly sanding if necessary, and reapplying the finish. Shellac is also highly repairable. Water-based polyurethanes can be trickier for spot repairs but generally hold up well.
By understanding the properties of Sustainable Finishes for Reclaimed Wood: Low-VOC Recipes and Application Tutorials and committing to proper application and maintenance, your reclaimed wood projects will not only look stunning but will also stand the test of time, becoming cherished pieces for generations to come. This commitment to craftsmanship extends to every part of your workshop, including the choice of tools, which can be further explored in resources like “precision woodworking tools – Wood Craft Wiz.”
Conclusion
The journey into “Sustainable Finishes for Reclaimed Wood: Low-VOC Recipes and Application Tutorials” is more than just a technical exercise; it’s a commitment to craftsmanship that honors both the material and our environment. In 2026, the conscientious choice of eco-friendly, plant-based finishes on character-rich reclaimed lumber has become a cornerstone of responsible woodworking. From understanding the impact of VOCs to mastering the application of natural oils, waxes, shellacs, and water-based polyurethanes, woodworkers now have the knowledge and resources to create stunning, durable, and healthy pieces.
The hands-on recipes and detailed application tutorials provided in this guide offer a pathway to transform urban-harvested wood into heirloom pieces that tell a story while adhering to the highest standards of sustainability. The emphasis on proper preparation, meticulous application, and diligent long-term care ensures that these projects not only look exceptional but also maintain their integrity and beauty for years to come. By embracing these practices, you are not merely finishing wood; you are contributing to a healthier planet and a legacy of mindful creation.
Actionable Next Steps:
- Identify Your Project’s Needs: Consider the intended use of your reclaimed wood piece (e.g., indoor vs. outdoor, high-traffic vs. decorative) to select the most appropriate low-VOC finish from the options discussed.
- Gather Materials: Collect the necessary ingredients for your chosen low-VOC recipe or purchase a reputable low-VOC commercial product. Ensure you have all the required tools for preparation and application.
- Practice on Scraps: Always test your chosen finish and application technique on a hidden area or a scrap piece of your specific reclaimed wood. This helps you refine your process and ensures the desired aesthetic and durability.
- Prioritize Safety: Adhere strictly to all safety guidelines, especially regarding the disposal of oil-soaked rags and ensuring adequate ventilation during application.
- Commit to Maintenance: Establish a routine for cleaning and reapplication (for natural finishes) to ensure the longevity and continued beauty of your finished reclaimed wood piece.
By following these steps, you will confidently bring your reclaimed wood projects to life with finishes that are as sustainable and rich in character as the wood itself.
