
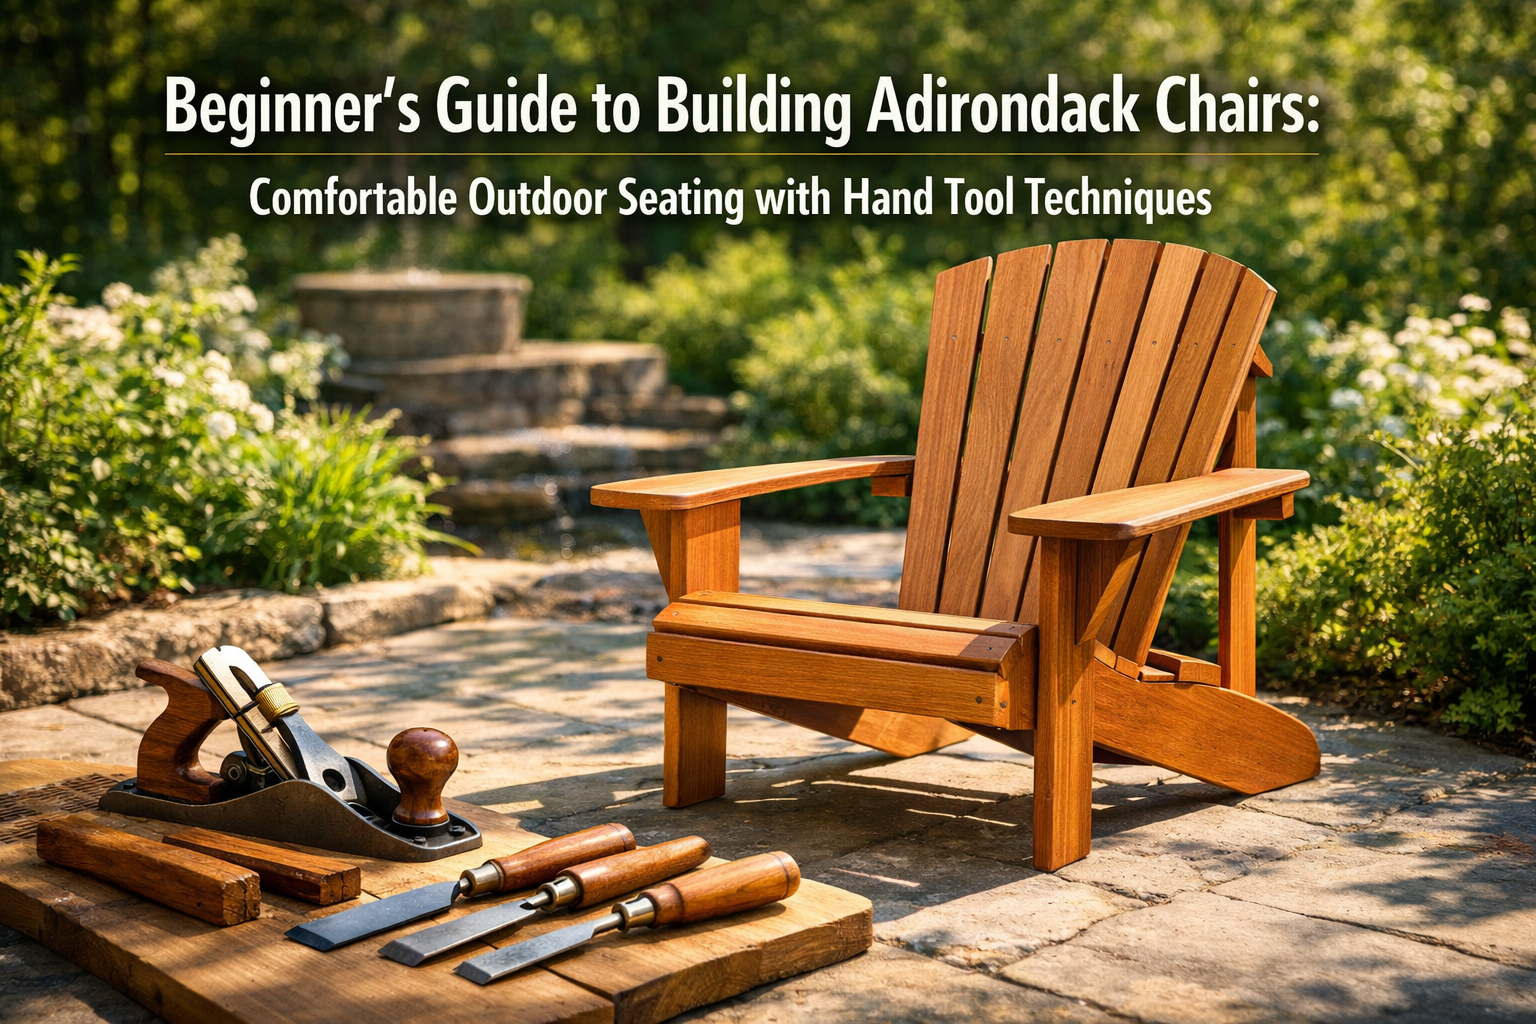

Imagine a tranquil evening, relaxing in a chair perfectly shaped to cradle your body, crafted by your own hands. This isn’t just a daydream; it’s a rewarding reality within reach for anyone willing to learn. This Beginner’s Guide to Building Adirondack Chairs: Comfortable Outdoor Seating with Hand Tool Techniques will walk you through the entire process. Adirondack chairs are renowned for their distinctive slatted design, wide armrests, and characteristic reclined back, making them a quintessential piece of outdoor furniture for patios, decks, and gardens. They promise comfort and a touch of rustic elegance. While often associated with power tools, this comprehensive guide focuses on the rewarding journey of crafting these iconic chairs primarily using traditional hand tool techniques. This approach not only makes the project accessible to those without extensive power tool setups but also fosters a deeper connection to the craft, enhancing precision and skill development. We’ll delve into ergonomic designs, ideal weather-resistant woods, and the essential hand joinery methods that ensure a sturdy and lasting build, perfect for enduring outdoor conditions in 2026.
Key Takeaways
- Hand Tool Mastery: Learn to craft a classic Adirondack chair using traditional hand tools, developing fundamental woodworking skills and fostering a deeper connection to the project.
- Ergonomic Design & Comfort: Understand the key design elements that make Adirondack chairs exceptionally comfortable, focusing on angles and contours for optimal relaxation.
- Weather-Resistant Wood Selection: Discover the best wood species for outdoor furniture, prioritizing durability and longevity against the elements.
- Strong Joinery Techniques: Master essential hand-cut joinery, such as adapted mortise-and-tenon and lap joints, to ensure a robust and stable chair structure.
- Step-by-Step Build Process: Follow a detailed, accessible guide from material selection to final finishing, empowering beginners to achieve a professional-looking result.
Understanding the Adirondack Chair and Essential Preparations
The Adirondack chair, originally known as the Westport plank chair, was designed by Thomas Lee in 1903 for his summer home in the Adirondack Mountains. Its hallmark features—a deeply slanted seat, wide armrests, and a high, slatted back—were all engineered for comfort on uneven terrain. For your own build in 2026, embracing this heritage means focusing on the same principles of comfort, stability, and durability, especially when using hand tool techniques.

Why Choose Hand Tools for Building an Adirondack Chair? 🛠️
Opting for hand tools over power tools for this project offers several distinct advantages, particularly for beginners:
- Enhanced Skill Development: Working with hand tools forces a deeper understanding of wood grain, cutting angles, and joinery. This builds foundational woodworking skills that transfer to many other projects.
- Increased Safety: While all tools require caution, hand tools generally pose a lower risk of severe injury compared to their powered counterparts.
- Quiet Operation: Enjoy the peace of your workshop or backyard without the noise of motors, allowing for a more meditative and focused crafting experience.
- Cost-Effective Entry: A basic set of quality hand tools can be acquired for less than a full suite of power tools, making woodworking more accessible.
- Precision and Control: Hand tools often offer superior control for fine adjustments and detailed joinery, leading to a higher quality finish for those willing to take their time.
Selecting the Right Wood: Durability and Aesthetics 🌳
The choice of wood is paramount for an outdoor piece like an Adirondack chair. It must withstand sun, rain, and temperature fluctuations.
- Cedar (Western Red or Aromatic): A top choice for outdoor furniture due to its natural resistance to rot, decay, and insect infestation. It’s lightweight, easy to work with, and has a beautiful aroma.
- Cypress: Similar to cedar in its resistance to decay and insects, cypress is also known for its stability and beautiful grain. It’s slightly harder than cedar.
- Redwood: Another excellent, naturally resistant option, redwood is known for its distinctive color and exceptional durability. It can be more expensive and harder to source in some regions.
- Teak: The gold standard for outdoor furniture. Teak is incredibly durable, highly resistant to moisture, rot, and insects, and weathers beautifully to a silver-grey patina. However, it is also the most expensive option.
- Treated Pine: A more budget-friendly option. Pressure-treated pine is chemically treated to resist rot and insects, but it can be heavier, may require more drying time before finishing, and its aesthetics might not be as refined as natural woods.
When selecting wood, look for straight, knot-free boards. Clear grain indicates stronger wood and easier workability.
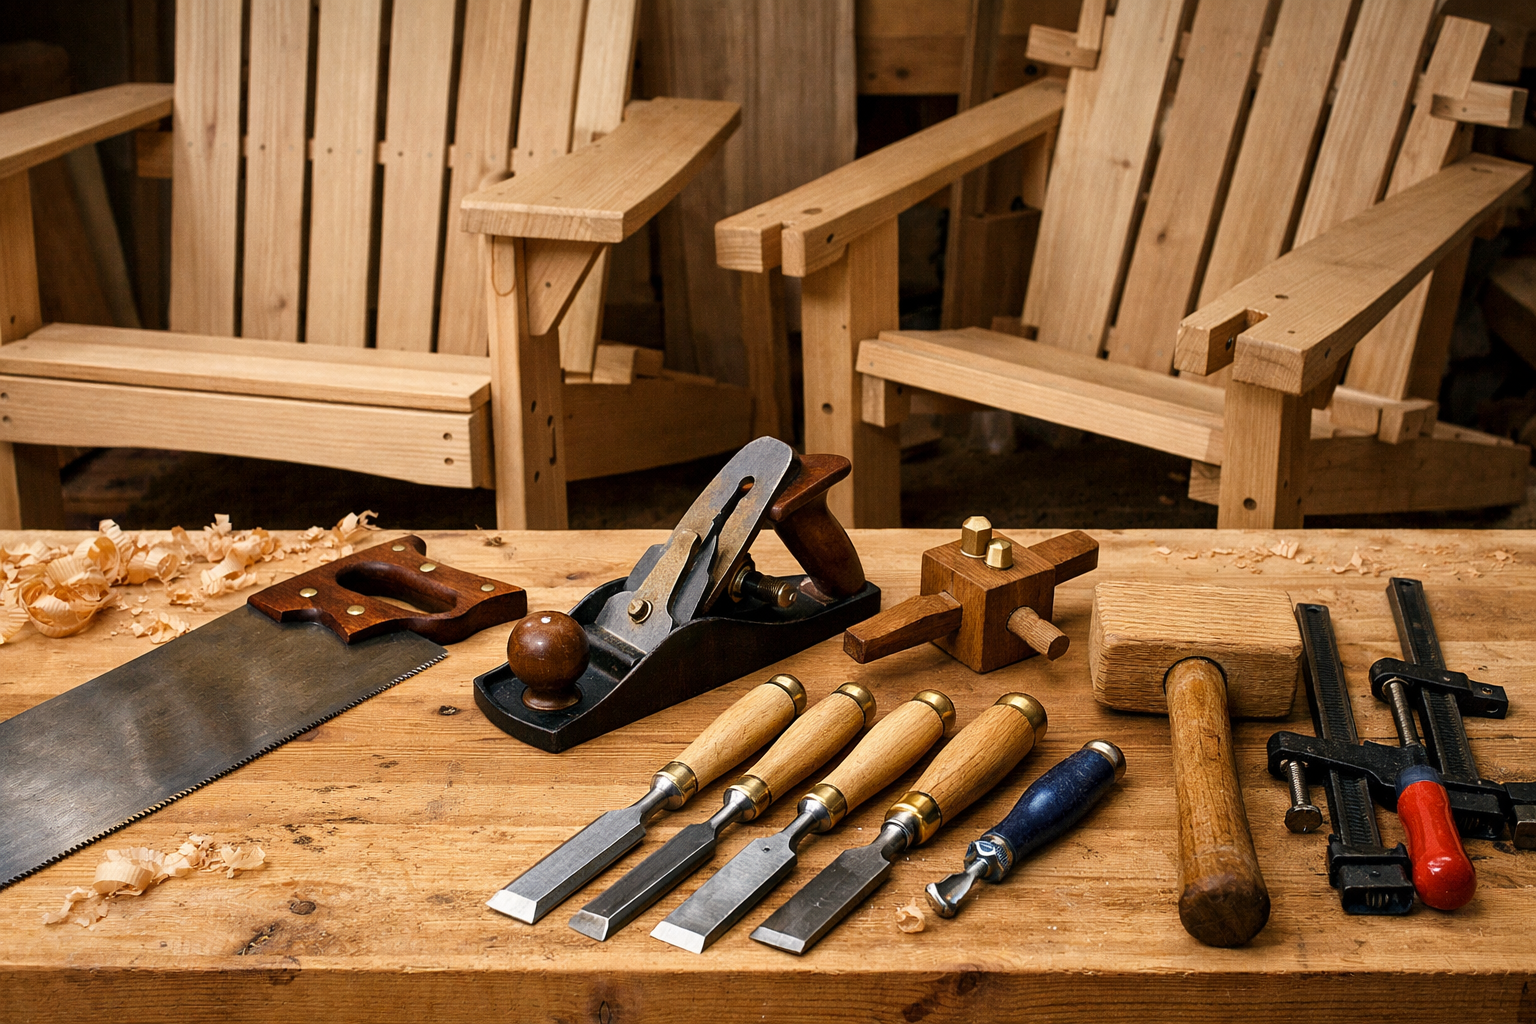
Essential Hand Tools for Your Adirondack Chair Project 📏
Building an Adirondack chair with hand tools requires a focused but not exhaustive set of equipment. Here’s a list of what you’ll need:
- Measuring & Marking Tools:
- Tape measure or ruler
- Pencil or marking knife
- Combination square
- Bevel gauge (for angles)
- Marking gauge (for joinery)
- Cutting Tools:
- Rip saw (for cutting along the grain)
- Crosscut saw (for cutting across the grain)
- Backsaw (for fine, accurate cuts, especially joinery)
- Coping saw (for curved cuts, if your design includes them)
- Shaping & Smoothing Tools:
- Hand plane (smoothing plane for general surfacing, block plane for end grain and small chamfers)
- Wood chisels (various sizes for joinery and clean-up)
- Mallet (for chisels)
- Rasps and files (for shaping curves and refining edges)
- Sandpaper (various grits from 80 to 220)
- Drilling Tools:
- Brace and bits (auger bits for larger holes, twist bits for pilot holes)
- Hand drill (eggbeater style) for smaller pilot holes
- Clamping & Holding Tools:
- F-clamps or bar clamps (essential for holding pieces during glue-up and joinery)
- Workbench with a vise (highly recommended for stability)
For securing your project, consider using stainless steel screws (to prevent rust) and exterior-grade waterproof wood glue. Remember, quality tools make a significant difference in the enjoyment and outcome of your project. If you’re looking to expand your toolkit, exploring guides like “Master Your Craft: Building the Ultimate Woodworking Storage Bench in 2026” could provide valuable insights for organizing your growing collection.
Planning Your Ergonomic Design and Dimensions 📐
A crucial aspect of the Adirondack chair’s appeal is its ergonomic comfort. While many plans exist, understanding the core dimensions and angles will help you adapt or create your own.
- Seat Angle: Typically, the seat slopes backward at an angle between 10-15 degrees. This gentle recline is key to comfort.
- Backrest Angle: The backrest is usually tilted between 25-35 degrees relative to vertical, providing a relaxed, lounge-like posture.
- Seat Height: The front edge of the seat is often quite low, around 10-12 inches from the ground, dipping significantly at the back.
- Armrests: Wide and flat armrests are a signature feature, perfect for resting a book or a beverage.
Before cutting any wood, it is highly recommended to create a full-size template or mock-up, especially for the curved pieces. Plywood or even cardboard can serve this purpose. This allows you to test the fit and feel of the chair before committing to your chosen wood. You can also trace all your parts onto the wood, ensuring efficient use of material and accurate cuts.
“Crafting an Adirondack chair with hand tools is a journey in patience and precision, where each cut and joint tells a story of dedication and skill. It’s more than just building a chair; it’s building character into your craft.”
Step-by-Step Construction with Hand Tool Techniques
This section will guide you through the process of building your Adirondack chair, emphasizing hand tool techniques for precision and robust joinery. This approach will give you a greater appreciation for the craft and result in a truly custom piece of outdoor seating.
Preparing Your Stock: Dimensioning and Squaring Lumber 🪵
The first step in any woodworking project is preparing your lumber. Even if you purchase S4S (surfaced four sides) lumber, it’s crucial to check for squareness and true dimensions.
- Rough Cutting: Use a crosscut saw to cut your boards roughly to length, leaving an extra inch or two for final trimming. This helps manage the wood and removes any damaged ends.
- Flattening and Squaring: This is where your hand plane becomes indispensable.
- Flatten one face: Use a smoothing plane to remove inconsistencies and create a perfectly flat reference surface. Use a straightedge to check for flatness.
- Square an edge to the face: With the flat face against your workbench or held securely in a vise, use your plane to create a perfectly square edge. Use a combination square to check.
- Dimensioning thickness: Once one face and one edge are square, use a marking gauge to scribe your desired thickness from the flat face. Then, plane down to this line, checking frequently.
- Dimensioning width: Similarly, mark your desired width from the square edge with a marking gauge, and then plane or rip saw down to this line.
- Final crosscuts: Use a backsaw and a shooting board, or a carefully guided crosscut saw with a square, to cut all pieces to their exact final lengths.
This meticulous preparation ensures that all subsequent cuts and joints will be accurate, leading to a stronger and more professional-looking chair.
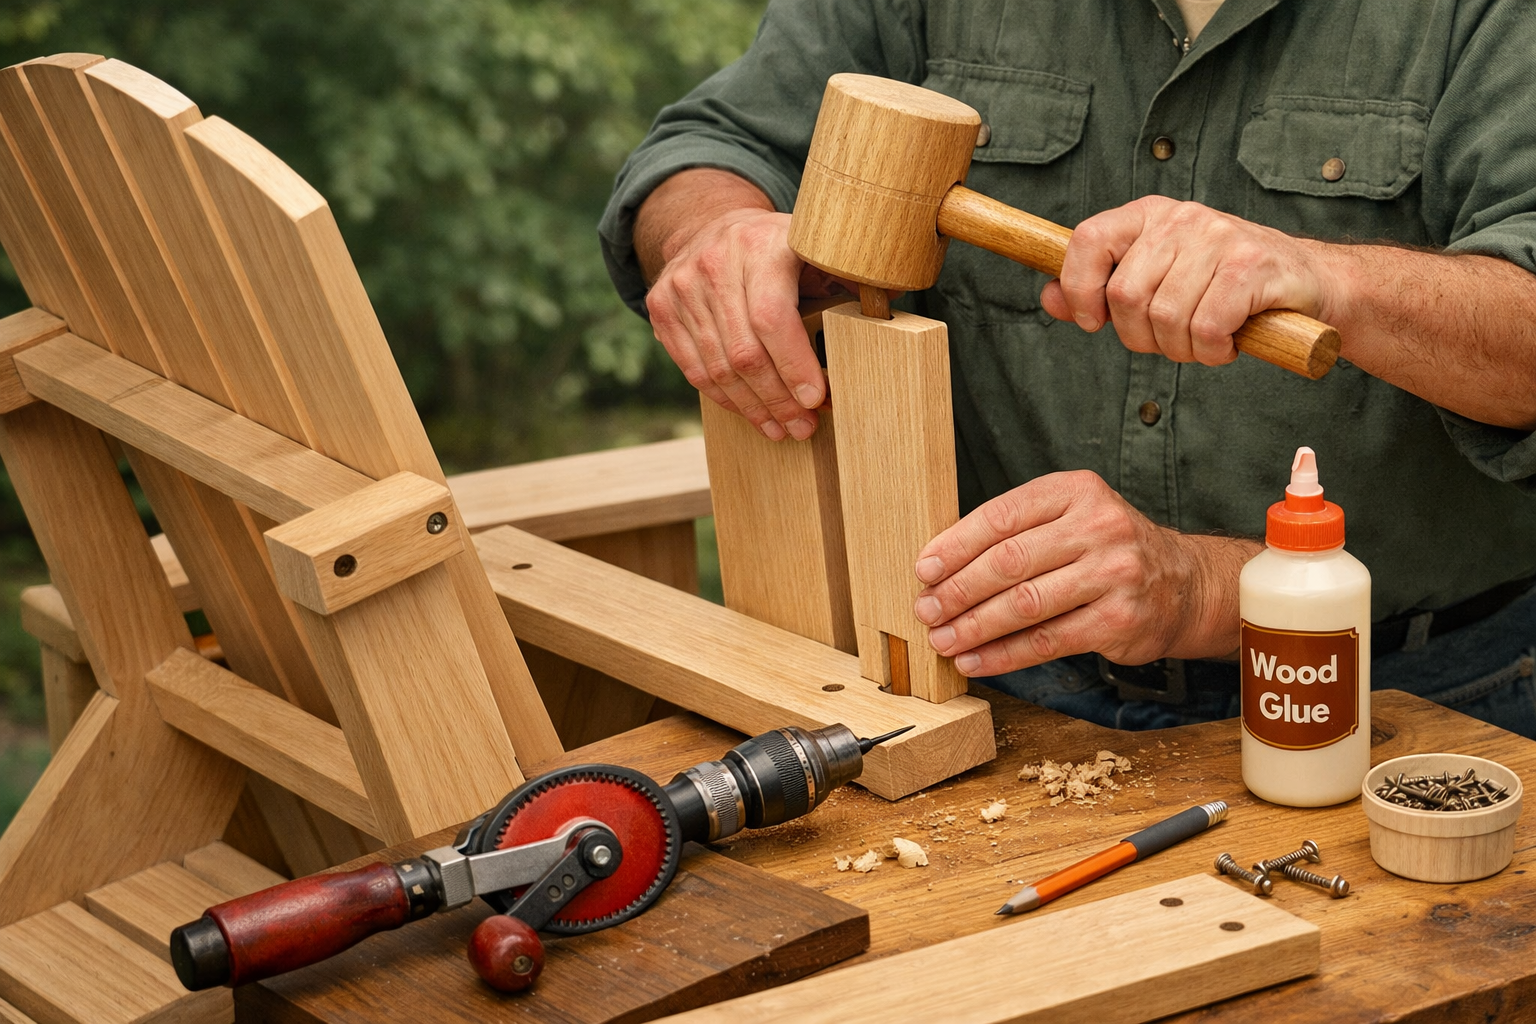
Mastering Hand Joinery: Mortise-and-Tenon and Lap Joints 🤝
For a durable Adirondack chair, especially one intended to last outdoors, strong joinery is critical. While modern plans sometimes rely on screws and butt joints, adapting traditional joinery techniques offers superior strength and longevity.
- Mortise-and-Tenon Joints: This classic joint is incredibly strong and ideal for connecting the legs to the stretchers, and the side rails to the backrest supports.
- Marking: Carefully mark the mortise (the hole) and tenon (the tongue) on your respective pieces using a marking knife and marking gauge for precision.
- Cutting the Mortise:
- Drill out the bulk of the waste within your marked mortise using a brace and bit.
- Then, use chisels and a mallet to pare down to your scribe lines, keeping the chisel bevel facing the waste. Work from both sides to prevent blow-out.
- Cutting the Tenon:
- Use a backsaw to cut the shoulders of the tenon first.
- Then, cut the cheeks (sides) of the tenon down to your depth lines.
- Use chisels to refine and pare the tenon to fit snugly into the mortise. It should be a tight friction fit, but not so tight that it splits the wood when assembled.
- Refining: A mortise gauge is excellent for ensuring consistent mortise and tenon widths.
- Lap Joints: Simpler to execute, lap joints are suitable for connecting pieces where less strength is required but a flat surface is desired, such as connecting the armrest supports to the front legs or the seat slats to the frame.
- Marking: Mark the area to be removed on both pieces that will overlap. The depth of the cut on each piece should be half the thickness of the wood.
- Cutting: Use a backsaw to cut the shoulders of the lap.
- Removing Waste: Use a chisel and mallet to remove the waste wood between the saw cuts, paring down to your marked depth.
- Fit: Ensure a flat, flush fit when the two pieces are joined.
These hand-cut joints, secured with exterior-grade wood glue and perhaps a few strategically placed stainless steel screws for extra reinforcement (pre-drilling pilot holes with a hand drill is essential!), will ensure your chair is incredibly robust. For further study on joining methods, exploring resources like “Doweling Jigs: A Comprehensive Guide to Types, Setup, Techniques, and Best Practices” can broaden your understanding of woodworking connections, even if dowels aren’t the primary joinery for this specific project.
Assembling the Frame and Attaching Slats 🔩
With your pieces dimensioned and joinery cut, it’s time to bring your Adirondack chair to life.

- Side Assemblies: Start by assembling the two side frames. This typically involves connecting a front leg, a back leg, an armrest support, and potentially a stretcher or rail. Use glue in your joints and clamp firmly. Allow sufficient drying time.
- Connecting the Sides: Once the side assemblies are dry and sturdy, connect them with the front and back stretchers, and the lower seat support rail. Again, use glue in your mortise-and-tenon or lap joints, clamp square, and allow to dry. This forms the basic skeletal frame.
- Backrest Assembly: The backrest typically consists of a series of vertical slats attached to curved horizontal supports.
- Cutting Curves: Use a coping saw or a bow saw for the curved backrest supports. Refine these curves with a rasp, file, and sandpaper.
- Attaching Slats: The backrest slats are usually spaced evenly. Lay them out, mark their positions, and attach them to the curved supports using glue and stainless steel screws (pre-drilled). The middle slat often extends higher than the others.
- Seat Slats: Similar to the backrest, the seat also uses spaced slats.
- Layout: Carefully lay out your seat slats, ensuring even spacing. The front slat is often wider than the others.
- Attachment: Attach the seat slats to the side rails and any central support with glue and pre-drilled stainless steel screws. Ensure the screw heads are countersunk for a smooth finish.
- Armrests: The wide armrests are typically the last major components to attach. Secure them to the armrest supports and the top of the front legs with glue and screws.
Throughout the assembly, consistently check for squareness and plumb. Use your clamps generously to hold pieces in alignment while the glue cures. Patience here will pay off in a well-built chair.
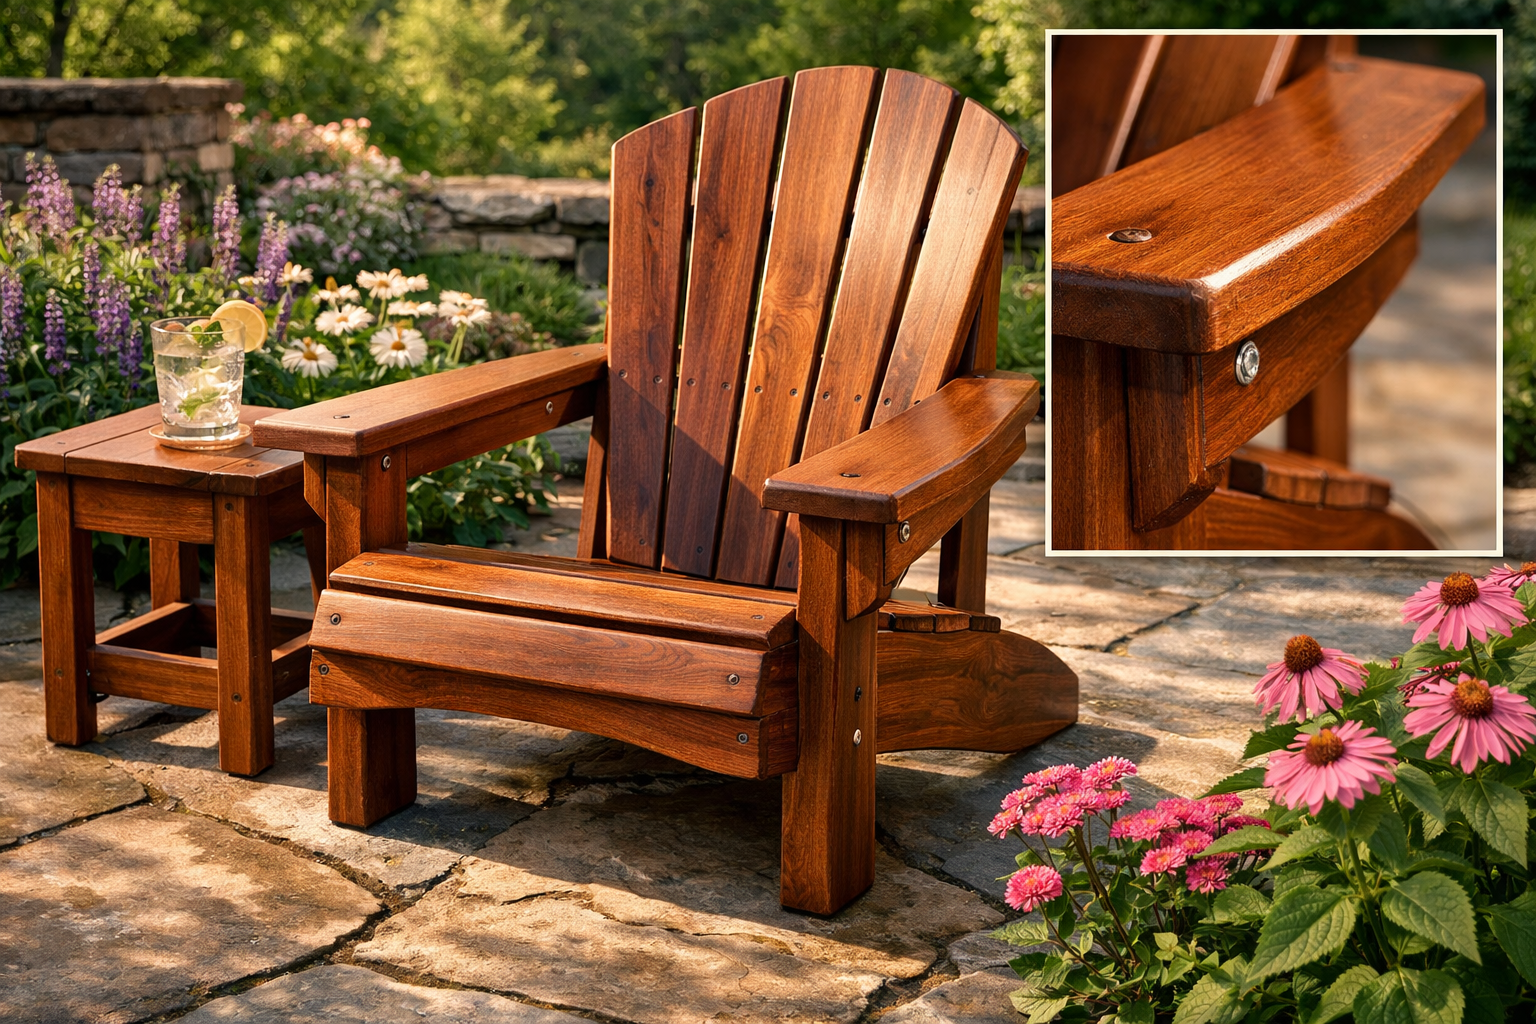
Shaping and Finishing for Comfort and Durability ✨
The final stages involve refining the chair for comfort and applying a protective finish.
- Sanding: This is a critical step for both comfort and finish adhesion. Start with a coarser grit sandpaper (e.g., 80 or 100 grit) to remove any saw marks, plane marks, or imperfections. Progress through finer grits (120, 150, 180, 220) until the entire chair is smooth to the touch. Pay extra attention to edges and areas that will be frequently touched.
- Edge Rounding/Chamfering: Use a block plane, a rasp, or sandpaper to slightly round over all sharp edges. This greatly enhances comfort and reduces the likelihood of splintering.
- Finishing Touches: Fill any visible screw holes with wood plugs or exterior-grade wood filler.
- Applying a Finish: For outdoor furniture, a protective finish is non-negotiable.
- Penetrating Oil Finishes: Products like teak oil, linseed oil, or tung oil penetrate the wood, enhancing its natural beauty and offering protection. They need reapplication annually. For a deep dive into specific wood finishing, you might find articles on “mahogany wood finishing techniques” or “cool wood finishing techniques” inspiring, even if they cover different wood types, as the principles of application can be similar.
- Exterior Varnish or Spar Urethane: These finishes form a protective film on the surface, offering excellent UV and moisture resistance. They come in various sheens and offer longer-lasting protection than oils but may require sanding and reapplication every few years. Ensure the product is rated for outdoor use.
- Paint: A high-quality exterior primer and paint can also protect your chair and allow for a custom color.
Apply your chosen finish according to the manufacturer’s instructions, ensuring adequate ventilation. Multiple thin coats are always better than one thick coat. Allow ample drying time between coats. Once finished, your comfortable outdoor seating will be ready to enjoy for many seasons to come!
Conclusion: Your Hand-Built Adirondack Legacy
Building an Adirondack chair with hand tools is more than just a woodworking project; it’s an investment in skill, patience, and a tangible piece of craftsmanship that will bring joy and comfort for years to come. By following this Beginner’s Guide to Building Adirondack Chairs: Comfortable Outdoor Seating with Hand Tool Techniques, you’ve embarked on a rewarding journey, learning about wood selection, mastering foundational hand tool techniques, and appreciating the fine details of joinery and finishing.
The ergonomic design, robust construction using traditional mortise-and-tenon and lap joints, and the careful selection of weather-resistant woods ensure that your hand-built chair will not only be comfortable but also exceptionally durable against the elements in 2026 and beyond. This project provides a profound sense of accomplishment, proving that with dedication and the right approach, even complex-looking furniture can be created with the elegance and precision of hand tools.
Actionable Next Steps:
- Gather Your Tools & Materials: Review the tool list and wood selection guide. Invest in quality hand tools if you don’t already have them, and source the best weather-resistant lumber you can afford.
- Find or Create Your Plan: Seek out detailed Adirondack chair plans that include dimensions and cutting lists. Consider sketching out your own based on the ergonomic principles discussed.
- Start with Practice: If you’re new to hand joinery, practice cutting mortises, tenons, and laps on scrap wood before working on your main project pieces. This builds confidence and refines your technique.
- Embrace the Process: Remember that woodworking with hand tools is a journey. Take your time, enjoy each step, and celebrate your progress. Don’t be afraid to make mistakes—they are opportunities for learning.
- Maintain Your Creation: Once built and finished, periodically inspect your chair for any signs of wear. Reapply finish as needed to ensure its longevity and continued beauty.
May your new hand-crafted Adirondack chair provide countless hours of comfortable outdoor relaxation!
