
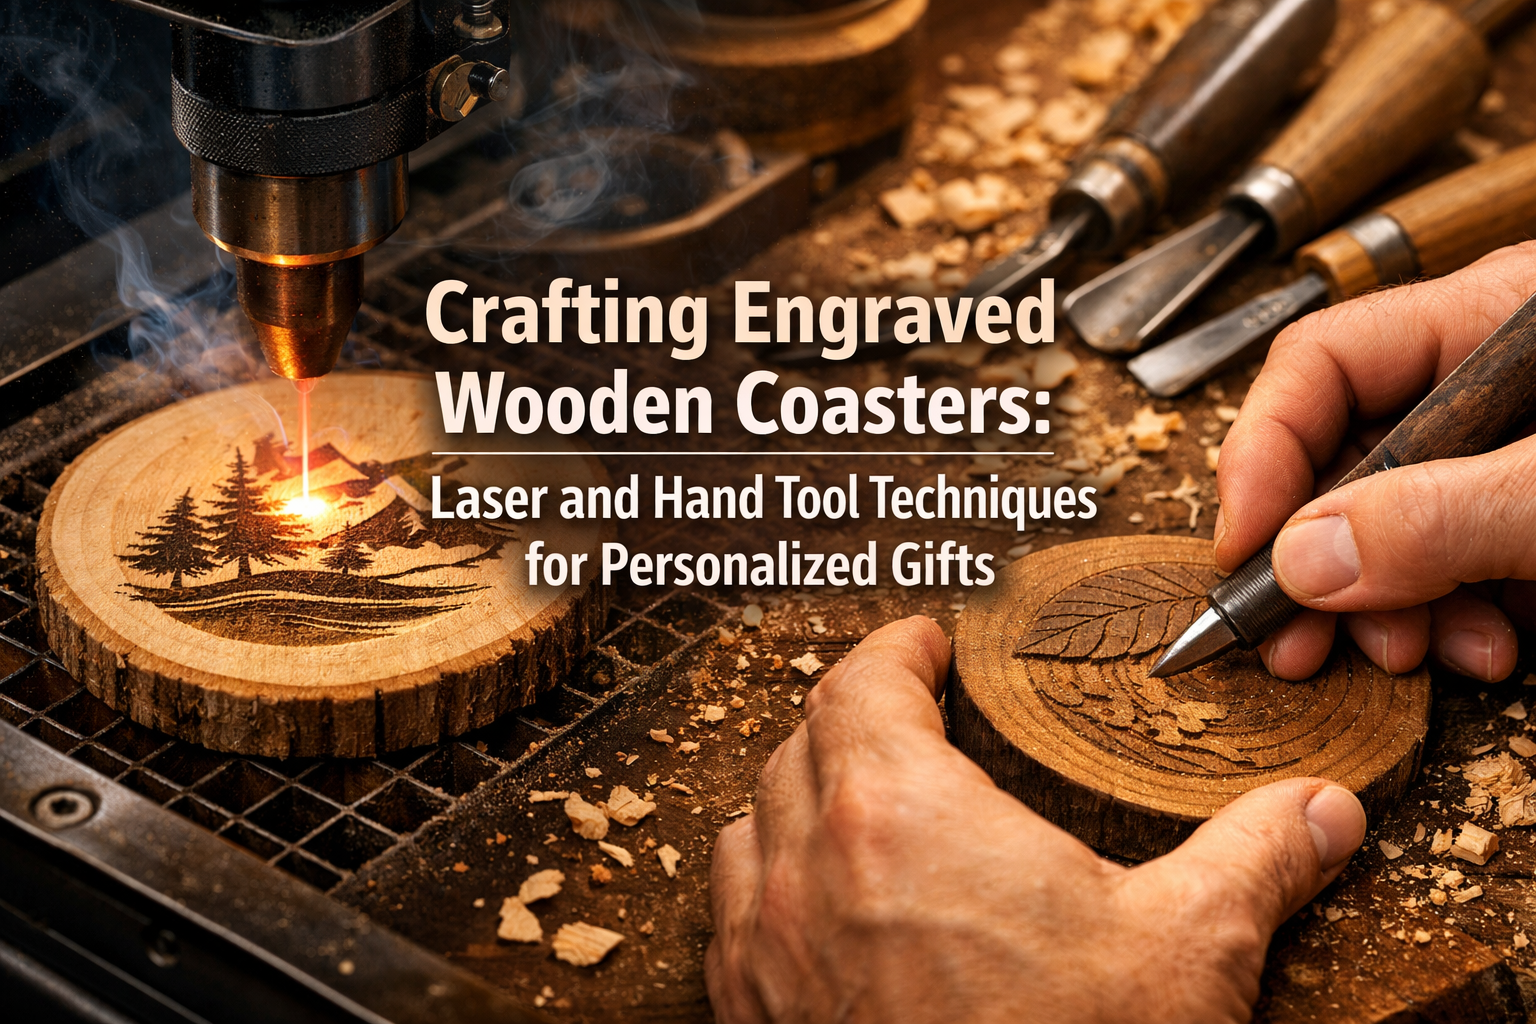

In the vibrant world of woodworking, where tradition meets innovation, crafting engraved wooden coasters: laser and hand tool techniques for personalized gifts stands out as a particularly rewarding and popular endeavor. These small but impactful pieces of art offer a fantastic canvas for creativity, combining the precision of modern laser etching with the timeless charm of hand carving. Whether you’re a seasoned woodworker looking to diversify your craft or a beginner eager to create unique, heartfelt gifts, this guide will illuminate the path to producing stunning, personalized wooden coasters in 2026. Imagine the satisfaction of presenting a set of coasters featuring intricate designs, custom monograms, or memorable dates, each piece a testament to skill and thoughtfulness. These aren’t just utilitarian items; they are cherished keepsakes, perfect for weddings, anniversaries, housewarmings, or corporate branding.
The appeal of engraved wooden coasters lies in their versatility and the deeply personal touch they convey. From rustic cabin aesthetics to sleek, modern minimalism, the possibilities are limitless. This article will delve into everything from selecting the right wood and preparing your blanks to mastering both laser and hand engraving techniques, ensuring your creations are not only beautiful but also durable and market-ready. We’ll explore various finishing methods to protect your artwork and discuss creative ways to package your coasters, making them irresistible gifts.

Key Takeaways
- Wood Selection is Crucial: Different wood types (maple, cherry, walnut, oak) offer unique grains and respond differently to engraving. Choose wisely based on the desired aesthetic and carving method.
- Preparation Ensures Quality: Proper sanding, cleaning, and conditioning are essential steps before engraving to achieve crisp lines and smooth finishes.
- Combine Techniques for Uniqueness: Integrating laser etching for intricate details with hand carving for texture and depth can elevate your coaster designs significantly.
- Finishing Protects and Enhances: Applying appropriate sealants and finishes is vital for durability, water resistance, and bringing out the beauty of the engraved designs.
- Presentation Matters for Personalized Gifts: Thoughtful packaging transforms a set of coasters into a truly memorable and marketable personalized gift.
Preparing Your Canvas: Wood Selection and Blank Preparation for Engraved Coasters
The foundation of any exceptional engraved wooden coaster lies in the quality of the wood and the meticulous preparation of the coaster blanks. Without a solid starting point, even the most intricate engraving will fall short of its potential. Understanding wood characteristics and mastering the preparatory steps are paramount for crafting engraved wooden coasters: laser and hand tool techniques for personalized gifts.
Choosing the Right Wood Species
The type of wood you select significantly impacts the final appearance and feel of your engraved coasters. Each species has unique properties that affect how it takes to engraving, its durability, and its aesthetic appeal.
- Maple: A popular choice for its light color and fine, uniform grain. Maple provides excellent contrast for laser engraving, as the laser tends to burn it to a dark brown, making designs pop. It’s also dense and takes well to intricate hand carving. For more on finishing maple, refer to “maple wood finishing techniques – Wood Craft Wiz” at https://woodcraftwiz.com/maple-wood-finishing-techniques/.
- Cherry: Known for its rich reddish-brown color that deepens with age and exposure to light. Cherry has a smooth texture and fine grain, offering beautiful results with both laser and hand tools. Laser engraving on cherry produces a slightly softer, often warmer contrast than on maple.
- Walnut: A premium hardwood with a beautiful, dark chocolate-brown color and a distinct grain pattern. Walnut creates stunning, sophisticated coasters. Laser engraving on walnut typically yields a subtle, yet elegant, darker tone against the wood. Hand carving on walnut is a delight due to its stability.
- Oak: Available in red and white varieties, oak features a prominent grain pattern that adds character. While it can be laser engraved, the open grain might lead to less uniform results compared to finer-grained woods. However, its rustic appeal is perfect for certain hand-carved designs. You can learn more about finishing oak at “oak wood finishing techniques – Wood Craft Wiz” at https://woodcraftwiz.com/oak-wood-finishing-techniques/.
- Mahogany: Offers a reddish-brown hue and a straight, fine grain. It carves beautifully and laser engraves with good contrast, producing elegant results. For finishing mahogany, check out “mahogany wood finishing techniques – Wood Craft Wiz” at https://woodcraftwiz.com/mahogany-wood-finishing-techniques/.
- Bamboo: While technically a grass, bamboo is often used in woodworking. It’s eco-friendly, has a distinctive grain, and laser engraves with excellent contrast, often producing a dark, clean burn. It’s generally not ideal for deep hand carving due to its fibrous nature.
Considerations for Wood Selection:
- Grain Pattern: Fine-grained woods (maple, cherry) are generally best for intricate details, especially with laser engraving. Open-grained woods (oak) can add character but might make small details less crisp.
- Hardness: Harder woods (maple, oak) are more durable but can be more challenging to hand carve. Softer woods (basswood, poplar) are easier to carve but less resistant to dents.
- Color: The natural color of the wood will influence the contrast of your engraving. Lighter woods generally offer higher contrast with laser burns.
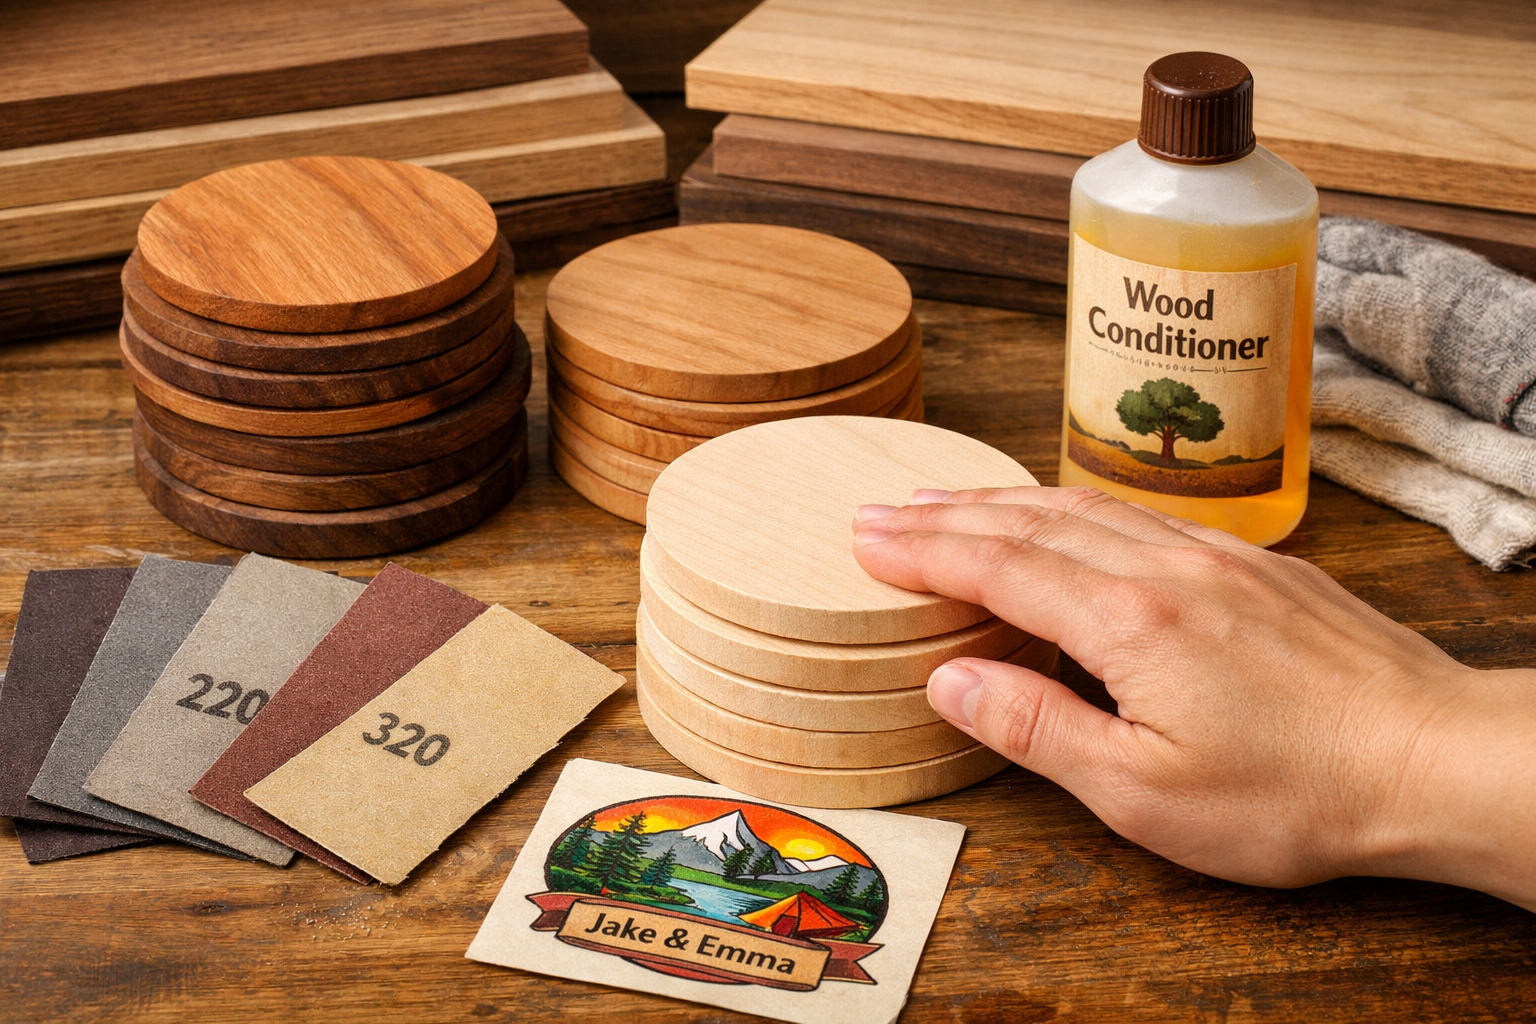
Sourcing or Creating Coaster Blanks
You have several options for obtaining your coaster blanks:
- Purchasing Pre-Cut Blanks: Many craft suppliers and woodworking stores offer pre-cut wooden coaster blanks, often in standard sizes (e.g., 3.5 to 4 inches in diameter or square) and various wood species. This is the easiest option, especially for beginners or those focused purely on engraving.
- Cutting Your Own Blanks: For woodworkers with access to saws, cutting your own blanks offers greater control over wood species, size, and thickness.
- From Boards: Use a table saw to rip boards to width, then a miter saw or crosscut sled to cut squares. A router with a round-over bit can soften edges, or a band saw can cut circular shapes.
- From Wood Slices/Log Sections: For a rustic look, consider using thin slices from tree branches or small logs. These often have live edges, adding unique character.
- Utilizing Scrap Wood: Coasters are excellent projects for using up smaller pieces of wood that might otherwise go to waste. This aligns perfectly with sustainable woodworking practices. Explore ideas for “Turning Shop Scraps into Design Features: Mixed-Wood Techniques and Offcut Utilization for Zero-Waste Woodworking” at https://woodcraftwiz.com/turning-shop-scraps-into-design-features-mixed-wood-techniques-and-offcut-utilization-for-zero-waste-woodworking-2/.
Essential Preparation Steps
Regardless of how you obtain your blanks, proper preparation is key to a professional-looking finished product.
- Sizing and Shaping: Ensure all blanks are uniformly sized and shaped if creating a set. Use sanders, routers, or carving tools to achieve desired edges (e.g., chamfered, rounded).
- Sanding: This is perhaps the most critical step for a smooth, even surface that accepts engraving well.
- Start with a coarser grit sandpaper (e.g., 100-120 grit) to remove any saw marks or imperfections.
- Progress through finer grits (e.g., 150, 180, 220 grit). For laser engraving, sanding up to 220 grit is usually sufficient. For hand carving, you might go up to 320 or 400 grit for an ultra-smooth finish.
- Sand in the direction of the grain to avoid visible scratches.
- Pro Tip: After sanding with one grit, slightly dampen the wood surface with water (a technique called “raising the grain”), let it dry completely, then sand again with the next finer grit. This helps lift any loose fibers that would otherwise swell and rough up the surface after finishing.
- Cleaning: After sanding, thoroughly remove all dust from the coaster surface. A tack cloth, compressed air, or a vacuum cleaner with a brush attachment works well. Any residual dust can interfere with laser engraving or finishing.
- Conditioning (Optional but Recommended): For some woods, especially those prone to blotching when stained or finished, a pre-stain wood conditioner can help achieve more uniform results. While not strictly necessary for clear finishes, it can enhance absorption and evenness.
By carefully selecting your wood and diligently preparing your blanks, you lay the groundwork for truly remarkable engraved wooden coasters.
Mastering Engraving Techniques: Laser Etching vs. Hand Carving
With your wooden blanks perfectly prepared, the exciting part begins: bringing your designs to life. Crafting engraved wooden coasters: laser and hand tool techniques for personalized gifts offers two primary avenues for customization: the high-tech precision of laser etching and the artistic finesse of hand carving. Each method has its unique advantages and considerations.
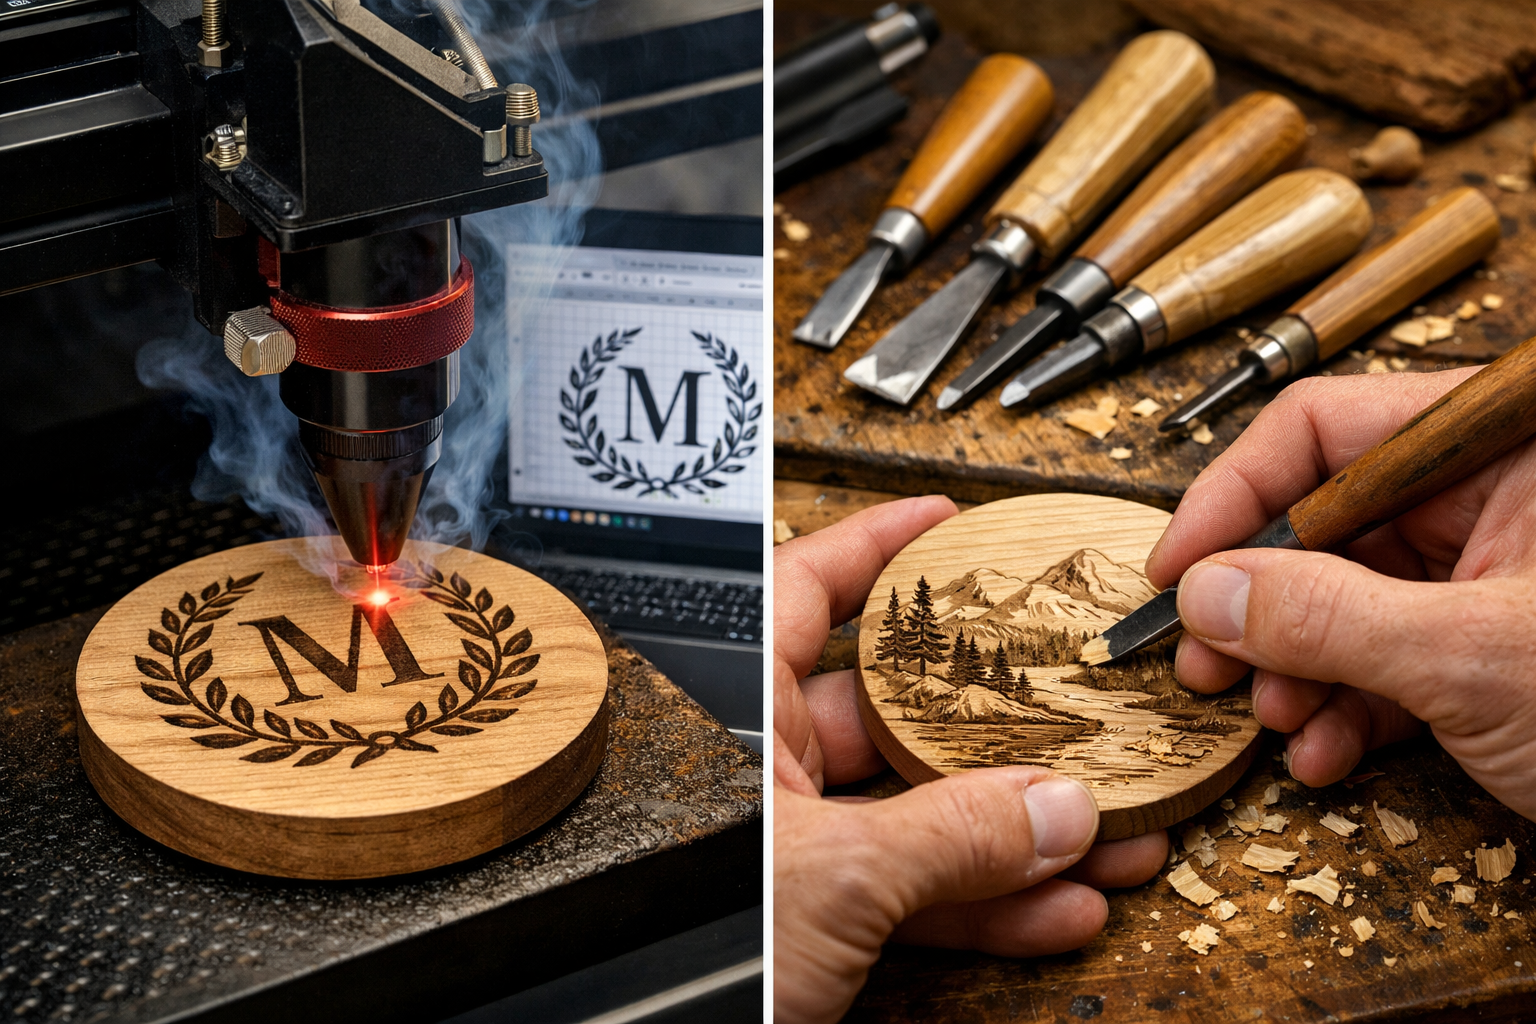
Laser Engraving Techniques
Laser engravers have revolutionized personalized crafting, offering speed, precision, and the ability to reproduce intricate designs with remarkable accuracy.
How Laser Engraving Works
A laser engraver uses a focused beam of light to burn away or vaporize the surface of the wood, creating a permanent mark. The depth and darkness of the engraving are controlled by power settings, speed, and the number of passes.
Advantages of Laser Engraving:
- Precision and Detail: Capable of reproducing extremely fine lines, intricate patterns, and detailed images, including photographs.
- Speed: Much faster than hand carving for complex designs or large batches.
- Consistency: Produces identical results across multiple coasters, ideal for sets or bulk orders.
- Versatility: Can engrave text, logos, custom artwork, and even photographic images.
- Ease of Use (after setup): Once a design is loaded, the machine handles the execution with minimal supervision.
Essential Equipment and Software:
- Laser Engraver: Entry-level diode lasers are affordable for hobbyists, while CO2 lasers offer higher power and speed for professional use.
- Computer with Design Software: Vector graphics software (e.g., Adobe Illustrator, Inkscape, CorelDRAW) for creating scalable designs, and raster software (e.g., Photoshop, GIMP) for image preparation.
- Laser Control Software: Programs like LightBurn, RDWorks, or the software bundled with your engraver.
Design Considerations for Laser Engraving:
- Vector vs. Raster:
- Vector graphics (lines, shapes) are ideal for cutting and crisp line art engraving. The laser follows the lines.
- Raster graphics (images, photographs) are “burned” pixel by pixel, similar to how a printer works.
- Contrast: High-contrast images work best. Convert color images to grayscale for better results.
- Resolution: Ensure images have sufficient resolution to avoid pixelation.
- Line Thickness: Keep lines reasonably thick, especially for smaller designs, to prevent them from burning away completely.
Process for Laser Engraving:
- Design Creation/Import: Create your design in graphic software or import an existing file.
- Software Preparation: Adjust the design for the laser engraver: resize, position, and set engraving parameters (power, speed, frequency/DPI).
- Test Engraving: Always perform a test engrave on a scrap piece of the same wood before starting on your coaster. This helps fine-tune settings for optimal depth and contrast.
- Placement: Securely place the coaster blank in the laser bed, ensuring it’s level and correctly positioned.
- Engrave: Start the engraving process. Monitor the machine for any issues.
- Cleaning: After engraving, gently clean the coaster to remove any soot or residue with a soft brush or a damp cloth (ensure wood is completely dry before finishing).
Hand Carving Techniques
Hand carving offers a tactile, meditative, and deeply artisanal approach to personalizing wooden coasters. It’s perfect for creating unique textures, relief carvings, and a truly handcrafted feel.
How Hand Carving Works
Hand carving involves using various sharp tools to remove wood chips, shaping the surface to create desired patterns, depths, and textures.
Advantages of Hand Carving:
- Artistic Expression: Allows for unique, one-of-a-kind pieces with an unmistakable human touch.
- Tactile Quality: Creates physical depth and texture that laser engraving cannot replicate.
- No Power Tools Needed: Can be done with minimal equipment, making it accessible.
- Sensory Experience: Many find the process of carving therapeutic and rewarding.
- Unique Aesthetic: Often results in a more organic, rustic, or traditional look.
Essential Tools for Hand Carving:
- Carving Knives: For general shaping, trimming, and detail work.
- Gouges: U-shaped or V-shaped tools for scooping out wood and creating curved lines.
- Chisels: Flat-edged tools for straight lines, cleaning out areas, and relief work.
- Mallet (optional): For heavier cuts with chisels and gouges.
- Sharpening Stones/Strops: Absolutely crucial for keeping tools razor-sharp, ensuring clean cuts and safety.
- Bench Vise or Clamp: To hold the coaster securely while carving.
- Safety Glove: To protect the non-carving hand.
Design Considerations for Hand Carving:
- Simplicity: Begin with simpler designs that have clear lines and shapes.
- Flow of Grain: Design with the wood grain in mind; carving against the grain can lead to tear-out.
- Depth: Plan for varying depths to add visual interest and dimension.
- Relief vs. Incised: Decide whether you want to carve away the background (relief carving) or carve lines into the surface (incised carving).
Process for Hand Carving:
- Transfer Design: Draw your design directly onto the coaster with a pencil, or use carbon paper or tracing paper to transfer a printed design.
- Secure the Coaster: Clamp the coaster firmly to your workbench.
- Outline the Design: Use a shallow V-gouge or carving knife to carefully outline the main elements of your design. This establishes the boundaries.
- Remove Wood: Systematically remove wood using appropriate tools. For relief carving, start by removing the background around your raised design. For incised carving, deepen your lines.
- Always carve away from your body and non-carving hand.
- Take small, controlled cuts. Don’t try to remove too much wood at once.
- Pay attention to the grain direction to avoid splintering.
- Detailing: Refine the shapes and add smaller details with fine carving knives or small gouges.
- Sanding (Optional): Lightly sand the carved areas with very fine sandpaper (e.g., 400-600 grit) to smooth any rough spots, being careful not to dull crisp edges.
Combining Laser and Hand Tool Techniques
The true magic in crafting engraved wooden coasters: laser and hand tool techniques for personalized gifts often comes from combining these two methods.
- Laser for Outline, Hand for Texture: Use the laser to etch a precise outline or intricate text, then use hand tools to add depth, texture, or sculptural elements around or within the laser-etched areas.
- Laser for Fine Details, Hand for Boldness: Laser engrave highly detailed images or small text, then hand carve larger, bolder elements or chamfers on the coaster’s edge to add a more robust, handcrafted feel.
- Masking and Layering: Laser engrave certain parts of a design, mask them off, then apply a finish or stain, and finally, hand carve unmasked areas for a multi-layered effect.
This hybrid approach allows you to leverage the best of both worlds, creating coasters that are not only personalized but also unique in their artistic execution. For projects that emphasize the beauty of hand-cut joinery, consider integrating similar precision techniques found in “Mastering Modern Hand-Cut Joinery: Adapting Classics for Live Edge and Modular Furniture” at https://woodcraftwiz.com/mastering-modern-hand-cut-joinery-adapting-classics-for-live-edge-and-modular-furniture/.

Finishing and Presentation: Ensuring Durability and Appeal for Your Engraved Coasters
After meticulously carving or laser-etching your wooden coasters, the final steps of finishing and presentation are crucial. These not only protect your hard work and ensure the longevity of the personalized gifts but also elevate their perceived value and appeal. This section focuses on making your crafting engraved wooden coasters: laser and hand tool techniques for personalized gifts truly stand out in 2026.
Choosing the Right Finish for Wooden Coasters
Coasters are exposed to moisture, heat, and friction, so a durable, water-resistant, and ideally food-safe finish is essential. The finish should also enhance, not obscure, your engraved designs.
Here’s a comparison of popular finishing options:
| Finish Type | Advantages | Disadvantages | Best For |
|---|---|---|---|
| Mineral Oil | Food-safe, easy to apply, natural look | Requires frequent reapplication, less durable | Lightly used coasters, decorative pieces, very rustic feel |
| Wax (Beeswax/Carnauba) | Food-safe (some), soft luster, easy to apply | Limited water resistance, requires reapplication | Light use, decorative, adds a smooth feel |
| Polyurethane (Water-Based) | Excellent durability, good water resistance, fast drying, low VOCs | Can appear plasticky if applied too thickly, needs careful application to avoid bubbles | High-use coasters, maximum protection, clear finish |
| Shellac | Dries fast, natural, easy to repair, food-safe when dry | Not highly water-resistant, easily damaged by alcohol | Decorative coasters, historical reproduction, quick sealing before another topcoat |
| Spar Urethane | Extremely durable, excellent water and UV resistance | Slower drying, generally oil-based (higher VOCs), can yellow over time | Outdoor coasters, maximum protection against elements |
| Epoxy Resin | Ultimate durability, high gloss, waterproof, food-safe options | Difficult to apply without bubbles, thick layer, irreversible | Heavy-duty, modern aesthetic, embedded elements |
Recommendations for Engraved Wooden Coasters:
- For most engraved coasters, a food-safe, water-resistant finish is ideal. Water-based polyurethane offers excellent protection and is easy to work with. Apply several thin coats, sanding lightly with very fine sandpaper (e.g., 400-600 grit) between coats for a smooth, durable surface.
- If you prefer a more natural, subtle look, consider a hardwax oil finish. These products penetrate the wood, offering good protection while maintaining a “wood-like” feel. Brands like Osmo Polyx-Oil or Rubio Monocoat are popular choices for their durability and natural aesthetic.
- For coasters that will see heavy use or are intended for outdoor settings, spar urethane or even a thin coat of epoxy resin might be considered, though epoxy can obscure fine laser details slightly.
Application Techniques
- Clean Thoroughly: Before applying any finish, ensure the coasters are completely free of dust and debris. Use a tack cloth or compressed air.
- Apply Thin Coats: Always apply finishes in thin, even coats. Thick coats can lead to drips, uneven drying, and a plasticky appearance.
- Brush, Wipe, or Spray:
- Brushing: Use a high-quality natural bristle brush for oil-based finishes or a synthetic brush for water-based finishes.
- Wiping: Many finishes (especially oils and hardwax oils) can be wiped on with a lint-free cloth, which helps achieve very thin coats.
- Spraying: For the smoothest, most professional finish, consider spraying if you have the equipment.
- Drying and Curing: Allow adequate drying time between coats and ensure the final finish has fully cured before packaging or using the coasters. Curing time is often longer than dry-to-touch time.
- Buffing: For a satin or matte finish, a final buff with a fine abrasive pad (like 0000 steel wool or a Scotch-Brite pad) after the finish has fully cured can create a lovely soft sheen.
Adding a Non-Slip Backing
To prevent scratching furniture surfaces and to provide grip, adding a non-slip backing is a simple yet effective enhancement.
- Felt Pads: Self-adhesive felt pads are readily available in various sizes and colors.
- Cork Backing: Self-adhesive cork sheets or pre-cut cork circles can be applied to the bottom of the coaster. Cork provides excellent grip and a professional look.
- Rubber Feet: Small, self-adhesive clear rubber bumpers offer discreet non-slip protection.
Packaging Your Personalized Gifts
Thoughtful packaging transforms a set of beautiful coasters into a truly memorable and impressive gift, especially for holiday markets or custom orders.
- Simple & Elegant:
- Twine or Ribbon: Tie a stack of 4-6 coasters together with natural twine, jute, or a decorative ribbon. Add a small, personalized tag.
- Burlap or Fabric Pouch: Place a set of coasters into a small, drawstring pouch made from burlap, linen, or other attractive fabric.
- Gift Boxes:
- Kraft Paper Boxes: Inexpensive and customizable. Line with tissue paper or crinkle-cut paper for cushioning.
- Custom Wooden Boxes: For a truly premium gift, consider crafting a small wooden box specifically designed to hold your coasters. This adds an extra layer of craftsmanship.
- Clear Lid Boxes: Boxes with clear acetate lids allow the beautiful coasters to be seen without opening the package.
- Branding and Personalization:
- Logo/Sticker: Affix a sticker with your brand logo or contact information to the packaging.
- Care Instructions: Include a small card with care instructions (e.g., “Wipe clean with a damp cloth,” “Do not submerge in water”).
- Personalized Tags: For custom orders, a tag with the recipient’s name or a special message adds immense value.
Creative Ideas for Coaster Sets
- Themed Sets: Create sets around a specific theme (e.g., pet breeds, astrological signs, local landmarks, abstract patterns).
- Milestone Sets: Engrave dates, initials, or locations for weddings, anniversaries, or housewarmings.
- Business Branding: Offer coasters as promotional items with company logos for corporate gifts.
- Holiday Collections: Design specific sets for Christmas, Valentine’s Day, Mother’s Day, etc.
- Geometric Patterns: Explore intricate geometric designs that look stunning with both laser and hand carving, perhaps inspired by “Handcrafted Wooden Wall Art: 3D Layered Panels and Geometric” techniques at https://woodcraftwiz.com/handcrafted-wooden-wall-art-3d-layered-panels-and-geometric-carvings-with-router-techniques/.
By focusing on durable finishes and attractive packaging, your engraved wooden coasters will not only protect surfaces but also serve as cherished, personalized gifts that reflect the care and skill put into their creation. This comprehensive approach ensures that your efforts in crafting engraved wooden coasters: laser and hand tool techniques for personalized gifts result in products that delight both givers and receivers.
Conclusion
Crafting engraved wooden coasters: laser and hand tool techniques for personalized gifts offers a truly rewarding journey into the world of personalized woodworking. From the careful selection of a beautiful wood species like maple or walnut to the intricate dance between modern laser precision and the tactile artistry of hand carving, each step contributes to creating a unique and cherished item. We’ve explored the critical importance of wood preparation, ensuring a flawless canvas, and delved into the distinct advantages and processes of both laser etching and traditional hand tools. Finally, we’ve emphasized how thoughtful finishing and creative packaging elevate these functional pieces into exquisite, personalized gifts.
In 2026, the demand for custom-made, handcrafted items continues to grow, and engraved wooden coasters are perfectly positioned to meet this trend. They represent an ideal project for both hobbyists and small business owners, offering a high return on creativity and relatively low material costs. The ability to combine machine precision with human artistry allows for an unparalleled level of personalization, making these coasters suitable for a vast array of occasions and recipients.
Actionable Next Steps
- Start Small: Begin with readily available wood blanks and focus on mastering one engraving technique (either laser or hand carving) before experimenting with both.
- Invest in Quality Tools (Gradually): A good set of carving tools or an entry-level diode laser can significantly enhance your results. Remember, sharp hand tools are safer and more effective.
- Experiment with Wood Species: Try different woods to see how they respond to your chosen engraving methods and how their grain patterns affect the final look.
- Practice Finishing: Experiment with various finishes on scrap wood to find the one that best suits your aesthetic and durability requirements.
- Develop Your Signature Style: Whether it’s through unique design elements, a specific type of engraving, or distinctive packaging, cultivate a style that makes your coasters instantly recognizable.
- Consider Your Market: If selling, research popular designs, pricing, and optimal packaging for your target audience (e.g., wedding favors, corporate gifts, general home decor).
- Explore Related Projects: Once comfortable with coasters, consider applying your engraving and finishing skills to other small woodworking projects that make excellent gifts, such as cutting boards, small boxes, or even personalized wall art.
By embracing the techniques and insights shared in this guide, you are well on your way to mastering the art of crafting engraved wooden coasters: laser and hand tool techniques for personalized gifts. Each coaster you create will not only serve its purpose but also tell a story, making it a truly invaluable and lasting present.
