
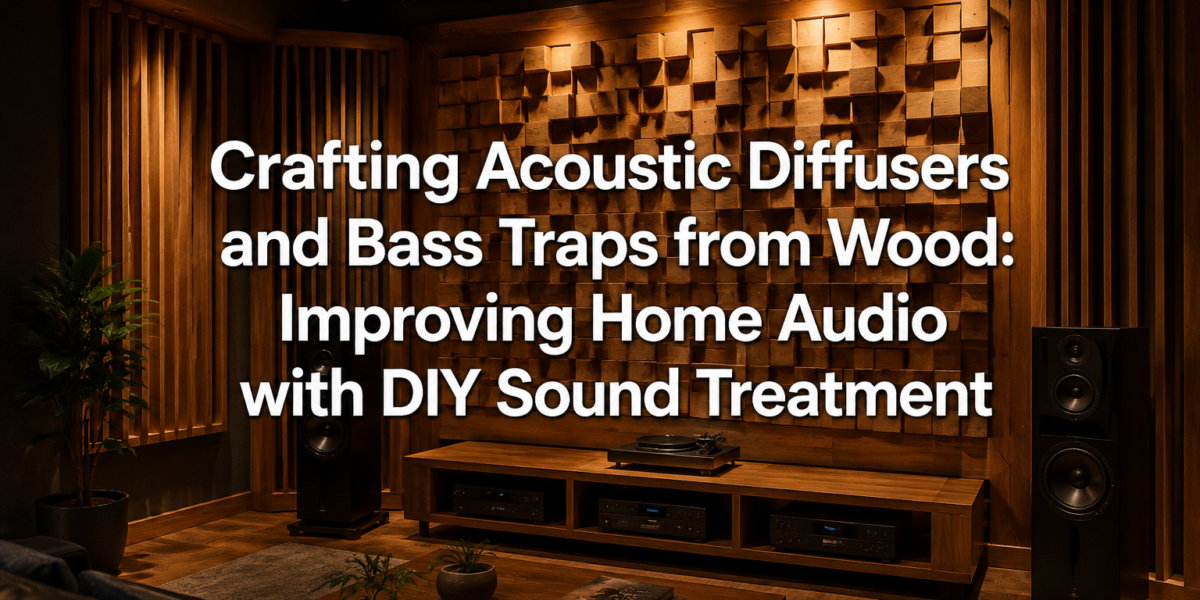

A staggering 70% of a room’s sound quality can be attributed to its acoustics, not just the equipment itself. For audiophiles, home theater enthusiasts, and budding music producers, this often overlooked fact means that even the most expensive speakers can sound subpar in an untreated space. The good news? Achieving superior sound doesn’t always require professional installers or exorbitant costs. By engaging in Crafting Acoustic Diffusers and Bass Traps from Wood: Improving Home Audio with DIY Sound Treatment, you can transform your listening environment, marrying the satisfaction of woodworking with the pursuit of sonic perfection. This comprehensive guide will equip you with the knowledge and steps to design and build effective, aesthetically pleasing sound treatment solutions that enhance clarity, tighten bass, and create a more immersive audio experience right in your own home.
Key Takeaways
- Understanding Room Acoustics: Proper sound treatment addresses common issues like flutter echoes, standing waves, and excessive reverberation.
- Diffusers vs. Bass Traps: Diffusers scatter sound waves to prevent echoes, while bass traps absorb low-frequency energy to control muddiness.
- Wood as a Material: Wood is an excellent material for DIY acoustic treatment, offering both functional properties and aesthetic appeal.
- DIY Benefits: Building your own treatment saves money, allows for customization, and provides a rewarding woodworking project.
- Strategic Placement: The effectiveness of diffusers and bass traps depends heavily on their correct placement within the listening space.
The Science of Sound: Why Your Room Needs Treatment
Before diving into Crafting Acoustic Diffusers and Bass Traps from Wood: Improving Home Audio with DIY Sound Treatment, it’s crucial to understand the problems you’re trying to solve. Sound waves interact with your room’s surfaces in complex ways. When sound hits a hard, flat surface (like a wall or ceiling), it reflects. Too many reflections, especially if they are delayed or out of phase, lead to acoustic issues:

- Reverberation: This is the persistence of sound after its source has stopped. Think of singing in a tiled bathroom – the sound “hangs” in the air. While some reverb adds character, excessive amounts muddy the sound and reduce clarity.
- Flutter Echoes: Occur between parallel reflective surfaces, creating a distinct, rapid echo sound that is highly distracting and detrimental to audio fidelity.
- Standing Waves: Low-frequency sounds (bass) tend to build up in corners and along walls, creating “boomy” or “muddy” bass in some spots and dead spots in others. This uneven bass response can make music sound distorted and unbalanced.
 Acoustic treatment aims to manage these reflections. Absorbers (like bass traps) reduce the energy of sound waves, especially at lower frequencies. Diffusers scatter sound waves, breaking up harsh reflections and creating a more even, spacious sound field. Wood, with its natural variations and workability, is an ideal material for many of these applications.
Understanding the Difference: Diffusers vs. Bass Traps
While both improve room acoustics, diffusers and bass traps serve distinct purposes:
| Feature | Acoustic Diffuser | Bass Trap (Absorber) |
|---|---|---|
| Primary Function | Scatters sound waves to create a more even, spacious sound field and prevent flutter echoes. | Absorbs low-frequency sound energy (bass) to reduce muddiness, control standing waves, and improve bass clarity. |
| Construction | Typically hard, uneven surfaces (e.g., wooden blocks of varying depths, calculated patterns). | Porous, fibrous materials (e.g., mineral wool, rockwool, fiberglass) encased in a frame, often with a fabric covering. Sometimes a membrane absorber design. |
| Material | Wood (often solid lumber or plywood), MDF, sometimes plastic. | Mineral wool, rockwool, fiberglass, sometimes foam. Wooden frame construction is common. |
| Placement | Often on rear walls, ceilings, or side walls at reflection points. | Primarily in corners (tri-corners, di-corners), along wall-ceiling junctions, and at first reflection points. |
| Impact on Sound | Enhances soundstage, improves localization, adds “air” and depth without deadening the room. | Tightens bass, removes boominess, improves low-end accuracy, prevents sound from bleeding into other rooms. |
| Aesthetic | Can be highly decorative and architectural due to intricate patterns. | Often discreet, fabric-covered panels, but wood frames can add elegance. |
For a deeper dive into woodworking techniques that ensure precision and strength, consider exploring guides on Mastering Dovetail Joints with Hand Tools: A Step-by-Step Guide for flawless wood joinery which are vital for robust acoustic panel frames.
Crafting Acoustic Diffusers and Bass Traps from Wood: Design and Materials
The core of this project lies in leveraging woodworking skills to create functional acoustic elements. Wood is an excellent choice due to its stability, workability, and aesthetic appeal.
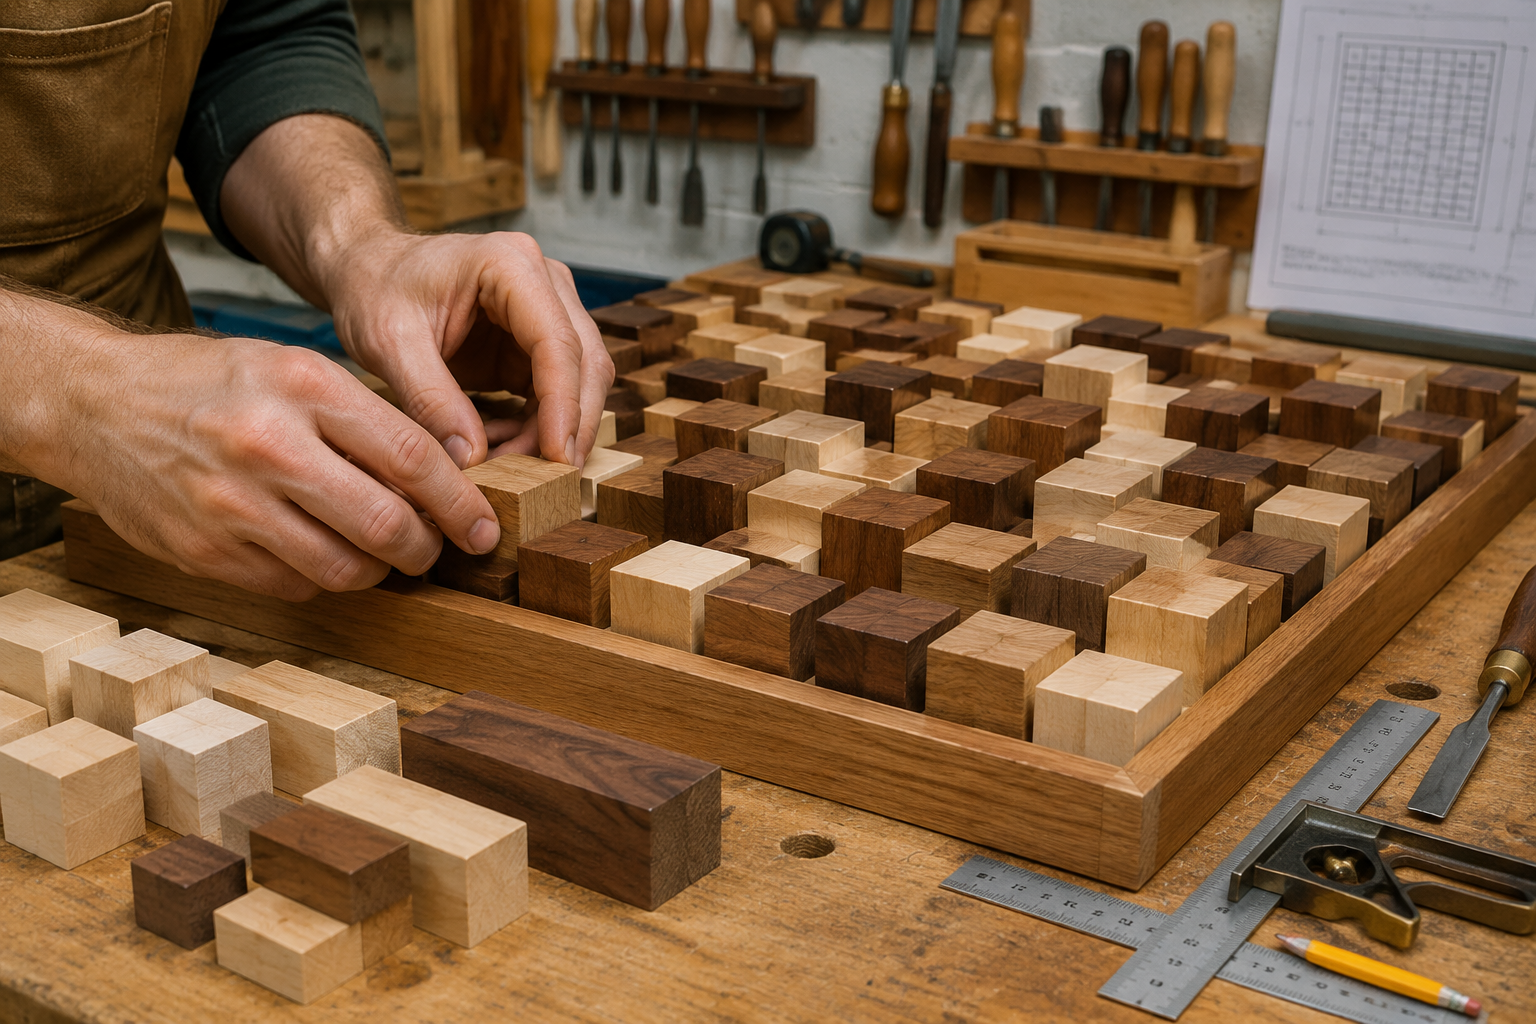
Designing Wooden Diffusers
The most common and effective DIY wooden diffusers are Quadratic Residue Diffusers (QRDs). These work by reflecting sound waves at different times and angles, effectively scattering them. The design involves a series of wells of varying depths, determined by a mathematical sequence.
Materials for QRDs:
- Wood Type: Solid hardwoods like maple, oak, or poplar are excellent for their density and workability. Plywood or MDF can be used for the base, with solid wood or composite strips for the wells. The choice of wood affects the aesthetic more than the acoustic performance for diffusers.
- Adhesive: A strong wood glue is essential for securing the well blocks. Check out The Ultimate Guide to Wood Glue: Choosing the Right Adhesive for every project, joint, and environmental condition for optimal selection.
- Finishing: Natural wood finishes, stains, or paints can be applied to match your room’s decor. Consider Natural Wood Finishing Techniques for inspiration.
Basic QRD Design Principles:
- Calculate Prime Number: QRDs are based on prime numbers (e.g., 7, 11, 13). A higher prime number results in a larger diffuser that scatters over a wider frequency range.
- Determine Well Depths: Using a specific formula (based on the prime number and desired diffusion frequency), calculate the depth of each well.
- Construct the Frame: Build a sturdy wooden frame to house the well blocks.
- Cut Well Blocks: Cut individual wooden strips to the calculated depths and desired width. Precision is key!
- Assemble: Glue the well blocks into the frame according to the calculated sequence.
For detailed calculations, numerous online QRD calculators are available that input your desired frequency range and output the well depths.
Building Wooden Bass Traps
Unlike diffusers that scatter sound, bass traps absorb it. The most effective DIY bass traps are typically thick panels of porous absorption material, framed in wood.
Materials for Bass Traps:
- Frame Wood: Softwoods like pine or spruce are common due to their affordability and ease of work. Hardwoods can also be used for a more premium finish. Precision woodworking for frames can be achieved by mastering Mastering the Band Saw: Essential Techniques for Resawing, Curve cutting, and Joinery Preparation.
- Absorption Material:
- Mineral Wool/Rockwool: Densely packed, these materials are excellent broadband absorbers, particularly effective at lower frequencies. Examples include Roxul Rockboard 60 or Owens Corning 703/705.
- Rigid Fiberglass: Similar properties to mineral wool, also highly effective.
- Density: Aim for materials with a density of 3-8 lbs/cu. ft.
- Thickness: The thicker the material (e.g., 4-6 inches), the lower the frequencies it will absorb.
- Fabric Covering: An acoustically transparent fabric is necessary to cover the absorption material and protect it while allowing sound to pass through. Jute, burlap, or dedicated speaker grill cloth are good options.
- Adhesive/Staples: For securing fabric and internal components.
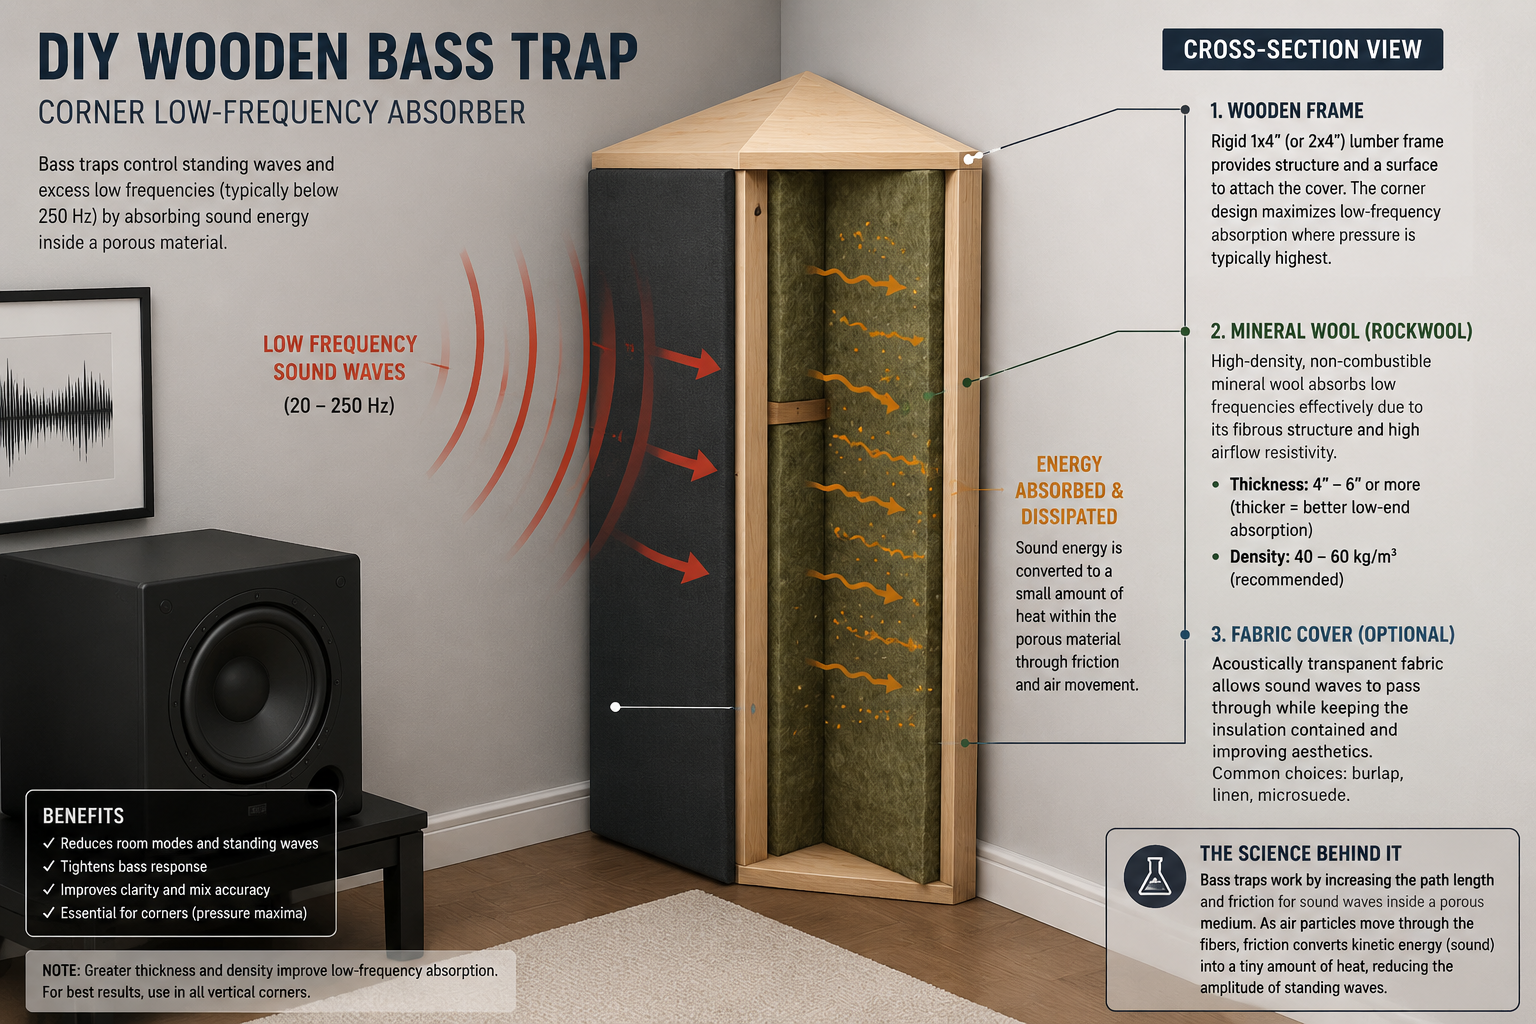
Basic Bass Trap Construction:
- Cut Frame Pieces: Cut four pieces of wood for the frame (two long, two short) and four thinner strips for the back.
- Assemble Frame: Use screws and wood glue to assemble a sturdy rectangular frame. For corner traps, the frame might be triangular or deeper on one side.
- Install Backing: Attach thin wood strips or a taut fabric across the back to hold the absorption material.
- Insert Absorption Material: Carefully cut and fit the mineral wool or rigid fiberglass into the wooden frame. Ensure a snug fit without compression.
- Cover with Fabric: Wrap the entire frame and absorption material with your chosen acoustically transparent fabric, stapling it tightly to the back of the frame. Ensure the fabric is taut and wrinkle-free for a clean finish.
- Mounting Hardware: Attach appropriate hardware for hanging the trap securely on walls or in corners.
For those interested in integrating woodworking projects into a cohesive home design, exploring concepts like Warm Minimalism in Woodworking: Balancing Clean Lines with Tactile Wood Materials can provide inspiration for acoustic treatment aesthetics.
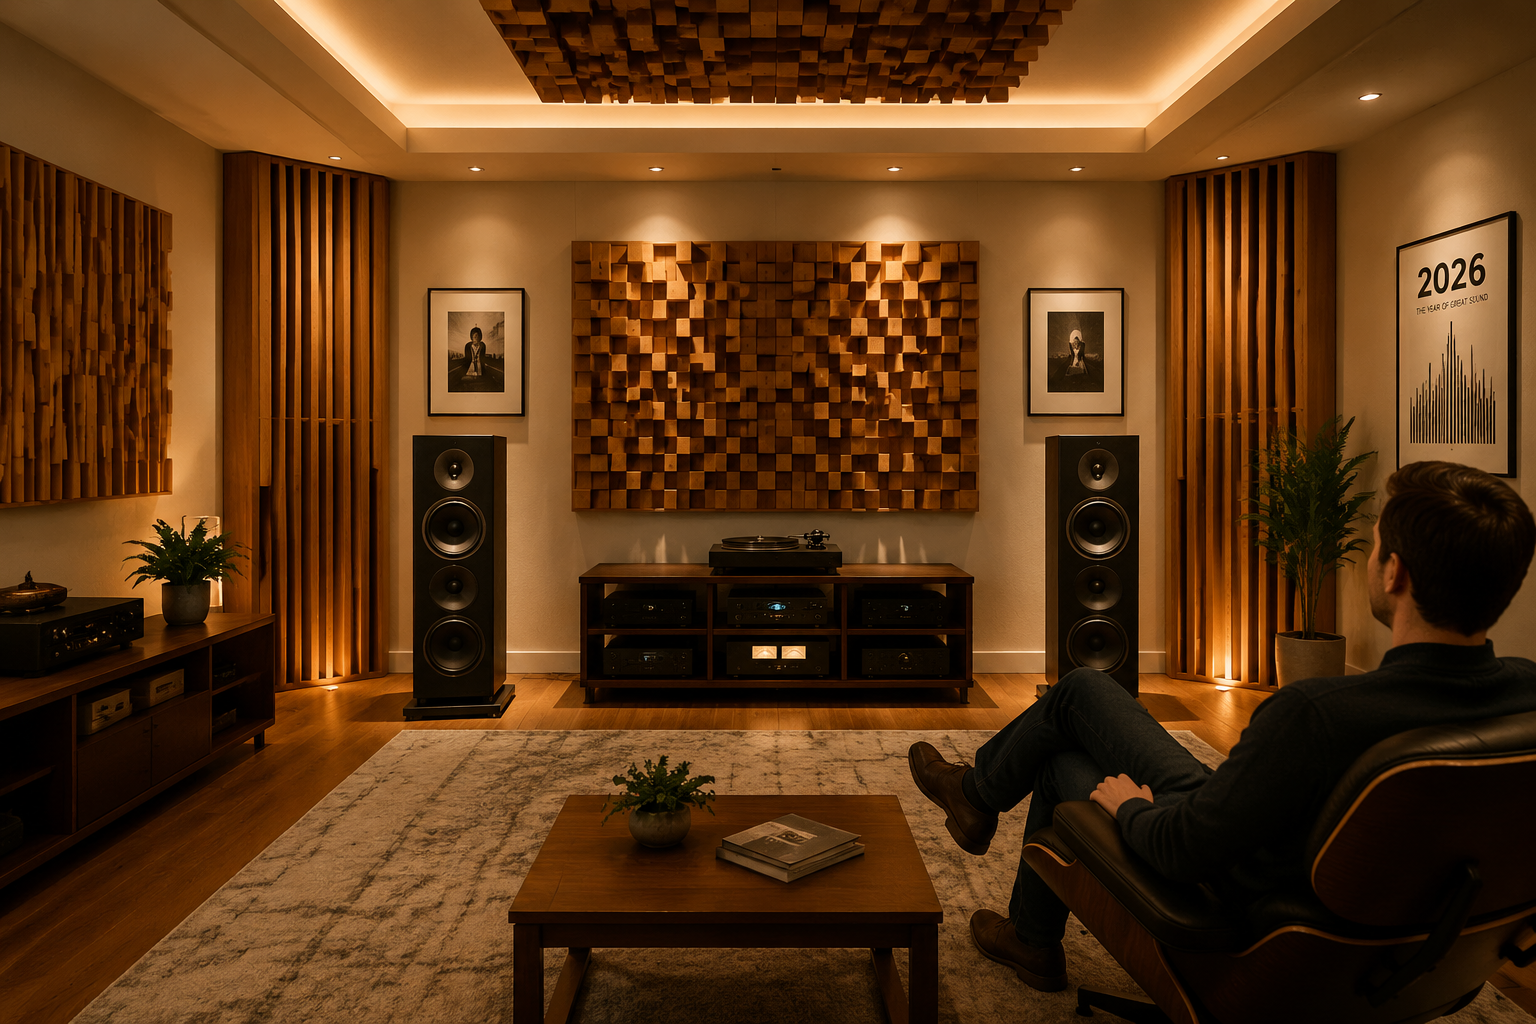
Strategic Placement and Finishing for Optimal Sound in 2026
The effectiveness of your custom-crafted acoustic diffusers and bass traps hinges not only on their construction but also on their strategic placement within your room. Even the best DIY sound treatment will underperform if incorrectly positioned.

Placement Guide for Diffusers
Diffusers are typically placed at later reflection points to scatter sound.
- Rear Wall: A common and highly effective placement for QRDs. This helps break up reflections coming from behind the listening position, creating a sense of spaciousness.
- Ceiling: If your ceiling is reflective, placing diffusers here can help prevent ceiling flutter echo.
- Side Walls (Secondary Reflection Points): After addressing first reflection points with absorption, diffusers can be beneficial further down the side walls.
Tip: Avoid placing diffusers too close to the listening position (within 3-4 feet) as the early reflections might be perceived as direct sound, which can be disorienting.
Placement Guide for Bass Traps
Bass traps are primarily used to tame low-frequency build-up.
- Corners: This is the most crucial placement for bass traps. All four vertical room corners (wall-to-wall) and the eight tri-corners (where three surfaces meet: wall-wall-ceiling/floor) are prime locations for bass accumulation.
- Wall-Ceiling Junctions: Long bass traps placed horizontally along these junctions are highly effective.
- First Reflection Points: While primarily for broadband absorption panels, thick bass traps can also be used at first reflection points if severe bass issues persist.
First Reflection Points: These are the points on your side walls, ceiling, and sometimes the floor where sound from your speakers reflects first to your listening position. You can find these by sitting at your listening position and having a friend move a mirror along the walls until you can see the speaker in the mirror. That’s a first reflection point.
Finishing Your Wooden Acoustic Treatments
Once built, the finishing touches can make your DIY acoustic treatment blend seamlessly with your interior design.
- Sanding: Thorough sanding (starting with coarse grit, progressing to fine) is crucial for a professional look and feel.
- Staining/Painting:
- Stain: Enhances the natural beauty of the wood grain. Different stains can dramatically alter the appearance.
- Paint: Offers a wide range of color options to match existing decor. For diffusers, consider a low-sheen paint to minimize further reflections.
- Sealing: A clear sealant or polyurethane finish protects the wood and provides durability. Ensure it’s fully cured before introducing the panels into your listening space.
- Mounting: Use sturdy hardware like Z-clips, French cleat systems, or heavy-duty picture wire, ensuring the treatments are securely attached to walls or ceilings. For larger or heavier units, locate wall studs.
Integrating these DIY elements with other wooden features in your home, such as custom floating shelves, can create a cohesive and refined aesthetic in your space.
Conclusion
Crafting Acoustic Diffusers and Bass Traps from Wood: Improving Home Audio with DIY Sound Treatment is a rewarding endeavor that combines practical woodworking skills with a deep understanding of audio acoustics. By carefully designing, building, and strategically placing these essential sound treatment elements, you can elevate your home audio experience from merely good to truly exceptional. The effort invested in these DIY projects will not only lead to clearer vocals, tighter bass, and a more expansive soundstage but also provide the immense satisfaction of having created a professional-grade listening environment with your own hands. As we move through 2026, the demand for personalized home improvement projects continues to grow, and acoustic treatment stands out as a high-impact, skill-building undertaking.
Actionable Next Steps:
- Assess Your Room: Listen critically to your current audio setup. Identify issues like muddy bass, harsh echoes, or lack of clarity.
- Research Designs: Choose between QRD diffusers and various bass trap constructions based on your room’s needs and your woodworking skill level.
- Gather Materials: Source high-quality wood, absorption material, and fasteners.
- Build with Precision: Take your time with cuts, measurements, and assembly. Precision is key for both acoustics and aesthetics.
- Experiment with Placement: Start with recommended placements (corners for bass traps, rear wall for diffusers) and fine-tune by ear. Minor adjustments can yield significant improvements.
Remember, the goal is to balance absorption and diffusion, creating a lively yet controlled acoustic environment that lets your audio equipment truly shine.
