
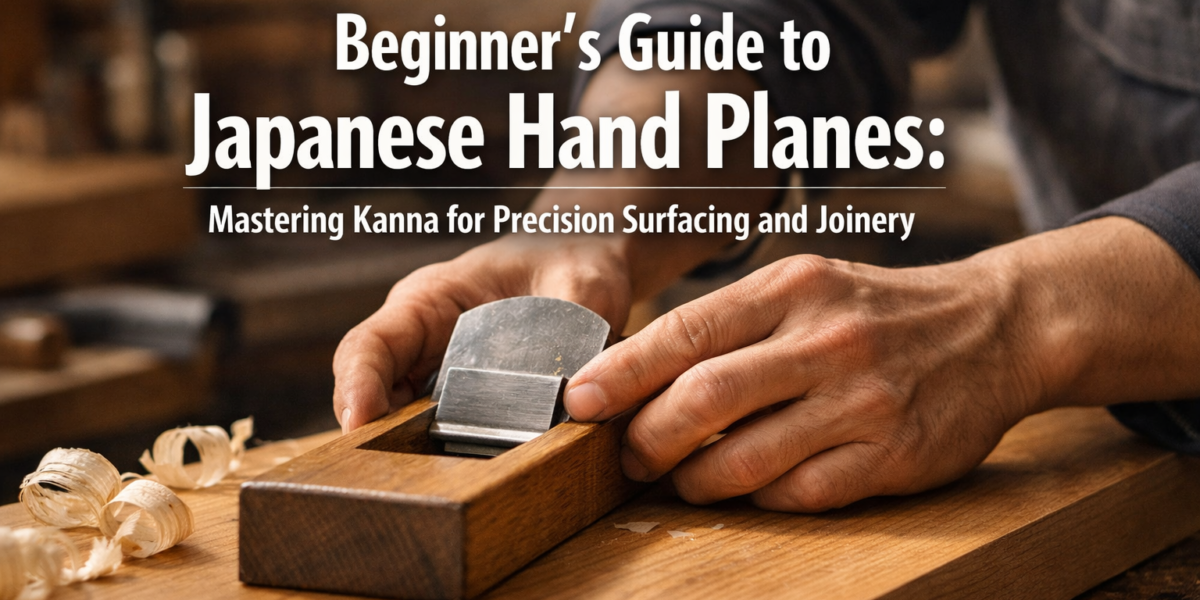

Have you ever marveled at the mirror-smooth surfaces and impossibly tight joints of traditional Japanese woodworking? Much of this artistry comes from the masterful use of the kanna, or Japanese hand plane. In this Beginner’s Guide to Japanese Hand Planes: Mastering Kanna for Precision Surfacing and Joinery, we will embark on a journey to understand, set up, and effectively use these remarkable tools. Far from being intimidating, the kanna offers a deeply satisfying, precise, and surprisingly efficient way to prepare wood, yielding results often superior to their Western counterparts, especially when striving for that ultimate silky finish. By 2026, many woodworkers are rediscovering the timeless value and joy of hand tools, and the Japanese plane stands at the forefront of this resurgence.
Key Takeaways
- Japanese hand planes operate on a pull stroke, providing greater control and allowing for thinner shavings.
- Proper setup, including blade protrusion and mouth adjustment, is critical for optimal performance.
- Achieving a razor-sharp blade is paramount; mastering a consistent sharpening regimen is essential.
- Effective body mechanics and understanding grain direction are key to smooth, tear-out-free surfacing.
- Kanna are versatile tools, essential for both fine surfacing and precise joinery preparation.
Understanding the Kanna: Components and Basic Function
The Japanese hand plane, or kanna, differs significantly from its Western cousin not only in appearance but also in its fundamental operation. Unlike Western planes that are pushed, the kanna is pulled towards the user. This pull-stroke design provides exceptional control, allowing woodworkers to feel the cutting action more intimately and achieve incredibly thin, consistent shavings. This sensitivity is crucial for producing the glass-like finishes for which Japanese woodworking is renowned.

A basic kanna consists of three main components:
- The Dai (Body): This is the wooden block, typically made from hard, stable wood like Japanese white oak. It’s the housing for the blade and chipbreaker, and its precisely machined sole is what glides over the wood. The dai’s sole usually has specific relief cuts (known as uragane and maetana) to reduce friction and improve cutting performance.
- The Kanna-ba (Blade): The heart of the plane, usually made from a lamination of hard, high-carbon steel (often blue or white steel) forge-welded to a softer iron backing. This combination provides both exceptional edge retention and ease of sharpening. The blade also features an ura (hollow ground back) that aids in sharpening and ensures a perfectly flat cutting edge.
- The Osae-ba (Chipbreaker/Cap Iron): This smaller blade sits atop the main blade, just behind the cutting edge. Its primary function is to curl and break the shaving as it emerges, preventing tear-out, especially in difficult grain. It’s held in place by small pegs in the dai.

Types of Kanna for Precision Surfacing and Joinery
While the basic structure remains, kanna come in various forms, each suited for specific tasks:
- Hira Kanna (Smoothing Plane): The most common type, used for general surfacing and achieving smooth finishes.
- Chona (Adze): While not strictly a plane, it’s often the first tool used to rough-shape timber before finer planes.
- Kiwaganna (Rebating Plane): Designed for cutting rebates and shoulders, often featuring an adjustable fence.
- Mizo-kanna (Grooving Plane): Used for cutting grooves, such as those for sliding doors.
- Sorihira Kanna (Curved Sole Plane): For shaping concave surfaces.
- Maru Kanna (Round Sole Plane): For shaping convex surfaces.
For beginners, a good quality hira kanna is the ideal starting point. It’s versatile and will teach you the fundamental skills applicable to other types.
Essential Setup and Sharpening for Your Kanna
Mastering the kanna begins long before the first shaving. Proper setup and razor-sharp blades are not merely desirable; they are absolutely essential for the tool to function correctly and provide that legendary Japanese finish.
Setting Up Your Kanna: The Initial Adjustment
When you first acquire a kanna, particularly a new one, it will likely require some fettling (fine-tuning). This process ensures the blade fits snugly, the chipbreaker is properly aligned, and the blade protrudes correctly.
- Blade Seating: The blade must seat firmly in the dai. If it’s too tight, you may need to gently pare away some wood in the mortise. If too loose, a thin shim might be needed temporarily until the blade expands slightly.
- Chipbreaker Adjustment: The chipbreaker needs to fit tightly against the main blade and be set very close to the cutting edge – typically within 0.5mm to 1mm (1/64″ to 1/32″) for fine work. For rougher work, it can be set further back.
- Blade Protrusion: This is perhaps the most critical adjustment. The blade should protrude only a hair’s breadth from the sole. With the kanna upside down, look down the sole towards a light source. You should see a thin, consistent line of light along the blade edge. Adjust by gently tapping the back of the blade (to retract) or the front of the dai (to advance). The goal is to take gossamer-thin shavings.
{{IMG_SLOT_1}}
A common beginner’s mistake is to have the blade protrude too much, leading to thick shavings, excessive effort, and tear-out. Start with minimal protrusion and gradually increase until you get a consistent shaving.
The Art of Sharpening: Achieving a Hair-Splitting Edge
A sharp blade is a safe and effective blade. For a Japanese plane, “sharp” means an edge that can effortlessly shave hair from your arm. This is a skill that takes practice, but it’s incredibly rewarding. For a deeper dive into sharpening techniques applicable to all your woodworking tools, consider exploring “The Ultimate Guide to Sharpening Woodworking Chisels and Planes: Achieving Razor-Sharp Edges”.
Here’s a simplified approach to sharpening your kanna blade:
- Whetstones (Toishi): You’ll need a progression of waterstones:
- Coarse (e.g., 1000 grit): For initial shaping, removing nicks, or re-establishing the bevel.
- Medium (e.g., 4000-6000 grit): For refining the edge and removing scratches from the coarse stone.
- Fine (e.g., 8000+ grit): For polishing the edge to a mirror finish.
- Flattening the Ura (Hollow Back): This is unique to Japanese blades. The ura is the slightly hollow-ground back of the blade. It must be perfectly flat at the very edge to meet the bevel. Use a fine stone to gently flatten the ura until a thin, consistent line (the uradashi) appears along the edge.
- Sharpening the Bevel:
- Hold the blade at its established bevel angle (typically around 25-30 degrees).
- Use firm, consistent pressure and make full strokes across the stone, ensuring you maintain the angle.
- Work through the grits, spending more time on the coarser stones and less on the finer ones.
- Check for a burr on the ura side after each grit.
- Removing the Burr: Once a burr forms, gently remove it by making a few light strokes on the ura side of the blade on the same stone, then switch back to the bevel side for a final light pass. Repeat on progressively finer stones until the burr is gone and the edge is polished.
{{IMG_SLOT_2}}
Tip: Keep your stones wet and flat. Flattening your waterstones regularly with a flattening stone or sandpaper on a flat surface is crucial for effective sharpening.
Mastering Kanna Techniques for Precision Surfacing and Joinery
With your kanna properly set up and razor-sharp, you’re ready to experience the joy of incredibly smooth wood. Precision surfacing and joinery preparation with a kanna require a combination of good technique, understanding wood grain, and consistent practice.

The Pull Stroke: Body Mechanics and Control
The fundamental difference lies in the pull stroke. This feels counter-intuitive to those accustomed to Western planes, but it offers distinct advantages:
- Stability: Pulling keeps your arms closer to your body, engaging your core and providing greater stability and control.
- Feedback: You get better tactile feedback on the cutting action, allowing you to react quickly to changes in grain or resistance.
- Precision: The controlled stroke allows for extremely thin shavings, essential for a fine finish and precise dimensioning.
Proper Stance and Grip:
- Stance: Stand comfortably with your feet shoulder-width apart, one foot slightly forward. Position yourself so the plane passes between your feet during the stroke.
- Grip: Hold the front of the dai with your non-dominant hand, applying downward pressure. Your dominant hand grips the back of the dai, providing the pulling force.
- Body Movement: Initiate the stroke by engaging your core and pulling your entire body back, rather than just using your arms. This ensures a consistent, powerful, and controlled cut.
Reading the Grain and Preventing Tear-out
Understanding wood grain is paramount when using any plane, but especially the kanna, where the goal is a flawless surface.
- Grain Direction: Always plane with the grain. This means the fibers are supported as the blade cuts, leading to clean shavings. Planing against the grain (uphill) will cause the fibers to lift and tear out.
- Figured Grain: Highly figured woods, interlocking grain, or areas around knots can be tricky. Here, a very sharp blade, minimal blade protrusion, and often skewing the plane (planing at an angle to the grain) can help minimize tear-out.
Achieving a Glass-Smooth Finish:
- Start Flat: Ensure your workpiece is flat and stable on your workbench. A good bench hook or planing stop can be invaluable.
- Light Passes: Begin with very light, consistent passes. You should be aiming for shavings that are translucent and feel like silk.
- Overlap: Slightly overlap each pass to ensure no ridges are left behind.
- Listen and Feel: Pay attention to the sound and feel of the plane. A smooth, consistent whoosh indicates a good cut. Increased resistance or a chattering sound means something needs adjustment (sharpening, blade protrusion, or grain direction).
- Test: Periodically check your surface by running your hand over it. It should feel incredibly smooth.
{{IMG_SLOT_3}}
Kanna for Joinery Preparation
While often associated with surfacing, the precision of a kanna makes it invaluable for preparing components for joinery. Whether you’re working on dovetails, mortise and tenon joints, or box joints, a precisely dimensioned workpiece is the foundation of strong, tight joinery. For more on hand-cut joints, see our guide on “Hand Tool Joinery for Visible Wood Joints: Dovetails, Mortise and Tenon, and Box Joints as Design Features in Furniture and Small Projects“.
A kanna can be used for:
- Dimensioning stock: Bringing boards to exact thickness and width.
- Squaring edges: Creating perfectly straight and square edges for glue-ups.
- Refining tenon cheeks: Shaving off microscopic amounts to achieve a perfect fit.
- Chamfering: Adding decorative chamfers or breaking sharp edges.
The key here is incremental adjustment and absolute precision. A well-tuned kanna allows you to remove just a few thousandths of an inch at a time, essential for fine-tuning joint fit. For example, to master specific joinery challenges like dovetail drawers, additional resources like “Mastering Dovetail Joinery for Drawers: Hand and Router Meth” can further enhance your skills. If you are starting with basic cuts, our “Beginner’s Guide to Japanese Hand Saws: Precision Cuts and Essential” offers a great complementary resource.
Conclusion
The journey into the world of Japanese hand planes is a deeply rewarding one for any woodworker seeking to elevate their craft. This Beginner’s Guide to Japanese Hand Planes: Mastering Kanna for Precision Surfacing and Joinery has provided the foundational knowledge to begin that journey in 2026. From understanding the unique components of the kanna to meticulously setting it up, sharpening its blade, and employing effective pull-stroke techniques, you now have a roadmap to achieving those coveted smooth surfaces and precise joints.
Remember that patience and practice are your greatest allies. The kanna is not a tool to be rushed; it encourages a mindful, deliberate approach to woodworking. Start with simple pieces, focus on consistent sharpening, and pay close attention to the feedback the plane gives you as it glides over the wood.
Next Steps for Aspiring Kanna Masters:
- Acquire a Quality Kanna: Invest in a good quality Hira Kanna to start. It doesn’t have to be the most expensive, but ensure it’s well-made.
- Invest in Sharpening Gear: A set of good quality waterstones (1000, 4000, 8000 grit) and a flattening stone are crucial.
- Practice on Scrap Wood: Before tackling a project, spend dedicated time practicing on scrap wood. Focus on blade adjustment, consistent shavings, and feeling the grain.
- Watch and Learn: Seek out videos and demonstrations from experienced Japanese woodworkers. Observing their technique can offer invaluable insights.
- Join a Community: Connect with other hand tool enthusiasts online or in person. Sharing experiences and tips can accelerate your learning.
Embrace the learning curve, and soon you’ll be producing work with a level of finish and precision that only a truly mastered kanna can provide. Happy planing!
References:
Schwarz, C. (2009). The Anarchist’s Tool Chest. Lost Art Press.
Takamura, S. (1986). The Japanese Wood Plane: Kanna. Lark Books.

Odate, T. (1984). Japanese Woodworking Tools: Their Tradition, Spirit, and Use. Taunton Press.
SEO Meta Title: Master Kanna: Beginner’s Guide to Japanese Hand Planes 2026 SEO Meta Description: Dive into the Beginner’s Guide to Japanese Hand Planes (Kanna) for precision surfacing & joinery. Learn setup, sharpening, and techniques for smooth wood in 2026.
