
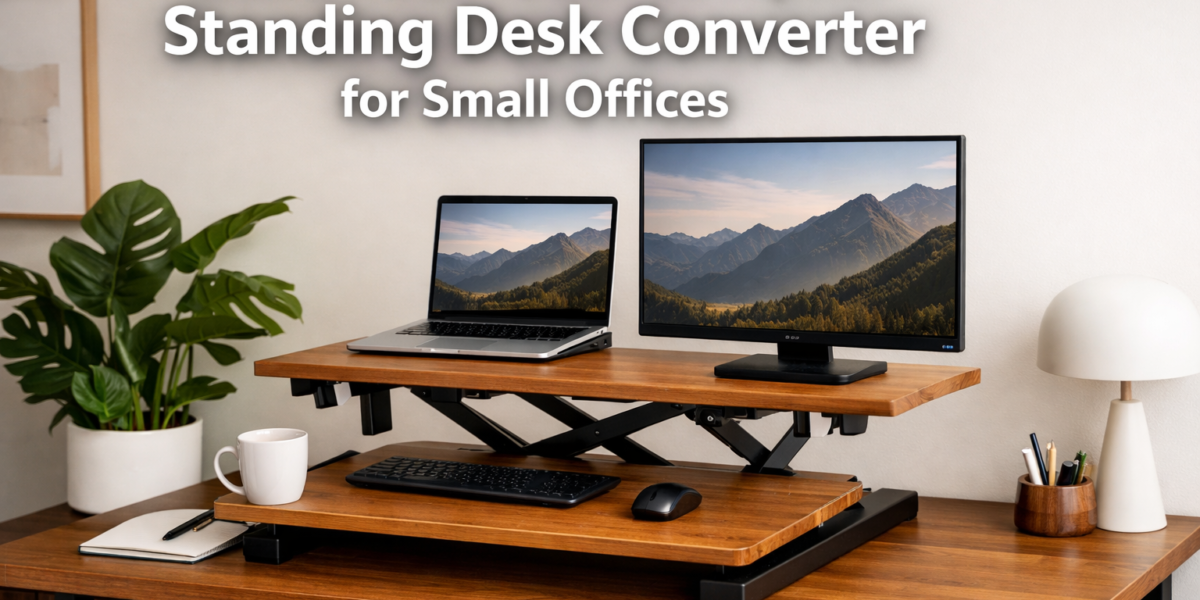

Less than 10% of homeowners with dedicated home offices utilize standing desks, despite compelling evidence for their health benefits. This statistic highlights a significant gap, particularly for those in compact living situations where a full-sized standing desk might be impractical. This article delves into the practical and rewarding journey of Building a Compact and Convertible Standing Desk Converter for Small Home Offices. By constructing your own, you gain a custom solution that perfectly fits your space and ergonomic needs, offering the flexibility to switch between sitting and standing without dedicating an entire footprint to a larger, often expensive, commercial unit. This DIY approach not only saves money but also provides a sense of accomplishment and a workspace tailored precisely to your workflow in 2026.
Key Takeaways
- Customization is Key: A DIY approach allows for a standing desk converter perfectly sized for your small home office and tailored to your specific ergonomic requirements.
- Cost-Effective Solution: Building your own converter is significantly more budget-friendly than purchasing a pre-made commercial unit, especially for unique size constraints.
- Embrace Convertibility: Design elements that allow for easy setup, breakdown, and storage are crucial for maximizing space in compact environments.
- Ergonomic Benefits: Transitioning between sitting and standing throughout the workday can mitigate the negative health effects of prolonged sitting, improving focus and well-being.
- Skill Development: This project offers an excellent opportunity to refine woodworking skills, from precise cuts to effective joinery.
Designing Your Space-Saving Standing Desk Converter
The first step in Building a Compact and Convertible Standing Desk Converter for Small Home Offices involves thoughtful design. A well-planned design ensures that your converter is not only functional but also seamlessly integrates into your existing workspace, making the most of every square inch. Considerations for small spaces are paramount, focusing on features like foldability, modularity, and lightweight construction.

Essential Design Principles for Small Offices
When designing for a compact space, think about verticality and multi-functionality. Your converter should ideally store flat or be able to tuck away when not in use.
- Footprint: Measure your existing desk space carefully. The base of your converter should be smaller than your desk to allow for proper placement and stability.
- Adjustability: The core of any standing desk is its adjustability. Consider simple mechanisms for height changes, such as slotted designs with pins, adjustable shelves, or even stacked modular blocks. Ensure the height range accommodates both your sitting and standing ergonomic needs.
- Portability: If you plan to store it away, make it easy to move. Lightweight materials and perhaps integrated handles are beneficial.
- Storage: Can it fold flat? Can components detach and stack neatly? These questions guide a truly convertible design.
- Ergonomics: Beyond height, consider monitor placement and keyboard tray elevation. Your monitor should be at eye level, and your keyboard should allow your elbows to be at a 90-degree angle.
Material Selection: Balancing Durability and Weight
Choosing the right materials is crucial for a converter that is both sturdy and easy to handle.
- Plywood: A popular choice for DIY projects due to its stability, strength, and relatively light weight. Baltic birch plywood is excellent for its many thin plies, providing great rigidity and an attractive edge if left exposed. Half-inch or three-quarter-inch thickness is usually sufficient.
- Solid Wood: While beautiful and durable, solid wood can be heavier and more prone to warping. If using solid wood, select stable species like maple, oak, or poplar, and ensure proper drying and finishing.
- Hardware: Quality hardware is non-negotiable. Look for sturdy hinges, reliable pins, and strong fasteners if your design includes moving parts.
| Material Type | Pros | Cons | Best For |
|---|---|---|---|
| Plywood | Lightweight, stable, strong, good for joinery | Edges may need finishing, can splinter if not cut well | Main structure, shelves, adjustable components |
| Solid Wood | Aesthetically pleasing, very durable, natural feel | Heavier, more expensive, prone to warping/movement | Accent pieces, stability bracing |
| MDF/Particle | Inexpensive, smooth surface for painting | Heavy, poor screw retention, susceptible to moisture | Not recommended for structural components |

Conceptualizing Convertible Features
The “convertible” aspect is what makes this project truly shine for small home offices.
- Collapsible Design: Imagine a unit that can fold down to a flat profile. This might involve hinged side panels or a telescoping mechanism for the main support.
- Modular Stacking: A simpler approach could be a series of wooden blocks or platforms that stack on top of each other, allowing you to choose your desired height. When not in use, they can be stored under the desk or stacked off to the side.
- Integrated Keyboard Tray: A separate, adjustable keyboard tray can greatly enhance ergonomics. This might slide out from beneath the monitor platform or attach via an independent mechanism. For more ideas on integrating such features, consider reviewing our guide on DIY Home Office Ergonomics: Building Custom Wooden Monitor Stands and Keyboard Trays.
“A truly effective standing desk converter for a small office isn’t just about going up and down; it’s about seamlessly disappearing when not needed.”
When considering designs, a good reference point might be commercial converters, but with an eye toward simplified, DIY-friendly construction. Sketch multiple ideas, measure twice (or thrice!), and don’t be afraid to create a cardboard prototype to test dimensions and usability before committing to wood. If you’re looking for broader inspiration for a flexible workspace, you might also find value in Building a Modular Home Office Desk System: Customizable Designs for.
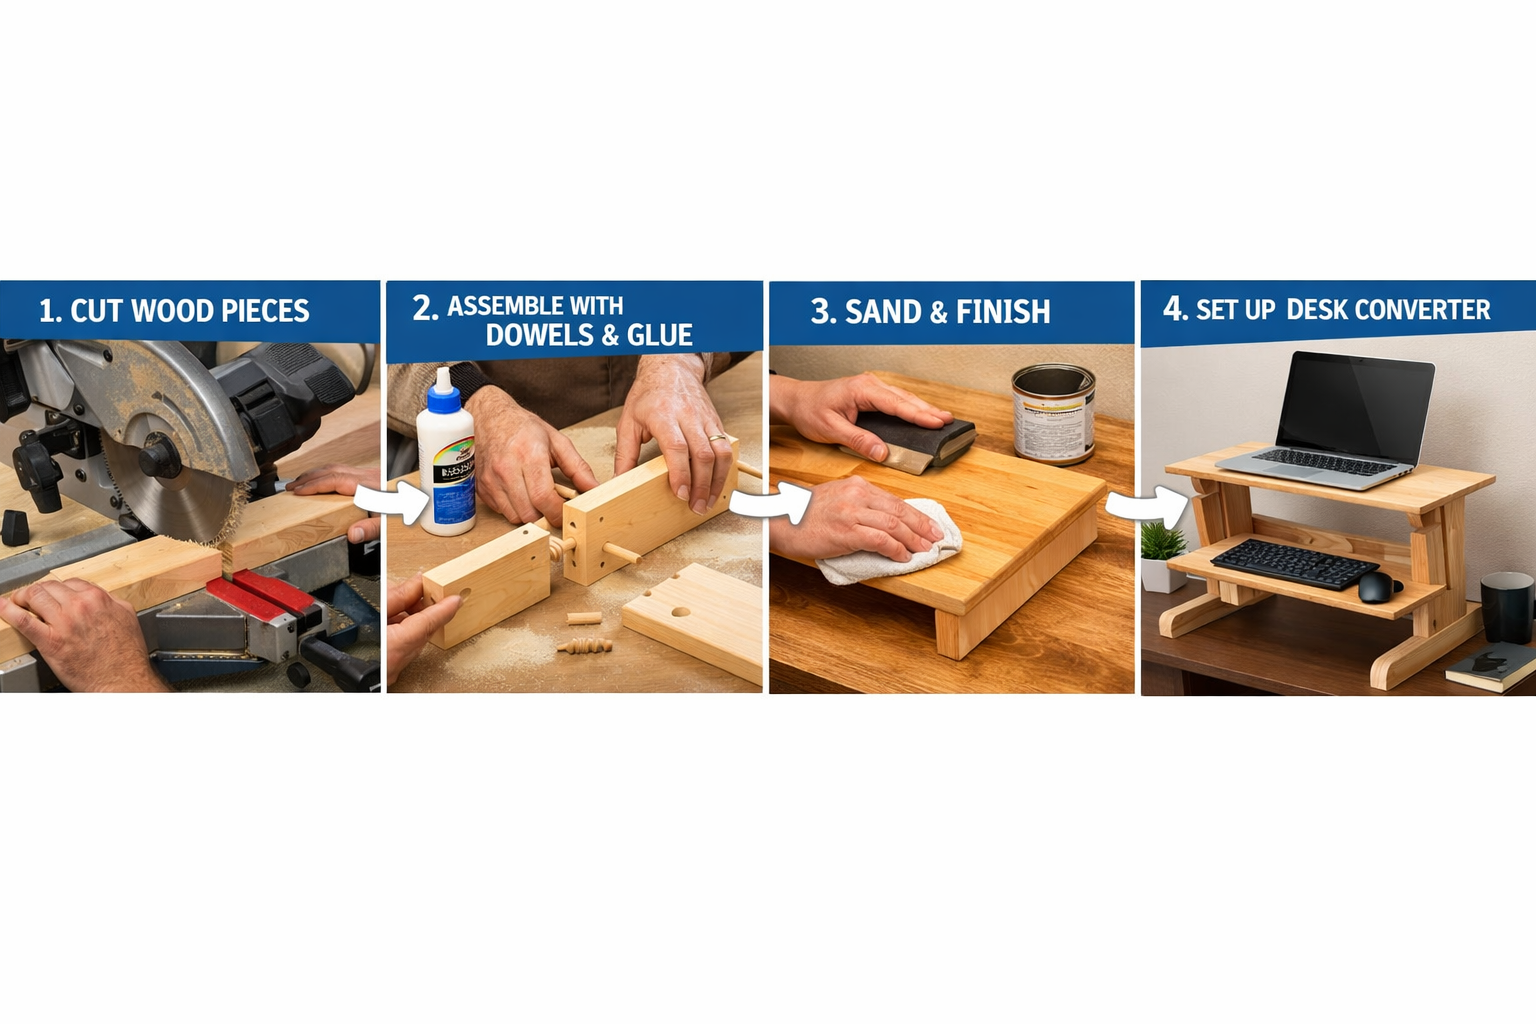
Step-by-Step Construction Guide for Your Converter
Once your design is finalized, the exciting part begins: bringing your vision to life. This section provides a general guide for Building a Compact and Convertible Standing Desk Converter for Small Home Offices, focusing on common woodworking techniques.
Tools and Materials Checklist
Before you start, gather all necessary tools and materials. Having everything on hand will make the process smoother and safer.
Tools:
- Measuring Tape & Pencil: For precise marking.
- Circular Saw or Table Saw: For accurate straight cuts. A Pro-Tech 10 Table Saw can be an excellent asset for this.
- Jigsaw: For curved cuts or internal cutouts.
- Drill/Driver: For pilot holes and fasteners.
- Sander (orbital or block): For smoothing edges and surfaces.
- Clamps: Essential for holding pieces during assembly and glue-up.
- Safety Gear: Safety glasses, hearing protection, dust mask.
Materials:
- Plywood/Solid Wood: As per your design.
- Wood Glue: High-quality wood glue for strong joints.
- Screws/Dowels/Pocket Hole Screws: Depending on your chosen joinery.
- Wood Filler: To address any imperfections.
- Sandpaper: Various grits (80, 120, 180, 220).
- Finish: Stain, paint, or clear coat (e.g., polyurethane).
Cutting and Preparing Components
Precision in cutting is paramount for a professional-looking and stable converter.
- Measure and Mark: Transfer your design measurements onto your chosen wood, marking all cut lines clearly.
- Cut Major Panels: Use a circular saw or table saw for the main vertical supports, horizontal shelves (monitor and keyboard platforms), and base. Ensure all cuts are square. For more on ensuring stability in woodworking, especially for larger structures, refer to Building a Custom Wood Workbench: Design Considerations and.
- Cut Adjustable Elements: If your design includes slots for adjustable shelves, use a router with a straight bit or a jigsaw for these, followed by sanding to smooth the edges. If using pins, drill precisely sized holes.
- Edge Treatment: Consider adding a slight chamfer or round-over to all exposed edges using a router or sandpaper to improve aesthetics and comfort.
- Sand Components: Before assembly, sand all individual pieces to at least 180-grit. This is much easier than sanding after assembly.
Assembly Techniques for Stability and Convertibility
The joinery methods you choose will impact the converter’s strength and its ability to convert.
- For Fixed Joints (Base/Main Supports):
- Wood Glue and Screws: A strong and common method. Ensure pilot holes are drilled to prevent splitting.
- Pocket Hole Joinery: Creates strong, concealed joints. A pocket hole jig makes this process efficient.
- Dowels: For a cleaner look, dowel joints offer excellent strength. Our guide on Doweling Jigs: A Comprehensive Guide to Types, Setup, Techniques, and Best Practices can be helpful.
- For Convertible Joints (Hinges, Sliders):
- Heavy-Duty Hinges: If your design folds, choose hinges appropriate for the weight and stress they will endure.
- Sliding Mechanisms: For keyboard trays, simple wooden runners or drawer slides can be integrated.
Assembly Sequence Example (for a common multi-level design):
- Assemble Base: Join the bottom platform to the vertical support structure. Ensure it is perfectly square.
- Attach Main Vertical Supports: Secure these to the base. Use clamps and allow glue to dry fully if using.
- Install Monitor Platform: Fasten the main monitor platform at your desired fixed or adjustable height.
- Integrate Keyboard Tray: If applicable, add the sliding or hinged keyboard tray mechanism. Ensure smooth operation.
- Test Stability: Once assembled, test the converter for wobbles or instability. Reinforce any weak points.
Finishing and Integrating into Your Small Office
The final touches transform raw wood into a functional and aesthetically pleasing piece of furniture that complements your small home office.

Finishing for Durability and Aesthetics
A good finish protects the wood and enhances its appearance.
- Final Sanding: Do a final sanding with 220-grit sandpaper to achieve a smooth surface. Remove all dust with a tack cloth or vacuum.
- Stain or Paint (Optional): If you want to color the wood, apply stain according to the manufacturer’s instructions. If painting, apply a primer first, followed by several thin coats of paint, sanding lightly between coats.
- Protective Topcoat: A durable topcoat is essential.
- Polyurethane: A popular choice for its durability and resistance to moisture and scratches. Apply several thin coats, sanding lightly with fine-grit sandpaper (e.g., 320-grit) between coats. For insights on applying finishes, particularly polyurethane, you might find our article on Maple Wood Finishing Techniques useful, even if using different wood.
- Varnish or Lacquer: Other strong options, often chosen for their specific aesthetic properties.
- Oil Finish: For a natural look, a penetrating oil finish can be beautiful but may require more maintenance.
Allow ample drying time for each coat as recommended by the product manufacturer. Proper curing ensures maximum durability.
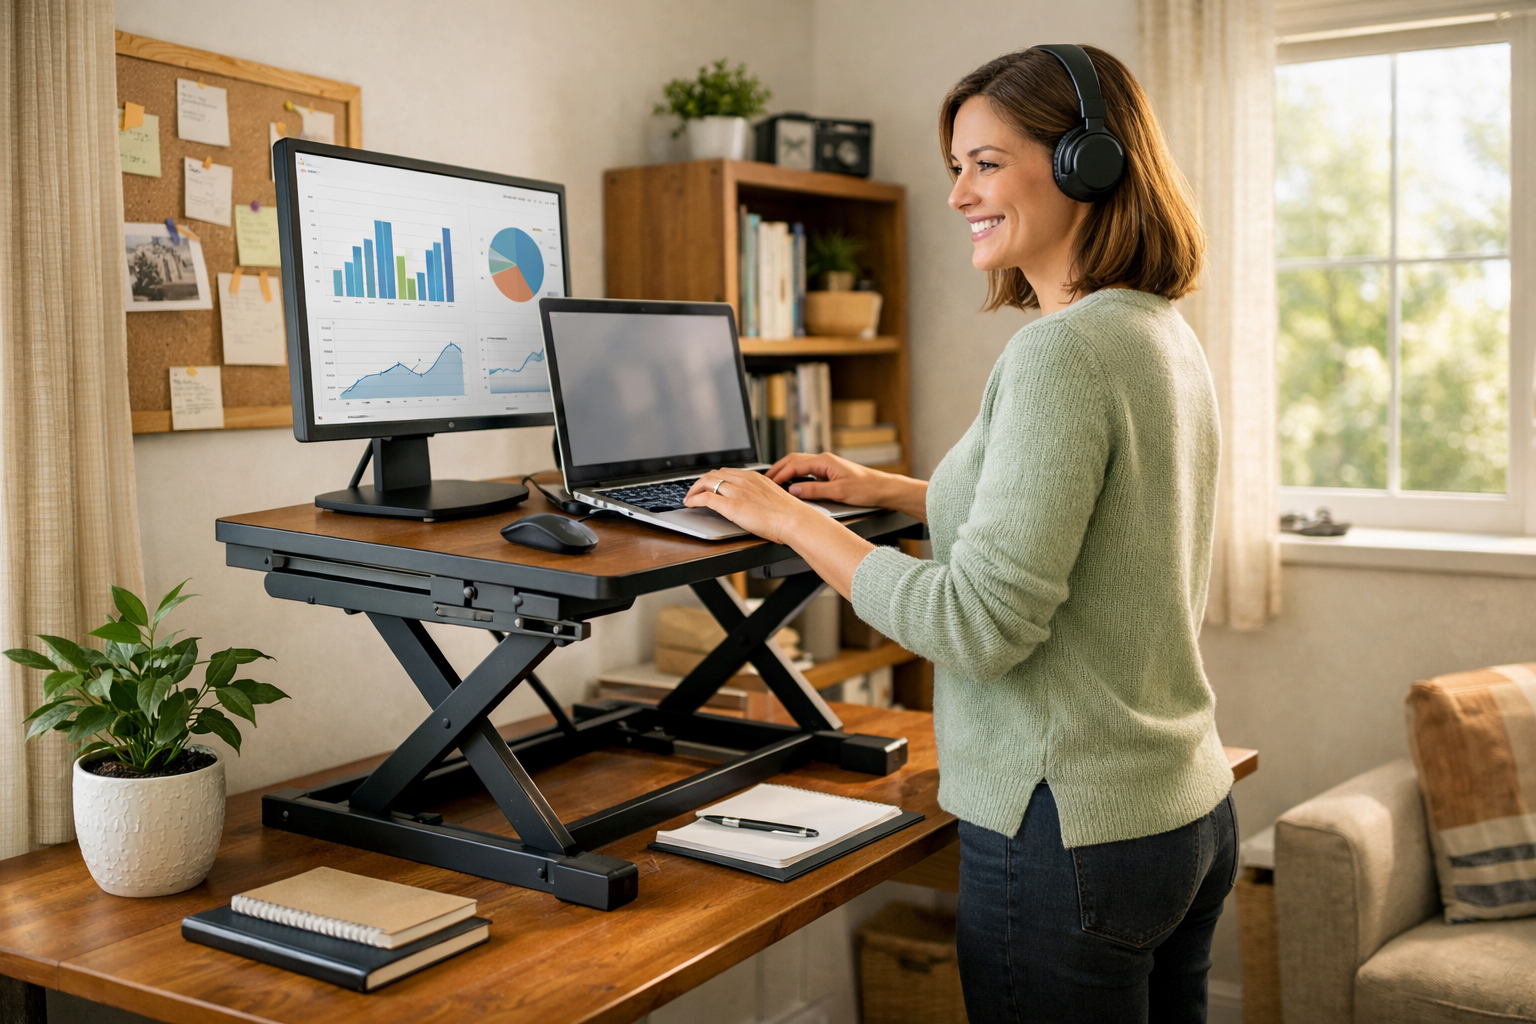
Ergonomic Considerations and Setup
Even the most beautiful converter won’t be effective if it’s not set up ergonomically.
- Monitor Height: When standing, the top of your monitor screen should be at or slightly below eye level. This prevents neck strain.
- Keyboard and Mouse Placement: Your elbows should be at roughly a 90-degree angle, and your wrists should be straight and neutral, not bent up or down. A separate keyboard tray allows for optimal positioning.
- Distance: Maintain an arm’s length distance from your monitor.
- Movement: Remember the goal: regular movement. Don’t stand for too long without breaks, and switch back to sitting periodically.
- Anti-Fatigue Mat: A simple anti-fatigue mat can make a significant difference in comfort when standing for extended periods, reducing strain on your feet, legs, and back.
Integrating the Converter into Your Small Home Office
Your custom-built converter should enhance, not clutter, your small office space.
- Cable Management: Plan for cable routing. Simple clips or channels on the back of your converter can keep wires tidy, preventing tangles and a messy look. This is especially important in small spaces where visual clutter is amplified.
- Storage Solutions: Consider how accessories like pens, notebooks, or external hard drives will be stored. Can your converter incorporate small shelves or cubbies?
- Aesthetic Harmony: Choose finishes that match or complement your existing office furniture. A beautifully finished wooden converter can become a focal point rather than just a utility item. For further integration ideas, especially for wooden elements, explore DIY Smart Home Integration with Custom Woodwork: Hiding Tech with.
By carefully considering these finishing and integration steps, your custom-built compact and convertible standing desk converter will not only provide ergonomic benefits but also elevate the functionality and aesthetics of your small home office in 2026.
Conclusion
Building a Compact and Convertible Standing Desk Converter for Small Home Offices is an incredibly rewarding project. It allows you to address specific ergonomic needs and space constraints with a custom solution that store-bought alternatives often cannot match. From the initial design phase, focusing on convertibility and a small footprint, through precise cutting and robust assembly, to the final protective finish, each step contributes to a highly functional and durable addition to your workspace.
By investing your time and effort, you gain more than just a piece of furniture; you create a healthier, more dynamic work environment tailored precisely for your needs in 2026. Embrace the flexibility of switching between sitting and standing, reduce the sedentary risks of prolonged desk work, and enjoy the satisfaction of using something you crafted yourself.
Actionable Next Steps
- Measure Your Space: Accurately measure your current desk and identify where a converter would sit and store.
- Sketch Your Design: Draw out a few conceptual designs, incorporating adjustable and convertible features.
- Gather Materials: Create a detailed list of wood, hardware, and finishes based on your chosen design.
- Practice Cuts: If new to woodworking, consider practicing cuts on scrap wood to ensure precision.
- Start Building: Follow your plan, paying close attention to safety and joinery techniques.
- Refine Ergonomics: Once built, test the converter with your setup and make any minor adjustments for optimal comfort.
