
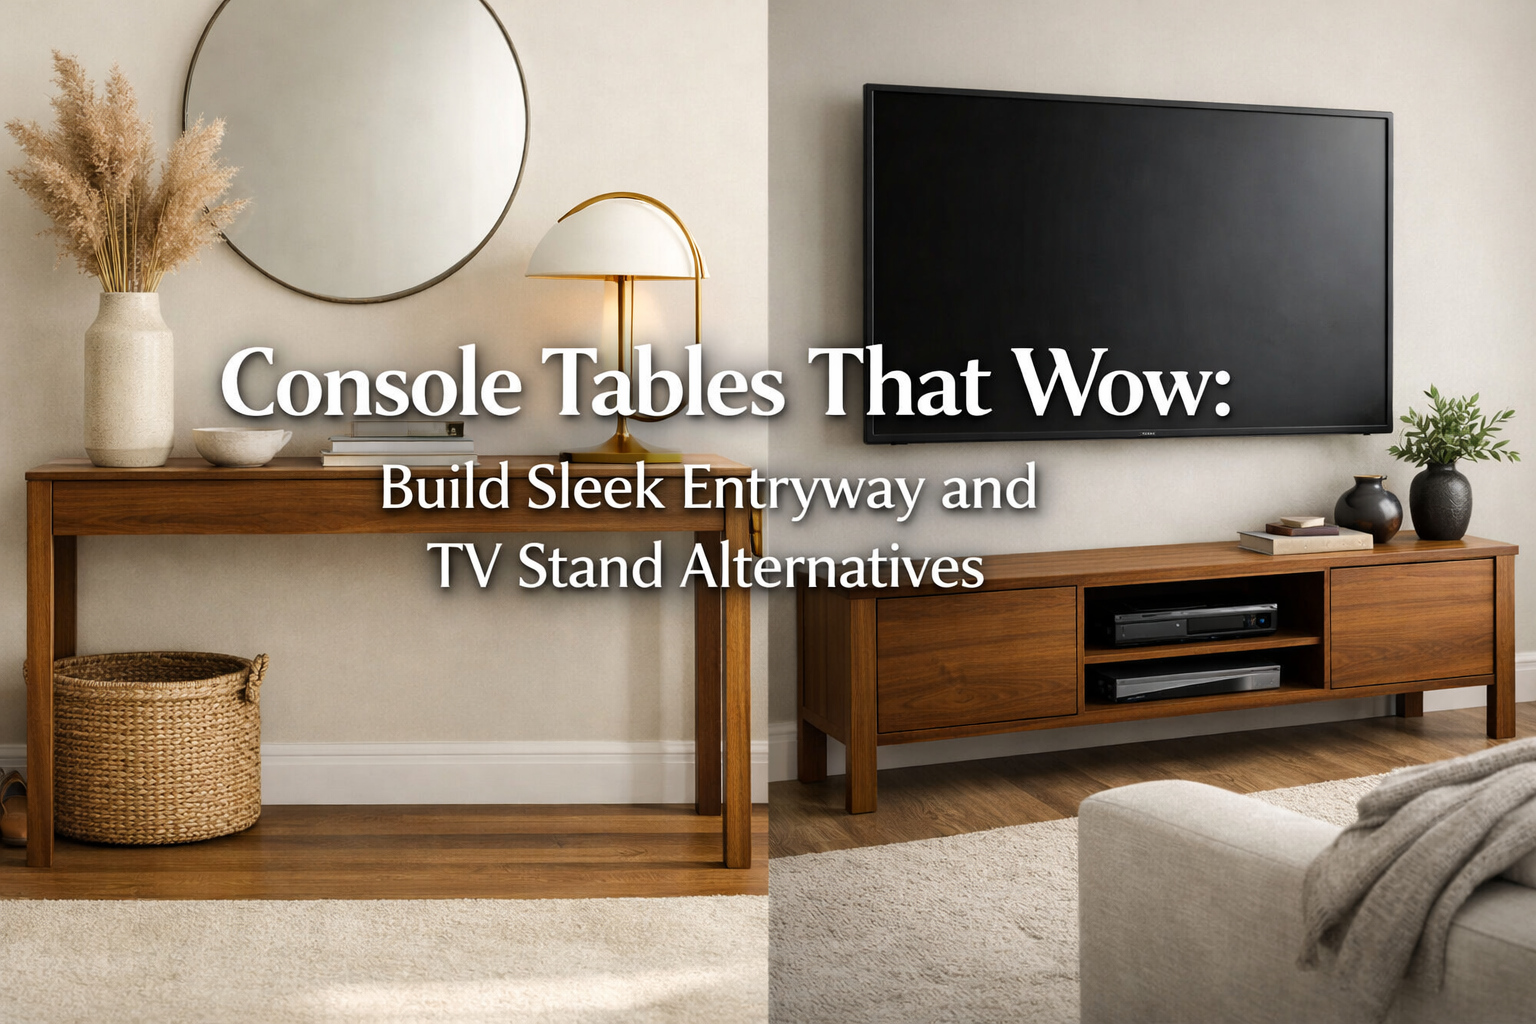

The modern home of 2026 demands furniture that is not only functional but also artfully designed, space-efficient, and deeply personal. Gone are the days of bulky, generic pieces that merely fill a room. Today, the focus is on smart solutions that elevate aesthetics while serving multiple purposes. This is where the custom console table shines, offering a sophisticated answer to common design dilemmas. If you’re looking to create [Console Tables That Wow: Build Sleek Entryway and TV Stand Alternatives], this comprehensive guide will equip you with the step-by-step power tool workflows needed to craft slim, customizable consoles featuring hidden storage, and the ingenious integration of live-edge accents without mimicking existing table trends. Prepare to transform your living spaces with pieces that are both striking and supremely practical.
Key Takeaways
- Design for Modern Living: Console tables in 2026 are multi-functional, slim-profile pieces that seamlessly integrate into entryways, living rooms, and hallways, offering both aesthetic appeal and practical storage.
- Power Tool Precision: Achieving sleek, professional results requires accurate power tool workflows, including precise cutting, routing, and joinery techniques to create durable and elegant structures.
- Embrace Hidden Storage: Innovative designs incorporating hidden drawers, compartments, or cable management systems are crucial for maintaining a minimalist look while maximizing utility.
- Live-Edge Integration: Learn to artfully incorporate live-edge wood elements as subtle accents, adding organic beauty without overwhelming the console’s sleek lines or traditional furniture aesthetics.
- Versatile Alternatives: Custom console tables serve excellently as stylish entryway organizers, elegant media consoles, or chic display surfaces, providing superior alternatives to conventional furniture.
Mastering the Foundation: Designing and Cutting for Sleek Profiles
Building [Console Tables That Wow: Build Sleek Entryway and TV Stand Alternatives] begins with a meticulous design process and precise execution in the workshop. The goal is to achieve slim, elegant profiles that don’t overpower the space but rather enhance it. This section focuses on the initial steps: conceptualization, material selection, and the power tool workflows for cutting and shaping your console’s core components.

Conceptualizing Your Sleek Console
Before any sawdust flies, envision the role your console table will play. Is it a minimalist entryway piece for keys and mail, or a low-profile TV stand alternative with integrated media storage? Consider the dimensions of your space. A truly “wow” console table is one that fits perfectly, neither too large nor too small. Sketch out various designs, paying close attention to the depth, width, and height. Modern aesthetics lean towards clean lines, often incorporating floating elements or slender legs. Think about the overall style: contemporary, industrial, or a touch of rustic charm with refined accents.
Design Considerations for Slim Consoles:
- Depth: Keep it shallow to prevent it from jutting out excessively in hallways or entryways. 10-14 inches is often ideal.
- Length: Proportional to the wall it will sit against, often extending ⅔ to ¾ the length of the wall or furniture it accompanies.
- Height: Standard console height is around 30-34 inches, aligning with typical counter heights, but adjust if it’s specifically for a TV (lower) or a decorative entryway (higher).
- Leg Design: Tapered legs, hairpin legs, or a solid panel base can all contribute to a sleek look. Avoid overly chunky designs.
- Material Thickness: Use thinner stock for visual lightness where structural integrity isn’t compromised.
Material Selection: The Foundation of Elegance
The choice of wood greatly influences both the aesthetic and the ease of working with your console. For sleek designs, hardwoods like maple, walnut, or oak offer durability and a fine grain that takes finishes beautifully. Plywood, especially high-quality Baltic birch, can also be an excellent choice for its stability and strength, particularly for internal structures or if you plan to veneer the surfaces. When incorporating live-edge elements, select a slab that complements the primary wood and has an interesting, but not overly obtrusive, natural edge.
- Maple: Light, hard, and uniform grain, excellent for modern, clean finishes.
- Walnut: Rich, dark, luxurious, and easy to work with, perfect for sophisticated designs.
- White Oak: Strong, durable, with an attractive grain, versatile for various styles.
- Plywood (Cabinet Grade): Stable, cost-effective for internal components, and ideal for painted or veneered finishes.
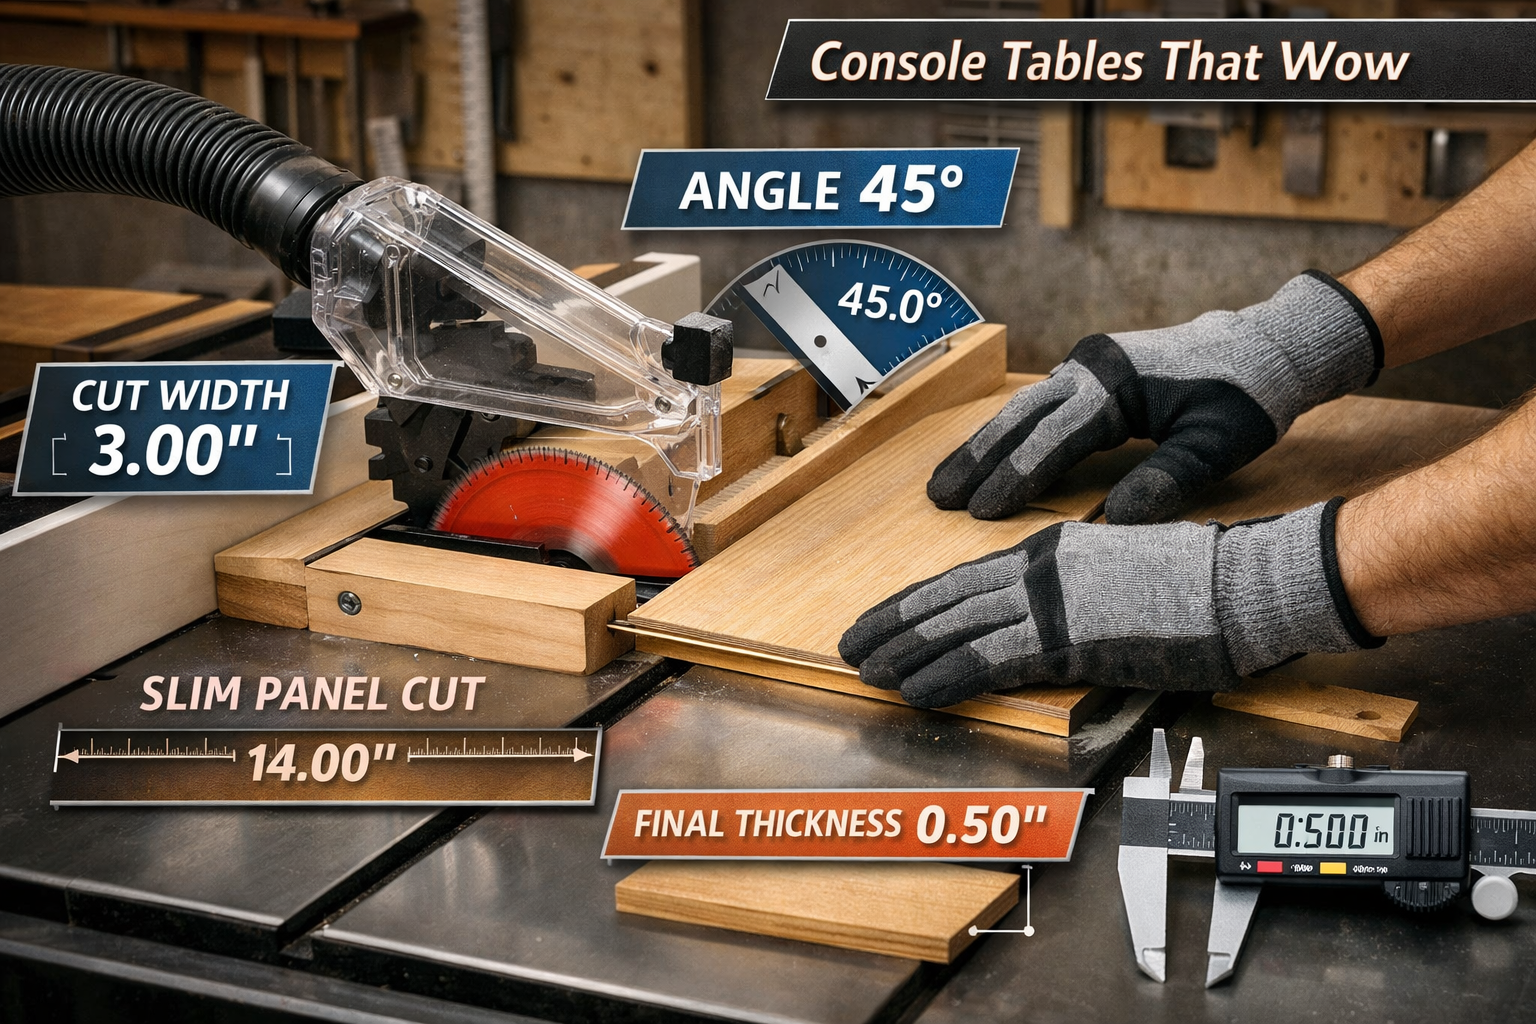
Precision Cutting with Power Tools
Achieving the sharp, clean lines essential for sleek console tables relies heavily on accurate power tool usage.
Breaking Down Stock with a Table Saw:
Begin by ripping your lumber to rough width and cross-cutting to rough length using a table saw. For precise, clean edges, ensure your blade is sharp and properly aligned. Utilize a crosscut sled for consistent, square cuts, especially when dealing with panels for tabletops or shelves. If working with plywood, consider using a scoring blade or a zero-clearance insert to minimize tear-out. For those seeking advanced performance, a Delta Unisaw X5 offers exceptional precision and power for these foundational cuts.Dimensioning and Squaring with a Jointer and Planer:
For solid wood components, a jointer is crucial for flattening one face and squaring one edge. Follow this with a thickness planer to bring both faces to the desired uniform thickness. This step is non-negotiable for furniture-grade results, ensuring all your pieces fit together perfectly with minimal gaps. If you’re using a Delta 22-560 Planer, ensure it’s well-maintained for optimal performance.Refining Edges and Curves with a Router:
A router is indispensable for creating decorative edges, dados, rabbets, and flush-trimming veneers or edge banding. For sleek designs, a small chamfer or a slight round-over bit can soften edges without adding bulk. Use a router table for greater control and safety, especially when working on smaller pieces. This tool allows for the creation of intricate joinery or smooth transitions that elevate the console’s finish.Specialty Cuts for Joinery:
Depending on your chosen joinery (e.g., mortise and tenon, dado, biscuit, or dowel joints), you’ll employ specific tools. A router can create precise dados and rabbets. A mortising machine or drill press with a mortising attachment is excellent for mortise and tenon joints. For hidden joinery that contributes to a seamless, sleek look, consider options like Domino joiners or Festool’s specialized tools that ensure strong, invisible connections.
“The true measure of a custom furniture piece lies not just in its final appearance, but in the precision of its underlying joinery. Hidden storage and sleek lines demand impeccable fit and finish, achievable only through careful planning and skilled power tool application.”
— Woodcraft Wiz Editorial Team
Building Beyond Basics: Hidden Storage and Live-Edge Accents
Once the foundational cuts are made, the true artistry of creating [Console Tables That Wow: Build Sleek Entryway and TV Stand Alternatives] comes into play. This section delves into integrating hidden storage solutions and tastefully incorporating live-edge elements, transforming a simple table into a functional and aesthetically compelling showpiece.
Integrating Hidden Storage Solutions
Hidden storage is a hallmark of modern, space-saving furniture. It allows for decluttering entryways or tidily managing media components without disrupting the console’s clean lines.
Methods for Hidden Storage:
- Concealed Drawers: Design drawers that are flush with the console’s apron or body, often opened with push-to-open mechanisms rather than visible pulls. Utilize accurate drawer slides for smooth operation. For guidance on building drawers, our article on Ultimate DIY End Tables offers insights into dovetail joinery, which can be adapted for console table drawers.
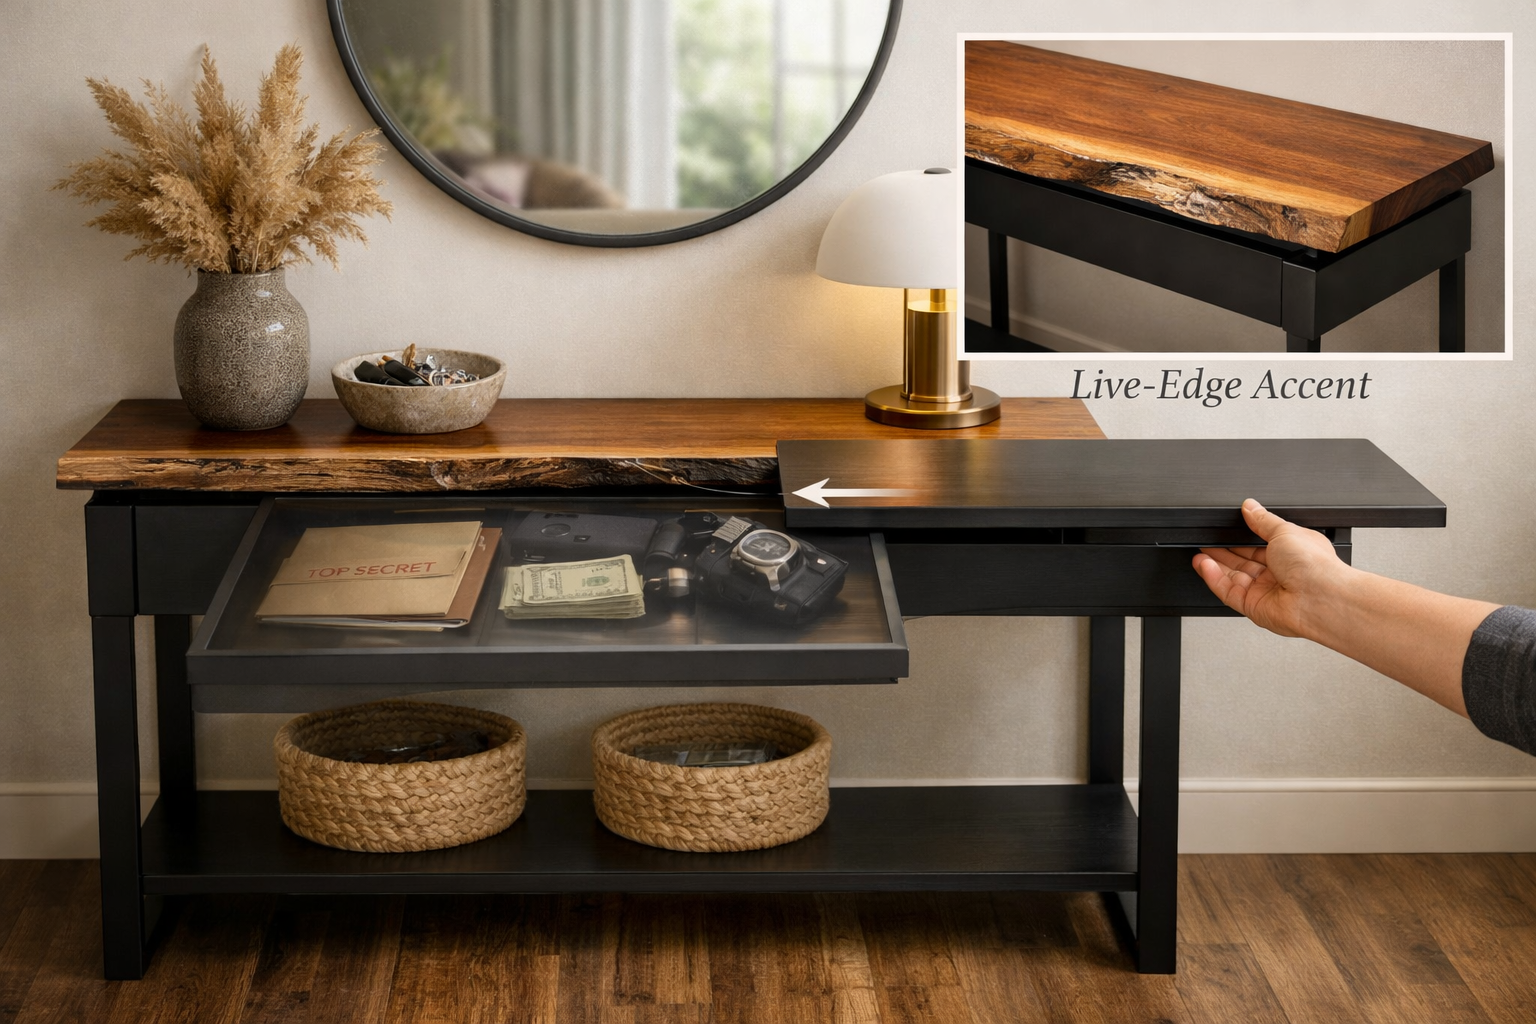
- Flip-Top Compartments: A section of the tabletop can be hinged to lift, revealing a shallow compartment perfect for keys, wallets, or small electronics. Ensure the hinge mechanism is robust and discreet.
- Sliding Panels: For larger items or media components, design the console with a sliding front or side panel that glides to reveal shelving or a cubby. This maintains a solid, clean facade when closed. This approach can be particularly effective for TV stand alternatives, allowing for cable management and device storage to be completely out of sight.
- Cable Management Channels: For TV stand alternatives, integrate routed channels or false backs with cutouts to manage cables. This keeps wires tidy and unseen, crucial for a sleek look. Consider the principles discussed in Building Custom Wooden TV Stands: Modern Media Consoles with Cable Management and Hidden Joinery for advanced techniques.
When designing hidden compartments, remember to factor in the thickness of the panels and the space required for mechanisms. Precision joinery, such as dadoes or rabbets cut with a router, will ensure a snug fit for panels and drawers, maintaining the console’s sleek profile.
Thoughtful Live-Edge Integration
Live-edge wood adds a unique, organic touch that can elevate a console table from functional to artistic. The key is integration, not domination. We aim for accents that complement, rather than overwhelm, the sleek design.
Techniques for Live-Edge Accents:
Live-Edge Top Slab (Carefully Selected): Instead of a full, wide live-edge slab that might feel too rustic, choose a narrower live-edge piece specifically for the top. The “live” edge can be strategically placed along the back, against the wall, or along one of the long edges, with the other edges cleanly milled and squared. This provides the natural texture without the bulky appearance.
- Preparation: Clean the live edge thoroughly, removing bark and loose material. Use a wire brush and sand it smooth. Fill any voids or cracks with epoxy for durability and a polished finish.
- Flattening: Even a narrow live-edge slab needs to be flat. Use a router sled or a planer if the slab fits to achieve a level surface.
Live-Edge Shelf or Bottom Tier: Incorporate a small, thin live-edge slab as a floating shelf beneath the main tabletop, or as a lower tier. This draws the eye but keeps the primary working surface clean and functional.
Live-Edge Inlay or Panel: For a truly unique and controlled accent, cut a portion of a live-edge slab and inlay it into the main tabletop or a side panel. This creates a striking visual contrast within a predominantly smooth surface. This requires precise routing and inlay techniques.
Live-Edge “Standoff” Accent: Mount a narrow, finished live-edge piece slightly above or in front of the main console body using standoffs. This creates a layered look, allowing the natural edge to be a distinct, almost sculptural, element.
Remember, the goal is to enhance, not distract. A little live-edge goes a long way in a sleek design. The finishing on the live-edge component should match or complement the rest of the table’s finish, ensuring cohesion. For finishing, consider options like Danish oil for a natural look or polyurethane for durability, keeping in mind the discussion around Danish oil vs. linseed oil.
Finishing Touches and Versatile Applications
With the structure complete and unique features integrated, the final steps involve sanding, finishing, and considering the versatile applications of your custom-built console table. These details will truly allow your [Console Tables That Wow: Build Sleek Entryway and TV Stand Alternatives] to stand out.
Sanding for a Flawless Finish
A smooth, professional finish is paramount for a sleek console table. This requires meticulous sanding.

- Gradual Grit Progression: Start with a coarser grit (e.g., 80 or 100) to remove any tool marks or imperfections. Progress through increasingly finer grits (120, 150, 180, 220, and even 320 for hardwoods) until the surface is silky smooth.
- Even Pressure: Use an orbital sander for large, flat surfaces, ensuring even pressure and consistent movement to avoid swirl marks. For edges and details, hand-sanding or a detail sander may be necessary.
- Dust Removal: Between grits, thoroughly remove all dust from the surface with a tack cloth or compressed air. Residual dust can create scratches with the next, finer grit.
- Grain Raising: After the initial sanding to 220 grit, wipe the wood surface with a damp cloth to raise the grain. Once dry, lightly sand again with 220 or 320 grit to knock down the raised fibers, resulting in a smoother final finish.
Applying a Durable and Attractive Finish
The finish protects the wood and enhances its natural beauty. For a sleek, modern look, clear finishes are often preferred to let the wood grain shine.
- Polyurethane: A highly durable and protective finish, available in various sheens (matte, satin, semi-gloss, gloss). Apply thin coats, sanding lightly between each for optimal adhesion and smoothness. For spraying water-based poly, consider techniques found in our guide on spraying water-based poly. You can also compare gloss vs. semi-gloss poly to choose the best look.
- Oil Finishes (e.g., Danish Oil, Tung Oil): These penetrate the wood, offering a more natural, hand-rubbed look. They provide less surface protection than polyurethane but are easy to repair. Multiple coats are typically required.
- Lacquer: Dries quickly and builds a durable, clear film. Often applied with a spray gun for a professional, smooth finish.
- Stain (Optional): If you desire to alter the wood’s color, apply stain before the topcoat. Always test the stain on a scrap piece of the same wood species to ensure the desired outcome. For achieving specific color effects, exploring mahogany wood finishing techniques or rustic wood finishing techniques can provide inspiration.
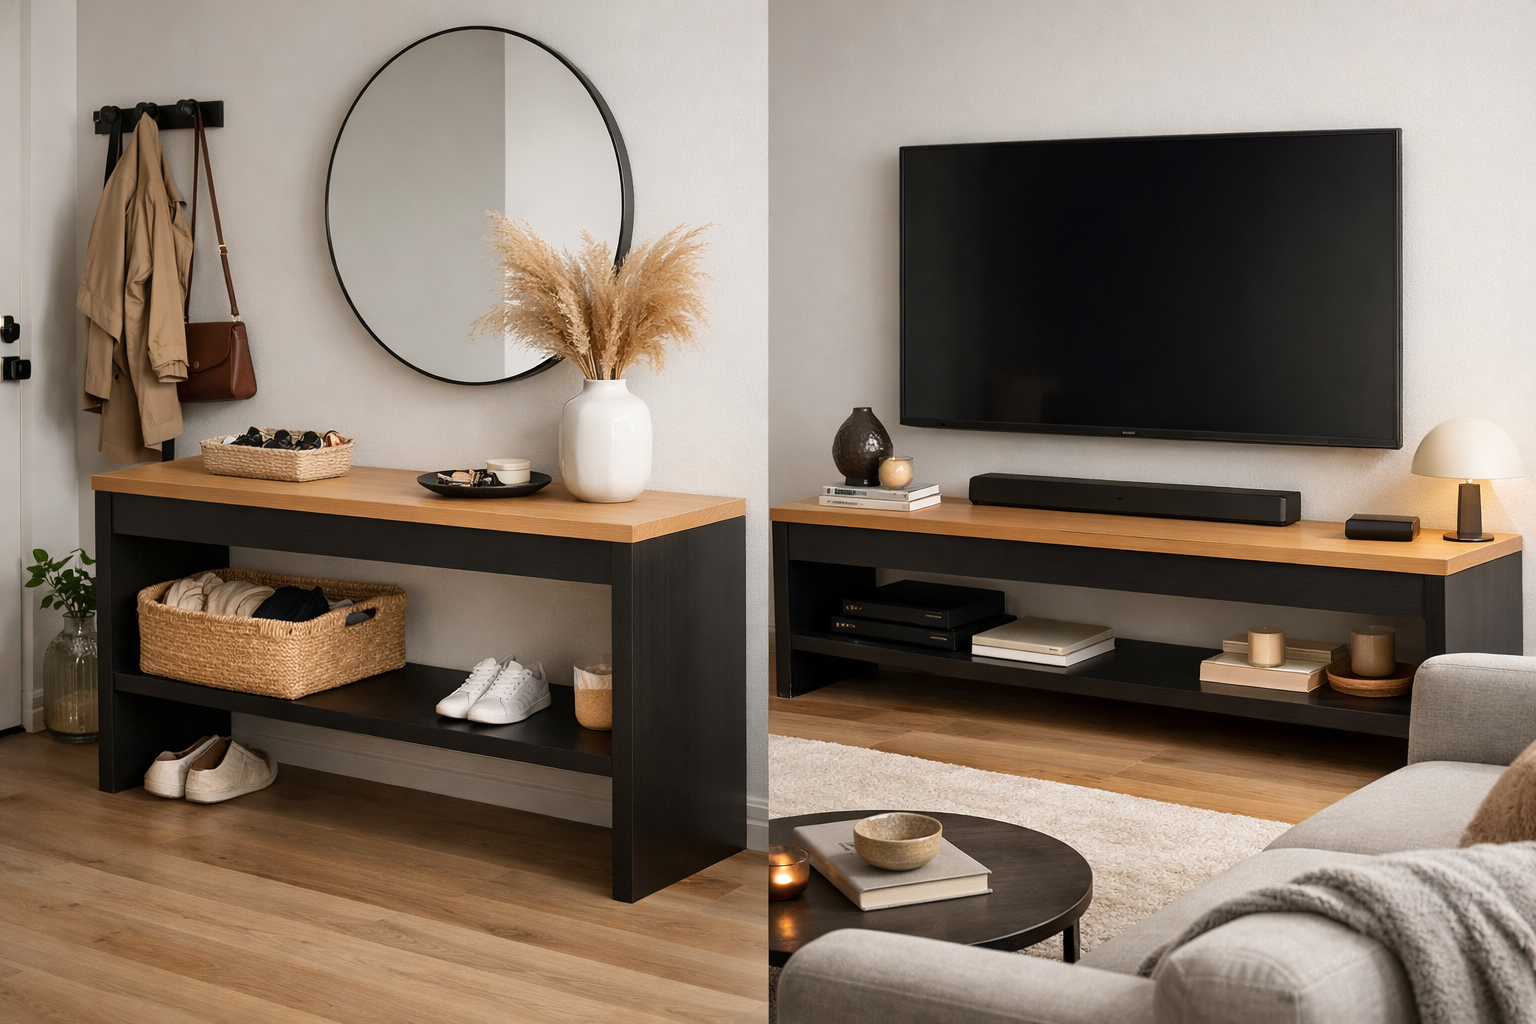
Versatile Applications: Beyond the Entryway
Your custom console table is a chameleon, adapting to various spaces and needs within the home in 2026.
- The Elegant Entryway Organizer: This is a classic role. Use it to catch keys, mail, and display a piece of art or a plant. The hidden storage keeps clutter at bay, while the sleek profile doesn’t crowd the often-narrow space. Consider adding a small mirror above it for quick last-minute checks.
- Sophisticated TV Stand Alternative: For minimalist living rooms, a low-slung console table provides a chic alternative to a traditional, bulky TV stand. It can house media devices discreetly within hidden compartments, with clever cable management maintaining a clean aesthetic. This offers a seamless look that integrates technology into your decor.
- Hallway Display and Storage: A long, narrow console table can transform an otherwise overlooked hallway into a curated display area for photographs, books, or decorative objects. Hidden drawers provide essential storage for linens, stationery, or seasonal items.
- Home Office Helper: In a compact home office, a console can serve as a slim desk for a laptop, or as a secondary surface for printers and office supplies, with drawers for documents.
- Dining Room Server: For smaller dining areas, a console table can double as a compact server for drinks or appetizers when entertaining, easily pushed against a wall when not in use.
By building [Console Tables That Wow: Build Sleek Entryway and TV Stand Alternatives], you’re not just creating furniture; you’re crafting adaptable, beautiful solutions that enhance the functionality and style of any room. The satisfaction of designing and building a piece that perfectly fits your space and meets your specific needs is truly unmatched.
Conclusion
The pursuit of crafting [Console Tables That Wow: Build Sleek Entryway and TV Stand Alternatives] is a rewarding journey that combines precise woodworking skills with thoughtful design. In 2026, homeowners increasingly seek furniture that offers smart solutions, maximizes space, and reflects personal style. By focusing on slim profiles, incorporating clever hidden storage, and artfully integrating live-edge accents, you can create pieces that are not only functional but also stand as unique statements in your home.
From the initial conceptualization and meticulous material selection to the precision cuts facilitated by power tools like table saws, jointers, and routers, every step contributes to the console’s overall elegance and durability. Mastering the integration of concealed drawers or sliding panels ensures a clutter-free environment, while the subtle inclusion of live-edge elements adds an organic, artistic touch without overwhelming the sleek aesthetic. Finally, a professional sanding and finishing process elevates the piece, making it ready to serve as a stunning entryway focal point, a minimalist TV stand alternative, or a versatile display surface in any room.
Embark on this woodworking adventure to transform your living spaces with custom-built console tables that truly wow.
Actionable Next Steps:
- Sketch Your Design: Begin by drawing out your ideal console table, focusing on dimensions, intended use, and desired features like hidden storage or live-edge placement.
- Gather Materials: Select high-quality wood that complements your home’s aesthetic and is suitable for precision work.
- Prepare Your Workshop: Ensure your power tools are sharp, calibrated, and that you have all necessary safety equipment before beginning any cuts.
- Practice Joinery: If new to specific joinery techniques, practice on scrap wood until you achieve precise, strong connections.
- Start Building: Follow a structured workflow, tackling foundational cuts, then assembly, and finally the detailed finishing processes.
References
- Fine Woodworking. (2024). The Essential Guide to Table Saws. Taunton Press.
- The Woodworker’s Journal. (2023). Custom Furniture Design: Integrating Modern Aesthetics. August Issue.
- Schroeder, S. (2022). Building Modern Wood Furniture. Popular Woodworking Books.
