
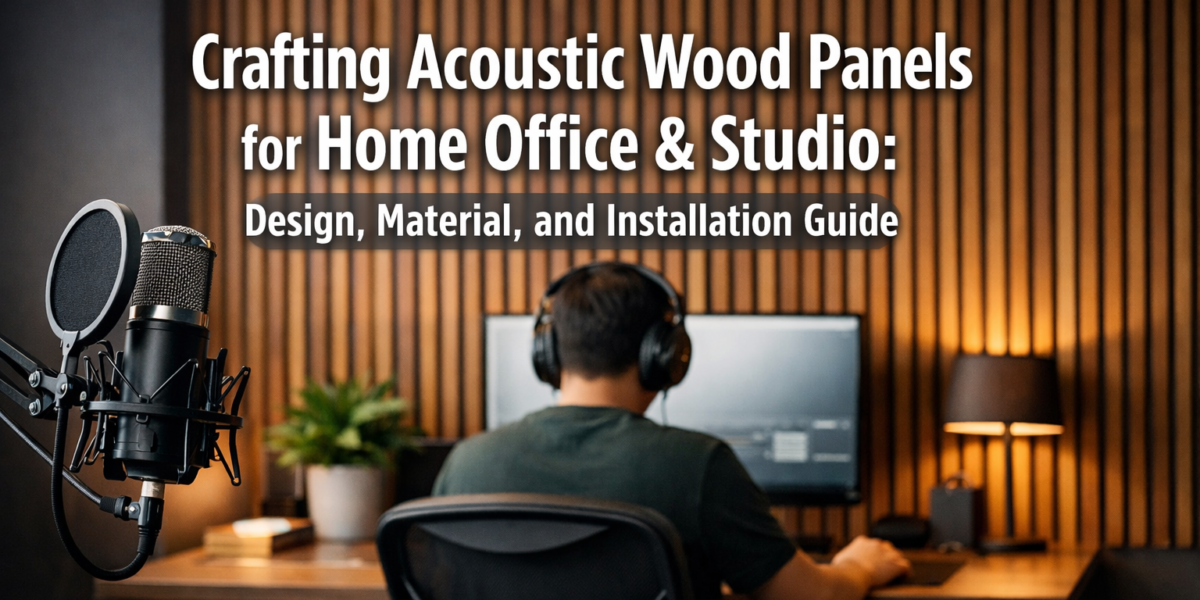

In today’s interconnected world, a quiet, productive home office or an acoustically balanced studio is more than a luxury—it’s a necessity. Unwanted echoes, reverberation, and external noise can severely impact concentration, communication during video calls, and the quality of audio recordings. This comprehensive guide, “Crafting Acoustic Wood Panels for Home Office & Studio: Design, Material, and Installation Guide,” will empower you to design and build custom wooden acoustic panels that not only dramatically improve sound quality but also serve as stylish, integrated decorative elements in your space. Learn how to transform your environment into an oasis of auditory clarity and aesthetic appeal.
Key Takeaways

- Acoustic Principles Matter: Understand the difference between sound absorption and diffusion to effectively treat common acoustic problems like echo and flutter.
- Design for Function & Aesthetics: Plan your panel layout to optimize sound treatment while integrating seamlessly with your room’s existing decor.
- Material Selection is Crucial: Choose the right wood and acoustic core materials for both performance and durability.
- Precision Craftsmanship: Accurate cutting, assembly, and finishing techniques are essential for effective and attractive panels.
- Safe & Secure Installation: Proper mounting ensures panels remain effective and safe for long-term use.
Understanding Acoustic Principles and Design for Your Space
Before diving into the actual crafting of acoustic panels, it’s essential to grasp the fundamental principles of room acoustics. Effective sound treatment involves a balance of absorption, diffusion, and sometimes blocking. For a home office or studio, the primary goals are typically to reduce echo (reverberation) and flutter echo, improve speech intelligibility, and create a more controlled listening or recording environment.
Sound Absorption vs. Sound Diffusion
- Sound Absorption: This involves materials that convert sound energy into heat, thereby reducing reflections. Soft, porous materials like mineral wool, fiberglass, or thick fabric are excellent absorbers. Absorbers are crucial for controlling overall reverberation time and eliminating echoes.
- Sound Diffusion: This scatters sound waves in various directions, rather than absorbing them. Diffusers prevent sound from building up in specific areas and help maintain a lively, spacious feel while still controlling reflections. Wood panels with varying depths and angles are excellent diffusers.

Assessing Your Room’s Acoustic Needs
Start by identifying the acoustic problems in your room. Clap your hands loudly in the center of the room. Do you hear a sustained echo? This indicates excessive reverberation. If you hear a rapid, buzzing echo, especially between parallel hard surfaces, you likely have flutter echo.
Consider the room’s purpose:
- Home Office: Focus on clear voice communication for calls and reducing distractions. A balance of absorption, particularly at the first reflection points (the spots on walls where sound hits before reaching your ears), and some diffusion for a natural sound.
- Home Studio (Recording/Mixing): Requires more precise control. Absorption is vital for reducing reflections in the tracking area and for creating a neutral listening environment at the mixing position. Diffusion is excellent for creating a sense of space and natural decay, especially on rear walls.
Table 1: Common Acoustic Problems and Panel Solutions
| Acoustic Problem | Description | Primary Solution | Panel Type |
|---|---|---|---|
| Echo/Reverberation | Sound sustains too long after source stops | Absorption | Flat absorbers, bass traps |
| Flutter Echo | Rapid, repeating echo between parallel surfaces | Absorption & Diffusion | Absorbers on one surface, diffusers on opposite |
| Muddy Bass | Low frequencies build up in corners | Bass Trapping | Thick absorption in corners (corner bass traps) |
| Harsh Reflections | Direct sound bounces off hard surfaces quickly | Absorption (First Ref.) | Absorption panels at reflection points |
| Sterile Sound | Over-damped room lacking natural ambiance | Diffusion | Wood diffusers (e.g., Quadratic Residue Diffusers) |
Designing Your Panels: Layout and Aesthetics
The design of your acoustic panels should be both functional and visually appealing.
Panel Placement:
- First Reflection Points: These are critical. Sit in your listening/working position and have a friend hold a mirror along the side walls and ceiling. Where you can see your speakers in the mirror, that’s a first reflection point—prime real estate for an absorption panel.
- Opposite Parallel Walls: To combat flutter echo, place absorption on one wall and diffusion on the opposite.
- Behind Speakers: Absorption can help tighten up the stereo image.
- Rear Wall: Diffusers work well here to prevent echoes from bouncing back to the listening position while maintaining a sense of space.
- Corners: Bass traps are essential for taming low-frequency build-up. These are typically thicker absorption panels designed specifically for corners.
Aesthetic Integration:
- Wood Species: Consider your existing decor. Light woods like maple or birch for modern, Scandinavian looks. Darker woods like walnut or cherry for a classic or luxurious feel. Reclaimed wood can offer a rustic charm. For more on working with different wood types, explore our guide on Understanding Wood Movement: How to Design and Build Furniture That.
- Patterns and Textures:
- Slatted Panels: These are highly popular for their modern aesthetic and dual function (some absorption, some diffusion/scattering depending on slat depth and spacing). They can be vertical, horizontal, or even diagonal.
- Geometric Diffusers: Quadratic Residue Diffusers (QRDs) or Primitive Root Diffusers (PRDs) are designed with specific well depths to scatter sound effectively across a wide frequency range. They can be complex to build but are highly effective and visually striking.
- Fabric-Wrapped Absorbers with Wood Frames: Combine the efficiency of fabric-wrapped panels with the elegance of a visible wood frame.
“A well-designed acoustic panel isn’t just about sound; it’s about seamlessly blending technical performance with visual harmony, making the space both functional and inspiring.”
Selecting Materials and Preparing for Construction
Choosing the right materials is paramount for both the acoustic performance and the aesthetic appeal of your panels. This section focuses on the wood, the acoustic core, and other components required for crafting acoustic wood panels for your home office or studio in 2026.
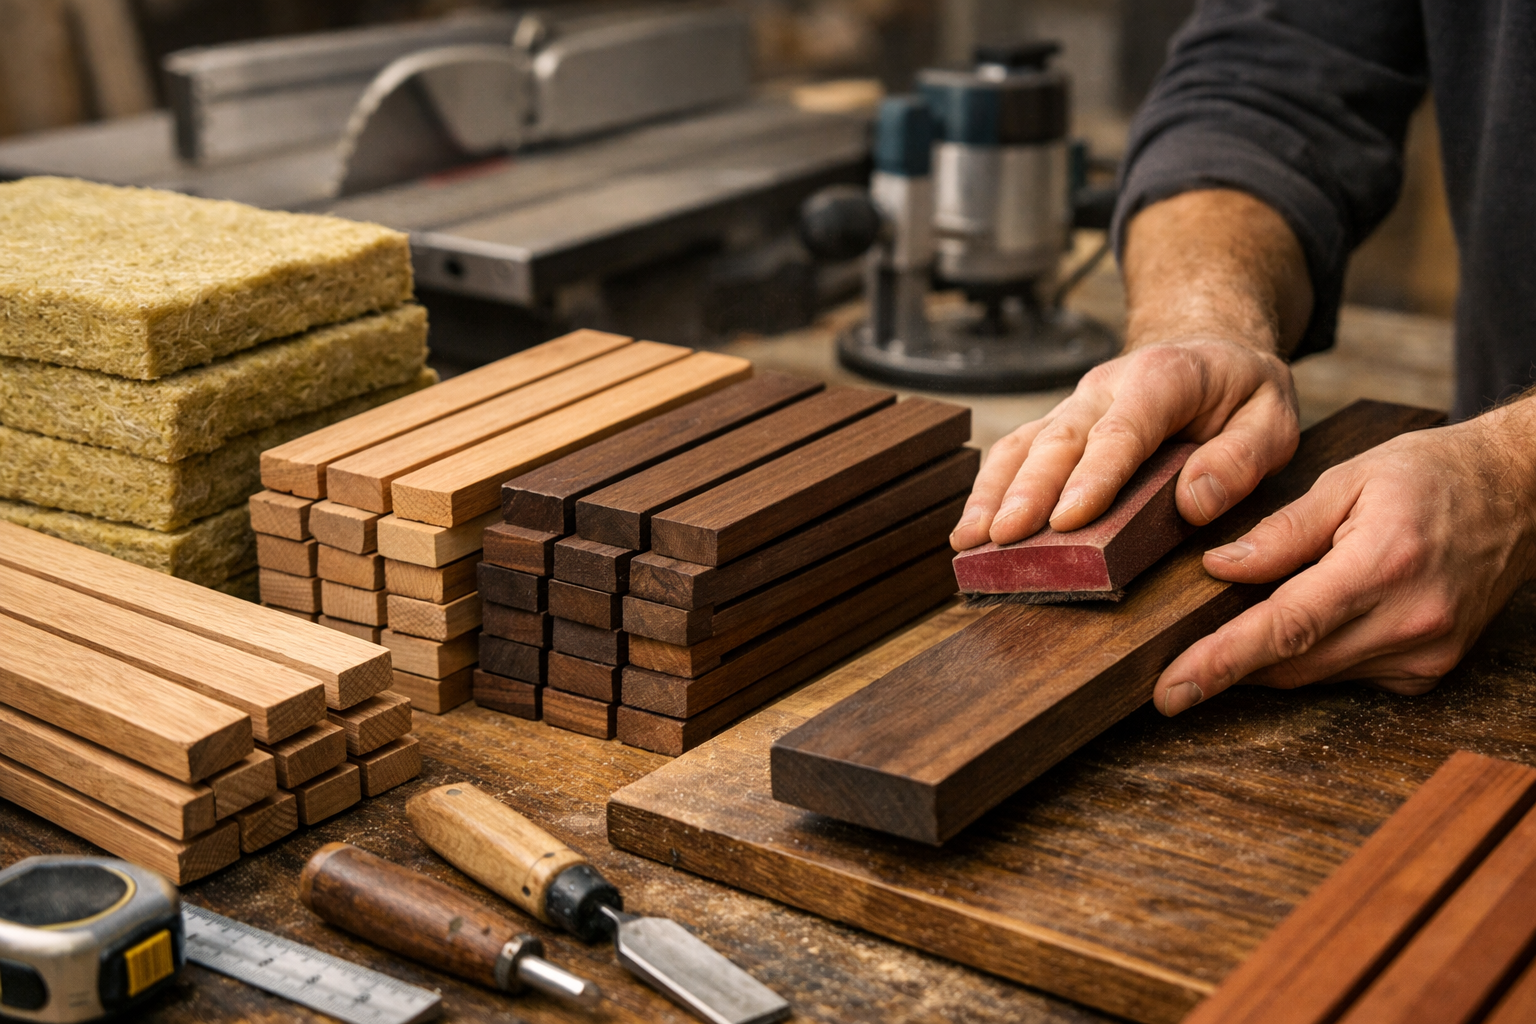
Wood Selection
The wood you choose will impact the final look and, to a lesser extent, the acoustic properties (primarily diffusion from its surface, not absorption).
For Frames & Slats:
- Solid Wood: Offers superior aesthetics, durability, and can be stained or finished to match any decor. Common choices include:
- Pine/Fir: Economical, easy to work with, but softer. Good for painted finishes or rustic looks.
- Oak/Maple: Harder, more durable, and excellent for natural finishes. They offer beautiful grain patterns.
- Walnut/Cherry: Premium woods with rich, deep colors and exquisite grains, perfect for high-end aesthetics.
- Plywood/MDF: Can be used for backer boards or frames where solid wood isn’t necessary or budget is a concern. Plywood offers stability, while MDF is very flat and takes paint well.
- Consider 12 Plywood for Cabinets: Strength, Durability, and Design Considerations for frame construction if using a fabric face.
- Solid Wood: Offers superior aesthetics, durability, and can be stained or finished to match any decor. Common choices include:
Finish: The finish protects the wood and enhances its appearance.
- Natural Oil Finishes (e.g., Danish oil, linseed oil): Penetrate the wood, offering a natural look and feel. See our guide on Danish Oil vs. Linseed: The Ultimate Wood Finishing Guide for more details.
- Polyurethane: Provides a durable, protective layer. Available in various sheens.
- Stain + Topcoat: Allows for color customization.
Acoustic Core Materials
This is where the magic of absorption happens. Safety and performance are key here.
- Mineral Wool (Rockwool/Roxul):
- Pros: Excellent broadband absorption, fire-resistant, mold-resistant, relatively rigid (easy to work with). Environmentally friendly.
- Cons: Can be irritating to skin/lungs during handling (wear PPE).
- Recommended Density: 4-8 PCF (pounds per cubic foot) for panels, often found in 2-inch or 4-inch thicknesses.
- Fiberglass (Owens Corning 703/705):
- Pros: Similar excellent broadband absorption to mineral wool, fire-resistant.
- Cons: Similar handling precautions needed. Less rigid than some mineral wool options.
- Recycled Cotton/Denim (Eco-friendly options):
- Pros: Non-irritating, environmentally friendly, good absorption, especially at mid to high frequencies.
- Cons: Can be less effective at lower frequencies than mineral wool/fiberglass for the same thickness, may be more expensive.
Important Note on Core Material: Always choose materials specifically designed for acoustic treatment, not standard home insulation, as the density and fiber structure are optimized for sound absorption.
Other Materials & Tools
- Backer Board: Thin plywood or MDF for the rear of the panel (optional for absorption panels, critical for diffusers).
- Acoustic Fabric: If you’re building fabric-wrapped absorption panels, use breathable fabric (e.g., Guilford of Maine, burlap, speaker cloth) that won’t impede sound waves.
- Wood Glue: High-quality wood glue for joinery.
- Screws/Nails: For securing frames and slats.
- Mounting Hardware: French cleats, Z-clips, or heavy-duty picture hangers. Ensure these are rated for the panel’s weight.
- Woodworking Tools:
- Table saw or circular saw with a straight edge for accurate cuts.
- Miter saw for precise angle cuts (especially for diffusers).
- Router (for edge profiles or complex diffuser patterns). For more on using routers, check out The Essential Guide to Router Bits: Choosing the Right Profile.
- Drill/driver.
- Measuring tape, ruler, speed square.
- Clamps.
- Safety glasses, hearing protection, dust mask/respirator.
Preparing Your Workspace
Ensure your workspace is well-lit, ventilated, and has enough room for cutting and assembly. Organize your tools and materials to ensure a smooth workflow. A clear and safe workshop is essential for any woodworking project. For tips on setting up your shop, consider reading Building Modular Wood Storage Systems for Small Workshops: Maximizing Space and Organization.
Construction and Installation Techniques
With your design finalized and materials gathered, it’s time to bring your acoustic wood panels to life. This section details the steps for crafting acoustic wood panels for home office and studio, and how to install them securely.
Step-by-Step Construction Guide
The construction process will vary depending on whether you’re building absorption panels with wood frames or more complex wooden diffusers.
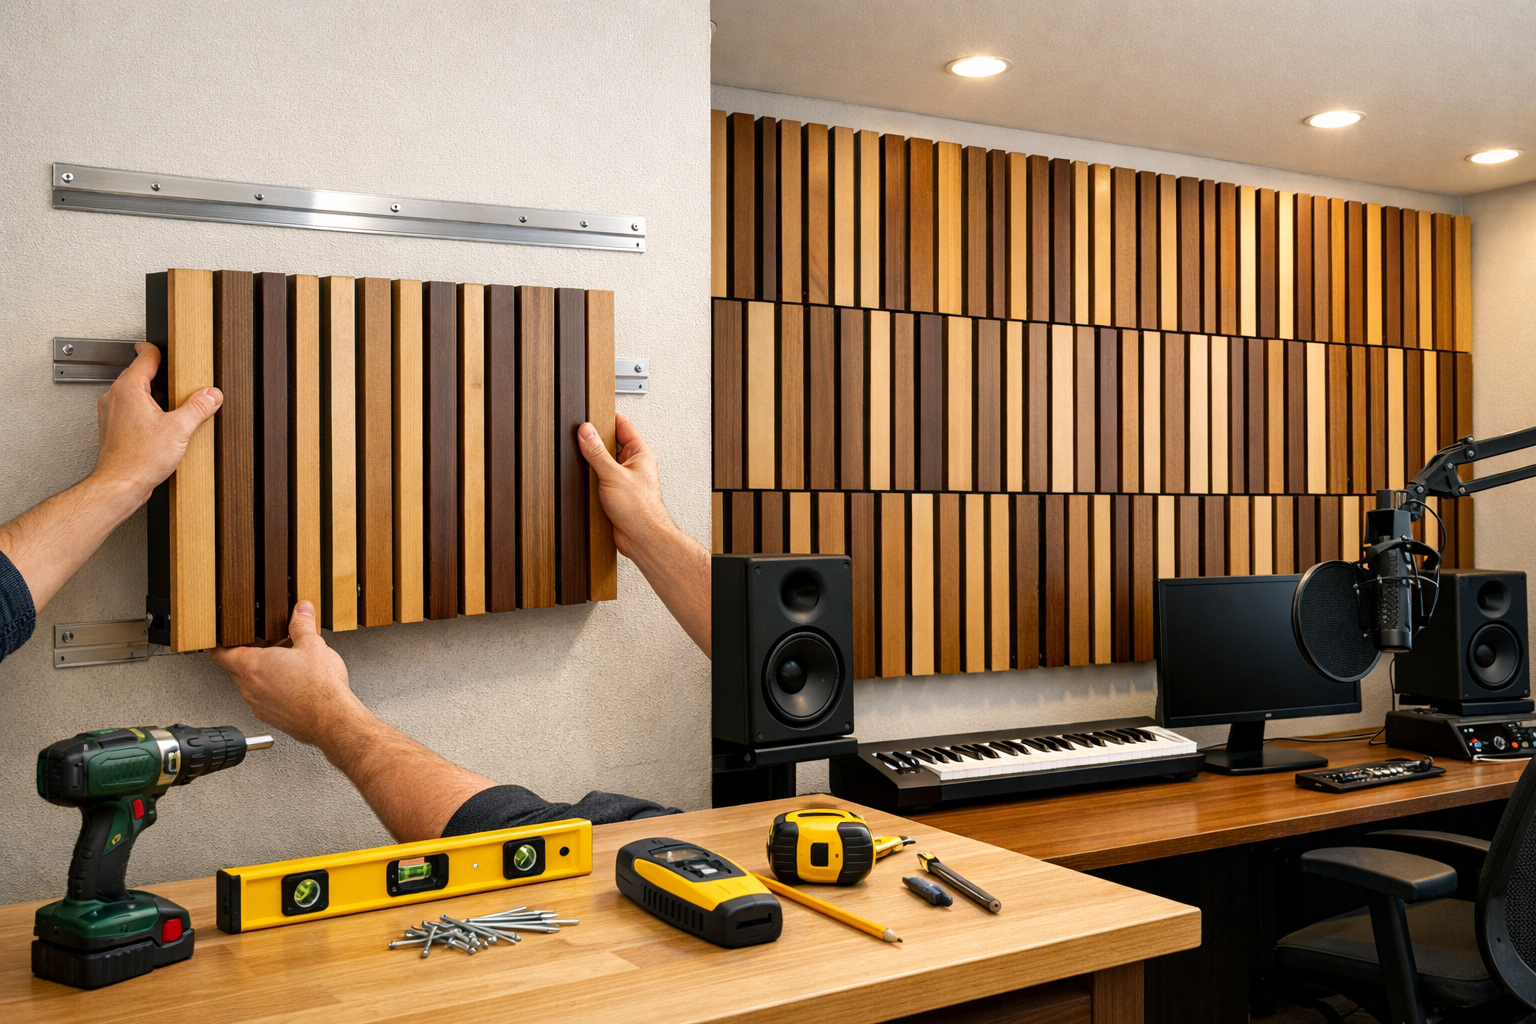
1. Building Absorption Panels with Wood Slats (Hybrid Design)
This popular design offers both absorption and a modern, diffusive aesthetic.

- Cut Frame Pieces: Cut four pieces of wood to create the outer frame. For a 24″x48″ panel, you’ll need two 24″ pieces and two 48″ pieces. The depth of your frame should match your acoustic core material (e.g., 2″ or 4″).
- Assemble Frame: Use wood glue and screws/pocket screws to assemble the frame. Ensure it’s square.
- Install Backer (Optional): Attach a thin plywood or MDF backer to one side of the frame. This provides a clean look and helps contain the acoustic material.
- Insert Acoustic Core: Carefully cut your mineral wool or fiberglass to fit snugly within the frame. Wear gloves, long sleeves, and a respirator when handling these materials.
- Cut Slats: Rip your chosen wood into uniform slats. Common dimensions are 1.5″ to 2″ wide and 0.5″ to 0.75″ thick. For diffusers, slat depths would vary.
- Attach Slats: Lay the frame face-up. Begin attaching slats to the frame. You can use wood glue and finish nails, or small screws. Maintain consistent spacing between slats (e.g., 0.5″ to 1″) for aesthetic and acoustic purposes. The spacing allows sound to pass through to the absorbent material while the slats themselves provide some diffusion.
- Sand and Finish: Once the glue is dry and all slats are secure, sand the entire panel. Apply your chosen finish (stain, oil, polyurethane). Allow ample drying time.
2. Building Quadratic Residue Diffusers (QRDs)
QRDs are more complex but offer superior diffusion.
- Determine Design: QRDs are based on mathematical sequences. You’ll need to choose the N-value (number of wells) and desired frequency range to calculate the well depths. Online QRD calculators can assist with this.
- Cut Base and Fin Stock: You’ll need a solid base (e.g., plywood) and many long strips (fins) for the well dividers.
- Cut Well Blocks: Cut individual blocks to the precise, varying depths determined by your QRD calculations. Precision is critical here. A CNC router can greatly simplify this step.
- Assemble: Glue the fins to the base, creating a grid. Then, glue the pre-cut well blocks into each compartment.
- Sand and Finish: Sand thoroughly and apply your chosen wood finish.
Installation Guide
Proper installation ensures your panels are effective and safe.
- Mark Panel Locations: Use a level and measuring tape to accurately mark where each panel will go, especially if installing at first reflection points or in a specific pattern.
- Locate Studs: For heavy panels, attaching directly to wall studs is ideal. Use a stud finder to mark stud locations. If studs aren’t available, use appropriate heavy-duty wall anchors.
- Install Mounting Hardware:
- French Cleats: This is a highly recommended method for heavier panels. Attach one cleat piece to the back of the panel (angled down) and the matching piece to the wall (angled up). This creates a secure, interlocking system.
- Z-Clips: Similar to French cleats, these metal clips offer a robust and level mounting solution.
- Heavy-Duty Picture Hangers: For lighter panels, large D-rings or sawtooth hangers can suffice, but ensure they are rated for the panel’s weight.
- Hang Panels: Carefully lift and hang each panel onto its corresponding wall hardware. Double-check that panels are level and secure.
- Final Adjustments: After installation, re-evaluate the room acoustics. You may need to fine-tune placement or add more panels for optimal results.
Safety Considerations
- PPE: Always wear appropriate personal protective equipment (safety glasses, hearing protection, dust mask/respirator, gloves) when cutting wood, sanding, or handling acoustic insulation.
- Tool Safety: Follow all manufacturer guidelines for power tools. Ensure blades are sharp and guards are in place.
- Weight: Wooden acoustic panels, especially diffusers, can be heavy. Get assistance when lifting and installing. Ensure your mounting hardware and wall can support the weight.
Conclusion
Crafting acoustic wood panels for your home office or studio is a rewarding project that combines practical acoustic engineering with aesthetic woodworking. By understanding the principles of sound absorption and diffusion, carefully selecting your materials, and executing precise construction and installation, you can create a space that is not only acoustically superior but also visually stunning. In 2026, investing in your workspace’s sound environment is an investment in your productivity, creativity, and overall well-being.
Take the time to plan your design, gather high-quality materials, and approach the build with attention to detail. The resulting custom wooden acoustic panels will not only eliminate distracting echoes and improve sound clarity but will also serve as unique, handcrafted elements that enhance the beauty and functionality of your cherished home office or studio.
