
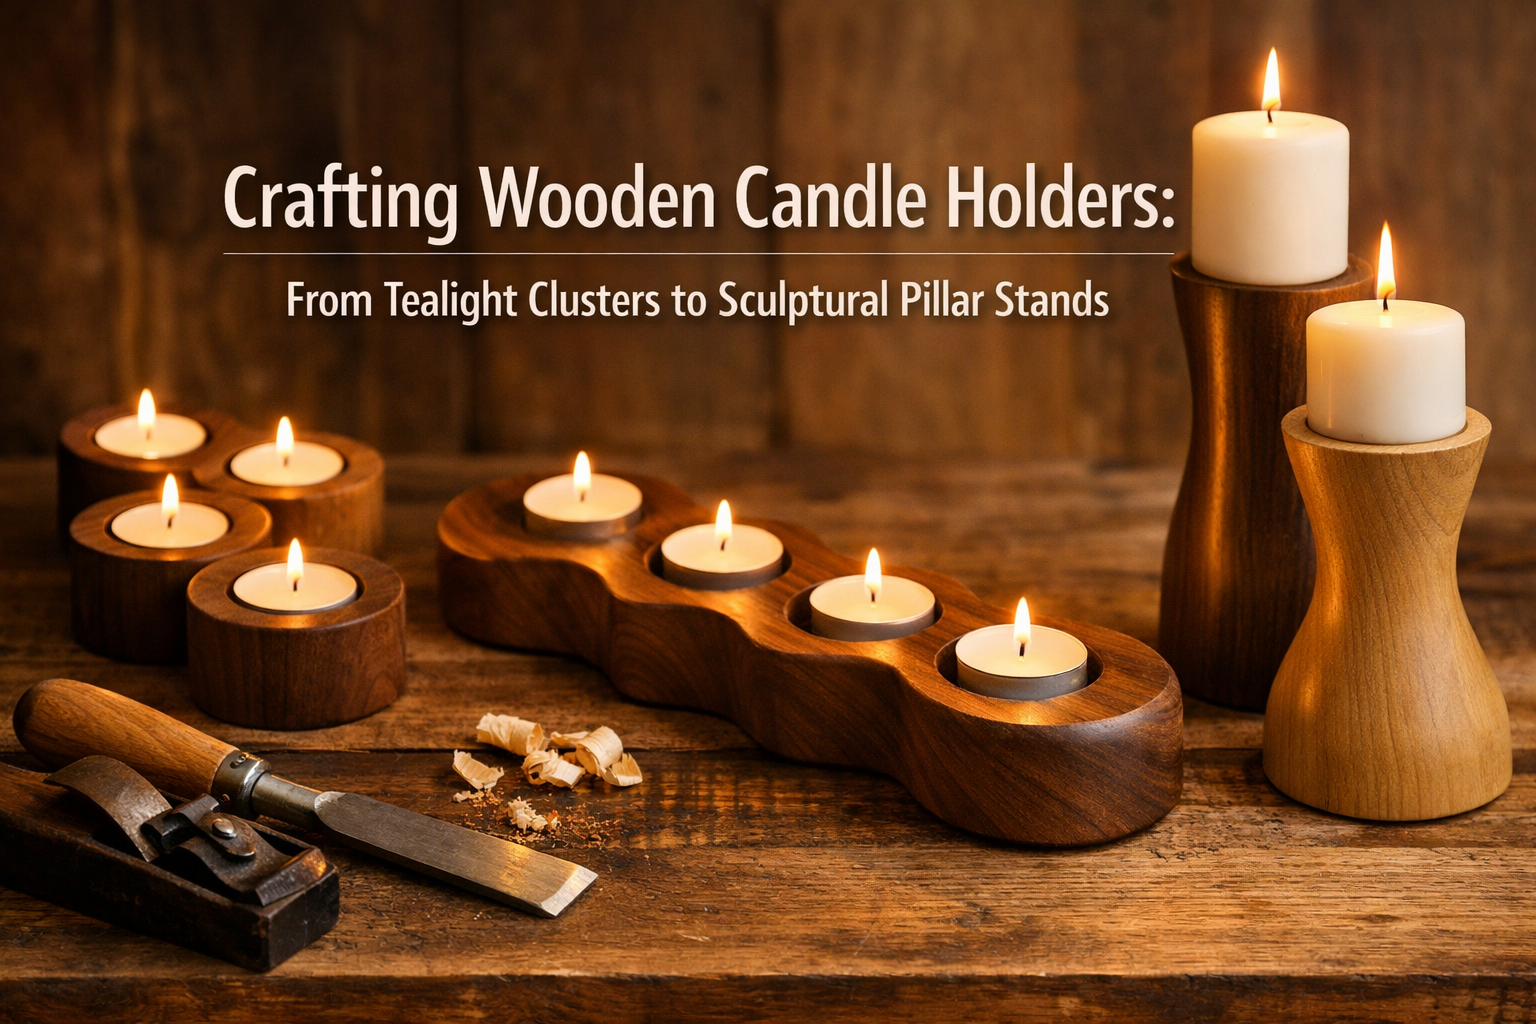

In an era where personalized home décor and handcrafted artistry are highly valued, the warmth and unique character of wooden candle holders stand out. Far beyond mere functional objects, these pieces serve as beacons of cozy minimalism, seamlessly blending utility with artistic expression. For woodworkers, both seasoned and novice, crafting wooden candle holders: from tealight clusters to sculptural pillar stands offers an immensely rewarding experience. This guide will delve into the exciting world of creating these ambient lighting pieces, exploring layered joinery for intricate designs and the elegant art of woodturning for sculptural forms, all while aligning with the aesthetic trends of 2026. Whether aiming to enhance a personal living space, create thoughtful gifts, or even develop a line of marketable woodworking projects, the techniques and insights shared here will illuminate the path to success. The beauty of these projects lies in their versatility and the opportunity to transform simple blocks of wood into captivating works of art that enhance any interior.
Key Takeaways
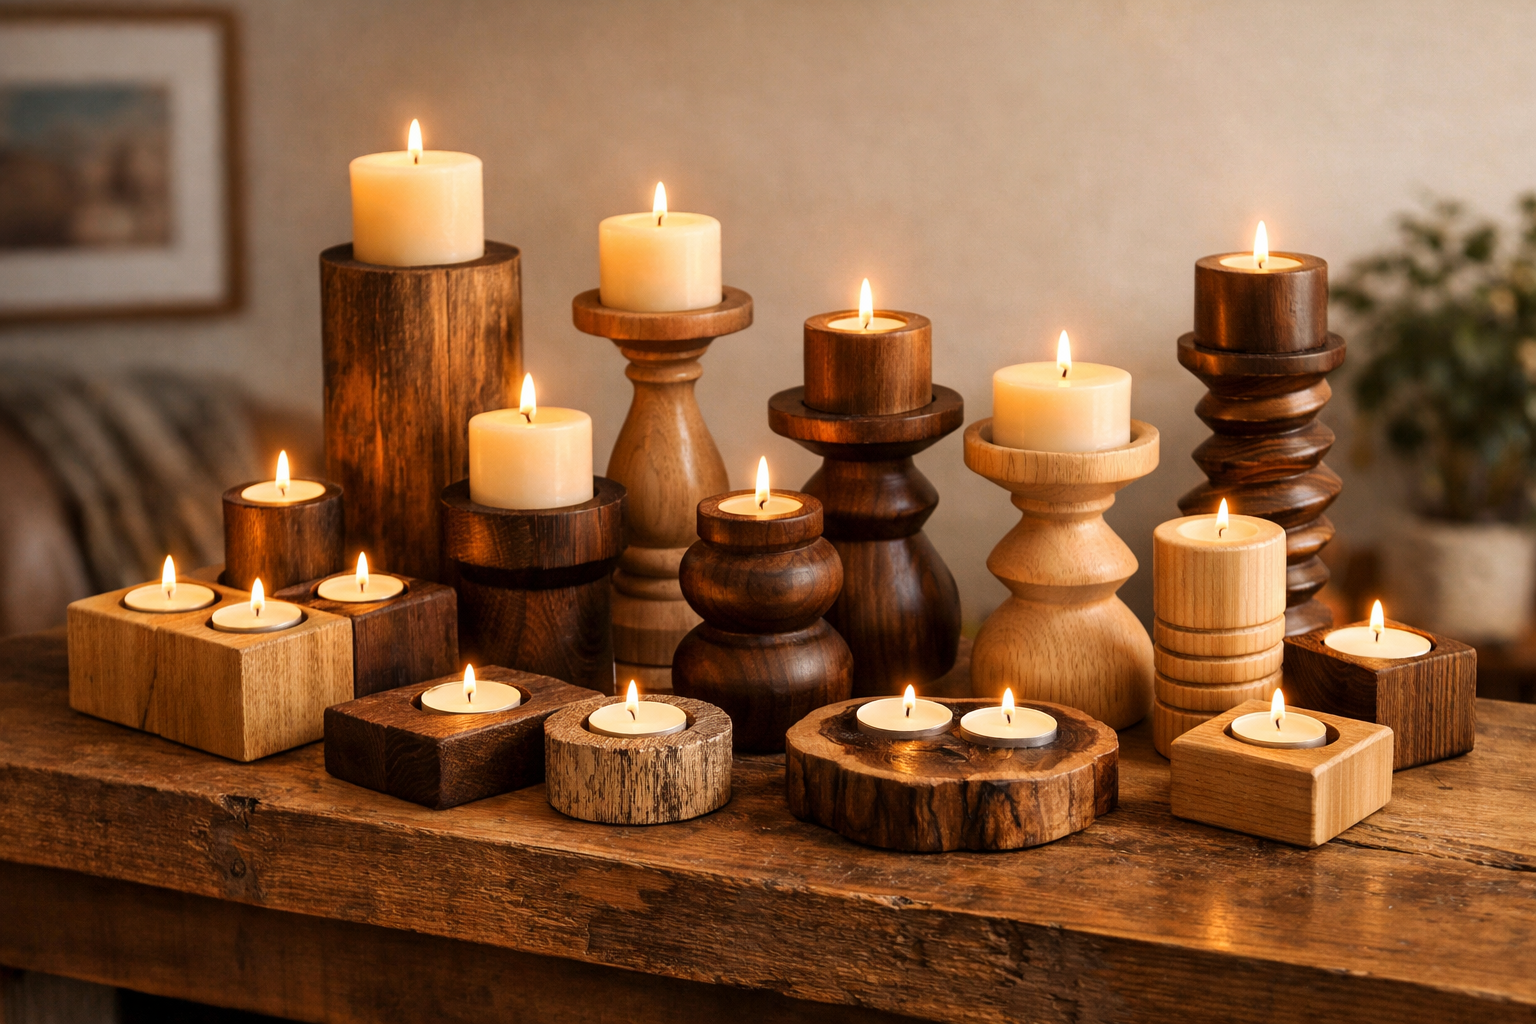
- Diverse Design Potential: Wooden candle holders can range from simple, minimalist tealight clusters crafted with basic joinery to complex, sculptural pillar stands utilizing advanced woodturning techniques.
- Material Selection Matters: The choice of wood (e.g., maple, walnut, oak, reclaimed lumber) significantly impacts the final aesthetic, durability, and workability of the candle holder.
- Essential Techniques: Mastering layered joinery for geometric designs and woodturning for symmetrical and organic shapes are crucial skills for creating varied styles.
- Safety First: Incorporating fire-safe measures, such as metal inserts for candles and appropriate finishes, is paramount for both beauty and functionality.
- Finishing Elevates: Proper sanding and finishing techniques (staining, oiling, waxing) enhance the wood’s natural beauty and provide protection, elevating the overall quality of the finished product.
The Foundation: Design Principles and Material Selection for Wooden Candle Holders
Creating a beautiful and functional wooden candle holder begins long before the first cut is made. It starts with thoughtful design and the careful selection of materials. In 2026, the trend leans towards pieces that embody “cozy minimalism,” emphasizing clean lines, natural textures, and a harmonious blend with existing décor. This section will explore fundamental design principles, essential material considerations, and crucial safety aspects when embarking on the journey of crafting wooden candle holders: from tealight clusters to sculptural pillar stands.

Understanding Design Aesthetics: Cozy Minimalism for 2026
Cozy minimalism combines the simplicity and functionality of minimalism with the warmth and inviting comfort of cozy aesthetics. For wooden candle holders, this translates into designs that are:
- Uncluttered: Clean forms, few extraneous details, letting the wood’s natural beauty shine.
- Textural: Emphasizing the grain, color, and tactile qualities of the wood.
- Functional: Designed primarily to hold candles safely, with stability and ease of use.
- Versatile: Able to complement a range of interior styles, from rustic to contemporary.
- Sustainable: Often incorporating reclaimed wood or responsibly sourced lumber.
Consider the intended placement of the candle holder. A minimalist tealight cluster might suit a coffee table or dining centerpiece, while a grand sculptural pillar stand could serve as a focal point on a fireplace mantel or an entryway console. Sketching ideas and creating mock-ups can help visualize the final piece and refine dimensions.
Wood Selection: Characteristics and Considerations
The type of wood chosen plays a pivotal role in the look, feel, and workability of your candle holder. Each species offers unique grain patterns, colors, and densities.
- Hardwoods:
- Maple: Known for its light color, fine grain, and excellent stability. It takes stain well but can also look stunning with a clear finish. Ideal for sleek, modern designs.
- Walnut: A rich, dark wood with a beautiful, often wavy grain. It’s strong, easy to work with, and produces an elegant finish. Perfect for sophisticated, high-end pieces.
- Oak: Available in red and white varieties, oak has a prominent grain pattern and is very durable. It lends itself well to rustic and traditional styles.
- Cherry: Features a warm, reddish-brown hue that deepens with age. It has a fine, straight grain and is a pleasure to work with, offering a classic aesthetic.
- Softwoods:
- Pine: Readily available and affordable, pine is lighter in color with noticeable knots. It’s easy to carve and shape, suitable for rustic or farmhouse-style holders. However, it can be softer and more prone to denting.
- Cedar: Offers a distinctive aroma and natural resistance to decay. Its reddish tones and unique grain are excellent for outdoor or aromatic indoor candle holders.
- Reclaimed Wood: Using reclaimed lumber adds character, history, and a sustainable element to your project. Barnwood, old pallet wood, or salvaged timber can create truly unique pieces with weathered patinas. For ideas on incorporating such materials, explore resources on sourcing and selecting reclaimed urban lumber.
Table 1: Common Wood Types for Candle Holders
| Wood Type | Key Characteristics | Best For | Pros | Cons |
|---|---|---|---|---|
| Maple | Light, fine grain, hard | Modern, sleek | Stable, smooth finish | Can be expensive |
| Walnut | Dark, rich grain, hard | Elegant, sophisticated | Beautiful, durable | Higher cost |
| Oak | Prominent grain, very hard | Rustic, traditional | Strong, readily available | Heavy, can be challenging to work |
| Cherry | Warm, reddish-brown, moderate grain | Classic, refined | Ages beautifully, works well | Moderate cost, can darken significantly |
| Pine | Light, knotty, soft | Rustic, budget-friendly | Inexpensive, easy to work | Prone to dents, less durable |
| Reclaimed | Unique patina, varied | Unique, sustainable | Character, eco-friendly | Sourcing difficulties, prep work |
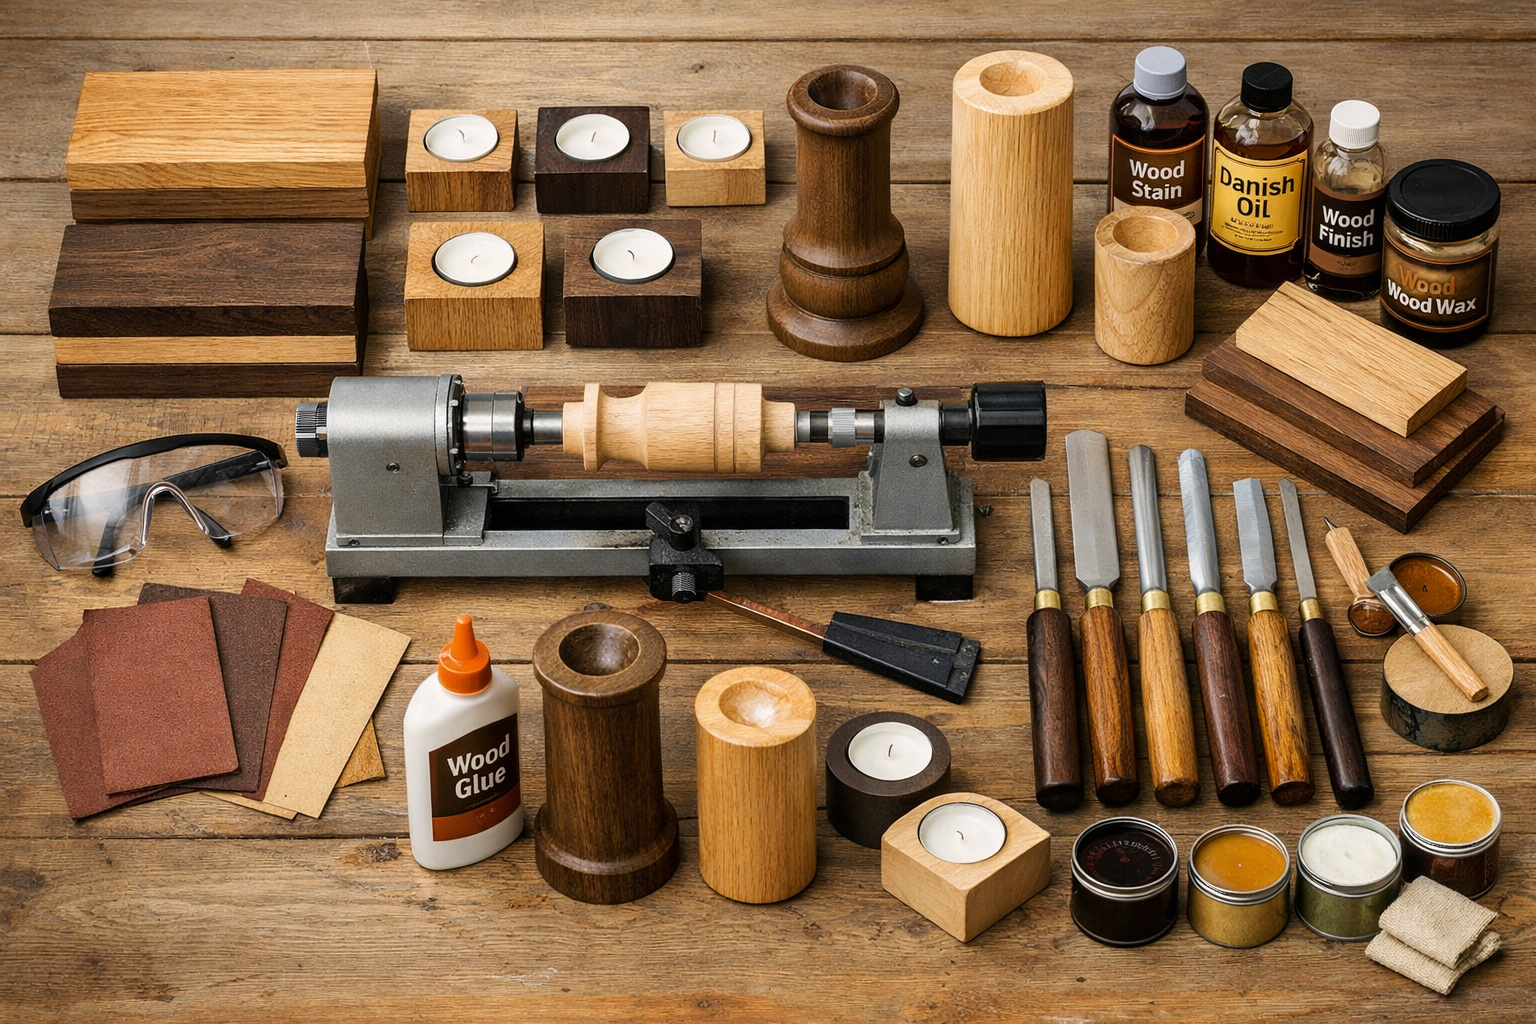
Tools and Safety Essentials
Regardless of the design complexity, a well-equipped and safe workspace is paramount.
Basic Hand Tools:
- Measuring tape, ruler, calipers
- Pencils for marking
- Hand saw (dovetail, coping saw)
- Chisels and mallets
- Block plane
- Sandpaper (various grits)
- Clamps
- Wood glue
- Drill and Forstner bits (for candle recesses)
Power Tools (Optional, but highly recommended for efficiency):
- Miter saw or table saw for accurate cuts
- Drill press for precise holes
- Router (for edge profiling, dadoes, or special recesses)
- Random orbital sander
- Woodturning lathe (for sculptural pillar stands)
Safety Gear:
- Eye protection: Always wear safety glasses or goggles.
- Hearing protection: Essential when using power tools.
- Dust mask/respirator: Protects against fine wood dust.
- Gloves: Can protect hands, but avoid loose gloves around rotating machinery.
- Push sticks and feather boards: For safe use of table saws and routers.
- First-aid kit: Keep one readily accessible.
Remember to familiarize yourself with all tools and their safety features before beginning any project. A tidy workspace free of clutter also significantly reduces the risk of accidents.
Incorporating Fire Safety Features
When crafting wooden candle holders, safety is not an option; it’s a necessity. Wood is a combustible material, so precautions must be taken to prevent fire hazards.
- Metal Inserts: The most effective way to ensure safety is to use metal candle cups or inserts. These create a barrier between the flame and the wood, catching dripping wax and preventing direct contact. They are widely available online and at craft stores. Design your candle recesses to snugly fit these inserts.
- Candle Stability: Ensure the candle holder design is stable and won’t easily tip over. Wider bases are generally safer.
- Recess Depth: For tealights, the recess should be deep enough to hold the metal cup securely. For pillar candles, the metal insert should extend beyond the top surface of the wood.
- Finish Considerations: While finishes generally make wood less flammable, no finish makes wood entirely fireproof. Choose durable, heat-resistant finishes, but always rely on physical barriers like metal inserts for safety.
By carefully considering design aesthetics, selecting the right wood, equipping your workshop safely, and prioritizing fire protection, you lay a solid foundation for successfully creating beautiful and safe wooden candle holders.
Techniques for Crafting Wooden Candle Holders: From Tealight Clusters to Sculptural Pillar Stands
Once the design and materials are determined, the true artistry of woodworking begins. This section explores two primary techniques crucial for crafting wooden candle holders: from tealight clusters to sculptural pillar stands: layered joinery for geometric forms and woodturning for elegant, symmetrical designs.
Layered Joinery: Creating Tealight Clusters and Geometric Forms
Layered joinery involves cutting multiple pieces of wood and assembling them to create intricate patterns, varying heights, or multi-candle designs. This technique is particularly well-suited for minimalist tealight clusters or modular pillar stands.

1. Design and Planning
Start with a clear sketch of your desired layered design.
- Dimensions: Determine the overall height, width, and depth.
- Number of Layers: Decide how many layers your design will have and the thickness of each.
- Candle Placement: Mark the exact positions for each candle recess. Consider spacing for aesthetic appeal and ease of lighting.
- Joinery Method: For simple layered designs, wood glue and clamps are often sufficient. For stronger bonds or decorative elements, consider small dowels, biscuits, or splines.
2. Cutting the Layers
- Precision is Key: Use a miter saw or table saw to cut your chosen wood into precise blocks or strips for each layer. Accuracy ensures tight-fitting joints and a professional appearance.
- Grain Direction: Pay attention to the wood grain. For stability and aesthetic flow, try to keep the grain running in the same direction across layers, especially if the pieces are thin.
- Sanding: Lightly sand each piece before assembly to ensure smooth surfaces and remove any saw marks. This is easier to do now than after assembly.
3. Drilling Candle Recesses
- Forstner Bits: These are ideal for drilling flat-bottomed holes for candle recesses. Select a bit that matches the diameter of your metal candle inserts.
- Drill Press: A drill press is highly recommended for accuracy and consistent depth. Clamp your wood securely to the drill press table.
- Depth Stop: Set the depth stop on your drill press to ensure all recesses are uniform and deep enough to accommodate the metal inserts while providing a secure fit.
- Safety Tip: When drilling, ensure the wood is firmly clamped. Start slowly, and clear chips frequently to prevent overheating the bit.
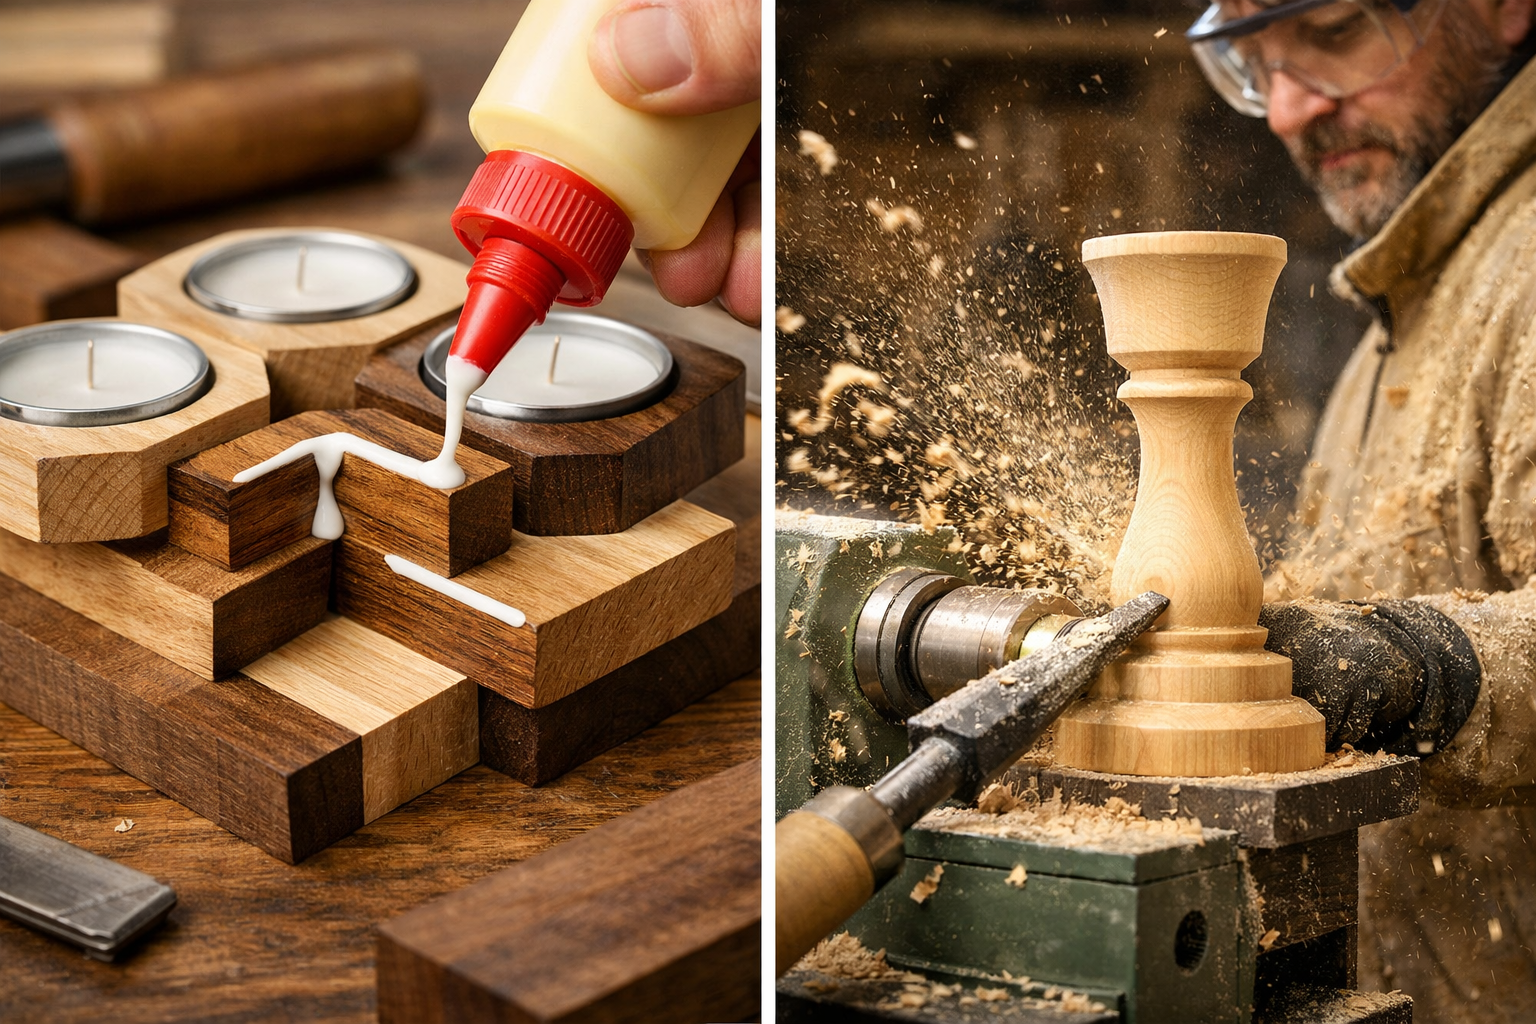
4. Assembly and Gluing
- Dry Fit: Always perform a dry fit before applying glue to ensure all pieces align correctly.
- Glue Application: Apply a thin, even layer of wood glue to the mating surfaces. Avoid excessive glue, which can squeeze out and create messy cleanup.
- Clamping: Use clamps to hold the layers tightly together while the glue dries. Ensure even pressure across all surfaces. Wipe away any glue squeeze-out with a damp cloth promptly.
- Drying Time: Allow ample time for the glue to cure according to the manufacturer’s instructions, typically 24 hours, before proceeding to the next steps.
5. Shaping and Refinement
Once the glue has dried, you can further refine your layered piece.
- Edge Treatments: Use a router with a decorative bit (e.g., chamfer, round-over, ogee) to soften edges or add visual interest.
- Sanding: Begin with a coarser grit (e.g., 100-120) to smooth any irregularities, then progressively move to finer grits (150, 180, 220, or even 320) for a silky smooth finish. For more on achieving different looks, consider exploring rustic wood finishing techniques.
Woodturning: Crafting Sculptural Pillar Stands
Woodturning transforms a block of wood into a symmetrical, often elegant, form using a lathe. This technique is perfect for creating flowing lines, intricate profiles, and unique sculptural pillar stands.
1. Lathe Setup and Wood Mounting
- Safety First: Ensure your lathe is stable, and all guards are in place. Wear eye protection, a dust mask, and avoid loose clothing or jewelry.
- Wood Selection: Choose a stable, dense wood free of major knots or cracks. Hardwoods like maple, walnut, or cherry are excellent choices for turning.
- Centering: Accurately find the center of both ends of your wood blank.
- Mounting: Securely mount the wood blank between the headstock (using a spur drive) and tailstock (with a live center). For faceplate turning (for bowls or wider forms), secure the wood to a faceplate with screws.
2. Roughing and Cylindering
- Roughing Gouge: Start with a roughing gouge to bring the square blank down to a cylindrical shape.
- Speed: Begin at a low RPM and gradually increase the speed as the blank becomes more balanced.
- Tool Rest: Position the tool rest close to the wood and slightly below the centerline. Keep your elbows tucked in and maintain a stable stance.
3. Shaping and Detailing
- Spindle Gouge: Use a spindle gouge to create curves, coves, and beads.
- Skew Chisel: For crisp lines, beads, and V-cuts, master the skew chisel. This tool requires practice and a light touch.
- Parting Tool: Use a parting tool to create shoulders, size down sections, or cut off the finished piece from the waste block.
- Scrapers: For smoothing surfaces or creating specific profiles, scrapers can be useful, especially for beginners.
- Design Iteration: Constantly evaluate your shape as you turn. Take breaks, step back, and look at the form from different angles.
4. Drilling the Candle Recess (On the Lathe)
- Chuck and Drill Bit: After turning the main shape, mount a drill chuck in the tailstock.
- Forstner Bit: Insert a Forstner bit of the appropriate diameter into the chuck.
- Drilling: Advance the tailstock slowly to drill the candle recess directly on the lathe, ensuring a perfectly centered and perpendicular hole.
- Depth Stop: If your tailstock doesn’t have a depth stop, mark the drill bit with tape to indicate the desired depth.
5. Sanding on the Lathe
- Gradual Grits: Begin sanding with a medium grit (e.g., 120-150) while the lathe is spinning at a lower speed. Progress through finer grits (180, 220, 320, 400) for a smooth finish.
- Even Pressure: Apply even, gentle pressure, moving the sandpaper across the rotating piece to avoid creating grooves or flat spots.
- Grain Eradication: To minimize visible sanding marks, occasionally stop the lathe and sand lengthwise by hand with the grain.
Finishing Touches: Enhancing and Protecting Your Craft
The finishing process is where your wooden candle holder truly comes to life. It protects the wood, enhances its natural beauty, and makes it ready for display.
1. Final Sanding and Dust Removal
- After all shaping and turning, perform a final hand-sanding with a very fine grit (e.g., 320 or 400).
- Thoroughly clean the piece to remove all dust. Use a tack cloth, compressed air, or a vacuum cleaner. Any remaining dust will be trapped under the finish.
2. Applying the Finish
The choice of finish depends on the desired look and level of protection.
- Oils (Tung Oil, Linseed Oil, Danish Oil):
- Pros: Penetrate the wood, enhance its natural grain, offer a natural feel. Easy to apply and repair.
- Cons: Less durable than film finishes, require reapplication over time. For more information, see our guide on can you stain over linseed oil.
- Application: Apply in thin coats, wipe off excess, and allow ample drying time between coats.
- Varnish/Polyurethane:
- Pros: Creates a durable, protective film. Available in various sheens (matte, satin, gloss). Good resistance to moisture and heat.
- Cons: Can obscure the natural feel of the wood. More challenging to repair if damaged.
- Application: Apply with a brush or spray, ensuring even coats. Lightly sand between coats for adhesion. For sprayable options, consult our guide on sprayable water-based polyurethane.
- Wax (Paste Wax, Beeswax):
- Pros: Provides a soft, lustrous sheen and a pleasant tactile feel. Easy to apply and buff.
- Cons: Offers minimal protection against moisture and abrasion. Often used over oil or shellac.
- Application: Apply a thin layer, let it haze, then buff to a shine. Learn more about wax over poly.
- Stain (Optional): If you desire to change or enhance the wood’s color, apply stain before the topcoat finish. Test stain on a scrap piece of the same wood first. For specific wood types, consider guides like dark stain on birch.
3. Inserting Metal Candle Cups
Once the finish has fully cured, carefully insert the metal candle cups into the prepared recesses. They should fit snugly. If a fit is too loose, a small amount of adhesive or felt pads can secure them.
By mastering these techniques, woodworkers can confidently create a diverse array of wooden candle holders, each reflecting a unique blend of craftsmanship and artistic vision.
Advanced Considerations and Creative Inspirations for 2026
As you gain proficiency in crafting wooden candle holders: from tealight clusters to sculptural pillar stands, you can explore advanced techniques and draw inspiration from current trends to elevate your creations. In 2026, the demand for unique, high-quality, and sustainably-minded home décor continues to grow, offering ample opportunities for innovative designs.
Incorporating Mixed Materials and Textures
While wood is the star, combining it with other materials can add intrigue and modern appeal to your candle holders.
- Metal Accents: Small brass, copper, or steel inlays can create striking contrasts against the wood grain. Metal strips can be inlaid into grooves, or small metal feet can be added to the base. This provides a contemporary edge, especially for minimalist designs.
- Resin Inlays: Clear or colored epoxy resin can be used to fill natural voids in wood (e.g., live edge pieces) or to create decorative patterns. Glow-in-the-dark pigments can add a whimsical touch.
- Concrete Bases: For a modern industrial-chic look, consider creating a wooden top piece that sits atop a simple concrete base. The juxtaposition of natural wood and raw concrete is very on-trend.
- Glass Elements: Integrating small panes of frosted or colored glass can create beautiful light diffusion, especially for tealight holders.
Pull Quote: “The synergy of contrasting materials, like warm walnut and cool brass, elevates a simple candle holder into a statement piece, embodying 2026’s sophisticated design ethos.”
Exploring Complex Joinery and Forms
Beyond basic layering, advanced joinery can transform functional pieces into works of art.
- Dovetail Joints: For square or rectangular pillar stands, exposed dovetail joints add a touch of traditional craftsmanship and incredible strength. These are particularly stunning when using contrasting wood species.
- Mitered with Splines: Mitered corners reinforced with contrasting wood splines offer a clean, contemporary look while providing superior strength compared to simple butt joints.
- Segmented Turning: For intricate sculptural forms on the lathe, segmented turning involves gluing together multiple small pieces of wood in various patterns before turning. This allows for complex geometric designs or color gradients within the turned piece. It’s a challenging but highly rewarding technique for experienced turners.
- Carving and Pyrography: For a more artisanal touch, consider hand-carving decorative elements into your candle holders or using pyrography (wood burning) to add intricate patterns or personalized messages. This can be especially effective on rustic designs or pieces made from reclaimed wood, creating unique textures that complement weathered wood finishing techniques.
Sustainable Practices and Ethical Sourcing
In 2026, conscious consumerism is a driving force. Integrating sustainable practices into your woodworking reflects this value.

- Reclaimed and Salvaged Wood: Prioritize using reclaimed barnwood, pallet wood, or salvaged urban lumber. Not only does this reduce waste, but it also imbues your pieces with unique character and history. Resources like building reclaimed wood mantels can offer insights into working with these materials.
- FSC Certified Lumber: If purchasing new wood, opt for FSC (Forest Stewardship Council) certified lumber, ensuring it comes from sustainably managed forests.
- Low-VOC Finishes: Choose finishes with low volatile organic compound (VOC) content to minimize environmental impact and improve air quality in your workshop and home.
- Waste Reduction: Optimize your cuts to minimize scrap wood. Small offcuts can often be used for other miniature projects or kindling.
Marketing Your Craft and Gifting Opportunities
Wooden candle holders are excellent items for both personal gifting and commercial endeavors.
- Market Appeal: Their versatility, aesthetic appeal, and functional nature make them popular choices for home décor. They are suitable for various occasions: housewarmings, weddings, birthdays, or holiday gifts.
- Online Presence: Showcase your work on platforms like Instagram, Etsy, or your own website (e.g., Wood Craft Wiz). High-quality photography that highlights the wood grain, craftsmanship, and ambient glow of the lit candles is essential.
- Storytelling: Share the story behind your pieces – the type of wood used, the inspiration for the design, or the specific techniques employed. Customers often connect with the narrative of a handcrafted item.
- Gifting Strategy: When gifting, consider personalizing the candle holder with an engraved message or selecting wood that holds special meaning. Package them beautifully to enhance the gifting experience. For similar gift-worthy woodworking projects, consider exploring woodworking projects that sell.
By embracing these advanced considerations and drawing inspiration from contemporary trends, woodworkers can create wooden candle holders that are not only functional and beautiful but also embody a deeper connection to craftsmanship, design, and sustainability in 2026. This journey from simple blocks of wood to ambient lighting sculptures is a testament to the enduring appeal and rewarding nature of woodworking.
Conclusion
The art of crafting wooden candle holders: from tealight clusters to sculptural pillar stands offers a rich tapestry of creative possibilities for woodworkers of all skill levels. From the initial spark of an idea to the final polished product, each step—design, material selection, precise cutting, intricate joinery, the dance of the lathe, and the careful application of finishes—contributes to a unique piece that radiates warmth and character. In 2026, as the appreciation for handmade items and the aesthetic of cozy minimalism continue to flourish, these wooden creations serve as more than just functional objects; they are expressions of artistry, thoughtful gifts, and sustainable additions to any living space.
This comprehensive guide has illuminated the journey, from foundational design principles and the critical importance of wood selection to mastering layered joinery for geometric precision and the sculptural elegance of woodturning. We’ve emphasized the non-negotiable aspect of fire safety, integrating metal inserts to ensure these beautiful pieces are as secure as they are stunning. Furthermore, exploring advanced techniques like mixed materials, complex joinery, and sustainable practices offers avenues for continuous growth and innovation.
Ultimately, crafting wooden candle holders is a rewarding endeavor that connects the artisan with the natural beauty of wood and the timeless allure of candlelight. It is a process that refines skill, inspires creativity, and results in tangible pieces of art that enrich homes and hearts.
Actionable Next Steps:
- Start Small: Begin with a simple tealight cluster using readily available wood to practice basic cutting, drilling, and gluing techniques.
- Invest in Safety: Prioritize acquiring appropriate safety gear and metal candle inserts before starting any project.
- Experiment with Wood: Try different wood species to understand their unique working properties and aesthetic outcomes.
- Practice Techniques: Dedicate time to practicing specific skills like precise cuts on a miter saw or basic turning forms on a lathe.
- Refine Your Finish: Experiment with various finishes (oils, waxes, polyurethanes) on scrap pieces to find your preferred look and level of protection.
- Seek Inspiration: Continuously look for design inspiration in nature, architectural elements, or contemporary home décor trends.
- Share Your Work: Show off your creations! The feedback and encouragement from others can be incredibly motivating.
References
Hoadley, R. B. (2000). Understanding Wood: A Craftsman’s Guide to Wood Technology. Taunton Press. Jackson, A. (2009). The Wood Handbook: Wood as an Engineering Material. USDA Forest Service. Krenov, J. (1981). The Impractical Cabinetmaker. Van Nostrand Reinhold.
