
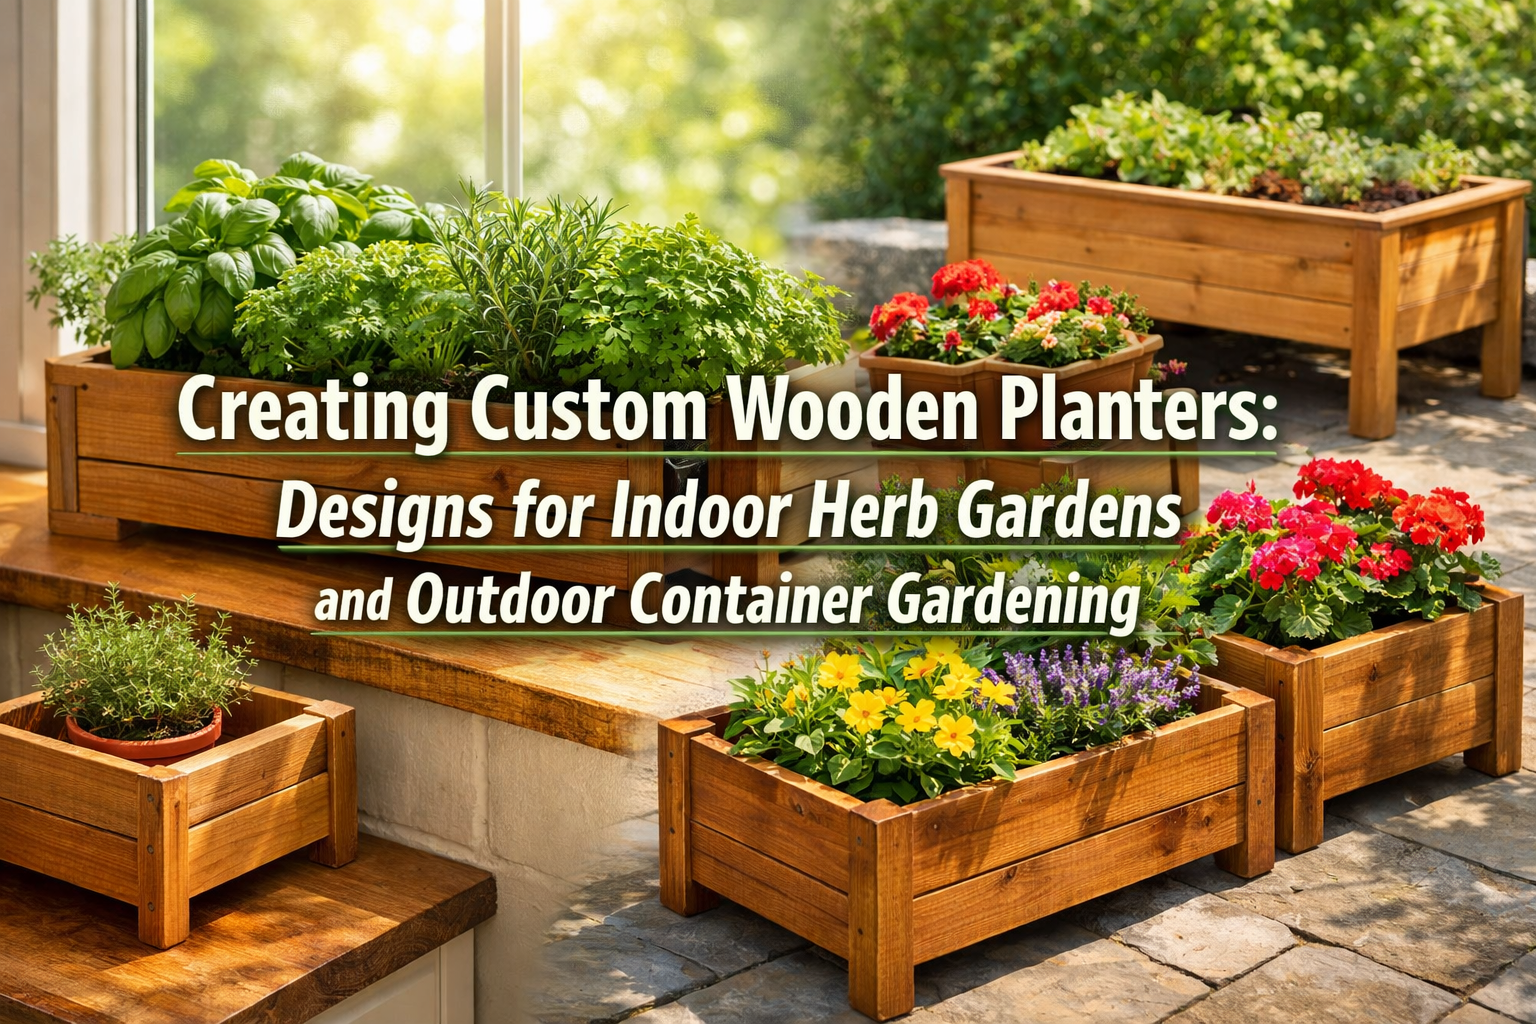

Imagine fresh basil just steps from your kitchen or vibrant petunias gracing your patio in a planter crafted by your own hands. Creating custom wooden planters offers a unique blend of functionality and aesthetic appeal, transforming any space into a thriving green oasis. From small, self-watering indoor herb boxes to grand outdoor container gardens, the possibilities are as limitless as your imagination. This comprehensive guide will walk you through the journey of designing and building unique wooden planters, focusing on crucial aspects like wood selection, joinery for lasting durability, and weather-resistant finishes to ensure your creations stand the test of time.
Key Takeaways
- Tailored Solutions: Custom wooden planters allow for precise design to fit specific spaces and plant needs, from indoor herb gardens to large outdoor displays.
- Wood Choice Matters: Selecting the right wood (e.g., cedar, redwood, pine) is crucial for durability, aesthetics, and resistance to moisture and pests.
- Durable Joinery: Employing strong woodworking joints ensures structural integrity and longevity, especially for outdoor and larger planters.
- Essential Drainage & Weatherproofing: Proper drainage is non-negotiable for plant health, and weather-resistant finishes are vital for outdoor planter longevity.
- Personalization & Sustainability: Wooden planters offer endless opportunities for personalization and can be a sustainable choice when using reclaimed or responsibly sourced timber.
Designing Your Wooden Planter: Form, Function, and Feasibility
Before you pick up a single tool, thoughtful design is paramount. The initial planning phase for creating custom wooden planters lays the foundation for a successful and enduring project. This involves considering the planter’s intended use, its location, the types of plants it will house, and your woodworking skill level.

Defining Purpose: Indoor Herb Gardens vs. Outdoor Container Gardening
The first step in design is clearly defining the planter’s purpose.
- Indoor Herb Gardens: These typically require smaller, more compact designs. Factors like available light, counter space, and the need for self-watering systems or integrated grow lights become critical. Consider planters with compartments for different herbs or tiered designs to maximize vertical space. A popular choice is a window box planter that can sit on a sill or be mounted.
- Outdoor Container Gardening: These planters can range from medium-sized patio accents to large raised garden beds. Here, considerations shift to overall volume, weight (especially when filled with soil), mobility (if on casters), and robust construction to withstand outdoor elements. Think about the aesthetic appeal in a garden setting, how it complements existing landscaping, and the scale required for larger plants like small shrubs, vegetables, or cascading flowers.
Wood Selection: The Foundation of Durability and Aesthetics
The type of wood you choose will significantly impact the planter’s longevity, appearance, and ease of construction.
- Naturally Rot-Resistant Woods:
- Cedar: Highly popular for its natural resistance to rot, insects, and moisture. It has a beautiful grain, is lightweight, and works easily. Cedar is an excellent choice for both indoor and outdoor applications, offering a pleasant aroma.
- Redwood: Similar to cedar in its rot and insect resistance, redwood is exceptionally durable and stable. It’s often more expensive but offers a rich, appealing color that ages gracefully. Ideal for long-lasting outdoor projects.
- Cypress: Another excellent choice for outdoor use, cypress is durable and stable, with good resistance to decay. It’s often more affordable than redwood.
- Other Suitable Woods (with proper treatment):
- Pine/Fir: More affordable and readily available. However, these woods are less resistant to decay and insect attack and must be treated with a non-toxic preservative or painted/sealed to ensure longevity, especially for outdoor use. When using for edible plants, ensure any treatment is food-safe.
- Hardwoods (Oak, Maple): While very durable, hardwoods are denser, heavier, and generally more expensive. They can be beautiful but are often overkill for simple planters and can be more challenging to work with. If using, ensure they are also appropriately sealed.
Sizing and Proportions: Matching Plants to Planters
Proper sizing is crucial for plant health.
| Plant Type | Minimum Planter Depth | Minimum Planter Width/Diameter | Considerations |
|---|---|---|---|
| Small Herbs | 6-8 inches | 6-8 inches | Space for root growth, quick drainage |
| Medium Herbs/Flowers | 8-12 inches | 10-14 inches | Allows for more vigorous growth |
| Small Vegetables | 12-18 inches | 12-24 inches | Deeper roots, nutrient requirements |
| Shrubs/Large Plants | 18+ inches | 18+ inches | Significant root mass, stability |
Always consider the mature size of the plant, not just its initial size. Overcrowding can stunt growth and lead to unhealthy plants.
Essential Design Elements: Drainage, Stability, and Aesthetics
- Drainage: Absolutely critical! Without adequate drainage, plant roots will rot.
- Drainage Holes: Drill multiple 1/2-inch to 1-inch holes in the bottom. For larger planters, consider adding a layer of gravel or broken pottery before soil, though this can add weight.
- Raised Bottom: Some designs incorporate a false bottom or feet to lift the planter off the ground, ensuring airflow beneath and preventing waterlogging.
- Stability: Ensure your design is sturdy enough to hold the weight of wet soil and plants without tipping. Tapered designs or wide bases offer better stability. For very large planters, internal bracing might be necessary.
- Aesthetics: Consider the overall style.
- Modern: Clean lines, geometric shapes, minimalist finishes.
- Rustic/Farmhouse: Distressed wood, natural finishes, simple box designs.
- Traditional: Raised panels, decorative trim, classic shapes.
“A well-designed planter isn’t just a vessel; it’s an integrated piece of garden architecture that enhances both plant life and living space.”
Joinery Methods for Durability
The type of joinery used will determine the planter’s strength and lifespan. For detailed guides on woodworking joints, consider exploring resources on hand tool joinery for visible wood joints.
- Butt Joints with Reinforcement: The simplest method, where two pieces meet end-to-end. For planters, these must be reinforced with screws and waterproof glue, or ideally, corner blocks or dadoes for added strength.
- Rabbet Joints: A groove cut along the edge of one board to accept the end of another. Provides more surface area for glue than a simple butt joint.
- Dado Joints: Similar to rabbets, but cut across the grain. Useful for supporting shelves or the bottom of a planter.
- Box Joints/Finger Joints: Excellent for strength and aesthetics, particularly for square or rectangular planters. They involve interlocking “fingers” that provide significant glue surface.
- Dovetail Joints: While more complex, dovetails offer superior strength and are highly decorative. Perfect for heirloom-quality planters. For advanced techniques, see our guide on mastering dovetail joinery for drawers.
Always use exterior-grade, waterproof wood glue for all joints, especially for outdoor planters.
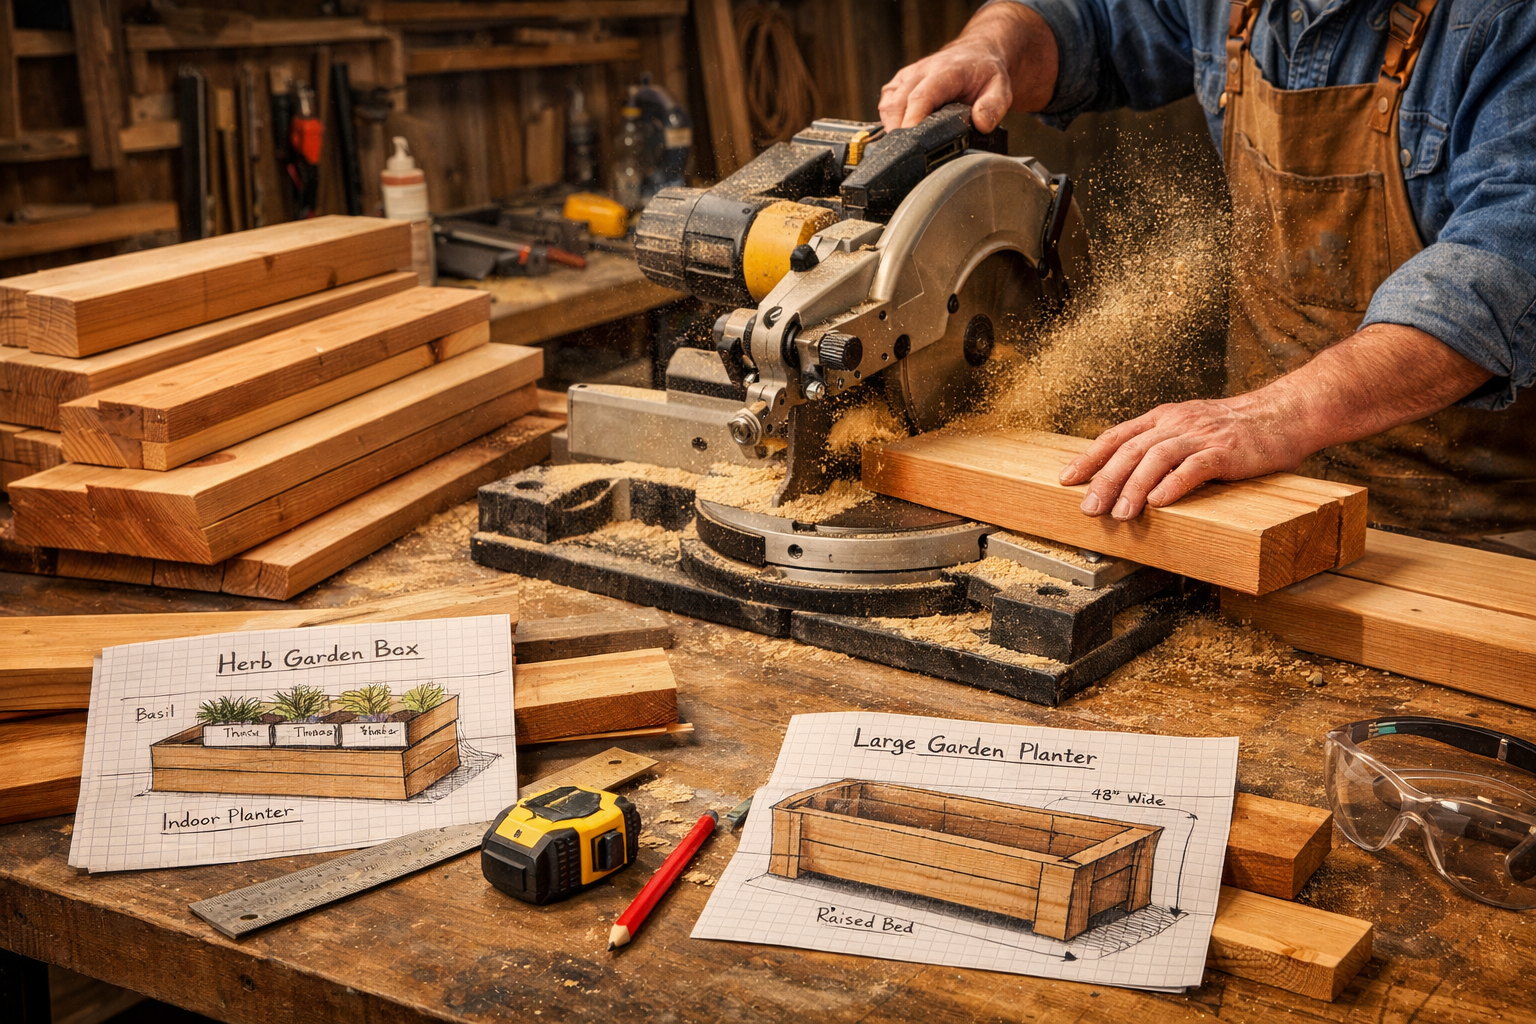
Building Your Custom Wooden Planter: Step-by-Step Construction
Once your design is finalized and materials are gathered, the construction phase begins. Precision and careful execution are key to a beautiful and durable planter.
Tools and Materials Checklist
Essential Tools:
- Measuring tape & pencil
- Saw (circular saw, miter saw, or hand saw)
- Drill/driver with drill bits and countersink bit
- Clamps
- Sanding blocks or orbital sander
- Safety glasses & ear protection
Optional/Advanced Tools:
- Router (for dados, rabbets, or decorative edges)
- Table saw (for precise rips and crosscuts)
- Block plane (for fine-tuning joints)
Materials:
- Selected wood (e.g., cedar planks, redwood, treated pine)
- Exterior-grade wood glue (e.g., Titebond III)
- Stainless steel or exterior-grade screws (e.g., deck screws)
- Wood filler (optional, for minor imperfections)
- Sandpaper (various grits: 80, 120, 220)
- Finishing product (e.g., exterior stain, sealant, paint)
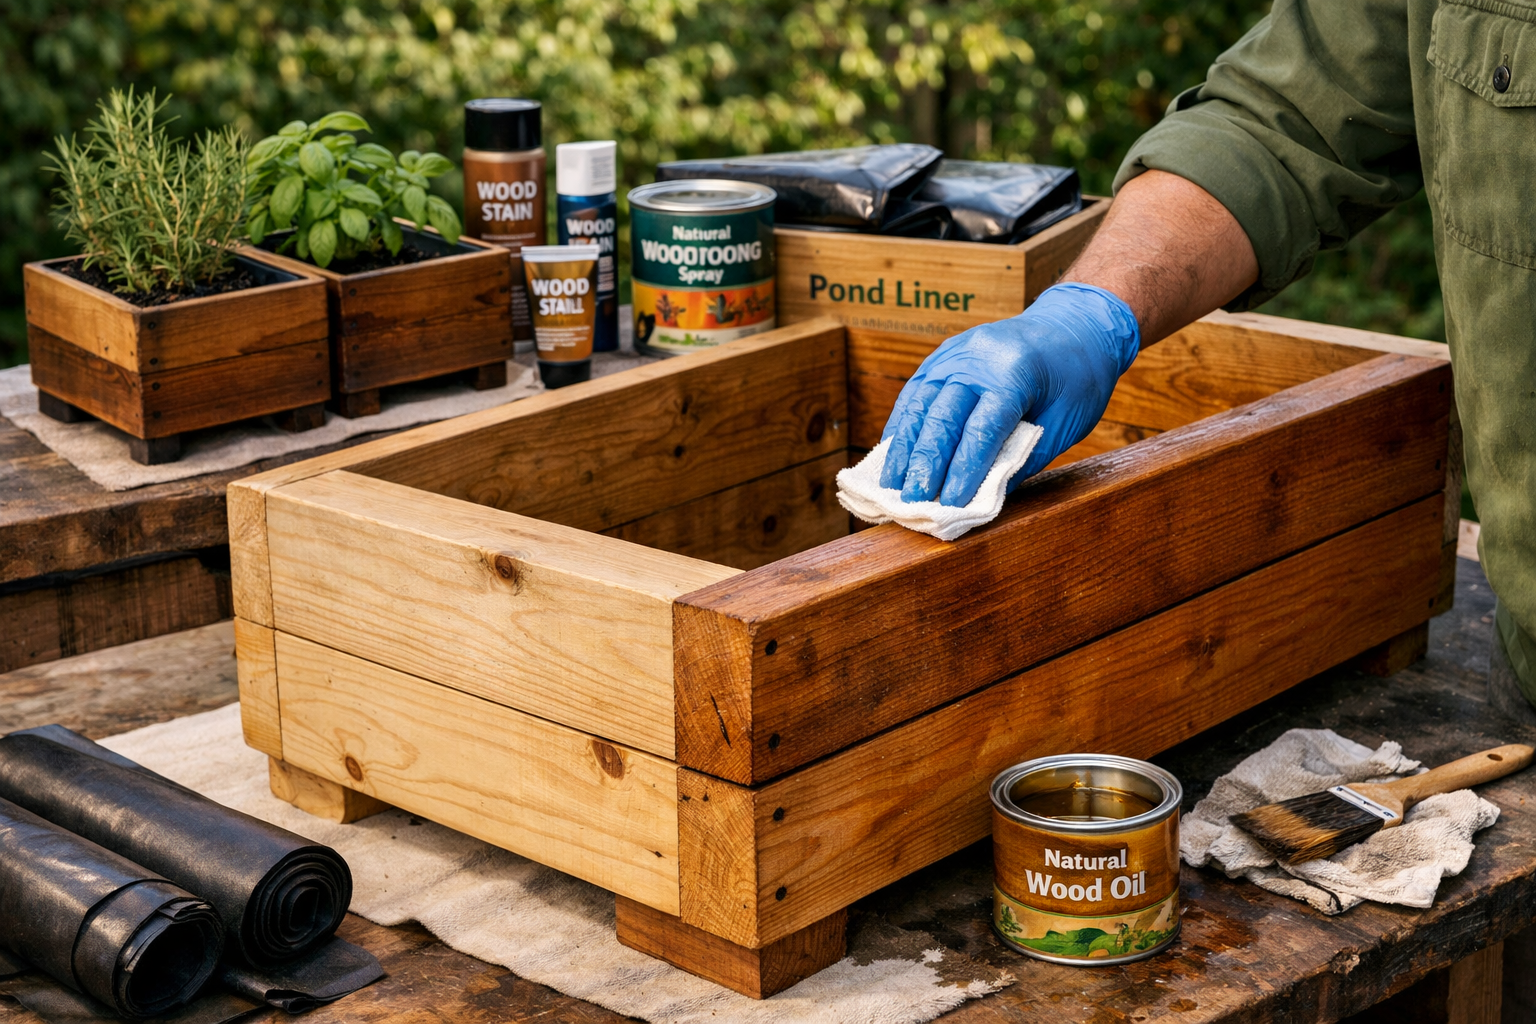
- Waterproof liner (optional, but highly recommended for prolonging wood life)
Cutting and Assembling the Sides
- Measure and Mark: Carefully measure all components according to your design plans. Double-check all measurements before cutting.
- Precise Cuts: Use your saw to cut the wood pieces. For crisp, square cuts, a miter saw or table saw is ideal. If using a hand saw, ensure your cuts are straight.
- Dry Fit: Before applying glue or screws, dry fit all pieces to ensure they align perfectly. Make any necessary adjustments now.
- Assemble Sides: Apply a generous but even layer of waterproof wood glue to the mating surfaces of your joints. Clamp the pieces together to hold them while you drive screws. Pre-drill pilot holes to prevent splitting, especially near the ends of boards. Use a countersink bit so screw heads sit flush or slightly below the surface.
- Let Glue Cure: Allow the glue to cure fully as per the manufacturer’s instructions before moving on to the next step. This is crucial for joint strength.
Attaching the Bottom and Adding Drainage
- Bottom Panel Preparation: Cut the bottom panel to fit precisely within the assembled sides.
- Drainage Holes: Drill several 1/2-inch to 1-inch drainage holes in the bottom panel. For larger planters, more holes are better.
- Attach Bottom: Apply glue to the edges where the bottom panel meets the sides. Position the bottom panel and secure it with screws, again pre-drilling pilot holes. Ensure the bottom is flush and secure. For very heavy-duty planters, dadoes can be routed into the side panels to accept the bottom panel, providing superior support.
Adding Legs or Feet
- Elevate for Longevity: Adding legs or feet is highly recommended, especially for outdoor planters. This elevates the planter off the ground, preventing the bottom from sitting in standing water and improving airflow, which significantly reduces the risk of rot.
- Simple Blocks: Cut small blocks of the same wood type and attach them to the bottom corners.
- Decorative Feet: Tapered or carved feet can add a touch of elegance.
- Casters: For large outdoor planters that you might want to move, attach heavy-duty locking casters to the bottom.
Optional: Integrated Features
- Self-Watering Reservoir: For indoor herb gardens, consider incorporating a false bottom with a water reservoir below and a wicking system to draw water up to the soil.
- Trellis or Support: For climbing plants, integrate a small trellis into the back of the planter.
- Lining: While not always required, adding a breathable landscape fabric or plastic liner (with drainage holes poked in it) can create a barrier between the soil and the wood, further extending the planter’s life. This is particularly useful for less rot-resistant woods. Our guide on crafting custom wooden planters with drainage solutions and weatherproofing offers more detailed insights into these techniques.
Finishing Your Wooden Planter: Protection and Personalization
The final steps involve preparing the wood surface and applying a finish that protects the planter and enhances its appearance. This is where your custom wooden planter truly comes to life.

Sanding for a Smooth Finish
- Rough Sanding: Start with 80 or 100-grit sandpaper to remove any saw marks, rough edges, and glue squeeze-out.
- Medium Sanding: Move to 120 or 150-grit to refine the surface and remove scratches from the coarser grit.
- Fine Sanding: Finish with 220-grit sandpaper for a smooth, ready-to-finish surface. For indoor planters, you might go even finer.
- Clean Dust: Thoroughly wipe down the planter with a tack cloth or damp rag to remove all sanding dust before applying any finish.
Weatherproofing and Sealing for Longevity
For outdoor planters, weatherproofing is non-negotiable. Even naturally rot-resistant woods benefit from protection against UV rays, moisture, and temperature fluctuations.

- Exterior Stains: These penetrate the wood, providing color and UV protection. Many also contain water repellents. Choose a stain suitable for outdoor use.
- Exterior Sealants/Varnishes: These form a protective film on the surface, offering excellent water and UV resistance. Look for marine-grade varnishes or exterior-grade polyurethanes for maximum durability.
- Penetrating Oils: Oils like tung oil or linseed oil (boiled) soak into the wood, enhancing its natural beauty and offering some water resistance. They require more frequent reapplication but are excellent for maintaining a natural look.
- Paint: Exterior paint provides a robust protective layer and allows for complete customization of color. Choose a primer and exterior-grade acrylic latex paint.
Important Considerations:
- Food Safety: If your planter will house edible plants, ensure any stains, sealants, or paints used are labeled as food-safe or non-toxic. Natural oils or leaving cedar/redwood unfinished are often preferred for edible gardens.
- Interior Lining: While the exterior is protected, the interior of the planter will be constantly exposed to wet soil. Lining the planter with heavy-duty plastic sheeting or landscape fabric (ensuring drainage holes are also poked through the liner) can significantly extend the life of the wood, especially for non-rot-resistant varieties.
Personalization and Decorative Touches
This is your chance to make the planter truly unique.
- Stenciling or Painting: Add patterns, numbers, or names to your planter.
- Carving or Engraving: For a rustic touch, carve initials or simple designs. For advanced techniques, explore guides on engraved wooden coasters with custom designs—the principles can be adapted.
- Hardware: Decorative handles, corner brackets, or unique fasteners can add character.
- Color Palette: Match the finish and color to your existing decor or garden theme. A vibrant color can make a statement, while a natural stain can blend seamlessly.
By following these steps, you can create a custom wooden planter that is not only robust and functional but also a beautiful addition to your indoor or outdoor space. The satisfaction of nurturing plants in a container you built yourself is immense, and with proper care, your wooden planter will provide joy for many seasons to come.
Conclusion
Creating custom wooden planters, whether for an intimate indoor herb garden or an expansive outdoor container display, is a rewarding woodworking endeavor. It allows for unparalleled customization, enabling you to tailor every aspect—from wood species and dimensions to specific design features—to perfectly suit your plants and aesthetic preferences. By meticulously planning your design, selecting appropriate materials like rot-resistant cedar or redwood, employing robust joinery techniques, and applying thorough weatherproofing, you can ensure your handcrafted planters are not only beautiful but also incredibly durable.
The journey of Creating Custom Wooden Planters: Designs for Indoor Herb Gardens and Outdoor Container Gardening empowers you to transform ordinary spaces into thriving green havens. Embrace the craftsmanship, enjoy the process, and take pride in cultivating life in a planter truly your own.
Actionable Next Steps:
- Sketch Your Design: Start by drawing out your ideal planter, considering its location, plant types, and desired dimensions.
- Research Wood & Joinery: Investigate local wood suppliers and decide on a wood type. Explore different joinery methods to find one that matches your skill level and durability requirements.
- Gather Tools & Materials: Compile a comprehensive list of everything you’ll need, from lumber and screws to finishes and safety gear.
- Start Small: If new to woodworking, consider beginning with a smaller indoor herb planter to hone your skills before tackling a larger outdoor project.
- Prioritize Protection: Always remember that proper drainage and weather-resistant finishes are non-negotiable for the longevity and health of your planter and its inhabitants.
References
- Fine Woodworking. (2024). The Woodworking Joints Handbook. The Taunton Press.
- The Old Farmer’s Almanac. (2025). Container Gardening Basics. Yankee Publishing Inc.
- University of California Agriculture and Natural Resources. (2023). Selecting Wood for Outdoor Projects. UC ANR Publication.
