

Creating Custom Wooden Planters for Indoor Vertical Gardens: Space-Saving Designs and Wood Selection
In an increasingly urbanized world, where living spaces often come at a premium, the dream of a lush indoor garden might seem out of reach. However, with thoughtful design and a touch of DIY spirit, anyone can transform a compact area into a vibrant, oxygen-rich sanctuary. The solution lies in vertical gardening, and more specifically, in creating custom wooden planters for indoor vertical gardens: space-saving designs and wood selection. This article will guide you through the process of designing and building stylish, durable, and space-efficient wooden planters, emphasizing moisture-resistant wood choices, modular designs, and easy assembly for urban dwellers and small homes in 2026.
Key Takeaways
- Maximize Space: Vertical planters efficiently utilize limited indoor areas, turning walls into productive green spaces.
- Wood Selection is Crucial: Choose moisture-resistant and rot-resistant wood like cedar, redwood, or cypress for longevity and plant health.
- Modular Design for Flexibility: Employ modular and scalable designs that can adapt to various spaces and plant needs.
- Proper Drainage and Waterproofing: Ensure adequate drainage and internal waterproofing to protect wood and prevent water damage.
- Personalization and Aesthetics: Custom wooden planters offer unique aesthetic appeal, allowing for integration with existing decor.
Understanding the Benefits of Vertical Gardens and Custom Wooden Planters
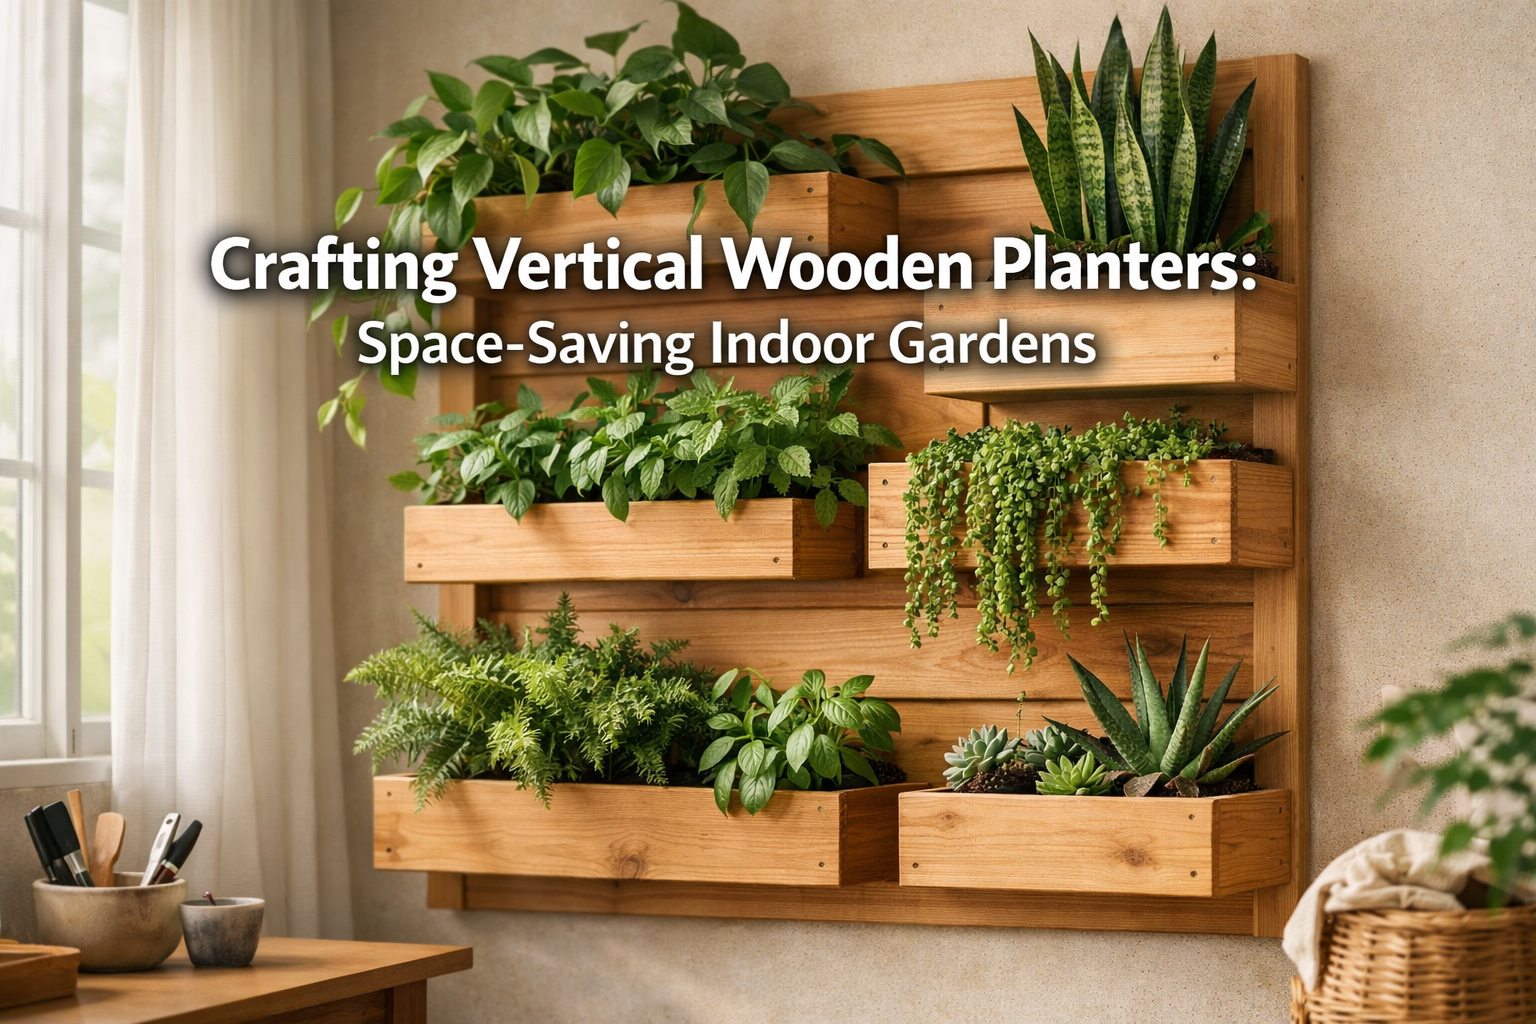
Indoor vertical gardens are not just a passing trend; they are a practical and aesthetically pleasing solution for bringing nature indoors. They significantly reduce the footprint required for plants, making them ideal for apartments, small homes, or even office spaces. When you choose to build custom wooden planters for indoor vertical gardens, you gain unparalleled control over design, dimensions, and material quality, ensuring a perfect fit for your space and a lasting structure for your plants.

The advantages extend beyond mere space-saving. Wooden planters offer a natural warmth and aesthetic appeal that plastic or metal alternatives often lack. They integrate seamlessly with various interior design styles, from rustic farmhouse to modern minimalist. Furthermore, crafting your own planters provides a rewarding woodworking project that can be tailored to the specific needs of your chosen plants, whether they are herbs, succulents, or decorative foliage.
“Custom wooden planters offer a blend of functionality, natural beauty, and the satisfaction of craftsmanship, transforming ordinary walls into living, breathing works of art.”
Choosing the Right Wood for Moisture Resistance and Durability
The success and longevity of your indoor vertical garden planters heavily depend on the wood you select. Since these planters will be exposed to consistent moisture, choosing wood with natural resistance to rot and decay is paramount. Investing in the right material at the outset will prevent premature deterioration, mold growth, and the need for frequent replacements.
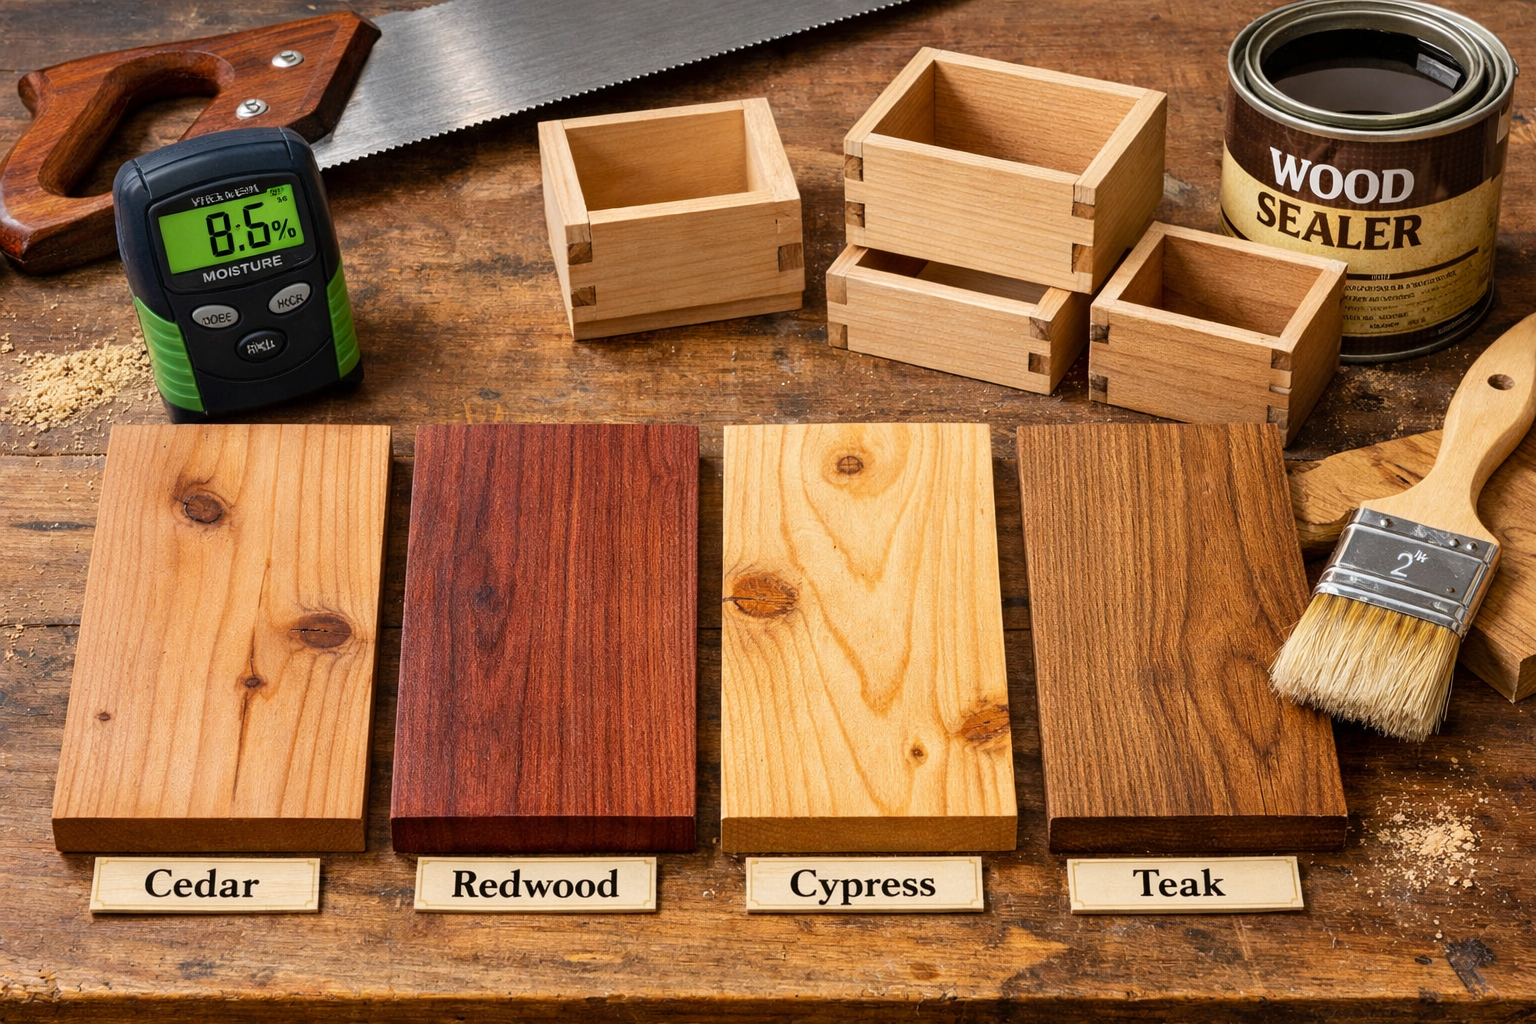
Top Wood Species for Indoor Vertical Planters:
- Cedar (Western Red Cedar, Aromatic Cedar):
- Pros: Naturally resistant to rot, insects, and moisture. Lightweight, easy to work with, and possesses a pleasant aroma. Ages beautifully.
- Cons: Can be more expensive than some other options.
- Redwood:
- Pros: Similar to cedar in its natural resistance to decay and insects. Known for its rich color and stability.
- Cons: Often pricier and might be harder to source depending on your region.
- Cypress:
- Pros: Features natural oils that make it highly water and insect resistant. Durable and relatively stable.
- Cons: Can be a bit harder to find and more expensive than common softwoods.
- Teak:
- Pros: The gold standard for outdoor and marine applications due to its extreme resistance to water, rot, and pests. Unmatched durability.
- Cons: Very expensive, typically reserved for high-end projects. Its density can make it harder to work with hand tools.
- Treated Lumber (Non-toxic options):
- Pros: Readily available and affordable. Some modern pressure-treated woods use ACQ (Alkaline Copper Quaternary) or MCA (Micronized Copper Azole), which are considered safer for gardening than older CCA (Chromated Copper Arsenate) treatments.
- Cons: Always verify that the treatment is safe for plants, especially edibles. Many still prefer natural resistance for indoor use.

Considerations Beyond Wood Type:
- Moisture Content: Always ensure your chosen wood has a low moisture content before building. High moisture can lead to warping, cracking, and poor adhesion of finishes. A moisture meter is a valuable tool for this.
- Sustainability: Consider sourcing sustainably harvested wood or reclaimed wood for an eco-friendly approach. Reclaimed wood, especially from old barns or fences, can offer unique character, but ensure it’s free from harmful chemicals or excessive rot. Learn more about reclaimed wood restoration.
- Finishings: Even with naturally resistant wood, applying a non-toxic, waterproof sealant or liner is essential. Consider food-safe mineral oil for interior surfaces if growing edibles, or a marine-grade varnish for maximum water resistance on exterior surfaces. For more on protecting your creations, see Crafting Custom Wooden Planters: Indoor and Outdoor Designs with Drainage Solutions and Weatherproofing.
Space-Saving Designs and Construction Techniques for Custom Wooden Planters
The magic of indoor vertical gardens lies in their ability to maximize space. When it comes to creating custom wooden planters for indoor vertical gardens: space-saving designs and wood selection, innovative designs are key. Modular, stackable, and wall-mounted solutions are particularly effective for urban environments.
Popular Space-Saving Designs:
- Stackable Planter Boxes:
- Concept: Individual wooden boxes are designed to interlock or stack securely on top of each other, forming a vertical column.
- Benefits: Highly customizable height, easy to move individual units, excellent for creating varied plant displays.
- Construction: Each box typically has a recessed bottom or notched sides that fit into the top of the box below. Ensure stable joinery.
- Ladder-Style Planters:
- Concept: A freestanding or wall-leaning structure resembling a ladder, with progressively shallower shelves or planter boxes at each “rung.”
- Benefits: Offers good visual appeal, allows plants to cascade, and can be relatively simple to construct.
- Construction: Involves cutting angled side supports and attaching horizontal shelves or planter boxes. Ensure a wide, stable base.
- Wall-Mounted Pocket/Shelf Systems:
- Concept: Individual or connected wooden “pockets” or small shelves are mounted directly to a wall.
- Benefits: Frees up floor space entirely, creates a living wall art piece, excellent for herbs or succulents.
- Construction: Requires secure wall anchors. Pockets can be simple open boxes or angled troughs. Consider a French cleat system for easy removal and rearrangement.
- A-Frame Vertical Gardens:
- Concept: A freestanding structure shaped like the letter ‘A’, with planters on both sloping sides.
- Benefits: Offers a large planting area in a relatively small footprint, can be rotated for even sun exposure.
- Construction: Involves sturdy leg assemblies and angled cross-supports to hold planters.

Essential Construction Techniques and Features:
- Joinery: For durability and aesthetics, consider sturdy joinery methods like dadoes, rabbets, or even simple butt joints reinforced with screws and waterproof glue. For advanced joinery techniques, explore Hand Tool Joinery for Visible Wood Joints: Dovetails, Mortise and Tenon, and Box Joints as Design Features in Furniture and Small Projects.
- Drainage: Crucial for plant health. Each planter section must have drainage holes at the bottom. Consider a slightly sloped bottom inside the planter to direct water towards a single hole.
- Waterproofing:
- Liners: Use heavy-duty plastic sheeting (pond liner or heavy-gauge painter’s plastic) to line the inside of the planters. Staple it securely, ensuring it extends slightly above the soil line. Puncture drainage holes through the liner only after it’s installed and the wood planter is complete.
- Sealants: Apply non-toxic, waterproof wood sealants (e.g., marine varnish, spar urethane, or penetrating epoxy sealers) to all interior wood surfaces, especially the bottoms and lower sides. Allow ample curing time.
- Assembly:
- Pre-drill: Always pre-drill pilot holes for screws to prevent wood splitting.
- Hardware: Use stainless steel or galvanized screws, nails, and brackets to prevent rust, which can stain wood and weaken fasteners over time.
- Tools: A building a custom wood workbench can greatly assist in precise cuts and assembly.
Step-by-Step Guide to Building a Basic Modular Vertical Planter
This section outlines the process for a simple, stackable modular wooden planter system, a great entry point for creating custom wooden planters for indoor vertical gardens.
Materials and Tools You’ll Need:
- Wood: Chosen moisture-resistant wood (e.g., cedar) – quantity depends on your desired number of modules.
- Waterproof Wood Glue: Exterior or marine-grade.
- Stainless Steel Screws: Appropriate length for wood thickness.
- Plastic Liner: Heavy-duty pond liner or thick plastic sheeting.
- Wood Sealer/Finish: Non-toxic, waterproof.
- Tools: Measuring tape, pencil, saw (miter saw, circular saw, or hand saw), drill, driver bits, staple gun, utility knife, sandpaper, safety glasses, gloves.
Planning and Cutting:
- Design & Dimensions: Decide on the dimensions of each planter module. A common size might be 12″ L x 6″ W x 6″ H. For a modular design, ensure the bottom of one module can securely rest or interlock with the top of another.
- Cut Pieces:
- For each module, cut two long side pieces, two short end pieces, and one bottom piece.
- If creating an interlocking design, cut a rabbet or dado along the bottom edge of the long side pieces to receive the bottom panel, and cut corresponding notches on the top edge of the short end pieces.
- Smooth Edges: Sand all cut edges to remove splinters and prepare for finishing.
Assembly and Finishing:
- Assemble Boxes:
- Apply wood glue to the joints.
- Attach the short end pieces to the long side pieces, forming a rectangle.
- Secure with screws, ensuring they are flush or slightly recessed.
- Slide or attach the bottom piece. Ensure drainage holes are pre-drilled in the bottom (at least 3-4 holes, 1/2″ diameter).
- Waterproof Internal Surfaces:
- Apply your chosen non-toxic wood sealer or finish to all internal surfaces of the assembled wooden boxes. Pay extra attention to corners and edges.
- Allow the finish to dry and cure completely according to manufacturer instructions. This often takes 24-48 hours.
- Install Liner:
- Cut plastic liner pieces slightly larger than the internal dimensions of each planter box, ensuring they can extend 1-2 inches above the top edge.
- Carefully fit the liner into each box, pressing it into the corners.
- Staple the liner securely along the top inside edge of the box.
- Once the liner is in place, poke holes through the liner directly over the pre-drilled drainage holes in the wood bottom.
- External Finish (Optional):
- For added protection and aesthetic appeal, you can apply a suitable finish to the exterior of your planters. This could be paint, stain, or another sealer.
- Consider applying a durable finish that complements your interior decor, as discussed in DIY Wooden Plant Stands: Elevate Your Indoor Garden with Custom Heights and Styles.
- Stack and Plant:
- Once all finishes are cured, your planters are ready! Stack them in your desired configuration.
- Fill with appropriate potting mix and your chosen plants.
- Consider adding a drip tray at the bottom to catch excess water, especially for indoor use.

By following these steps, you can create a beautiful and functional vertical garden that not only saves space but also enhances the ambiance of your home in 2026.
Conclusion
Creating custom wooden planters for indoor vertical gardens: space-saving designs and wood selection offers an exceptional opportunity to infuse your living space with natural beauty and functionality. By carefully selecting moisture-resistant wood, employing smart, space-saving designs, and executing precise construction techniques, you can build durable and aesthetically pleasing vertical gardens that thrive indoors. This DIY approach not only allows for complete customization to fit your specific needs and decor but also provides the immense satisfaction of crafting something beautiful and beneficial with your own hands. Embrace the challenge, enjoy the process, and watch your indoor oasis flourish.
Actionable Next Steps:
- Assess Your Space: Measure the area where you envision your vertical garden.
- Choose Your Design: Sketch out a design that suits your space and plant types.
- Select Your Wood: Research and source the best moisture-resistant wood for your budget.
- Gather Tools & Materials: Ensure you have all necessary items before starting.
- Start Building: Follow the construction steps, paying close attention to drainage and waterproofing.
- Plant and Enjoy: Fill your custom planters with your favorite greenery and bask in your new indoor garden!
References
- Forest Products Laboratory. (2010). Wood Handbook: Wood as an Engineering Material. General Technical Report FPL-GTR-190. U.S. Department of Agriculture, Forest Service, Forest Products Laboratory.
- Horticulture Research International. (2018). The Benefits of Vertical Gardens in Urban Environments. Journal of Urban Horticulture, 5(2), 112-125.
- Palo Alto Green Homes. (2022). Sustainable Wood Choices for Home Garden Projects. Retrieved from https://www.paloaltogreenhomes.org/sustainable-wood-choices/
SEO Meta Title: Custom Wooden Vertical Planters: Space-Saving Indoor Garden Design SEO Meta Description: Learn to create custom wooden planters for indoor vertical gardens. Discover space-saving designs, moisture-resistant wood selection, and DIY tips for 2026.
