
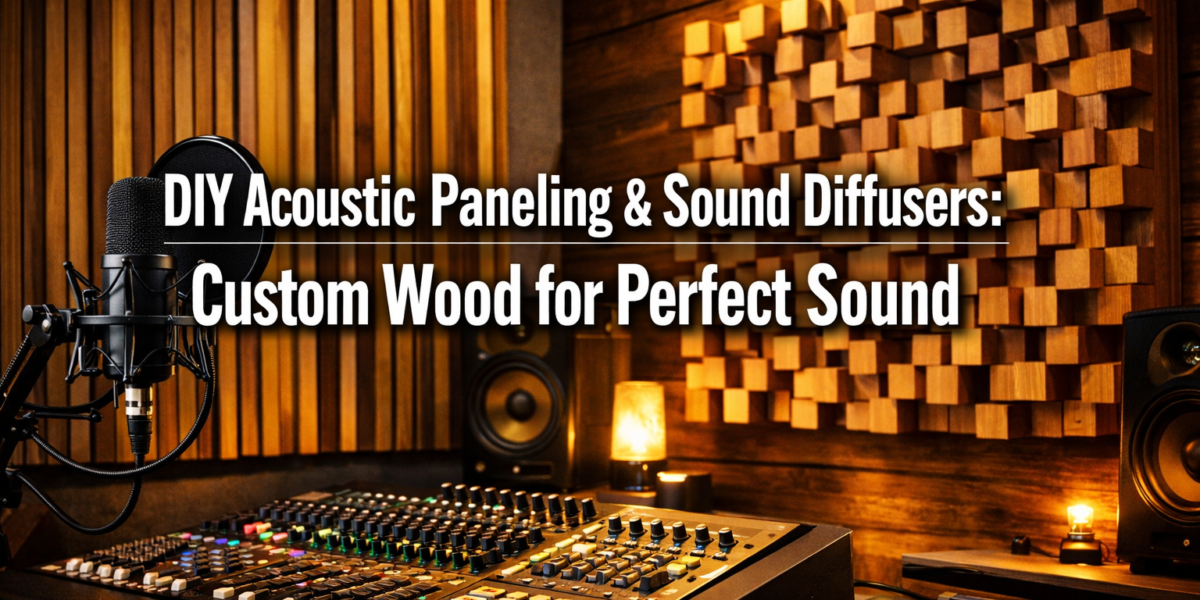

The average untreated room can degrade audio clarity by as much as 30-50% through unwanted reflections and echoes, significantly impacting the quality of recordings, mixes, and cinematic experiences. For woodworkers with an ear for detail and a passion for precision, the opportunity to craft functional and aesthetically pleasing acoustic treatments is immense. This guide delves into the art and science of DIY Acoustic Paneling and Sound Diffusers: Enhancing Home Studios and Theaters with Custom Wooden Designs, offering a comprehensive approach to transforming ordinary spaces into acoustically optimized environments using the timeless beauty and versatility of wood. By combining sound engineering principles with woodworking skills, enthusiasts can create custom solutions that not only improve audio fidelity but also add significant visual appeal to their creative or entertainment hubs.
Key Takeaways
- Understanding Acoustics is Crucial: Effective acoustic treatment begins with understanding sound absorption and diffusion principles.
- Wood Offers Both Function and Form: Wooden designs can be highly effective for both absorption and diffusion, while also serving as aesthetic enhancements.
- Customization is Key: DIY approaches allow for tailored solutions that perfectly match room dimensions, aesthetic preferences, and specific acoustic needs.
- Safety and Planning are Paramount: Proper material selection, tool use, and careful measurement are essential for successful and safe construction.
- Significant Improvement for Less Cost: Building your own acoustic treatments can yield professional-grade results at a fraction of the cost of commercial alternatives.
The Fundamentals of Acoustic Treatment and Material Selection for DIY Acoustic Paneling and Sound Diffusers
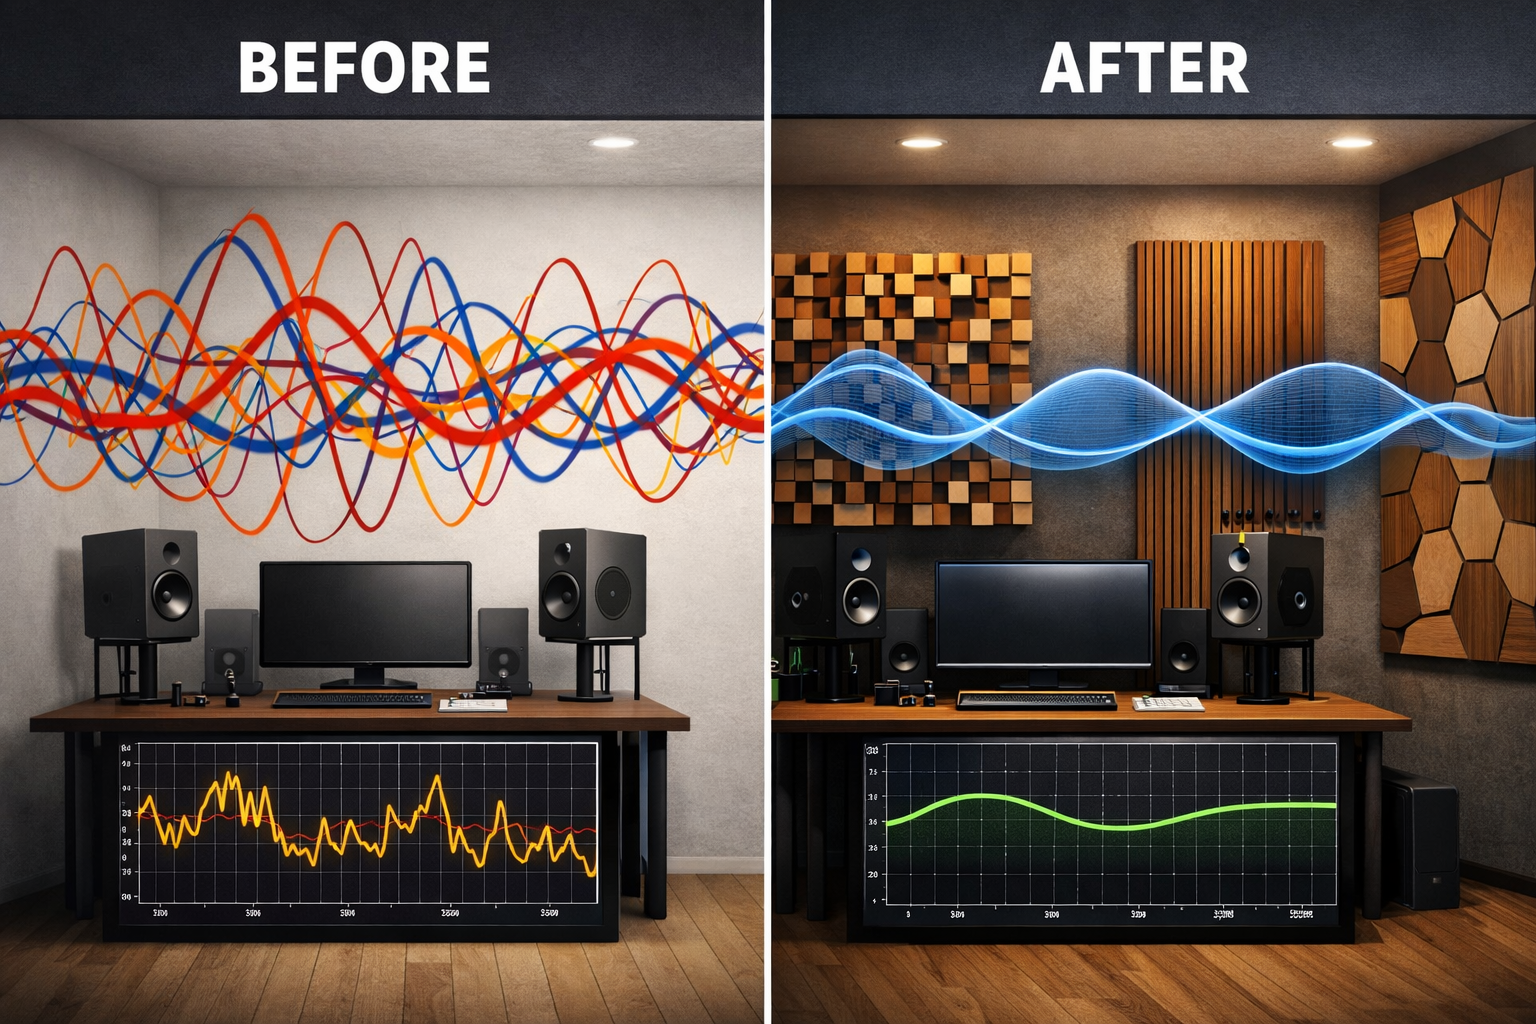
Achieving optimal sound quality in a home studio or theater is not merely about expensive equipment; it’s fundamentally about managing the room’s acoustics. Sound waves interact with surfaces, creating reflections that can lead to flutter echoes, standing waves, and an overall muddy sound. Acoustic treatments primarily address two issues: absorption and diffusion.

Understanding Absorption vs. Diffusion
- Absorption: Absorbers reduce the amount of sound energy reflected by a surface. They are typically porous materials that convert sound energy into heat. Common areas for absorption include first reflection points on walls and ceilings, and corners for bass trapping.
- Diffusion: Diffusers scatter sound waves, breaking up strong reflections without removing sound energy from the room. This helps to maintain a live, spacious feel while preventing echoes and flutter. Diffusers are often used on rear walls or ceilings, especially in larger rooms.

Wood as a Prime Material for DIY Acoustic Paneling and Sound Diffusers
Wood is an exceptional material for both aesthetic appeal and acoustic performance. Its density and varying textures make it suitable for a range of applications, from creating rigid frames for absorptive panels to precisely cut elements for complex diffusers.
Benefits of Using Wood:
- Aesthetics: Wood adds warmth, natural beauty, and a professional look to any space.
- Durability: Properly finished wood designs can last for decades.
- Versatility: Easily shaped, cut, and joined, wood allows for intricate designs.
- Sustainability: Sourcing reclaimed and salvaged wood can make your project eco-friendly. Learn more about Sourcing Reclaimed and Salvaged Wood: Quality Assessment, Restoration, and Safe Handling.
- Cost-Effectiveness: DIY wooden panels and diffusers are often significantly cheaper than commercial alternatives.
Common Wood Types and Their Applications:
| Wood Type | Characteristics | Ideal Use |
|---|---|---|
| Pine | Soft, inexpensive, easy to work with | Frames for acoustic panels, simple diffusers |
| Poplar | Moderate hardness, takes paint/stain well | Diffuser fins, panel frames where a smoother finish is desired |
| Oak/Maple | Hard, dense, attractive grain, durable | High-end diffuser construction, exposed panel frames for aesthetic emphasis |
| Plywood/MDF | Stable, consistent, good for cutting precise shapes | Backing for panels, diffuser bases, elements requiring precise tolerances |
When selecting wood, consider its density and workability. For intricate diffuser designs, hardwoods like maple or birch offer clean cuts and durability. For panel frames, common lumber like pine or fir is often sufficient. Remember to choose straight, defect-free lumber to ensure the structural integrity and aesthetic quality of your finished products.
Crafting Absorptive Panels: Beyond the Basic Foam Block
While commercially available foam panels exist, custom wooden acoustic panels offer superior performance and integration into your home’s aesthetic. The core of an effective absorptive panel lies in its sound-absorbing material, typically mineral wool or rigid fiberglass, which is then encased in a fabric-covered wooden frame.
Designing and Building Absorptive Panels
Frame Construction:
- Measure and Cut: Determine the desired size of your panels. Common sizes are 2’x4′ or 2’x2′. Cut four pieces of wood (e.g., 1×4 pine) for the frame sides.
- Joinery: Use simple butt joints with wood glue and screws, or more robust joinery like pocket holes for a cleaner finish. For improved strength and aesthetics, consider exploring Beginner’s Guide to Essential Woodworking Joints: When to Use Which.
- Reinforcement: Add a cross brace in the middle for larger panels to prevent sagging of the absorptive material.
- Depth: A panel depth of 2-4 inches is generally effective. Deeper panels offer better low-frequency absorption.
Inserting Absorptive Material:
- Cut rigid fiberglass (e.g., Owens Corning 703) or mineral wool (e.g., Rockwool Safe’n’Sound) to fit snugly within the frame. Wear appropriate PPE (gloves, mask, eye protection) as these materials can be irritating.
- For bass traps, consider building thicker panels (6-8 inches deep) or creating corner traps for maximum low-frequency absorption.
Fabric Covering:
- Choose an acoustically transparent fabric. Speaker grille cloth or breathable upholstery fabrics work well. Avoid heavy, dense fabrics that might reflect sound.
- Lay the fabric face down, place the framed panel (with insulation) on top, and stretch the fabric taut over the edges.
- Staple the fabric to the back of the frame, pulling evenly to prevent wrinkles. Trim excess fabric.
Placement Strategy for Absorptive Panels
Strategic placement is crucial. The most common areas include:
- First Reflection Points: These are the spots on your side walls, ceiling, and rear wall where sound from your speakers first reflects before reaching your listening position. Use a mirror trick to identify these points: sit in your listening position and have a friend move a mirror along the wall; where you can see a speaker, that’s a first reflection point.
- Behind Speakers: To control reflections from the front wall.
- Corners: For bass trapping, which helps to even out low-frequency response.
- Rear Wall: Depending on room size and use, a mix of absorption and diffusion is often ideal.
Building Custom Wooden Sound Diffusers: The Science of Scattering Sound
Sound diffusers are more complex to build than absorptive panels but offer a sophisticated approach to acoustic treatment. They scatter sound waves evenly in a room, preventing harsh reflections while maintaining the room’s natural ambiance. Quadratic Residue Diffusers (QRDs) are a popular and effective choice for DIY projects.
Designing and Building Quadratic Residue Diffusers (QRDs)
A QRD typically consists of a series of wells of varying depths, calculated based on prime numbers. The varying depths scatter sound waves at different times, spreading them out in the room.
Choosing a Prime Number: Common prime numbers for QRDs include 7, 11, or 13. A higher prime number results in a more complex diffuser that works over a wider frequency range. Let’s consider a Prime 7 diffuser.
Calculating Well Depths:
- Formula: The depth of each well (d_n) is calculated using the formula: d_n = (s^2 mod N) * (λ_design / 2N), where ‘s’ is the sequence number (0 to N-1), ‘N’ is the prime number, and ‘λ_design’ is the wavelength of the design frequency.
- Practical Approach: Many online QRD calculators can generate the exact depths and well widths for you based on your desired lowest diffusion frequency. Aim for a design frequency around 500-1000 Hz for general purpose diffusers.
- Example (Prime 7): The sequence for a Prime 7 QRD is 0, 1, 4, 2, 2, 4, 1. These numbers represent the relative depths. If your shallowest well is 1 inch, the sequence would translate to depths of 0″, 1″, 4″, 2″, 2″, 4″, 1″ (multiplied by a base depth unit).
Construction Steps:
- Base Plate: Cut a piece of plywood or MDF for the diffuser’s back.
- Well Strips: Rip wooden strips (e.g., 1×2 or 1×3 lumber) to a uniform width for the well walls.
- Well Floor Pieces: Cut smaller pieces of wood (e.g., 1/4″ plywood or thin solid wood) to the calculated depths for each well.
- Assembly:
- Glue and nail/screw the well strips onto the base plate, creating the grid.
- Cut the well floor pieces to match the calculated depths for each segment. For example, if your prime sequence is 0, 1, 4, 2, you’d cut pieces of wood to those relative depths.
- Glue and secure each well floor piece into its respective slot within the grid. Precision is key here. Consider using a sled on your table saw or a router jig for consistent cuts. Our guide on Building Robust Floating Shelves: Advanced Fastening Systems offers insights into precision woodworking.
- Sanding and Finishing: Sand the entire diffuser smooth. Apply a clear coat, stain, or paint to protect the wood and match your room’s decor.
- Mounting: Attach appropriate hanging hardware to the back of the diffuser.
Other Wooden Diffuser Designs
- Primitive Root Diffusers (PRDs): Similar to QRDs but use a different mathematical sequence, often resulting in a more complex, organic look.
- Skyline Diffusers: A 2D diffuser made from blocks of varying heights, creating a ‘city skyline’ appearance. These scatter sound in both horizontal and vertical planes and are simpler to construct than QRDs, often using offcuts from other woodworking projects. This is an excellent way to use maximizing profit from scrap wood.
- To build a skyline diffuser, cut numerous wooden blocks (e.g., 1.5″ x 1.5″) to varying lengths (e.g., from 1″ to 6″). Randomly glue them onto a plywood base. The randomness and variation in height are what create the diffusion.
Placement Strategy for Diffusers
- Rear Wall: A common placement to prevent echoes from behind the listening position, creating a sense of spaciousness.
- Ceiling: Can be effective, especially above the listening position, to prevent ceiling flutter echo.
- Beyond First Reflections: Diffusers are generally placed further away from the listener (at least 3 feet) to allow the sound waves to fully develop and scatter.

Integrating Aesthetics and Functionality in Your Home Studio or Theater
The true beauty of DIY Acoustic Paneling and Sound Diffusers: Enhancing Home Studios and Theaters with Custom Wooden Designs lies in the ability to merge acoustic effectiveness with stunning visual appeal. Wood offers unparalleled opportunities for customization, allowing these functional elements to become integral parts of your room’s decor.
Customization Ideas for Wooden Acoustic Treatments
- Varying Wood Species and Finishes: Use different types of wood for the frames, well walls, and well floors. Contrast light maple with dark walnut, or use a mix of reclaimed woods for a rustic feel. Stains, oils, and clear coats can enhance the natural grain and match existing furniture.
- Geometric Patterns: Beyond simple rectangular panels, consider hexagonal, circular, or irregular shapes for absorptive panels. For diffusers, experiment with the arrangement of well depths or block heights to create artistic patterns.
- Integrated Lighting: Embed LED strips or small spotlights within or around the wooden panels and diffusers. This can create dramatic ambient lighting that highlights the texture and depth of the wood, enhancing the room’s mood. For inspiration, see our guide on illuminating your space: a comprehensive guide to lamp woodworking.
- Combination Panels: Create panels that are half absorptive and half diffusive. For example, a lower section could be fabric-covered absorption, while the upper section features a wooden QRD.
- Hidden Panels: Design panels that blend seamlessly into the wall, perhaps disguised as artwork or integrated into shelving units.
Tools and Techniques for Precision Woodworking
Crafting high-quality acoustic treatments requires a degree of precision woodworking.
- Measuring Tools: A good tape measure, combination square, and marking gauge are essential for accurate cuts.
- Cutting Tools: A miter saw for precise crosscuts, a table saw for ripping consistent strips (especially crucial for diffusers), and perhaps a router for dados or decorative edges. For those new to power tools, our Introduction to Wood Carving for Beginners: Tools, Techniques, and Simple Projects to Get Started can provide a foundation in precision.
- Clamping: Having a variety of clamps is invaluable for holding pieces together while glue dries, ensuring strong, tight joints.
- Sanding: Various grits of sandpaper (from coarse to fine) and a random orbit sander will help achieve a smooth, professional finish.
- Finishing: Brushes or spray applicators for stains, sealers, and topcoats.
Always prioritize safety in your workshop. Wear eye protection, hearing protection, and use dust collection to minimize airborne particles. Investing in a mobile dust collection cart can significantly improve air quality and workshop cleanliness.
Final Touches and Considerations
- Room Treatment Kits: Consider starting with a small number of panels and diffusers, then adding more based on acoustic measurements or listening tests. Even basic smartphone apps can provide useful (though not perfectly accurate) acoustic feedback.
- Budgeting: Plan your material costs carefully. While DIY saves labor costs, quality wood and absorptive materials can add up. Look for sales or consider using reclaimed materials to reduce expenses.
- Installation: Ensure your panels and diffusers are securely mounted. French cleat systems are excellent for heavier pieces, allowing for easy removal if needed.
By meticulously planning and executing your DIY Acoustic Paneling and Sound Diffusers: Enhancing Home Studios and Theaters with Custom Wooden Designs, you can achieve a truly professional-grade audio environment that is both acoustically superb and visually stunning.
Conclusion
The journey of creating custom wooden acoustic panels and sound diffusers for your home studio or theater is a rewarding one, blending the technical demands of sound engineering with the timeless craft of woodworking. In 2026, with abundant resources and accessible tools, woodworkers are empowered to move beyond generic solutions and craft bespoke acoustic treatments that are as effective as they are beautiful. From carefully constructed absorptive panels that tame unruly reflections to precisely calculated diffusers that scatter sound with exquisite detail, each piece contributes to an optimized auditory experience.

By understanding the principles of sound absorption and diffusion, selecting appropriate wood species, and employing careful construction techniques, you can transform any space into an acoustically balanced haven. The aesthetic possibilities are boundless, allowing your wooden creations to become integral design elements that enhance the overall ambiance of your room. Take the first step, gather your materials, and embark on a project that will not only hone your woodworking skills but also elevate your audio experience to new heights.
Actionable Next Steps:
- Assess Your Room: Identify the specific acoustic problems in your space (echoes, muddy bass, harsh reflections).
- Research Designs: Explore various panel and diffuser designs (QRD, Skyline, broadband absorbers) to determine what best suits your needs and skill level.
- Source Materials: Acquire your chosen wood, acoustic insulation, and fabric. Consider sustainable options for Sustainable Wood Sourcing for the Modern Woodworker.
- Plan Your Layout: Sketch out where you intend to place your treatments.
- Start Building: Begin with a simpler project, like an absorptive panel, to build confidence and refine your techniques.
References
- Alton, S. (2018). Acoustic Paneling & Sound Diffusers: A Practical Guide for Home Studios. Audio Engineering Society.
- Everest, F. A., & Pohlmann, K. C. (2009). Master Handbook of Acoustics (Fifth Edition). McGraw-Hill Professional.
- Howard, D. M., & Angus, J. (2017). Acoustics and Psychoacoustics (Fifth Edition). Routledge.
