

In any woodworking space, from a professional shop to a home hobby bench, clutter can quickly become the enemy of efficiency and creativity. Small tools, hardware, measuring devices, and various supplies have a knack for disappearing or creating a disorganized mess. The solution lies in building adaptable wooden desk organizers, trays, and compartments tailored to your specific needs. This comprehensive guide will explore how to design and construct DIY Modular Desk Organizers: Custom Solutions for a Clutter-Free Woodworking Workspace, ensuring every item has its place and your workflow remains smooth and productive in 2026.
Key Takeaways
- Modular design offers unmatched flexibility, allowing you to reconfigure your workspace as needed.
- Careful planning, including inventorying your tools and sketching layouts, is crucial for effective organization.
- Basic woodworking skills and common tools are sufficient to create functional and aesthetic organizers.
- Custom-built solutions not only declutter but also enhance the overall efficiency and enjoyment of your woodworking projects.
- Personalizing your organizers with finishes and specialized compartments makes them truly unique and highly functional.
Planning and Designing Your Modular System
The foundation of any successful organizational project is meticulous planning. Before cutting any wood, consider the specific demands of your woodworking workspace. What tools do you use most frequently? Which hardware items constantly go missing? What supplies need dedicated, easily accessible storage?

Assessing Your Workspace Needs
Start by taking stock of your existing desk or workbench. Measure its dimensions and identify areas prone to clutter. Group similar items together:
- Hand Tools: Chisels, screwdrivers, planes, files.
- Power Tool Accessories: Drill bits, router bits, sanding discs.
- Fasteners: Screws, nails, bolts, washers.
- Measuring Tools: Rulers, squares, calipers.
- Adhesives & Finishes: Glues, oils, waxes.
- Consumables: Pencils, sandpaper, rags.
Consider the ergonomics of your workflow. Items you use constantly should be within arm’s reach. Less frequently used items can be stored further away or in stackable units.
Sketching Concepts and Layouts
Once you have an inventory, begin sketching potential designs. Think about modularity – the ability to rearrange, add, or remove components. This flexibility is key to a truly custom solution.
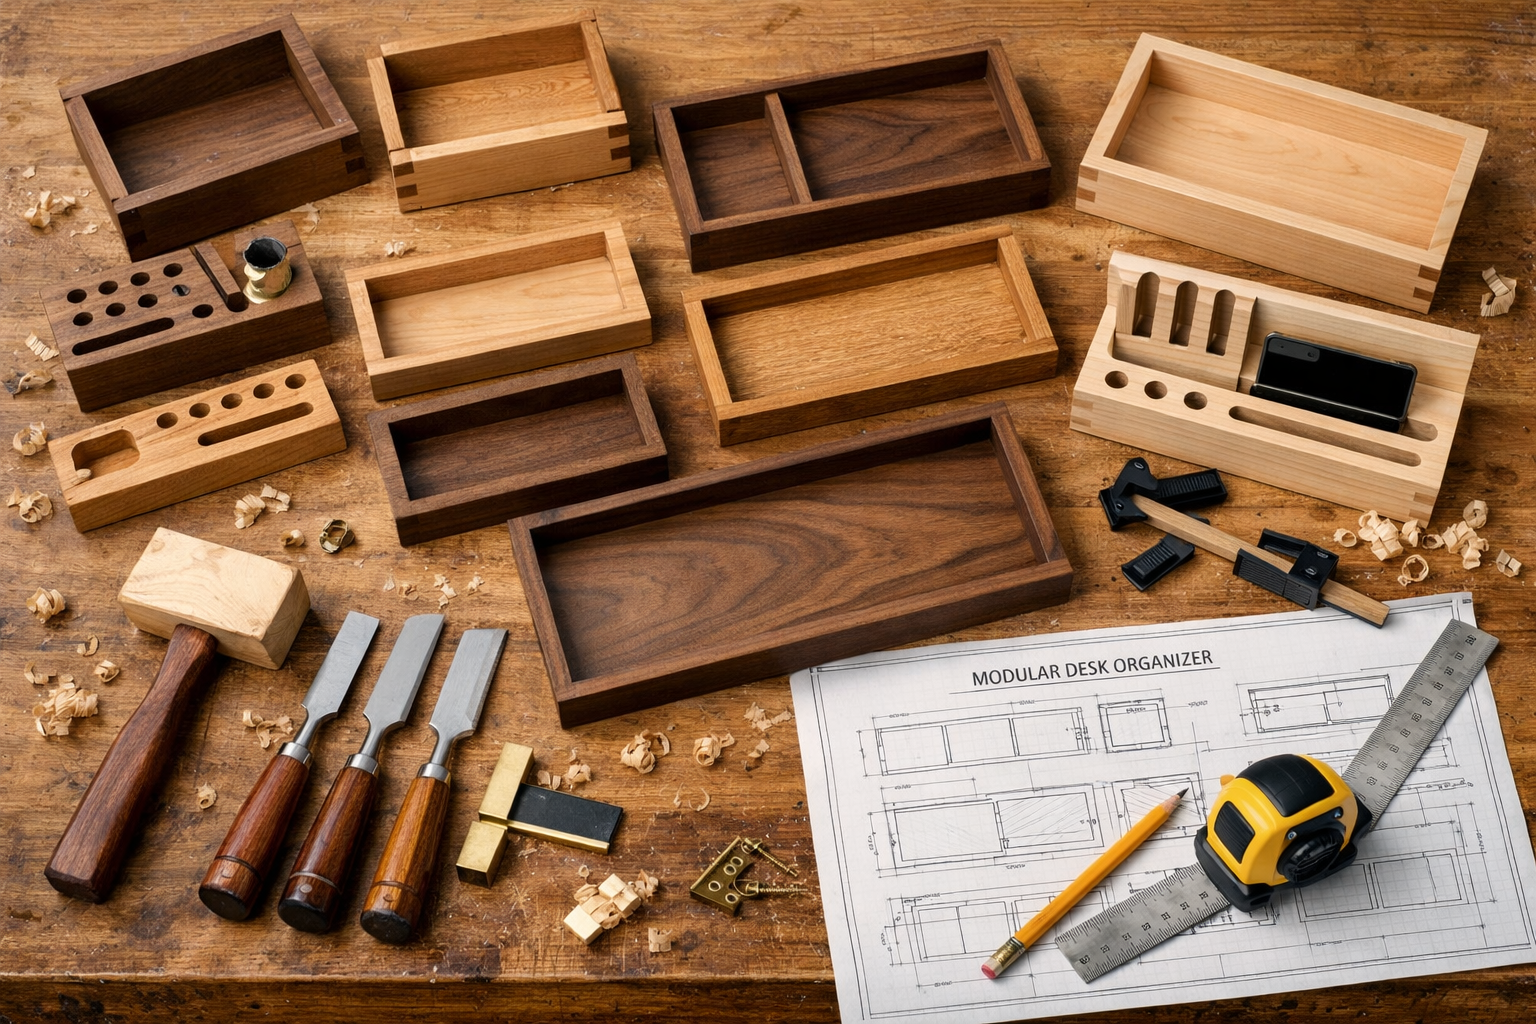
Table: Modular Organizer Component Ideas
| Component Type | Common Use | Example Materials | Key Feature |
|---|---|---|---|
| Open Trays | Small tools, fasteners, general catch-alls | Plywood, Solid Wood | Easy access, stackable |
| Divided Boxes | Specific hardware, drill bits, router bits | Plywood, MDF, Hardwood | Categorization, prevents mixing |
| Tool Racks/Holders | Screwdrivers, chisels, pencils, clamps | Solid Wood, Dowels | Vertical storage, prevents rolling |
| Small Drawers | Delicate items, measuring tools, sandpaper | Plywood, Melamine | Enclosed storage, dust protection |
| Shelves/Cubbyholes | Glues, finishes, larger hand tools, small power tools | Plywood, Solid Wood | Varied storage heights, accessible |
Experiment with different configurations. Will you have a central base unit with smaller modules that fit inside? Or a series of independent boxes that can be stacked and moved? For inspiration, you might explore concepts from Modular Furniture Design for Woodworkers.
“A well-designed modular system adapts to your craft, not the other way around. It grows with your needs and shrinks with your triumphs, always keeping you focused on the making.” – Workshop Wisdom, 2026
Consider materials. Plywood is excellent for its stability and affordability, while solid hardwoods like maple or oak can add durability and aesthetic appeal. Reclaimed wood can also be a fantastic choice, adding character and sustainability to your project. Learn more about Sourcing Reclaimed and Salvaged Wood.
Essential Woodworking Techniques for Organizers
Building your DIY Modular Desk Organizers: Custom Solutions for a Clutter-Free Woodworking Workspace requires a grasp of fundamental woodworking techniques. Even simple boxes can be elevated with careful craftsmanship.
Basic Cuts and Joinery
Accuracy is paramount when building modular units. Components need to fit together snugly for a professional look and optimal function.
- Precise Cuts: Use a miter saw or table saw for accurate square and angled cuts. Even for small pieces, precision ensures good fit-up. A well-tuned saw makes a world of difference. For guidance on optimizing your setup, check out our article on Miter Saw Table Height.
- Joinery Options:
- Butt Joints with Screws/Glue: The simplest method, suitable for less structural elements or when concealed. Reinforce with pocket screws or dowels for added strength.
- Rabbet Joints: Creates a stronger, self-aligning joint for box construction, often used for drawer bottoms or back panels.
- Dado Joints: Ideal for creating shelves or dividers that slot securely into side panels.
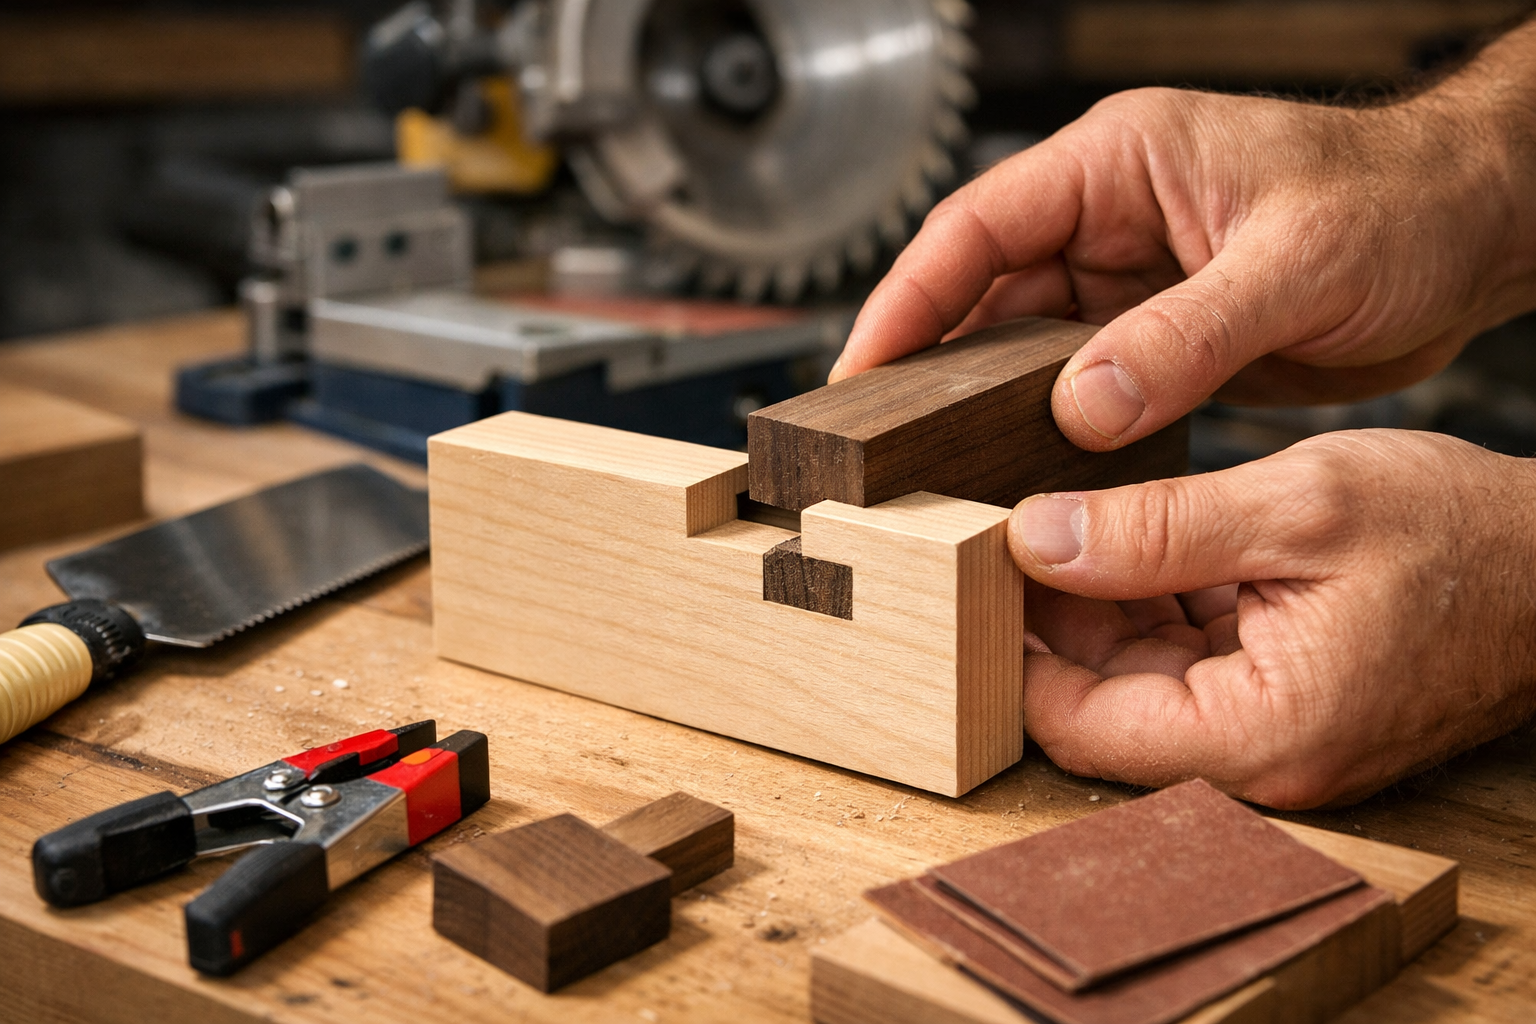
- Box Joints or Dovetails: For the ultimate in strength and aesthetic appeal, especially for drawers or visible components. Mastering Hand Tool Joinery for Visible Wood Joints can significantly enhance your organizers.
Assembly and Finishing
Once your pieces are cut, careful assembly is crucial.
- Dry Fit: Always dry fit your components before applying glue to ensure everything aligns correctly. This step allows you to make any necessary adjustments.
- Gluing and Clamping: Use appropriate woodworking glue and clamp evenly. Ensure joints are square before the glue sets.
- Sanding: Sand all surfaces smooth. Start with a coarser grit (e.g., 80-120) to remove tool marks, then progressively move to finer grits (e.g., 180-220) for a silky-smooth finish. Proper sanding is a cornerstone of professional results in any project, from DIY Wooden Plant Stands to complex furniture.
- Finishing: Apply a protective finish. Options include:
- Oil Finish: Penetrates the wood, enhancing its natural grain and offering good protection.
- Polyurethane: Creates a durable, hard-wearing surface, ideal for high-traffic areas or surfaces exposed to chemicals.
- Shellac: A fast-drying, natural finish that provides a beautiful amber tone.
Always test your chosen finish on a scrap piece of the same wood to ensure you achieve the desired look.
Customizing and Implementing Your Clutter-Free Workspace
The true power of DIY Modular Desk Organizers: Custom Solutions for a Clutter-Free Woodworking Workspace lies in their customizability and adaptability. Once built, these units transform your workshop into an environment that truly supports your craft.
Tailoring to Specific Tools and Supplies
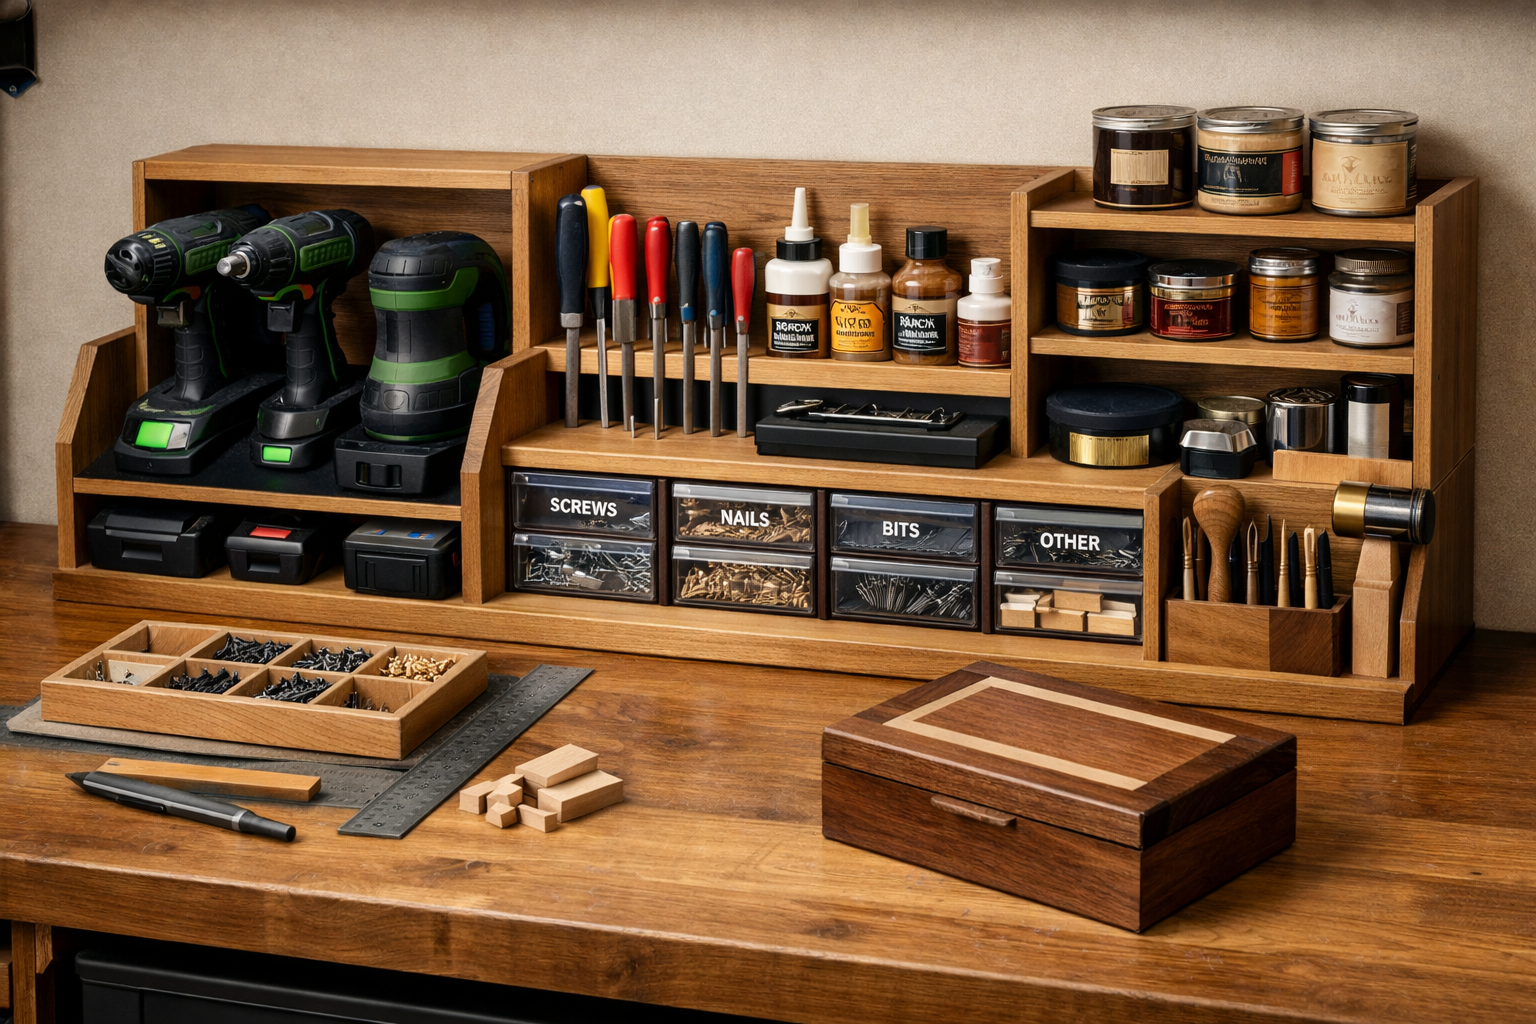
- Custom Compartments: Design specific slots for chisels to protect their edges, or use dowels to create individual holders for screwdrivers and files. Consider a dedicated spot for your often-used measuring tape or marking tools.
- Hardware Sorters: Create small, divided trays or shallow drawers for different screw types, nuts, and bolts. Labeling these compartments makes finding hardware effortless.
- Power Tool Charging Stations: Integrate a section with power outlets and cable management to keep batteries charging neatly and efficiently. This can dramatically reduce cord clutter.
- Integrated Storage: Think beyond the desk. Can a modular unit slot into an existing shelf, or be mounted on a wall above your workbench? Vertical storage is excellent for maximizing space. For more ideas on efficient shop storage, consider building an ultimate woodworking storage bench.
Benefits of a Clutter-Free Woodworking Workspace
Implementing your custom organizers offers numerous advantages:
- Increased Efficiency: No more searching for lost tools. Everything is visible and within reach, speeding up your workflow.
- Enhanced Safety: A tidy workspace reduces tripping hazards and the risk of tools falling. Sharps are stored safely.
- Improved Creativity: A clean environment fosters a clear mind, allowing you to focus on your project rather than the mess.
- Protection for Tools: Proper storage protects tools from damage, rust, and dulling.
- Aesthetic Appeal: A well-organized, custom-built system looks professional and inspiring. It reflects your commitment to your craft.
Maintaining Your Organized Space
Regular maintenance is key to keeping your woodworking space clutter-free. Get into the habit of returning tools to their designated spots immediately after use. Periodically review your modular system; as your tools and projects evolve, you may find the need to adjust or add new modules. The beauty of a modular system is its ability to adapt.

“An organized workshop is not just about tidiness; it’s about respecting your tools and valuing your time.”
Conclusion
Building DIY Modular Desk Organizers: Custom Solutions for a Clutter-Free Woodworking Workspace is a highly rewarding project that directly impacts your productivity, safety, and enjoyment of woodworking. From the initial planning and design to the careful execution of joinery and finishing, each step brings you closer to a perfectly tailored environment. By creating custom compartments, trays, and holders, you not only eliminate clutter but also streamline your workflow, allowing more time for the creative aspects of your craft. In 2026, take control of your workspace and transform it into an organized, efficient, and inspiring hub for all your woodworking endeavors.
Actionable Next Steps:
- Inventory Your Tools: Go through your workshop and list every item that needs a home.
- Measure Your Space: Determine the dimensions of your workbench and available vertical space.
- Sketch Designs: Begin drawing out modular concepts that fit your inventory and space.
- Gather Materials: Select the wood (plywood, solid, or reclaimed) and hardware you’ll use.
- Start Building: Tackle one or two modules first, refining your design as you go.
