

A single, reliable power source can mean the difference between productivity and standstill, comfort and inconvenience, especially when off-grid or in a busy workshop. While portable power stations offer immense utility, their inherent design often leaves them vulnerable to the rigors of real-world use – impacts, dust, and moisture. This article delves into the meticulous process of constructing a durable and aesthetically pleasing DIY Portable Power Station Enclosure: Building a Rugged Wooden Case for Off-Grid and Workshop Power to shield your valuable investment and enhance its functionality. By creating a custom wooden housing, you not only protect the sensitive electronics but also integrate features that make your power station more versatile, transportable, and ready for any challenge ⛰️.
Key Takeaways
- A custom wooden enclosure significantly extends the lifespan of a portable power station by protecting it from physical damage and environmental factors.
- Designing the enclosure allows for tailored features like integrated charging, improved ventilation, and ergonomic portability.
- Careful material selection, such as marine-grade plywood or treated lumber, ensures durability for both workshop and off-grid use.
- Precise joinery and robust hardware are critical for creating a truly rugged and long-lasting case.
- The project combines practical utility with the satisfaction of woodworking craftsmanship.
Designing Your DIY Portable Power Station Enclosure: Functionality Meets Durability
Before cutting the first piece of wood, a thorough design phase is paramount for your DIY Portable Power Station Enclosure: Building a Rugged Wooden Case for Off-Grid and Workshop Power. This isn’t merely about creating a box; it’s about engineering a protective shell that enhances usability. Consider the specific model of your portable power station. Measure its dimensions precisely – length, width, and height – paying close attention to irregular shapes, handles, and port locations. Provide ample clearance (at least 1-2 inches on all sides) to allow for heat dissipation, cable management, and future upgrades.

Material Selection for Resilience
The choice of wood directly impacts the enclosure’s durability and weight. Here are some strong contenders:
- Plywood (Marine-grade or Baltic Birch): Excellent strength-to-weight ratio, stability, and resistance to warping. Marine-grade plywood offers superior moisture resistance, making it ideal for off-grid or outdoor use. Baltic birch is known for its void-free core and smooth finish, perfect for a high-quality build.
- Hardwoods (Oak, Maple): Extremely durable and resistant to impact, but significantly heavier. Best for static workshop use where mobility is less of a concern, or if you desire a premium aesthetic.
- Exterior-grade Lumber (Cedar, Treated Pine): Good for outdoor exposure, but often less stable than plywood and may require more finishing. Cedar offers natural rot and insect resistance.
For joining the pieces, robust methods are key. Dovetail joints or reinforced butt joints with screws and wood glue provide superior strength. Pockets screws are also a quick and effective method for strong connections. For an in-depth look at various joining techniques, refer to our guide on Beginner’s Guide to Essential Woodworking Joints: When to Use Which.
Incorporating Essential Features
A truly effective enclosure goes beyond simple protection. Think about how you use your power station:
- Ventilation: Critical for preventing overheating. Design strategically placed vents, ideally near the power station’s own air intakes and exhausts. Consider adding small, low-profile fans for active cooling, especially if the power station will operate in high ambient temperatures or enclosed spaces.
- Access Panels: Ensure easy access to all ports, switches, and the charging input. Hinged panels with latches are ideal for security and weather protection.
- Cable Management: Integrate internal channels or clips to keep cables tidy and prevent snags. An external passthrough for a single charging cable or extension cord can be beneficial.
- Portability: Heavy-duty handles are a must. Recessed handles can offer a sleek look while protecting them from damage. Adding robust wheels or casters is highly recommended for heavier units, making transport a breeze.
- Storage: Depending on your needs, consider a small compartment for storing charging cables, adapters, or even an LED work light.
Design Sketch Example: Top-Down View
| Feature | Description |
|---|---|
| Overall Dimensions | 18″ L x 12″ W x 15″ H (example for a mid-size power station) |
| Material | 3/4″ Marine-grade Plywood |
| Joinery | Reinforced Butt Joints with screws and waterproof wood glue |
| Ventilation | Two 4″ diameter grates on opposing sides; two 2″ fans (in/out) powered by 12V output |
| Access | Hinged front panel for main display/ports; hinged top panel for charging access |
| Portability | Two recessed heavy-duty handles on top; two 2.5″ locking casters on bottom |
| Internal Storage | Small compartment (3″x3″x10″) for cables on one side |
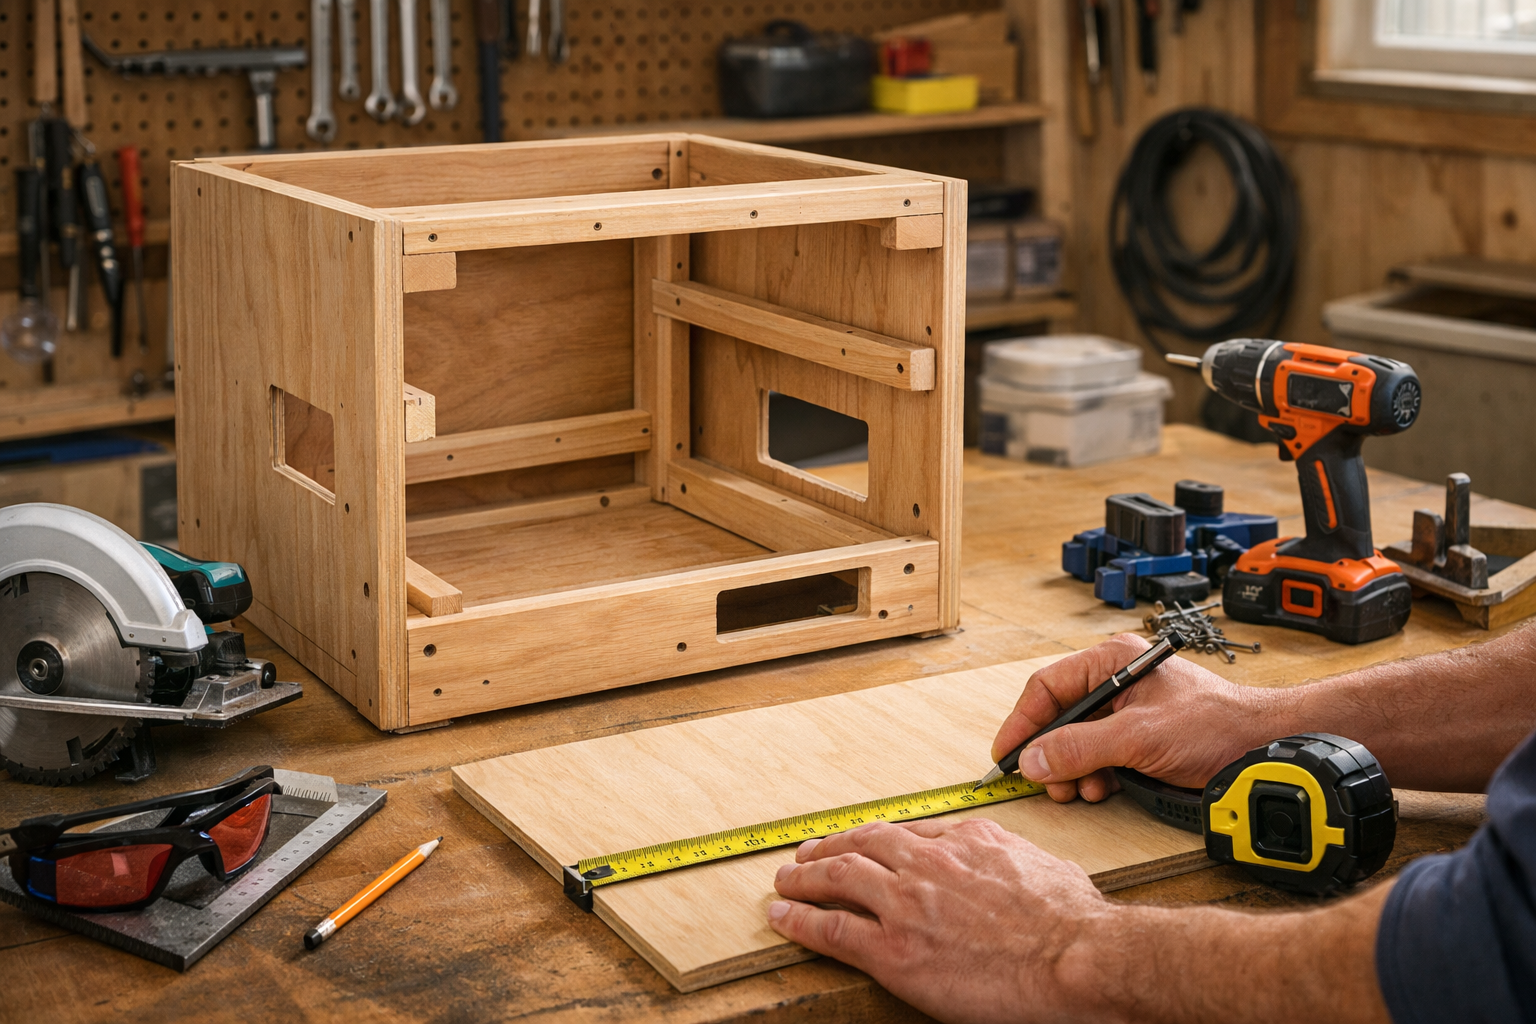
Construction Process: Building a Rugged Wooden Case
With your design finalized and materials gathered, the construction phase begins. Precision is key to a functional and durable enclosure.
Step-by-Step Build Guide
- Cut the Panels: Using a circular saw or table saw, cut all plywood or lumber panels according to your design dimensions. Always double-check measurements before cutting. For accurate and safe cuts, especially with larger panels, a table saw is invaluable.
- Rout Edges (Optional but Recommended): Chamfer or round over all exterior edges using a router. This not only improves aesthetics but also reduces sharp corners that can snag or chip. Our guide on Mastering the Router Table: Beyond Basic Edges for Precision Joinery offers advanced techniques.
- Assemble the Main Box: Begin by assembling the base and side panels. Apply a generous amount of waterproof wood glue to all mating surfaces before fastening with screws. Use clamps to hold pieces securely while the glue dries. Pre-drill pilot holes to prevent splitting the wood.
- Install Internal Supports: Add any internal bracing or supports required to hold the power station securely in place. This prevents it from shifting during transport. Use heavy-duty straps or custom-fitted wooden blocks.
- Create Ventilation Openings: Use a hole saw or jigsaw to cut out openings for ventilation grates and fans. Ensure these are aligned with your power station’s vents.
- Fabricate Access Panels: Cut the hinged panels to size. Attach them using robust stainless steel hinges and secure latches. Test their operation to ensure smooth opening and closing.
- Install Hardware: Attach the heavy-duty handles, casters (if using), and any other external hardware. Use appropriate screws for the thickness of your wood.
- Internal Wiring (Optional): If integrating fans or internal lighting, run the wiring neatly and securely. Connect to the power station’s DC output via a fused connection to prevent electrical issues.
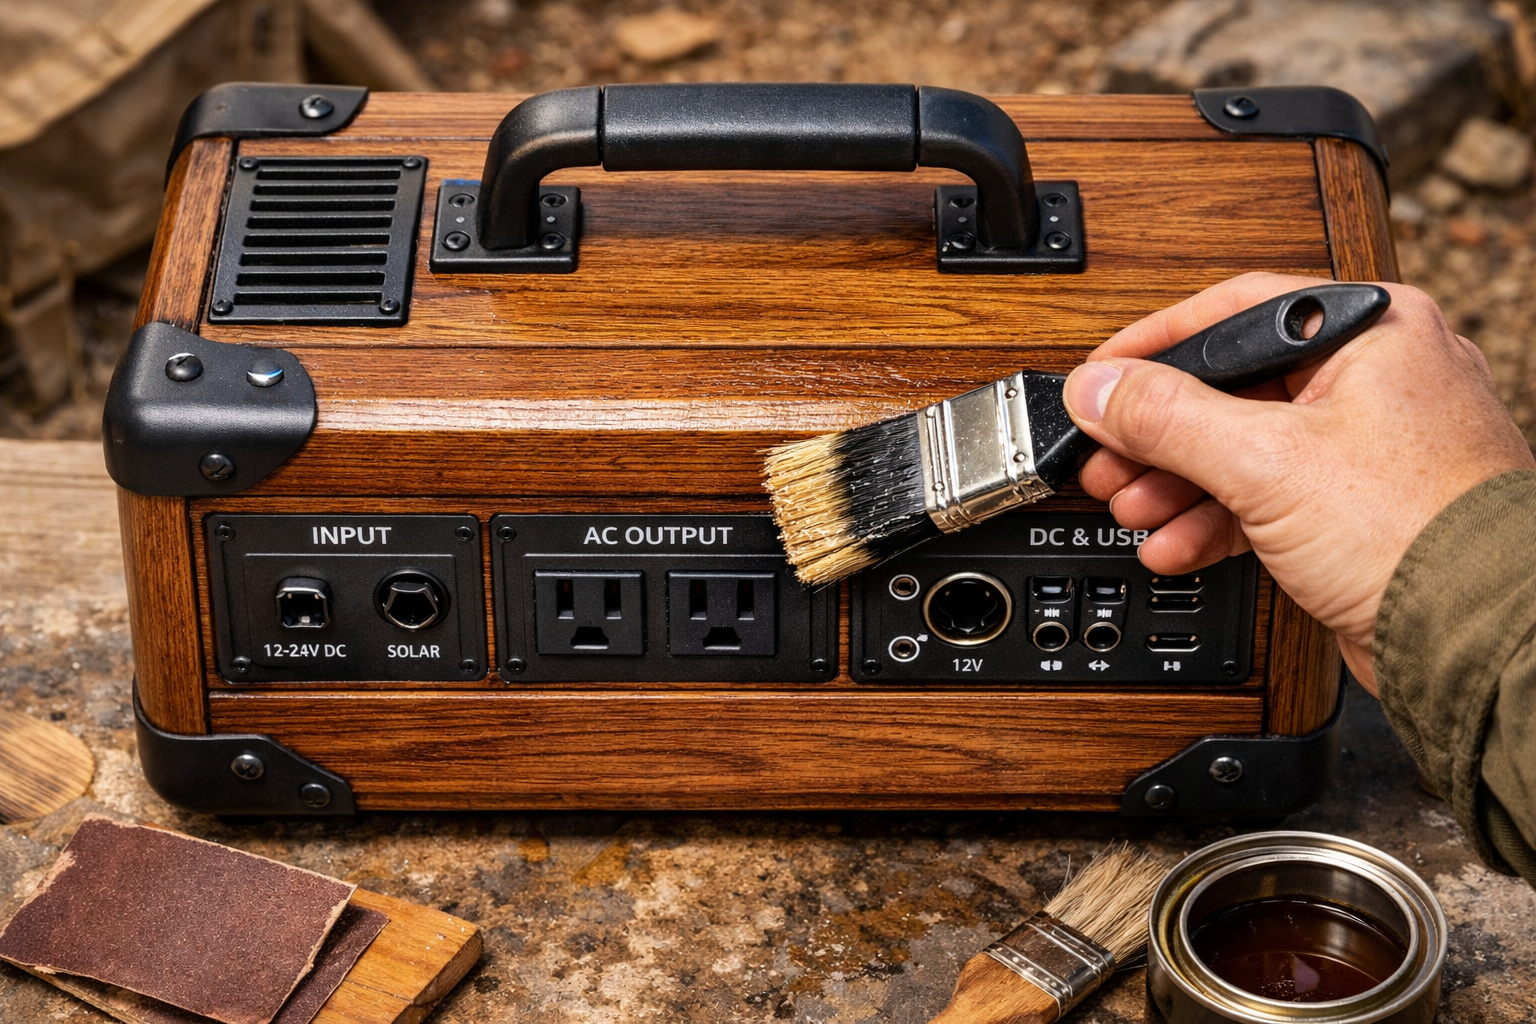
Finishing for Longevity
The finish protects your DIY Portable Power Station Enclosure from the elements and adds to its aesthetic appeal.
- Sanding: Sand all surfaces thoroughly, starting with a coarser grit (100-120) and progressing to a finer grit (180-220). This ensures a smooth surface for finishing.
- Sealing: Apply a wood sealer to all surfaces, especially if using plywood. This provides an even base for stain or paint.
- Staining/Painting: Choose a stain or paint that offers good weather resistance. For off-grid use, a marine varnish or exterior-grade paint is highly recommended. Apply multiple thin coats, allowing adequate drying time between each.
- Weatherproofing: Pay special attention to seams and joints. Apply a bead of exterior-grade sealant or caulk to prevent water ingress, particularly if the enclosure will be used outdoors.
- Adding Protection: Apply rubber feet or a rubber mat to the bottom of the enclosure to prevent skidding and protect the surface it rests on.
Consider using natural wood finishing techniques to highlight the beauty of the wood, or explore distressed wood finishing techniques for a rustic look suitable for off-grid adventures.
Integrating and Optimizing Your Power Station within the Enclosure
Once the construction and finishing are complete, the final step is to integrate your portable power station and optimize the setup for maximum efficiency and usability. This transforms a simple box into a sophisticated power hub.
Secure Placement and Connection
Carefully place your portable power station inside the finished enclosure. Ensure it sits snugly, preventing any movement during transport. As mentioned earlier, internal wooden blocks, custom-cut foam inserts, or heavy-duty hook-and-loop straps can be used for this purpose.
- Cable Routing: Route all necessary cables (charging input, AC outputs, DC outputs) through their designated access panels or passthrough holes. Use cable glands or rubber grommets to protect cables from chafing against the wood and to maintain a degree of weather resistance.
- External Power Strip (Optional): For workshop use, consider mounting a heavy-duty, outdoor-rated power strip to the exterior of the enclosure, wired internally to one of the power station’s AC outlets. This provides multiple accessible outlets without opening the main access panel repeatedly.
- Solar Charging Integration: If you use solar panels, design a dedicated input port for the solar charging cable, ensuring it’s clearly labeled and easily accessible. A dedicated storage area for a coiled solar cable can also be a valuable addition.
- Monitoring: If your power station has a display, ensure it’s either visible through a cutout or that an external monitor can be connected (if supported). Alternatively, rely on companion apps for remote monitoring.
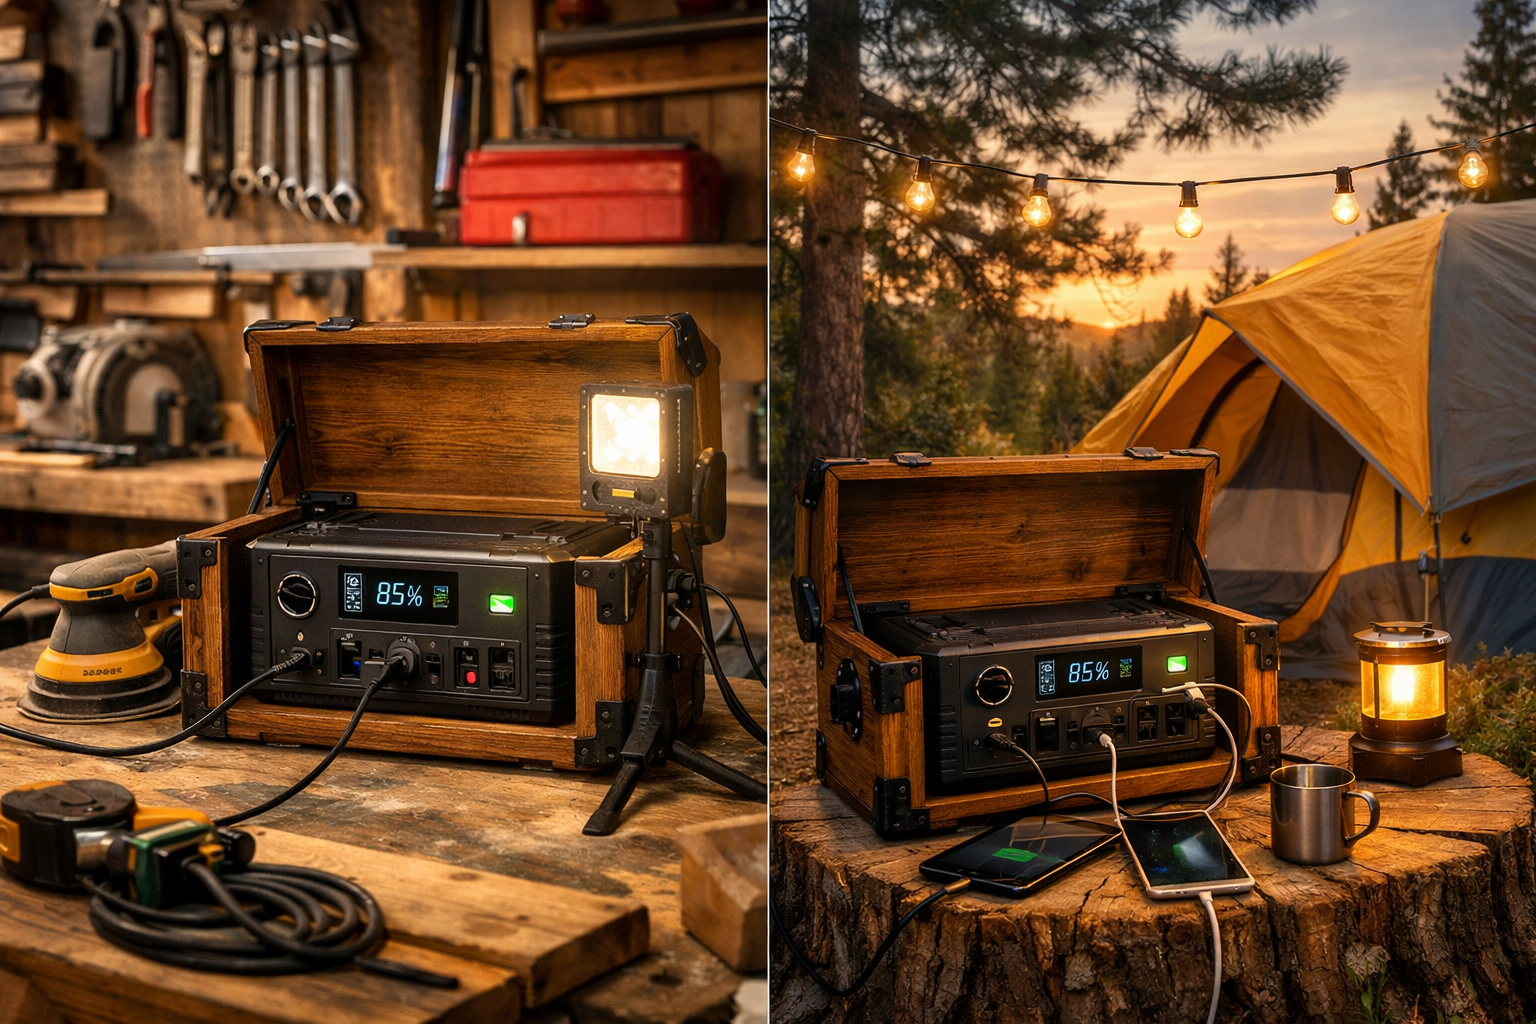
Enhancing Functionality for Specific Use Cases
The beauty of a DIY enclosure is its customizability.
- For the Workshop:
- Tool Storage: Add small shelves or compartments for frequently used tools, bits, or fasteners. This turns your power station into a mobile workstation. Refer to Smart Workshop Storage Solutions: Maximizing Small Spaces with Modular Systems and DIY Organizers for inspiration.
- Charging Hub: Integrate USB charging ports or wireless charging pads, powered directly from the power station, for convenient charging of phones, tablets, or battery packs.
- Lighting: Mount an LED work light on the enclosure that can be powered by the power station’s DC output, providing illumination where you need it most.
- For Off-Grid Adventures:
- Weather Sealing: Double-check all seals around panels, vents, and cable passthroughs. Use marine-grade sealants.
- Security: Consider adding a padlock hasp to secure the access panels, protecting your investment in remote locations.
- Mounting Points: Integrate attachment points for straps or bungee cords, allowing the enclosure to be secured in a vehicle or to a pack.
- Emergency Kit: A small, secure compartment for emergency items like a first-aid kit, flashlight, or fire starter can be invaluable.
By carefully considering these integration and optimization steps, your DIY Portable Power Station Enclosure: Building a Rugged Wooden Case for Off-Grid and Workshop Power will transform from a protective box into an indispensable, multi-functional tool, ready for any challenge whether in the garage or deep in the wilderness.
Conclusion
Building a custom wooden enclosure for your portable power station is a rewarding project that offers significant benefits, extending the life of your device and enhancing its utility. From selecting the right robust materials and employing strong joinery to integrating thoughtful features like ventilation, access panels, and portability options, every step contributes to creating a durable, versatile, and aesthetically pleasing unit. In 2026, as portable power solutions become increasingly integral to our lives, a custom-built enclosure ensures your investment is protected and optimized for both demanding workshop environments and the unpredictable conditions of off-grid adventures.
This project not only sharpens your woodworking skills but also provides a tangible asset that empowers your independence and preparedness. Take the time to plan meticulously, execute precisely, and finish thoughtfully, and you’ll have a power solution that stands the test of time and terrain.

Next Steps:
- Measure Accurately: Re-measure your portable power station, accounting for all protrusions and necessary clearances.
- Sketch Your Design: Create a detailed drawing, including dimensions, material choices, and feature placements.
- Source Materials: Gather your chosen wood, hardware, and finishing supplies.
- Start Building: Follow the construction steps, prioritizing safety and precision.
- Test Thoroughly: Once complete, test your power station within the enclosure under various loads and conditions to ensure optimal performance and cooling.
