

A recent study by the National Safety Council revealed that inadequate lighting is a contributing factor in nearly 10% of all workshop accidents. For dedicated crafters, hobbyists, and professional woodworkers alike, a well-lit workspace isn’t just a luxury—it’s a fundamental requirement for precision, safety, and productivity. This article delves into how you can achieve superior illumination and remarkable energy savings by implementing DIY Smart Workshop Lighting: Integrating LED Strips and Motion Sensors for Optimal Visibility and Efficiency. This comprehensive guide will cover everything from planning your layout to selecting the right components and executing a flawless installation, transforming your workshop into a beacon of efficiency and safety in 2026.
Key Takeaways
- Enhanced Safety & Precision: Proper lighting, especially task-specific LED strips, drastically reduces shadows and improves visibility, preventing accidents and boosting accuracy in detailed work.
- Significant Energy Savings: Motion sensors ensure lights are only active when needed, minimizing energy waste and lowering electricity bills.
- Customizable & Flexible: LED strips offer immense flexibility in placement and color temperature, allowing you to tailor lighting to specific tasks and zones within your workshop.
- Cost-Effective DIY Project: Implementing smart lighting with LED strips and motion sensors is an affordable project that delivers substantial long-term benefits.
- Improved Workspace Atmosphere: A bright, well-organized, and intelligently lit workshop enhances mood, concentration, and overall productivity.
Planning Your DIY Smart Workshop Lighting Layout
The first step in transforming your workspace is meticulous planning. Effective DIY Smart Workshop Lighting: Integrating LED Strips and Motion Sensors for Optimal Visibility and Efficiency hinges on understanding your workshop’s unique needs. Consider the size of your space, the types of tasks you perform, and existing power sources.

Assessing Your Workshop’s Current Lighting and Needs
Begin by evaluating your current lighting setup. Are there dark spots? Do you experience eye strain during detailed tasks? Different areas of a workshop demand different light levels:
- General Illumination: Overhead lighting for overall visibility.
- Task Lighting: Focused light directly over workbenches, machinery, and assembly areas.
- Accent Lighting: Though less common in workshops, it can highlight specific tools or storage.
Consider the dimensions of your workshop and any architectural features like windows or skylights that provide natural light. Natural light is excellent, but consistent, high-quality artificial lighting is essential for all hours of operation.
Strategic Placement of LED Strips for Optimal Visibility
LED strips are incredibly versatile and perfect for workshop environments. Their low profile and adhesive backing allow them to be installed almost anywhere, providing focused, shadow-free light.
- Under Cabinets and Shelves: This is a prime location for task lighting, illuminating surfaces directly below without casting shadows.
- Along Workbenches: Install LED strips along the front edge or underneath the lip of your workbench to brighten your immediate work area. For a complete guide on optimizing your workspace, consider The Ultimate Guide to Wooden Work Tables: Choosing, Building, and Maintaining Your Perfect Workspace.
- Inside Tool Chests/Drawers: Small sections of LED strips can make it much easier to find specific tools.
- Around Stationary Machinery: Ensure critical parts of your table saw, bandsaw, or drill press are brightly lit for safety and precision.
- Ceiling Perimeter: For general ambient light, running LED strips around the perimeter of your ceiling can supplement overhead fixtures.
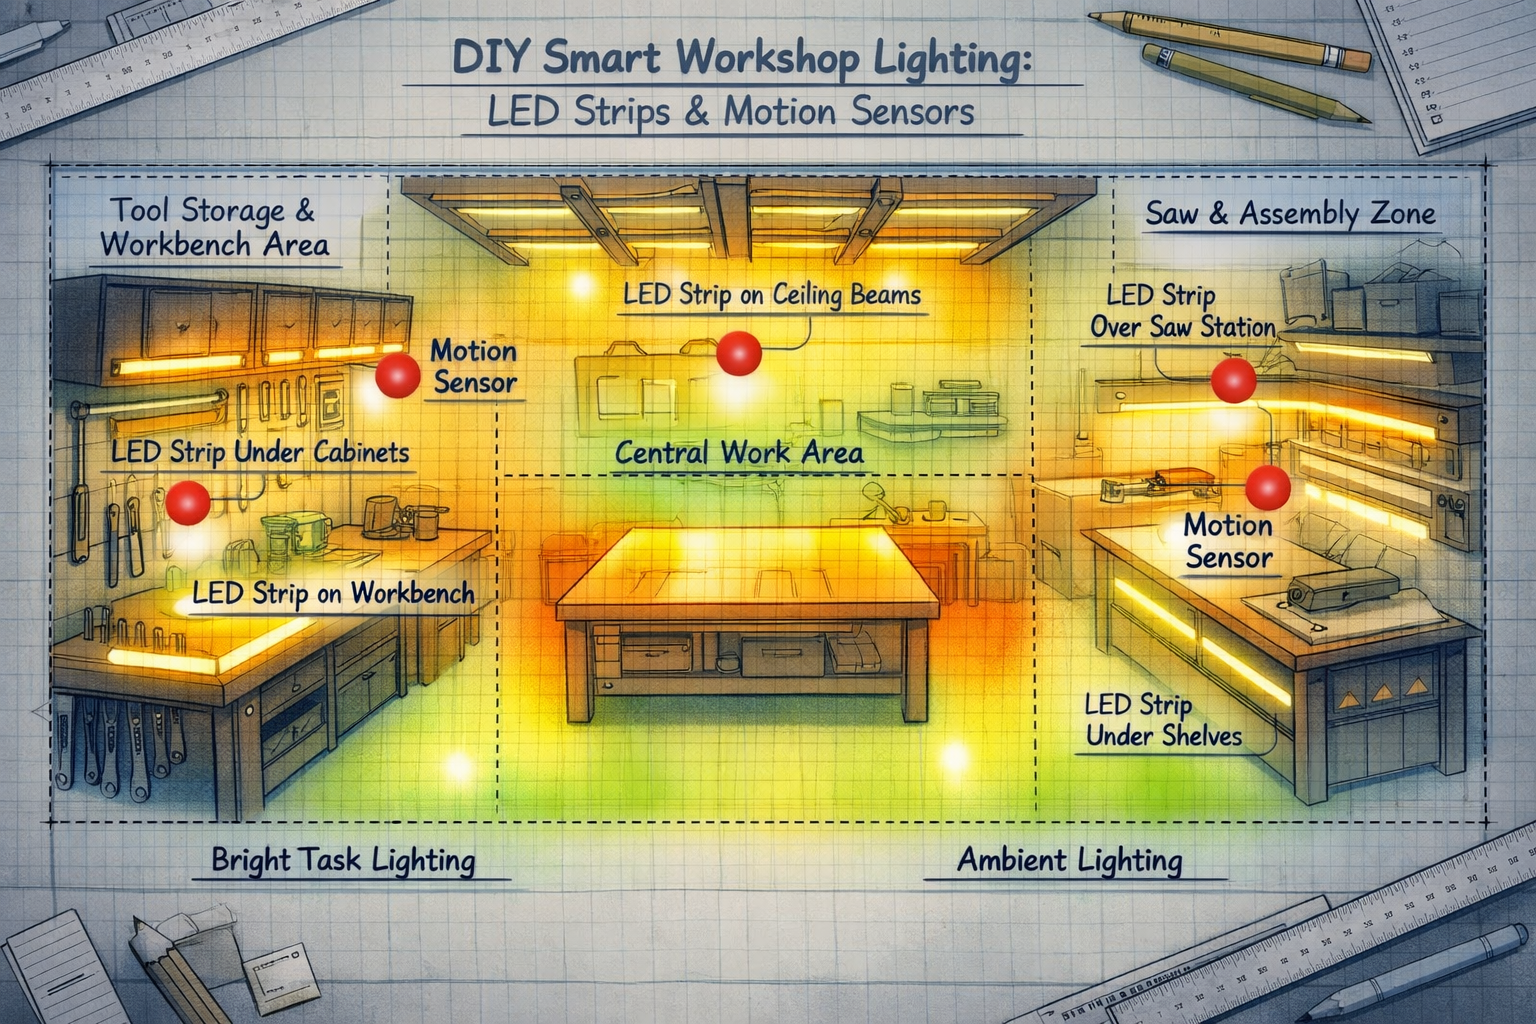

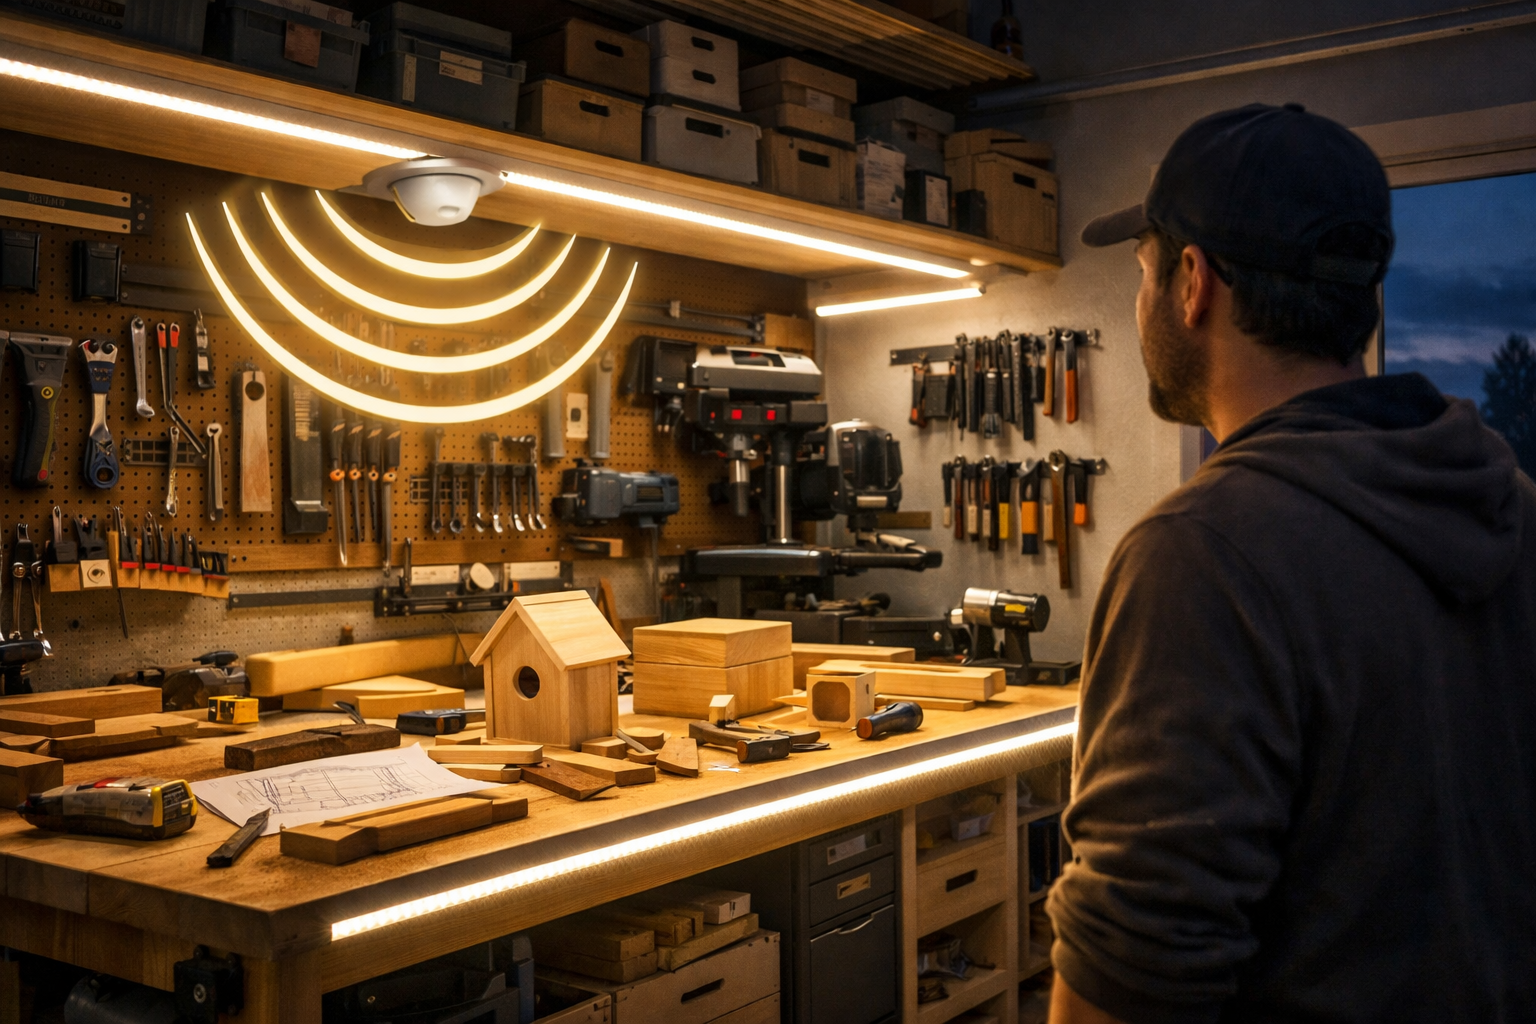
Incorporating Motion Sensors for Maximum Efficiency
Motion sensors are the “smart” component of your DIY Smart Workshop Lighting: Integrating LED Strips and Motion Sensors for Optimal Visibility and Efficiency. They eliminate wasted energy by ensuring lights are only on when someone is present.
- Placement Strategy:
- Entry Points: Position sensors near doors or main entryways to activate lights upon entry.
- High-Traffic Areas: In larger workshops, place sensors in zones where you frequently move, such as between workbenches and storage.
- Task Zones: For smaller, dedicated areas, a motion sensor can activate specific task lighting only when you’re working there.
- Types of Motion Sensors:
- PIR (Passive Infrared) Sensors: Detect heat changes, ideal for sensing human movement.
- Microwave Sensors: Emit microwave pulses and detect changes in the reflected signal, often more sensitive and can detect through thin walls.
- Occupancy Sensors: Combine PIR and ultrasonic technology for highly accurate detection, differentiating between active presence and simple movement.
When planning, consider integrating these concepts with other workshop improvements, such as Building Modular Wood Storage Systems for Small Workshops: Maximizing to ensure an organized and well-lit environment.
Selecting Components for Your Smart Lighting System
Choosing the right components is crucial for the performance and longevity of your DIY Smart Workshop Lighting: Integrating LED Strips and Motion Sensors for Optimal Visibility and Efficiency. Focus on quality, appropriate specifications, and compatibility.
Choosing the Right LED Strips
Not all LED strips are created equal. For a workshop, durability, brightness, and color temperature are key.
- Brightness (Lumens per Foot/Meter): Look for high lumen output, typically 500-1000 lumens per foot for effective task lighting.
- Color Temperature (CCT – Correlated Color Temperature):
- Cool White (5000K-6500K): Ideal for workshops, as it mimics natural daylight, reduces eye strain, and provides excellent color rendering, which is crucial for distinguishing wood tones and finishes.
- Neutral White (4000K-4500K): A good balance if you find cool white too stark.
- IP Rating (Ingress Protection): Workshops can be dusty or prone to spills. An IP65 rating or higher is recommended for dust and moisture resistance, especially near machinery or water sources.
- Voltage: Most LED strips are 12V or 24V. Choose based on your power supply and ease of wiring. 24V strips allow for longer runs without voltage drop.
- Density: Higher LED count per foot (e.g., 60 LEDs/meter vs. 120 LEDs/meter) provides more continuous, even light, reducing visible hot spots.
Power Supplies and Controllers
The power supply converts your mains electricity to the correct voltage for your LED strips.
- Wattage Calculation: Sum the total wattage of all LED strips you plan to install. Add a 10-20% buffer to avoid overloading the power supply. (e.g., 10 feet of 5W/foot LED strip = 50W; choose a 60W or 75W power supply).
- Voltage Matching: Ensure your power supply voltage (e.g., 12V or 24V) matches that of your LED strips.
- LED Controllers: If you want dimming, color temperature adjustment, or smart home integration, you’ll need an LED controller. Some controllers can also be integrated with motion sensors.
Selecting Compatible Motion Sensors
The motion sensor you choose must be compatible with your LED system and power supply.
- Voltage Compatibility: Ensure the motion sensor operates at the same voltage as your LED strips (e.g., 12V or 24V).
- Wattage Capacity: The sensor must be rated to handle the total wattage of the LED strips it will control.
- Adjustable Settings: Look for sensors with adjustable sensitivity, time-delay (how long lights stay on after motion stops), and lux sensitivity (to prevent activation during daylight).
- Wired vs. Wireless: Wired sensors offer reliability but require more effort to install. Wireless (e.g., Zigbee, Z-Wave) sensors offer flexibility and smart home integration but may require a hub.
Consider also how to maintain optimal air quality with your workshop tools; a powerful shop vac can be a great addition to keep dust down, for example, the 14 Gal Ridgid Shop Vac: Unveiling Features and Detailed Specifications.
Step-by-Step Installation Guide
With your planning complete and components acquired, it’s time for the hands-on installation of your DIY Smart Workshop Lighting: Integrating LED Strips and Motion Sensors for Optimal Visibility and Efficiency. Always prioritize safety by disconnecting power before working with electrical components.
Preparing Your Workshop for Installation
- Clean Surfaces: Ensure all surfaces where LED strips will be adhered are clean, dry, and free of dust or grease. Use rubbing alcohol for best results.
- Gather Tools: You’ll need wire cutters, wire strippers, a screwdriver, measuring tape, mounting clips (if not using adhesive-backed strips), and potentially a soldering iron for advanced connections.
- Map Out Wiring: Visualize your wiring paths. Plan to run wires neatly and discreetly, securing them with clips or conduit where necessary.
Installing LED Strips
- Measure and Cut: Carefully measure the required lengths of LED strips for each location. Most strips have designated cut marks.
- Connectors or Soldering: For corners or gaps, use solderless connectors or solder wires between strip sections. For robustness in a workshop, soldering offers a more reliable connection.
- Mounting: Peel the adhesive backing and firmly press the LED strip into place. For uneven surfaces or added security, use mounting clips.
- Wiring: Connect the positive (+) and negative (-) leads of your LED strips to your power supply or LED controller, ensuring correct polarity.


Integrating Motion Sensors and Power Supplies
- Mount Motion Sensors: Mount your chosen motion sensors in their planned locations. Ensure they have a clear line of sight to the areas they need to monitor.
- Wire Motion Sensors:
- Low Voltage Sensors (12V/24V): These typically wire in-line between your power supply and your LED strips. The power supply connects to the sensor’s input, and the sensor’s output connects to the LED strips.
- High Voltage Sensors (120V): If using a high-voltage sensor to control a low-voltage LED power supply, the sensor will be wired to control the AC input of the power supply. If you are not comfortable with AC wiring, consult a qualified electrician.
- Install Power Supplies: Securely mount your power supplies in a dry, accessible location, away from direct moisture or excessive heat.
- Connect to Mains: Connect your power supply’s input to a switched outlet or directly to your mains wiring (again, consult an electrician if unsure).
Testing and Adjusting Your Smart Lighting System
- Initial Power-Up: Once all connections are made and secured, carefully restore power.
- Test Motion Sensors: Walk through your workshop to test the activation and deactivation of the lights.
- Adjust Settings: Fine-tune the sensitivity, time delay, and lux settings on your motion sensors to optimize performance. You want lights to activate reliably when you enter and stay on for a reasonable period after you leave, without unnecessary activations.
- Evaluate Illumination: Check for any remaining dark spots. You might need to add small lengths of LED strips or adjust the angle of existing ones.
For additional DIY improvements to your workshop, consider Mastering the Router Table: Beyond Basic Edges for Precision Joinery to enhance your woodworking capabilities.
Benefits of Smart Workshop Lighting in 2026
Implementing DIY Smart Workshop Lighting: Integrating LED Strips and Motion Sensors for Optimal Visibility and Efficiency delivers a multitude of advantages that go beyond simply turning on a light switch.
Enhanced Safety and Precision
- Reduced Shadows: LED strips provide even, localized light, eliminating the deep shadows that traditional overhead fixtures often create. This is crucial when working with sharp tools or performing detailed tasks, significantly reducing the risk of accidents.
- Improved Visibility for Detail Work: The high color rendering index (CRI) of quality LEDs, especially in the cool white spectrum, makes colors appear more accurately and details stand out, essential for fine woodworking or intricate crafting.
- Reduced Eye Strain: Consistent, flicker-free lighting at appropriate brightness levels minimizes eye fatigue, allowing for longer, more comfortable work sessions.
Significant Energy Efficiency and Cost Savings
- “Lights On When Needed” Principle: Motion sensors ensure that your lights are only active when a human presence is detected. No more accidentally leaving the lights on for hours when you step away.
- LED Energy Savings: LED technology is inherently energy-efficient, consuming significantly less power than incandescent or fluorescent bulbs for the same light output.
- Lower Utility Bills: The combination of efficient LED technology and smart motion sensing leads to a noticeable reduction in your electricity consumption, translating directly into lower monthly bills. A well-lit and efficient space also impacts the value of your projects, like those found in Profitable Woodworking for Beginners: Building and Selling H.
Increased Productivity and Comfort
- Optimized Work Environment: A brightly lit, intelligently controlled workshop fosters a more productive atmosphere. It’s easier to find tools, read measurements, and focus on the task at hand.
- Customizable Lighting: With LED strips, you can tailor your lighting to specific zones or even specific tasks. Need extra light for a sanding station? Add an extra strip. This flexibility is impossible with traditional fixed lighting.
- Modern Aesthetic: A well-designed LED strip lighting system gives your workshop a professional, modern, and inviting appearance, making it a more enjoyable place to spend time. This kind of thoughtful design carries over into projects like DIY Home Office Ergonomics: Building Custom Wooden Monitor Stands and.

Conclusion
Transforming your workshop with DIY Smart Workshop Lighting: Integrating LED Strips and Motion Sensors for Optimal Visibility and Efficiency is an investment that pays dividends in safety, efficiency, and overall enjoyment. By carefully planning your layout, selecting the right components, and following a methodical installation process, you can create a workspace that is not only brilliantly lit but also intelligently managed. In 2026, smart lighting is no longer a luxury but a sensible upgrade for any serious craftsperson. Take the plunge and illuminate your path to greater productivity and a safer, more inspiring workshop environment.
Actionable Next Steps:
- Assess Your Needs: Walk through your workshop with a critical eye, noting dark spots and areas requiring improved task lighting.
- Research Components: Begin researching LED strips, power supplies, and motion sensors, paying close attention to brightness, color temperature, IP ratings, and voltage compatibility.
- Draw a Plan: Sketch out your ideal lighting layout, marking where LED strips and motion sensors will be placed.
- Start Small: If the project feels daunting, begin with a single workbench or a small section of your workshop to gain confidence before expanding.
References
- National Safety Council. (2023). Workplace Safety Statistics.
- U.S. Department of Energy. (2022). LED Lighting.
