
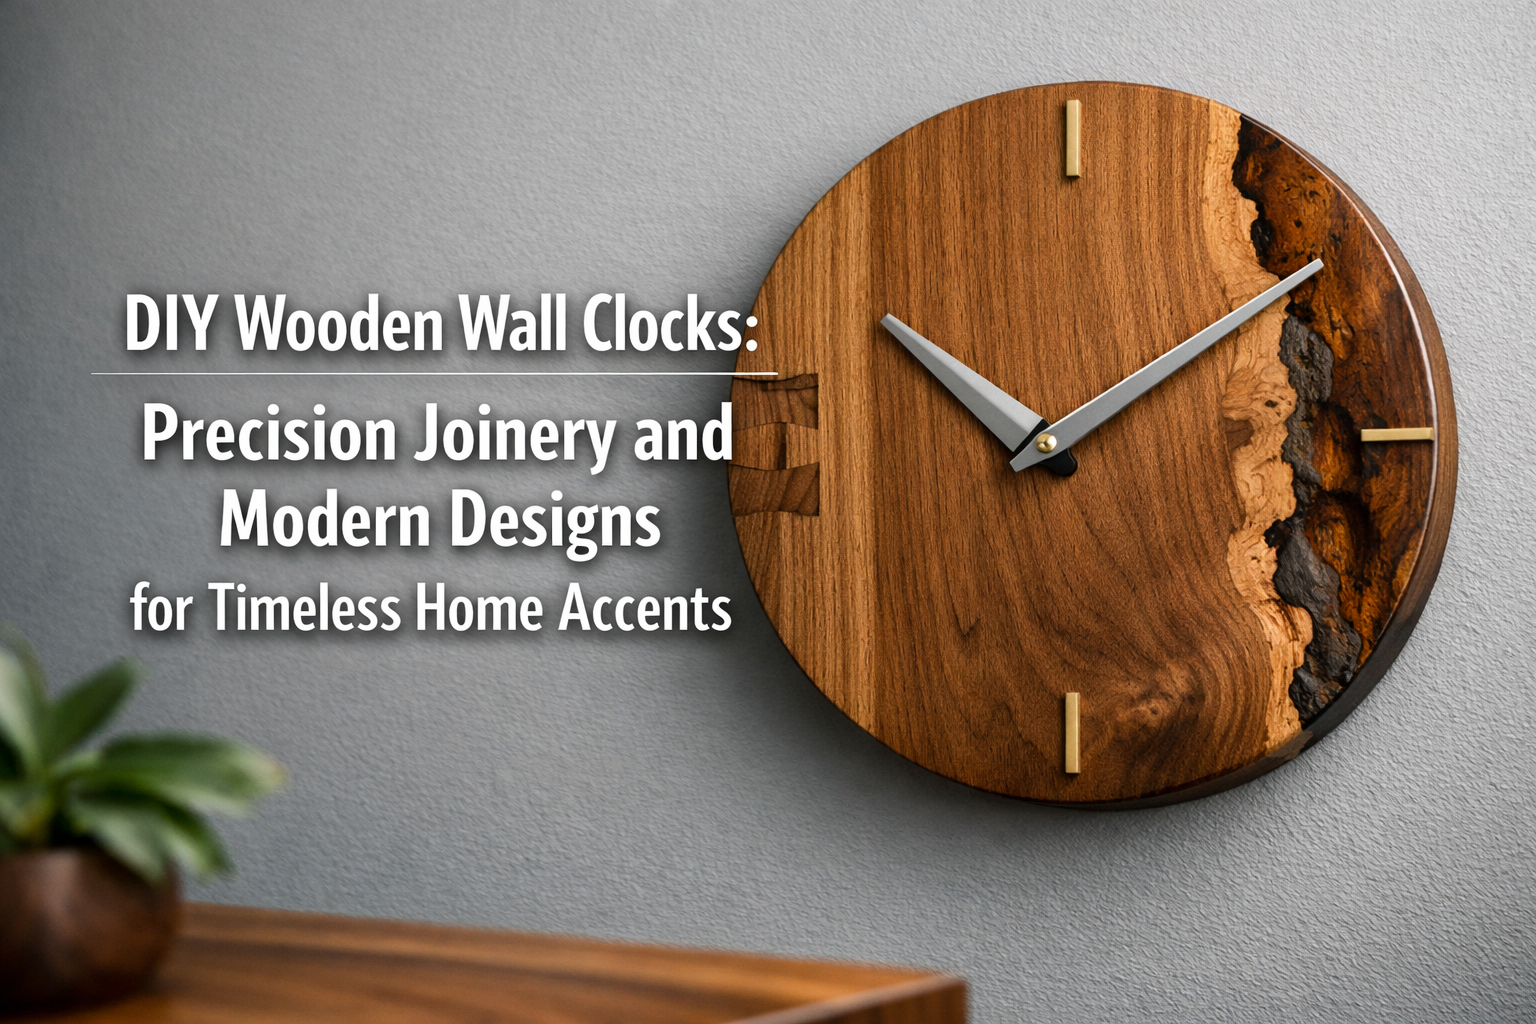

Transforming a simple piece of wood into a functional and beautiful timepiece is one of the most rewarding endeavors in woodworking. In 2026, the demand for unique, handcrafted home accents continues to soar, making DIY Wooden Wall Clocks: Precision Joinery and Modern Designs for Timeless Home Accents a perfect project for woodworkers of all skill levels. This article will guide you through creating stunning wooden wall clocks, exploring step-by-step builds using power tools for clean dovetail joints and hand tools for exquisite finishing touches. We’ll incorporate 2026 trends like minimalist faces with captivating live edge elements, offering pathways for beginners to scale up to advanced customization, including engraving.
Key Takeaways
- Precision is Paramount: Achieving perfect joinery, especially dovetails, is crucial for the clock’s structural integrity and aesthetic appeal.
- Blend Tools for Best Results: Utilize power tools for efficient, precise cuts and hand tools for refined details and a truly custom finish.
- Embrace Modern Design Trends: Incorporate minimalist clock faces, live edge elements, and geometric forms to create contemporary pieces.
- Customization Elevates Value: Engraving, unique wood choices, and personalized finishes turn a clock into a cherished heirloom or a profitable offering.
- Start Simple, Grow Complex: Beginners can begin with basic designs and progressively tackle more intricate joinery and advanced features.
The Foundation: Selecting Wood and Mastering Precision Joinery for DIY Wooden Wall Clocks
The journey to crafting exceptional DIY wooden wall clocks begins with thoughtful wood selection and a commitment to precision. The choice of wood significantly influences the clock’s final appearance, durability, and ease of working. For 2026 projects, popular choices range from domestic hardwoods like walnut, maple, and cherry to sustainable reclaimed woods. Each offers unique grain patterns and color variations, allowing for diverse design aesthetics. Consider premium wood selection for 2026 projects to ensure your material matches your design ambitions.

Wood Selection for Aesthetic and Durability
Choosing the right wood is more than just picking a pretty grain; it’s about understanding its properties.
- Hardwoods (Walnut, Cherry, Maple): Offer exceptional durability, stability, and a beautiful finish. Walnut provides deep, rich tones, while maple is known for its light color and fine grain. Cherry darkens beautifully over time.
- Softwoods (Pine, Cedar): More budget-friendly and easier to work with, but less durable and prone to dents. Can be a good starting point for beginners.
- Reclaimed or Live Edge Wood: For a truly unique and trending aesthetic, incorporating reclaimed urban lumber or live edge slabs adds character and a story to your clock. These pieces often feature natural imperfections and unique contours that become focal points.
“The wood itself is half the design. Let its natural beauty guide your craftsmanship.”
Essential Tools for Precision
A combination of power and hand tools will allow for both efficiency and refined detail.
Power Tools for Efficiency:
- Table Saw: Indispensable for accurate, straight cuts when squaring up stock and cutting clock components.
- Router (Table or Handheld): Excellent for creating decorative edges, grooves for inlays, or even recesses for clock mechanisms.
- Band Saw: Useful for cutting curves, especially when incorporating organic shapes or live edge elements.
- Drill Press: Ensures perfectly perpendicular holes for mounting clock mechanisms and hands.
- Orbital Sander: Speeds up the sanding process, crucial for a smooth finish.
Hand Tools for Refinement:
- Chisels: Essential for fine-tuning joinery, especially dovetails, and cleaning out corners.
- Hand Planes: For achieving incredibly smooth surfaces and precise dimensions that power tools might miss.
- Marking Gauge & Scribe: For accurate layout of joinery.
- Files & Rasps: For shaping and refining curved elements.
- Block Plane: Ideal for trimming end grain and chamfering edges.
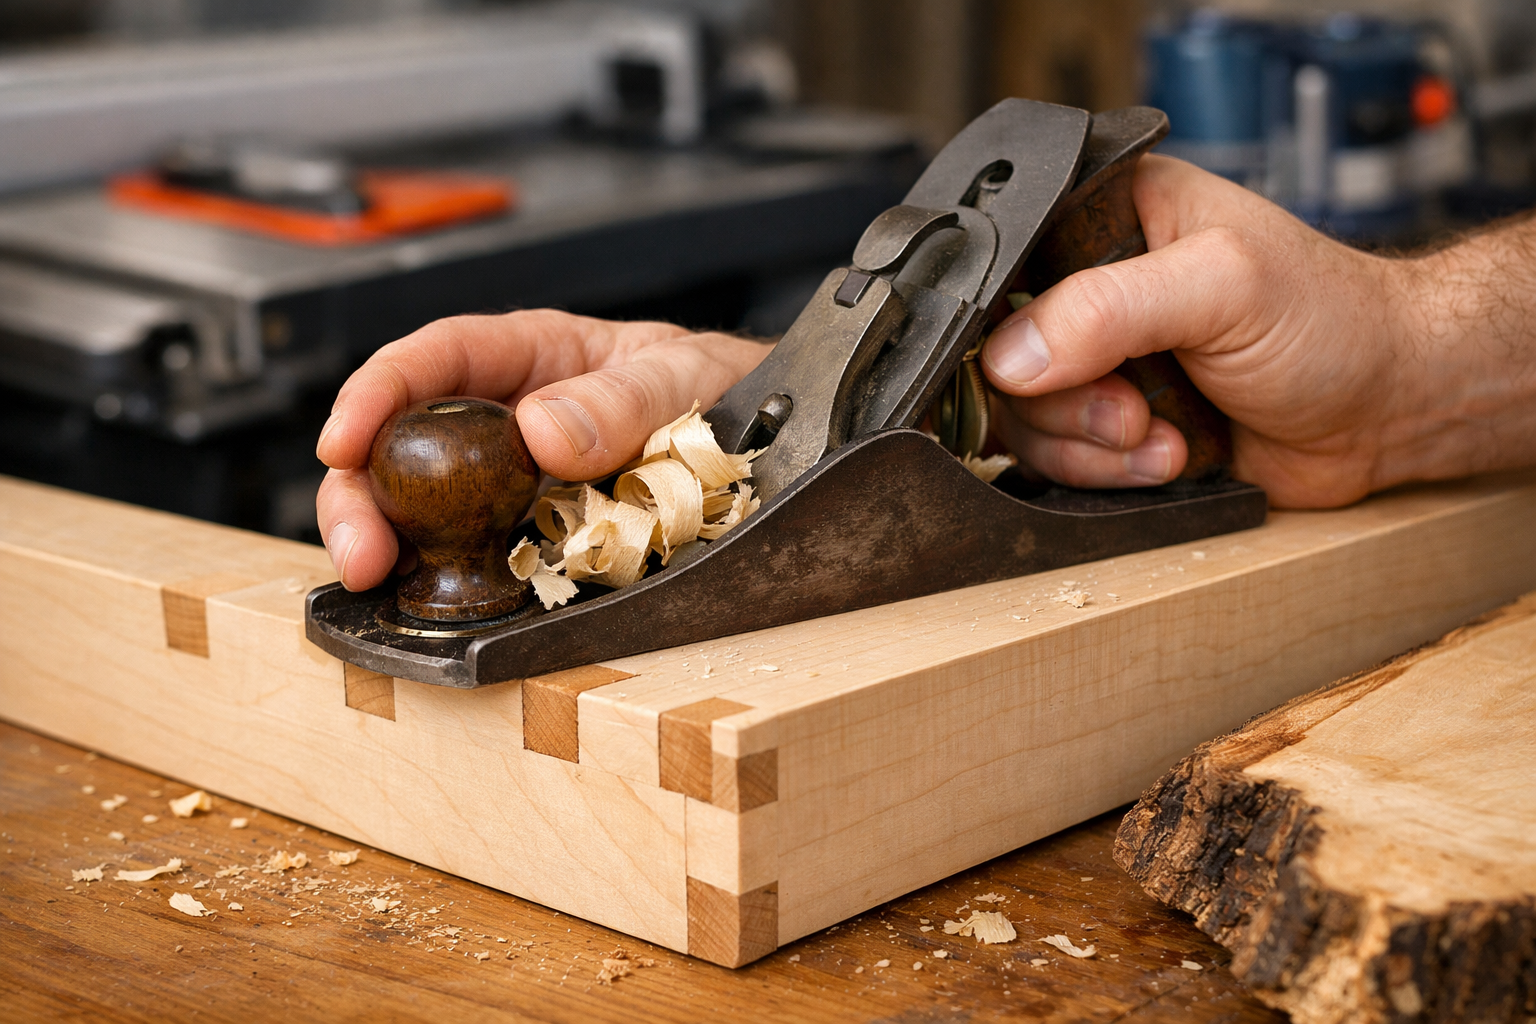
Mastering Precision Joinery: The Dovetail Joint
Dovetail joints are a hallmark of fine woodworking, offering both strength and beauty. While seemingly complex, they are achievable with patience and precision.
- Preparation: Square and dimension your wood pieces accurately. This is the most critical step for successful joinery.
- Layout: Use a marking gauge, dovetail marker, and pencil to carefully lay out the pins and tails. Accuracy here prevents frustration later.
- Cutting Tails (using a dovetail jig or by hand):
- Power Tool Method (Router & Dovetail Jig): A dovetail jig with a router makes cutting tails and pins relatively straightforward and consistent, especially for multiple identical joints.
- Hand Tool Method: Use a dovetail saw to cut along the waste side of your marked lines, then remove the waste with chisels.
- Transferring Marks: Place the cut tails onto the end of the opposing piece and carefully transfer the pin locations using a sharp pencil or knife.
- Cutting Pins: Cut the pins using the same method as the tails, ensuring to stay on the waste side of your transferred lines.
- Test Fit & Refine: Gently test fit the joint. It should be snug, requiring light tapping to seat. Use chisels to pare away any high spots.
| Joinery Type | Strength | Aesthetic | Skill Level | Common Use Cases |
|---|---|---|---|---|
| Dovetail | Very High | Excellent | Intermediate/Adv. | High-end clocks, drawer boxes, cabinetry (e.g. for wooden storage chests) |
| Miter Joint | Moderate | Clean | Beginner/Inter. | Picture frames, simple clock frames, box construction |
| Lap Joint | Moderate | Functional | Beginner | Interior frames, simpler joinery where strength isn’t paramount |
| Tongue & Groove | High | Hidden | Intermediate | Panel construction, creating flush surfaces |
Modern Designs and Live Edge Integration for DIY Wooden Wall Clocks
The aesthetic of DIY wooden wall clocks in 2026 leans heavily into modern minimalism, often juxtaposed with the organic beauty of live edge wood. This blend creates a “warm minimalist” appeal, where clean lines meet natural textures, making for truly timeless home accents. Focusing on this fusion allows for unique, eye-catching designs.
Embracing Modern Minimalist Designs
Modern clock designs often prioritize simplicity, functionality, and clean lines.
- Clean Faces: Opt for faces with minimal markings – subtle dots, dashes, or even no numerals at all. This allows the wood grain to be the star.
- Geometric Shapes: Beyond traditional circles, consider square, rectangular, or even abstract geometric shapes for your clock body. These can be made from a single slab or by joining multiple pieces using precision joinery.
- Recessed Details: Instead of applied numerals, router out shallow grooves or depressions for hour markers, adding a subtle depth to the design.
- Floating Elements: Design the clock face to appear slightly detached from its backer board, creating a contemporary “floating” effect using standoff hardware.
Incorporating Live Edge Elements
Live edge wood, with its natural, untamed edge, offers a stunning contrast to refined woodworking.
- Full Live Edge Slab: For a bold statement, use a single live edge slab as the entire clock body. Sand and finish the live edge to highlight its natural beauty.
- Live Edge Accents: Integrate a smaller live edge piece as an accent within a larger, more structured clock frame. For example, a rectangular clock could feature a thin live edge strip running vertically or horizontally.
- Clock Numbers from Live Edge Offcuts: Cut small, irregular shapes from live edge scraps to serve as unique hour markers, perhaps for a DIY wooden wine rack. This approach not only looks striking but also aligns with sustainable practices by utilizing shop scraps into design features.
Step-by-Step: Building a Minimalist Clock with Live Edge Accent
- Design & Sketch: Start with a clear drawing of your desired clock, noting dimensions and where the live edge will integrate.
- Wood Prep:
- Clock Body: Dimension your main clock body wood (e.g., walnut or maple) to your desired size and thickness. Ensure all faces are perfectly square.
- Live Edge Piece: Select a complementary live edge piece. Clean its bark, sand the edge smoothly, and consider stabilizing any cracks with epoxy.
- Precision Joinery (e.g., Dovetails): If your clock body is assembled from multiple pieces or you’re creating a frame, execute your dovetail joints or other chosen joinery. Ensure strong, tight bonds.
- Recessing for Clock Mechanism: Using a drill press and a Forstner bit, create a recess on the back of the clock body for the quartz clock mechanism. Ensure the shaft protrudes enough through the front.
- Integrating Live Edge:
- Flush Integration: If the live edge is meant to be flush, carefully rout a channel in the main clock body to perfectly accept the live edge piece. Glue securely.
- Surface Accent: If it’s a surface accent, glue it directly to the front of the clock body, ensuring proper alignment.
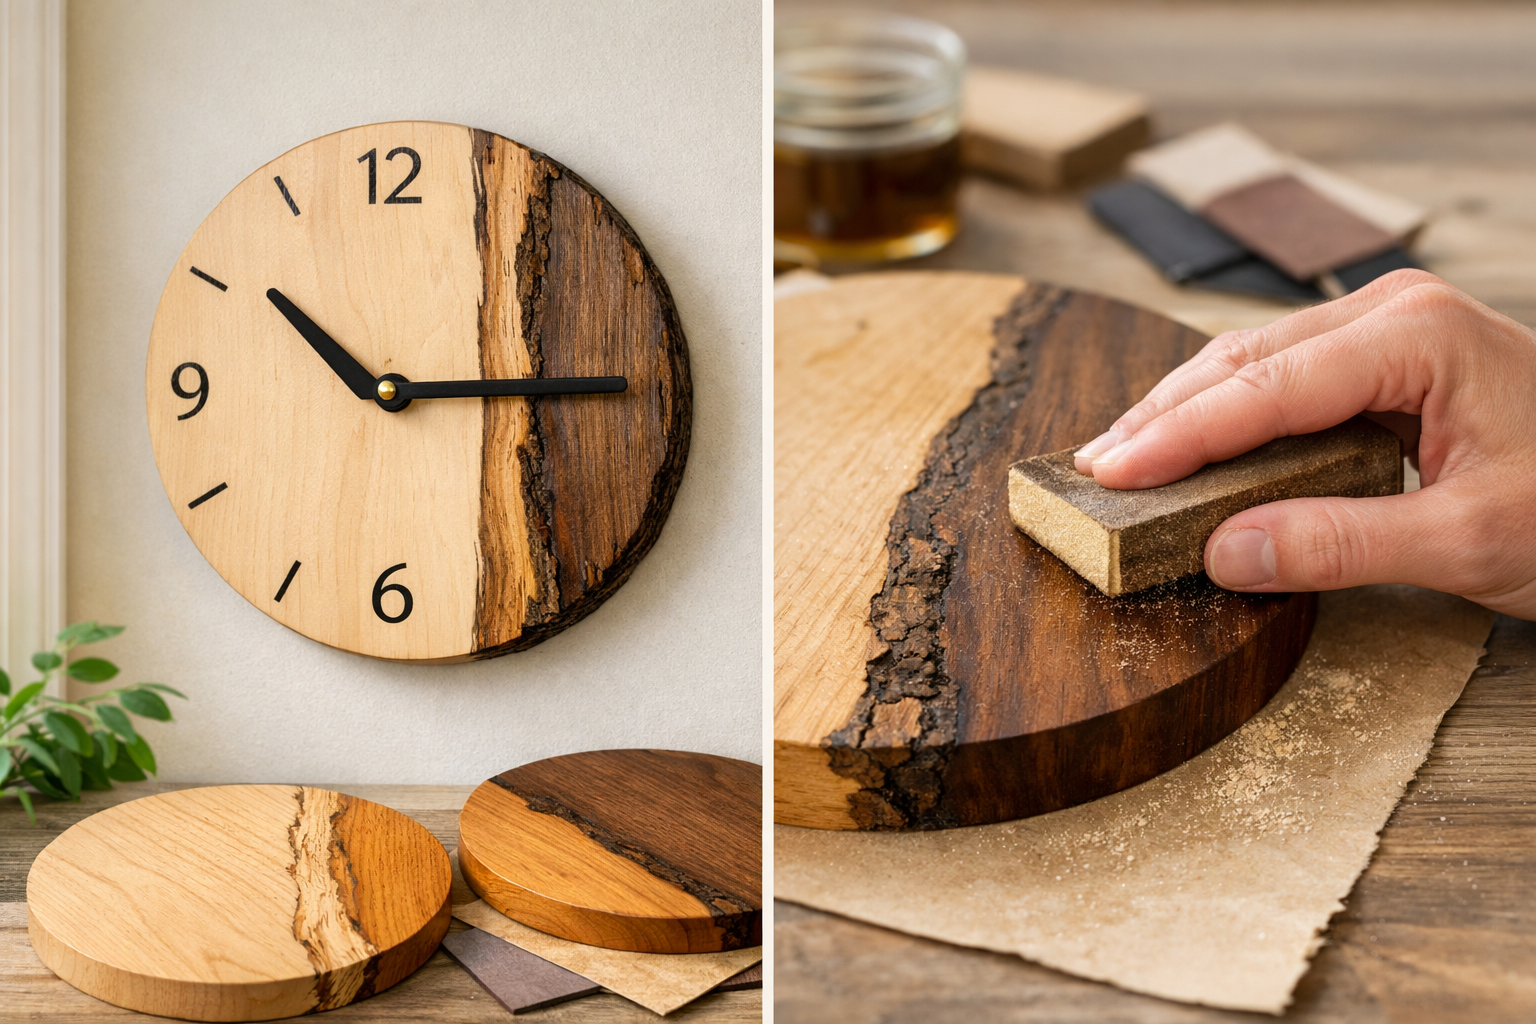
- Sanding: Begin with coarser grit (100-120) and progress through finer grits (up to 220 or 320) for a silky-smooth finish. Pay special attention to the live edge.
- Finishing: Apply your chosen finish. Oil finishes (like Danish oil or linseed oil) enhance natural wood beauty, while lacquers or polyurethanes offer more protection. For sustainability, explore sustainable finishes for reclaimed wood.
- Mechanism Installation: Install the quartz clock mechanism, hands, and hanger.
Finishing Touches and Customization for Timeless Home Accents
The final stages of crafting DIY wooden wall clocks are where they truly transition from functional items to personalized, timeless home accents. This involves meticulous sanding, appropriate finishing, and the opportunity for advanced customization that adds significant value and individuality.
Achieving a Flawless Finish
A great finish protects the wood and enhances its natural beauty.
Sanding Protocol:
- Start with a medium grit (100-120) to remove tool marks and rough spots.
- Progress systematically through finer grits (150, 180, 220). For most hardwoods, 220 grit is sufficient for a smooth finish. For an ultra-smooth, furniture-grade feel, go to 320 or even 400.
- Always sand with the grain. Cross-grain sanding leaves scratches that become very apparent after finishing.
- Remove all sanding dust between grits using a tack cloth or compressed air.
- Consider “water popping” by lightly dampening the wood after 220 grit sanding, letting it dry, and then doing a final light sanding with 220-grit. This raises wood fibers, leading to a smoother final finish. If you notice sanding marks after staining, it’s often due to insufficient sanding before staining.
Choosing Your Finish:
- Oils (Danish Oil, Tung Oil, Linseed Oil): Penetrate the wood, enhancing its natural color and grain. They offer a matte to satin finish and are easy to repair. Perfect for a natural, tactile feel.
- Varnishes (Polyurethane, Lacquer): Form a protective film on the surface, offering excellent durability against moisture and wear. Available in various sheens from matte to high gloss. Consider Danish oil vs. linseed oil for a deep dive into natural options.
- Waxes: Provide a soft, low-sheen finish and are often used over other finishes for added protection and luster.
- Stains: Can alter the wood’s color, but always test on scrap pieces first. Ensure the stain is compatible with your chosen topcoat.
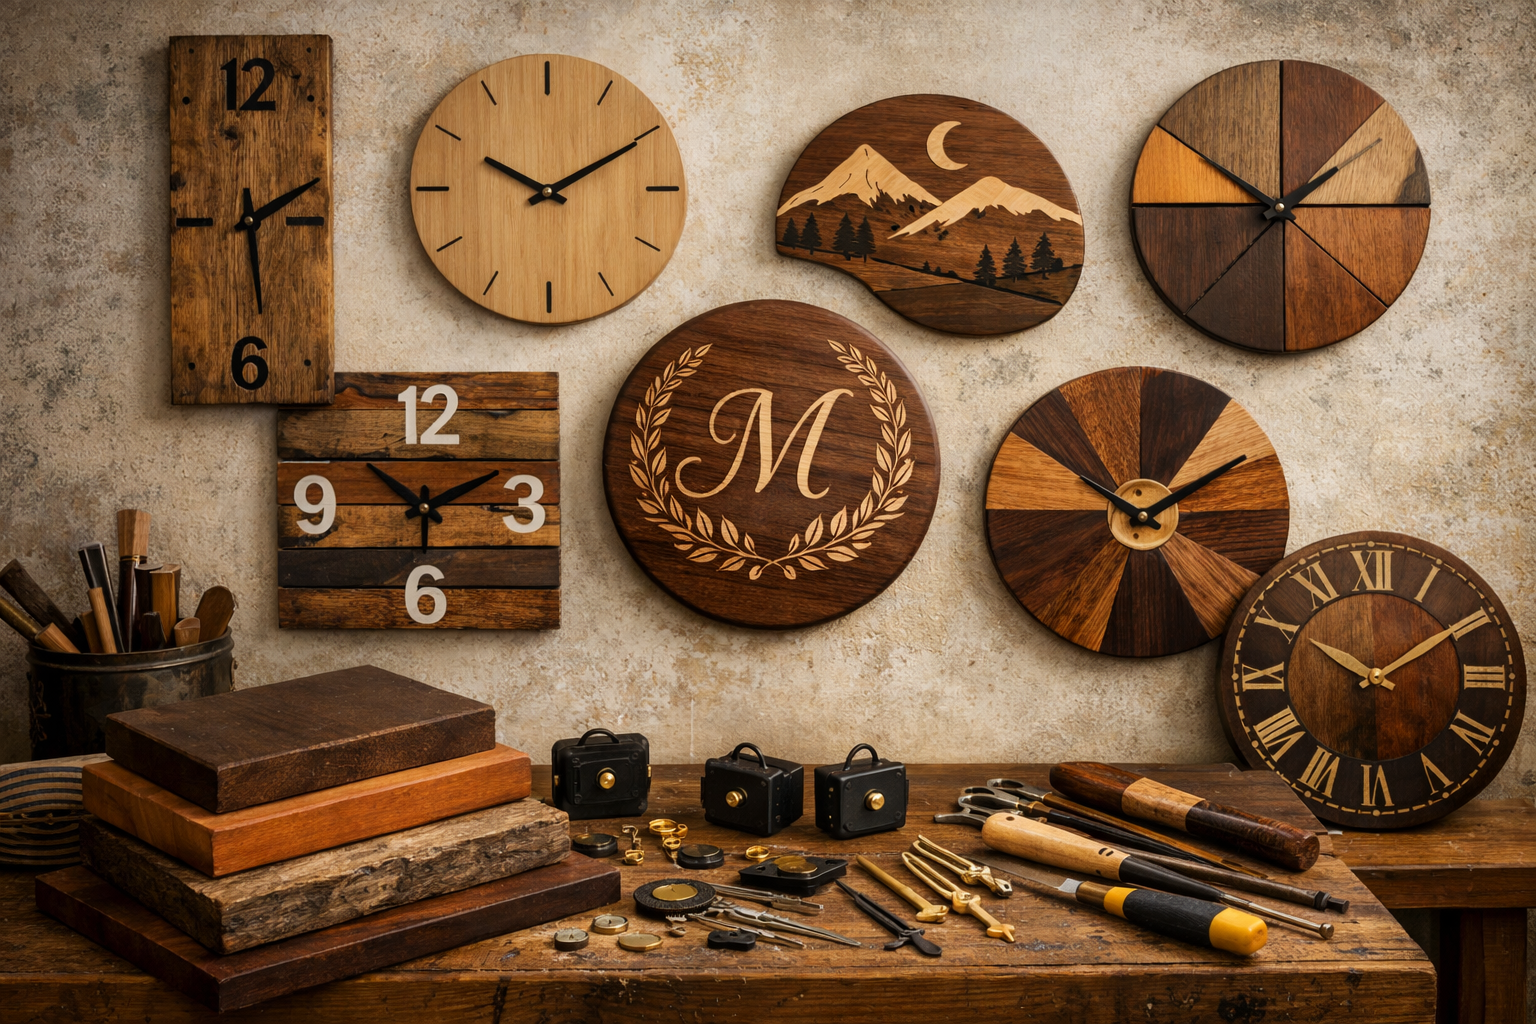
Advanced Customization: Beyond the Basic
This is where your clock truly becomes a unique statement piece.
- Engraving: Use a CNC router or laser engraver to add personalized text (names, dates), intricate patterns, or even corporate logos. This significantly elevates the clock’s perceived value and makes it ideal for gifts or bespoke orders. Hand carving is also an option for a more rustic feel.
- Inlays: Incorporate contrasting wood species, mother-of-pearl, or metallic elements as inlays for hour markers or decorative accents. This requires precision routing and careful fitting.
- Mixed Media: Combine wood with other materials like resin, metal, or stone to create unique aesthetic effects. For instance, a live edge clock face with a clear epoxy pour filling natural voids can be stunning.
- Unique Clock Hands: Don’t settle for generic hands. Source unique, custom-cut metal hands, or even craft your own from thin wood veneers, further personalizing your DIY wooden wall clocks.
Installing the Clock Mechanism and Hanger
Once the finish is fully cured, it’s time for assembly.
- Clock Mechanism: Insert the quartz mechanism into the pre-drilled hole from the back. Ensure it’s flush and secure.
- Hands: Gently push the hour, minute, and second hands onto the mechanism shaft, ensuring they are parallel to each other and do not rub.
- Battery: Insert a fresh AA battery.
- Hanger: Attach a sturdy picture hanger or keyhole hanger to the back of the clock. Position it carefully to ensure the clock hangs straight and securely. For heavier clocks, consider using two hangers for better stability.
By paying close attention to these finishing touches and exploring customization options, your DIY wooden wall clocks will not only tell time but also tell a story of craftsmanship and personal style, destined to become cherished timeless home accents in any 2026 interior. For more ideas on integrating unique pieces into your home, consider exploring options like building custom wooden TV stands or even crafting profitable wooden benches with advanced joinery.
Conclusion
Crafting DIY wooden wall clocks offers a deeply satisfying blend of artistry, precision, and functionality. From the careful selection of premium woods and the meticulous execution of joinery techniques like dovetails, to embracing modern minimalist designs enhanced by the organic beauty of live edge elements, each step contributes to a unique, timeless home accent. In 2026, the demand for personalized, handcrafted pieces that tell a story is stronger than ever.
Whether you’re a beginner seeking to hone your skills with a basic yet elegant design, or an advanced woodworker looking to incorporate intricate engraving or mixed media, the journey of creating a wooden wall clock is immensely rewarding. The combination of power tools for efficiency and hand tools for refined details ensures a professional-grade finish. By focusing on precision, embracing contemporary trends, and infusing your personality into the final product, you can create pieces that are not only functional timekeepers but also cherished works of art for years to come.

Next Steps:
- Start Small: Begin with a simpler design, perhaps a circular clock with a minimalist face and a straightforward miter joint frame, to build confidence in your measuring, cutting, and finishing skills.
- Invest in Quality Tools: Gradually acquire essential power and hand tools as your projects become more ambitious.
- Practice Joinery: Dedicate time to practicing dovetail joints on scrap wood until you achieve consistent, tight fits.
- Explore Wood Species: Experiment with different wood types to understand their working properties and aesthetic contributions.
- Personalize: Once comfortable with the basics, challenge yourself with a live edge integration or a personalized engraving to truly make your mark.
