
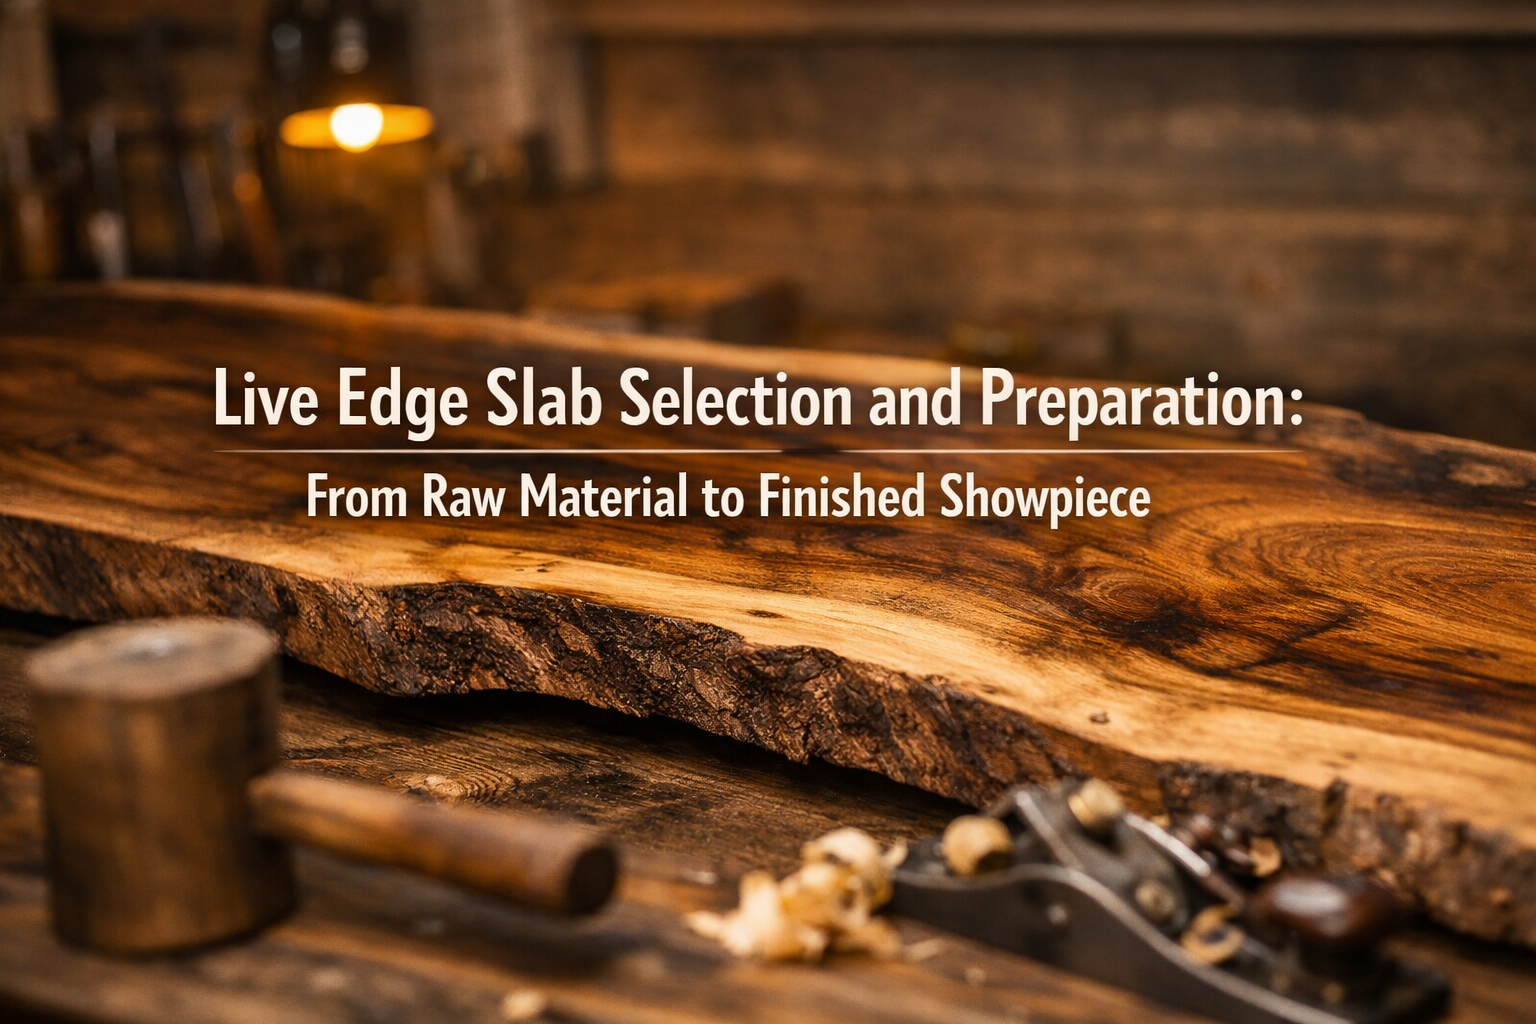

The allure of live edge furniture lies in its ability to bring nature’s raw beauty indoors, transforming a simple piece of wood into a functional work of art. In 2026, live edge designs continue to captivate homeowners and designers alike, offering a unique blend of rustic charm and modern elegance. But behind every stunning live edge table or countertop is a meticulous process of Live Edge Slab Selection and Preparation: From Raw Material to Finished Showpiece. This comprehensive guide will walk you through everything from understanding wood characteristics to the final installation, ensuring your live edge project is not only beautiful but also durable and long-lasting.
Choosing the right slab and preparing it correctly are critical steps that dictate the final appearance, stability, and longevity of your project. Whether you’re dreaming of a majestic dining table, a unique desk, or a captivating mantelpiece, mastering these foundational techniques is paramount.

Key Takeaways
- Slab Selection is Crucial: Carefully inspect for moisture content, stability, and character (knots, burls, cracks) to ensure it suits your design vision and will remain stable over time.
- Proper Drying is Essential: Green wood must be dried slowly and correctly to prevent warping, cracking, and insect infestation. Kiln-drying or air-drying both have their merits.
- Stabilization and Flattening: Techniques like epoxy filling, bow ties, and proper flattening are necessary to create a stable, level surface while preserving the slab’s natural form.
- Finishing Protects and Enhances: Selecting the right finish not only protects the wood but also accentuates its natural beauty and ensures durability for its intended use.
- Installation Matters: Secure and appropriate installation methods are vital for the safety and stability of your finished live edge piece.
Selecting the Perfect Live Edge Slab

The journey from a raw tree trunk to a magnificent live edge showpiece begins with the crucial first step: selecting the right slab. This involves more than just picking a visually appealing piece; it requires a keen eye for quality, stability, and suitability for your intended project.
Understanding Wood Species and Characteristics
Different wood species offer distinct aesthetics and properties. Your choice will largely depend on the desired look, expected durability, and budget.
| Wood Species | Characteristics | Common Uses for Live Edge |
|---|---|---|
| Walnut | Rich dark brown, distinctive grain, highly stable, moderate hardness. | Dining tables, desks, coffee tables, countertops |
| Maple | Light cream to reddish-brown, often has interesting figuring (e.g., curly, birdseye), very hard. | Kitchen islands, cutting boards, console tables |
| Oak | Light to medium brown, prominent open grain, very strong and durable. | Rustic tables, benches, outdoor furniture |
| Sycamore | Pale, often with striking “lacewood” figure when quarter-sawn, medium hardness. | Unique tables, accent pieces, wall art |
| Cherry | Light pinkish-brown, darkens with age to a rich red, fine grain, relatively stable. | Fine furniture, desks, decorative pieces |
When evaluating species, consider the grain pattern, color, and inherent stability. For instance, while a dramatic piece of spalted maple might be visually stunning, it may require more stabilization than a traditional black walnut slab. For advice on choosing materials that showcase hand-cut joints, you might find our guide on Wood Species Selection for Visible Joinery: Choosing Materials that Showcase Hand-Cut Joints in Contemporary Designs helpful.
Assessing Slab Quality: Moisture Content, Defects, and Stability
Once you’ve narrowed down your species choice, a thorough inspection of individual slabs is critical.
- Moisture Content (MC): This is perhaps the most important factor. Green wood (freshly cut) can have an MC of 30% or more. For indoor furniture, the target MC should be between 6-8%. An accurate moisture meter is indispensable. Slabs with high or uneven MC are prone to significant warping, cupping, and cracking as they dry.
- Pro Tip: Kiln-dried slabs generally offer more stability and are less likely to contain pests. Air-dried slabs are also viable but demand longer drying times and careful monitoring.
- Stability: Look for signs of stress or movement. Check for severe twists, bows, or cups. While some of these can be corrected, extreme distortion can make a slab unusable or incredibly challenging to work with.
- Defects and Character:
- Cracks and Checks: Small surface checks are common and often add character, but deep structural cracks running through the slab’s thickness can compromise its integrity. These may need stabilization with epoxy or bow ties.
- Burls, Knots, and Voids: These natural features define the live edge aesthetic. Burls offer unique swirling grain patterns. Knots, especially those that are “dead” or loose, may need to be removed and filled. Voids can be filled with clear or tinted epoxy for a striking effect.
- Pest Damage: Inspect for insect holes or trails. Fresh sawdust or exit holes could indicate active infestations, which must be treated before bringing the slab into your workshop.
- Edge Profile: The “live edge” itself should be interesting. Some slabs have a smooth, flowing edge, while others might be more jagged or incorporate bark. Consider how the natural contour will integrate with your design. Do you prefer bark on or off? Bark can be aesthetically pleasing but often needs to be stabilized or removed to prevent future flaking.
Pull Quote: “The soul of a live edge piece lies in its imperfections. Embrace them, but understand their implications for stability and preparation.”
Sourcing Your Live Edge Slab
Where you source your slab impacts its quality, price, and provenance.
- Local Sawmills and Lumberyards: Often the best source for a wide selection and competitive pricing. You can inspect slabs in person and discuss drying methods.
- Specialty Wood Suppliers: These suppliers often carry unique species and highly figured slabs, sometimes kiln-dried to specific specifications.
- Online Retailers: Offers convenience but requires careful review of photos, dimensions, and moisture content guarantees. Always ask for detailed pictures and dimensions.
- Arborists or Tree Removal Services: With proper connections, you might acquire raw logs, though this requires significant processing on your part (milling, drying).
Consideration: Always verify the dimensions, especially thickness, as you’ll likely need to plane and sand it down. Ensure the slab is large enough for your project, accounting for any necessary trimming or flattening. For ideas on various projects, consider our guide on Live Edge Wood Projects: From Design to Execution for Home Craftspeople.
From Raw Slab to Refined Masterpiece: Preparation Techniques
Once you’ve secured your ideal live edge slab, the real work of transforming it begins. This phase involves a series of preparation steps designed to stabilize, flatten, and clean the wood, laying the groundwork for a stunning finish.
Drying and Stabilization
If your slab isn’t fully dry (below 10% MC for most indoor applications), it must be dried properly.
- Air Drying: This slow process can take years (roughly 1 year per inch of thickness). Slabs must be stacked with stickers (small strips of wood) between layers, in a well-ventilated, shaded area, away from direct sunlight and rain. Ends should be sealed with wax to prevent rapid moisture loss and end-checking.
- Kiln Drying: This method uses controlled heat and humidity to dry wood much faster and more consistently, often resulting in more stable lumber and killing off any pests. Most commercial slabs are kiln-dried.
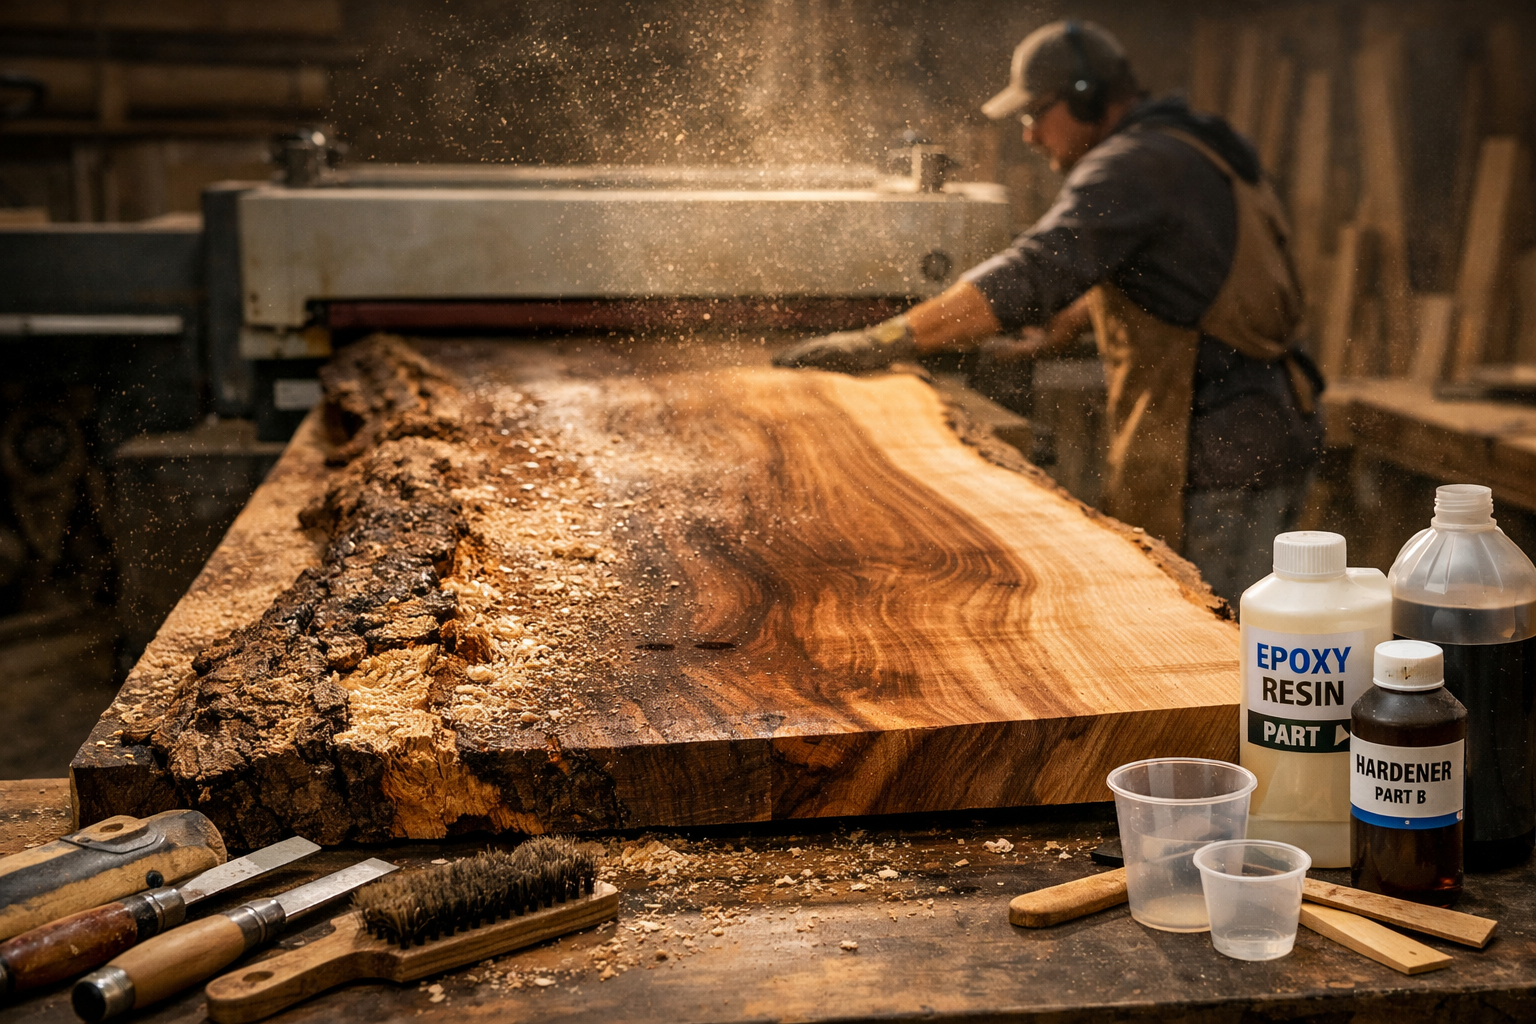
Flattening and Dimensioning
Raw slabs are rarely perfectly flat. Achieving a level surface is critical for any functional piece.
- Initial Assessment: Use a long, straight edge and winding sticks to identify high and low spots, as well as any twists or cups.
- Slab Flattening Mill / Router Sled: For large slabs, a router sled system is often the most accessible method for the home woodworker. This involves building a jig that allows a router to move across the slab’s surface, slowly planing it flat. This process is time-consuming but yields excellent results.
- Planer/Jointer (if applicable): Smaller, narrower slabs might fit through a wide planer or jointer, but these tools often have width limitations. For larger pieces, hand planes can also be used, but require significant skill and effort. If you’re considering a planer, you might find information on models like the Hitachi P13F Planer: Benefits, Setup, Maintenance, and More useful.
- Squaring Edges (Optional): If a perfectly straight edge is needed on one or more sides (e.g., for a desk against a wall), a track saw or a guided saw can be used after flattening. However, for true live edge pieces, the natural edges are preserved.
Addressing Cracks, Voids, and Bark
Natural imperfections are part of the live edge charm, but some require attention for structural integrity and aesthetics.
- Bark Removal/Stabilization: If the bark is loose or crumbly, it’s best to remove it to prevent future flaking. Use a wire brush, chisel, or even a pressure washer (allowing ample drying time afterward). If the bark is tight and you wish to keep it, a clear epoxy or finish can help stabilize it.
- Epoxy Filling: For structural cracks, knots, or voids, epoxy resin is an excellent solution.
- Cleaning: Thoroughly clean out any loose debris, dust, or rot from the crack.
- Pouring: Mix and pour the epoxy. For deep cracks, multiple pours may be needed to prevent excessive heat buildup. Clear epoxy preserves visibility, while tinted epoxy (black, blue, etc.) can create a dramatic contrast. Always dam the bottom of through-cracks to prevent leaks.
- Bow Ties / Butterfly Keys: These traditional joinery elements are not only decorative but also highly functional for preventing cracks from spreading further. They are typically cut into the surface and inlaid with contrasting wood species. They make a beautiful statement and contribute to the slab’s long-term stability.
Table: Common Stabilization Methods
| Method | Purpose | Best For | Considerations |
|---|---|---|---|
| Epoxy Resin | Fill voids, cracks, stabilize bark | Large cracks, burls, uneven surfaces | Curing time, potential for bubbles, various colors |
| Bow Ties | Stop crack propagation | Structural cracks, decorative accent | Requires precise routing/chiseling, wood choice |
| Bark Removal | Prevent flaking, clean look | Loose, decaying bark, cleaner aesthetic | Alters natural edge, labor intensive |
| Sanding | Smooth surface, prep for finish | All surfaces after flattening | Gradual grit progression, dust control |
Sanding and Edge Preparation
Sanding is where the true beauty of the wood begins to emerge.

- Gradual Grit Progression: Start with a coarser grit (e.g., 80 or 100) to remove milling marks and achieve initial smoothness. Progress through finer grits (120, 150, 180, 220) until the desired smoothness is achieved. Avoid skipping grits, as this leaves deeper scratches that are harder to remove later.
- Live Edge Specifics: The natural edge requires special attention. Use sandpaper by hand, wire brushes, or even power tools with soft sanding attachments to clean and smooth the contours without removing too much of the unique shape. If bark is retained, clean it thoroughly.
- Dust Removal: Before applying any finish, ensure the slab is completely free of dust. Use an air compressor, tack cloth, or a vacuum to remove all particulates.
This meticulous preparation ensures that your live edge slab is perfectly stable, smooth, and ready to become a stunning centerpiece. For more advanced techniques, especially for projects like a DIY Live Edge Dining Table: Step-by-Step Build for 2026 Trends, these steps are fundamental.
Finishing and Installation: Preserving Your Live Edge Showpiece
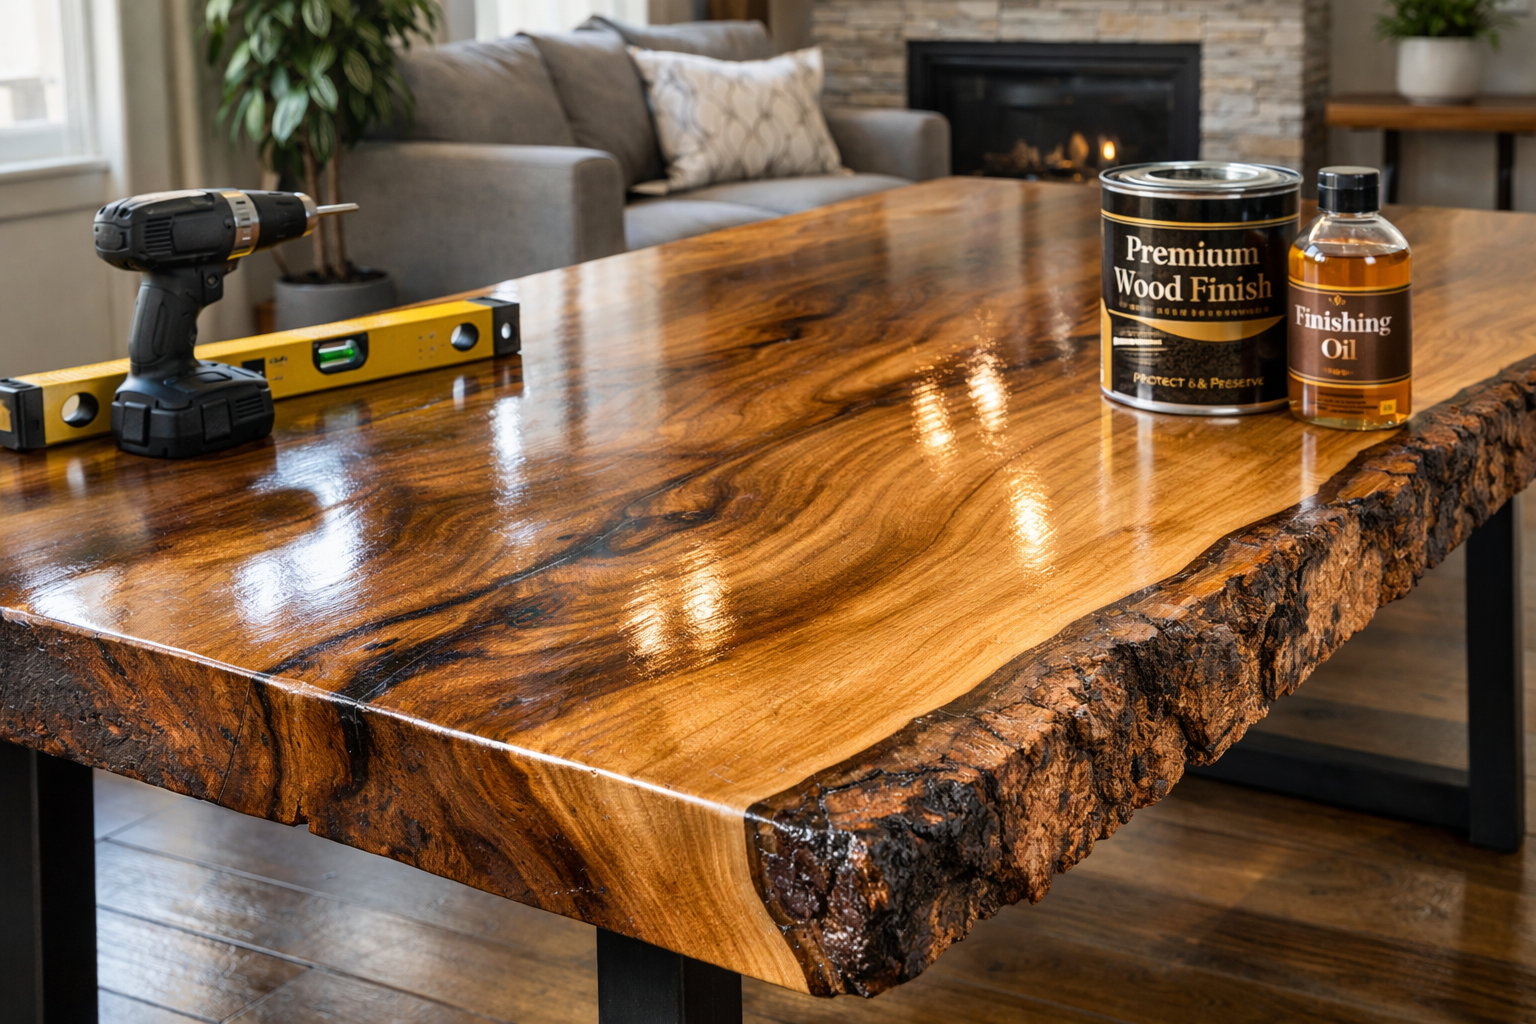
The final stages of your live edge project involve applying a protective finish and ensuring proper installation. These steps are crucial for enhancing the wood’s beauty, protecting it from daily wear and tear, and ensuring its longevity.
Choosing the Right Finish for Your Live Edge Slab Selection and Preparation: From Raw Material to Finished Showpiece
The choice of finish significantly impacts the look, feel, and durability of your live edge piece. Consider the intended use, desired aesthetic, and level of protection needed.
- Oil Finishes (e.g., Danish Oil, Tung Oil, Linseed Oil):
- Pros: Penetrates the wood, offering a natural, matte, or satin look. Enhances grain depth and character. Easy to repair and reapply.
- Cons: Less protective against moisture and heat compared to film-forming finishes. Requires more frequent reapplication, especially for high-use surfaces.
- Best for: Pieces where a natural feel and easy repair are prioritized, such as decorative tables or less-used surfaces. For a deeper dive into oils, see Linseed Oil vs. Stain: Pros, Cons, and Choosing the Right Finish and Danish Oil vs. Linseed: The Ultimate Wood Finishing Guide.
- Polyurethane (Oil-Based or Water-Based):
- Pros: Forms a durable, protective film on the surface. Excellent resistance to scratches, moisture, and heat. Available in various sheens (matte, satin, semi-gloss, gloss). Water-based polyurethanes are low-VOC and dry quickly.
- Cons: Can sometimes look “plastic-y” if too thick. Oil-based can yellow over time. Repairs are more challenging than with oil finishes.
- Best for: High-traffic surfaces like dining tables, kitchen islands, and desks where maximum protection is needed. Learn more about application techniques in Spray Water-Based Polyurethane: Benefits, Techniques, and Maintenance.
- Epoxy Pour-Over Finishes:
- Pros: Creates an incredibly durable, glass-like, thick, and waterproof surface. Ideal for showcasing intricate wood grain and embedded objects.
- Cons: Can be challenging to apply without bubbles or imperfections. Requires specialized techniques and a clean environment. Not easily repairable.
- Best for: Bar tops, extremely high-use surfaces, or statement pieces where a very thick, protective, and perfectly smooth surface is desired.
- Waxes:
- Pros: Enhances natural luster, provides a soft feel.
- Cons: Offers minimal protection against spills or scratches. Best used as a top coat over other finishes or for purely decorative items. Consult Wax on Top of Polyurethane: Achieving a Smooth Finish for combining finishes.
Application Tips:
- Cleanliness: Always apply finishes in a dust-free environment.
- Thin Coats: Multiple thin coats are always better than a few thick coats. This ensures proper curing and a more durable, even finish.
- Sanding Between Coats: Lightly sand with very fine grit (320-400) between coats of film-forming finishes to promote adhesion and achieve a smoother surface. Remove all dust before the next coat.
- Follow Manufacturer’s Instructions: Adhere strictly to drying times and application guidelines for your chosen product.
Securing and Installing Your Live Edge Piece
Proper installation ensures the safety and stability of your finished live edge creation. The method will depend heavily on the type of project.
- Table Bases:
- Wood Bases: Often involve mortise and tenon or robust bolted joinery. Consider the weight and size of your slab when designing the base.
- Metal Legs: Steel, cast iron, or aluminum legs offer modern aesthetics and strong support. They typically attach to the underside of the slab with screws. Ensure appropriate fasteners are used for the wood species and leg material.
- Movement Considerations: Wood expands and contracts with changes in humidity. When attaching a slab to a rigid base, use slotted holes or specialized fasteners (like Z-clips or figure-8 fasteners) that allow for this natural movement. Directly screwing a large slab to a fixed base can lead to cracking.
- Countertops/Desktops:
- Support Structure: Ensure sufficient support underneath to prevent sagging.
- Mounting: Similar to table bases, use fasteners that allow for wood movement. Silicone caulk can be used along walls for sealing, but avoid rigid glues that restrict expansion and contraction.
- Floating Shelves:
- Heavy-Duty Brackets: Live edge shelves are often quite heavy. Robust floating shelf brackets, securely anchored into wall studs, are essential.
- Considerations: For more insights on sturdy shelving, explore Custom Floating Shelves: Design & Install for 2026 Kitchens and Robust Floating Shelves with Hidden Fasteners: Power Tool Techniques for 2026 Warm Minimalism.
- Mantelpieces:
- Secure Fastening: Mantels must be securely attached to the fireplace structure or wall studs. Lag screws or heavy-duty mounting plates are common.
- Heat Expansion: Consider the proximity to heat if it’s a functioning fireplace. Ensure wood is properly dried to prevent cracking from heat cycling.
Safety First: Always use appropriate personal protective equipment (PPE) during installation, including safety glasses and gloves. If lifting heavy slabs, enlist help or use proper lifting equipment.
Maintenance and Care
To keep your live edge showpiece looking its best for years to come:
- Clean Regularly: Use a soft, damp cloth for routine cleaning. Avoid harsh chemicals.
- Protect from Heat and Moisture: Use coasters and trivets. Wipe spills immediately.
- Reapply Finish: Depending on the finish and usage, periodic reapplication of oil or a fresh topcoat may be necessary to maintain protection and luster.
By carefully selecting, preparing, finishing, and installing your live edge slab, you will create a durable and captivating piece that celebrates the inherent beauty of wood.
Conclusion
The journey of transforming a raw live edge slab into a finished showpiece is a rewarding endeavor that combines an appreciation for natural beauty with skilled craftsmanship. From the initial, discerning Live Edge Slab Selection and Preparation: From Raw Material to Finished Showpiece to the meticulous flattening, stabilization, and the final protective finish, each step plays a vital role in creating a functional work of art.
Understanding the nuances of wood species, the critical importance of moisture content, and the techniques for addressing natural imperfections ensures that your project is not only aesthetically stunning but also structurally sound and built to last. The character inherent in every burl, knot, and flowing edge is what makes live edge furniture truly unique, and with proper preparation, these elements become features to celebrate rather than flaws to hide.
As you embark on your own live edge projects, remember that patience and attention to detail are your most valuable tools. Embrace the natural variations of the wood, choose finishes that enhance its beauty while providing adequate protection, and install your creation with care. The result will be a timeless piece that adds warmth, elegance, and a direct connection to nature within your home for many years to come.
Next Steps:

- Research Wood Suppliers: Identify local sawmills or specialty wood dealers in your area and inquire about their slab inventory and drying processes.
- Invest in Tools: If you plan on doing multiple projects, consider investing in a moisture meter and a router sled setup for efficient flattening.
- Practice on Smaller Pieces: If new to live edge work, start with a smaller slab for a coffee table or shelf to hone your skills before tackling a large dining table.
- Explore Finishes: Experiment with different finishes on scrap pieces of the same wood species to see how they affect the grain and color before committing to your main project.
