

Mastering Mahogany Wood Finishing Techniques for Lasting Beauty
Mahogany, with its distinctive reddish-brown hues and exquisite grain patterns, has long been a favorite among woodworkers and furniture makers. Its inherent beauty and durability make it a prized material for everything from fine furniture to boat building. However, achieving that signature lustrous finish and ensuring its longevity requires more than just a quick coat of varnish. It demands a thorough understanding of mahogany wood finishing techniques. In this comprehensive guide, I'll delve into the world of finishing mahogany, sharing professional insights and step-by-step instructions to help you unlock the true potential of this magnificent wood. Whether you're a seasoned woodworker or a passionate DIY enthusiast, mastering these techniques will elevate your projects to a new level of sophistication.

Key Takeaways
- Preparation is Paramount: Thorough sanding, filling pores, and conditioning are critical first steps to ensure an even, beautiful finish on mahogany.
- Staining Enhances Natural Beauty: While mahogany is naturally beautiful, staining can deepen its color, highlight grain, and provide UV protection. Always test stains on scrap wood.
- Pore Filling for a Glass-Smooth Finish: Mahogany's open-grain structure benefits immensely from pore filling to achieve a truly smooth, high-end surface.
- Topcoats Provide Protection and Sheen: Various topcoats like polyurethane, lacquer, shellac, and oil offer different levels of durability and aesthetic appeal. Choose based on desired use and look.
- Proper Application and Curing: Adhering to manufacturer guidelines for application, drying times, and curing is essential for a durable and flawless finish.
Understanding Mahogany: Characteristics and Challenges
Before we dive into the specific mahogany wood finishing techniques, it's crucial to understand the wood itself. Mahogany is celebrated for its remarkable stability, workability, and stunning appearance. The most commonly used species, often referred to as "Genuine Mahogany" (Swietenia macrophylla), is native to Central and South America. Other woods are also sold as mahogany, such as African mahogany (Khaya spp.) and Philippine mahogany (various Shorea spp.), which share some characteristics but may differ in grain, hardness, and pore structure.
Mahogany's most distinctive features include:
- Color: Ranging from light pinkish-brown to a darker reddish-brown, often deepening with age and exposure to light.
- Grain: Typically straight, but can sometimes be interlocked or wavy, creating a beautiful ribbon figure, especially in quartersawn lumber.
- Texture: Medium to coarse texture due to its open pores. This open-grain structure is a key consideration for finishing, as it can absorb finishes unevenly and may require pore filling for a perfectly smooth surface.
- Durability: Highly durable, resistant to rot, and stable, making it ideal for high-quality furniture, boat building, and outdoor applications.
The primary challenge when finishing mahogany is its open-grain structure. Without proper preparation, finishes can sink into the pores, leading to an uneven, blotchy appearance, or a finish that feels rough rather than smooth.
Essential Surface Preparation: The Foundation of Flawless Mahogany Wood Finishing Techniques
The old adage "90% preparation, 10% application" holds exceptionally true for mahogany. Rushing the preparatory steps will inevitably lead to a disappointing finish, no matter how skilled you are with a brush or sprayer. I always emphasize that the quality of your finish is directly proportional to the effort you put into surface preparation.
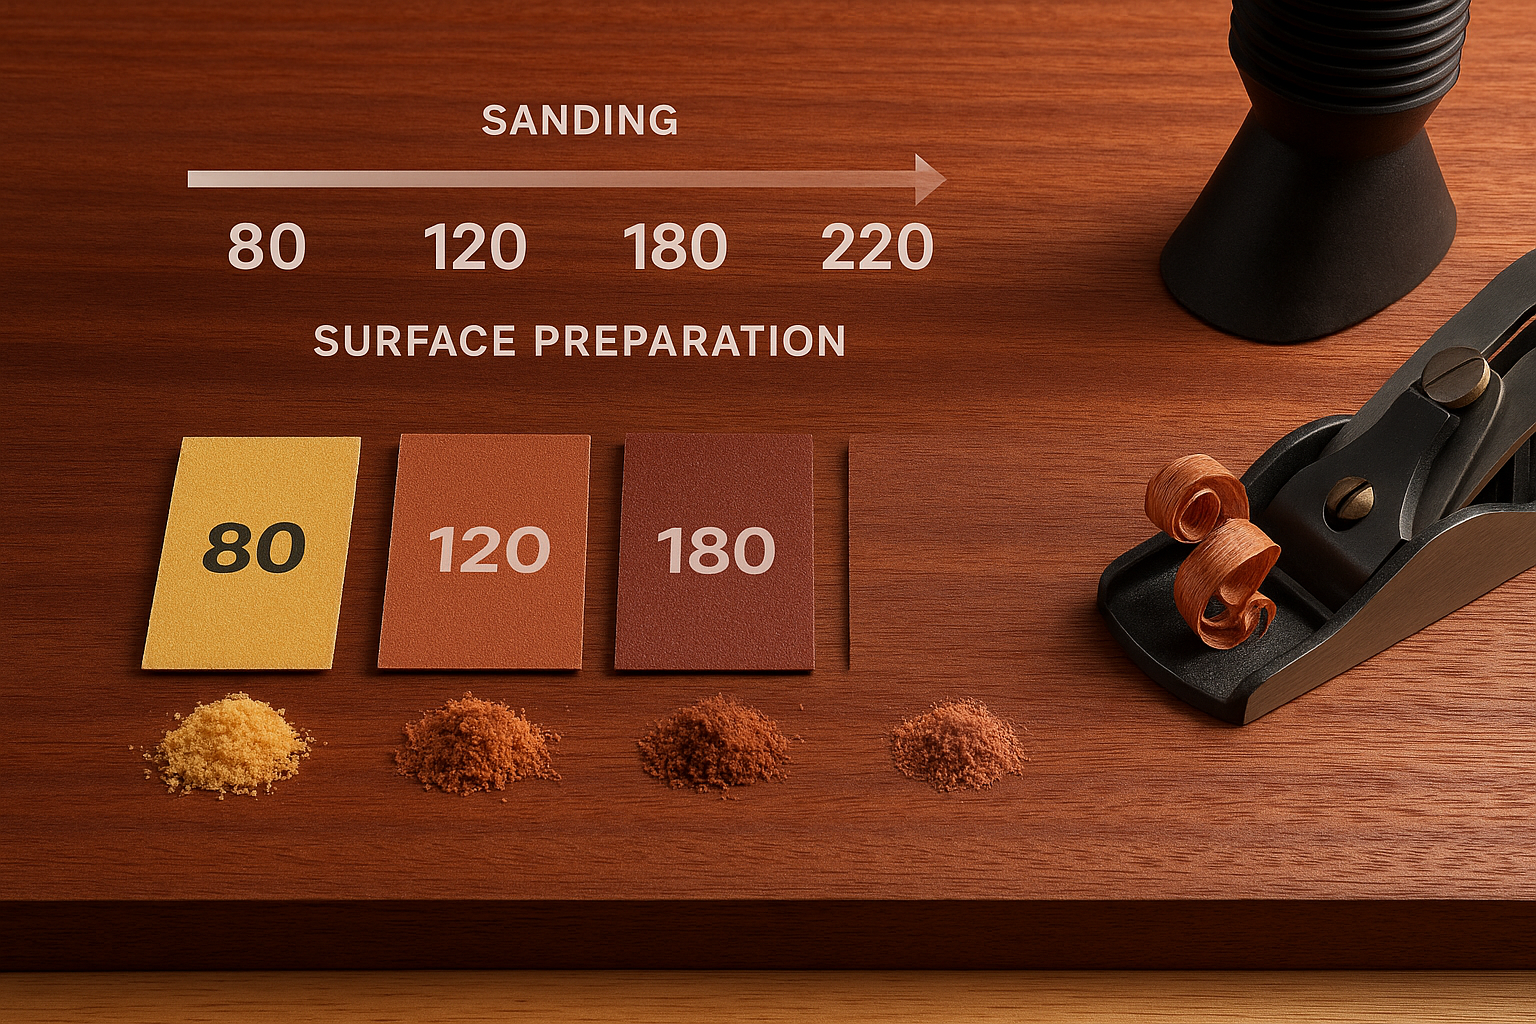
1. Sanding: The Path to Smoothness
Sanding is perhaps the most critical step in preparing mahogany for finishing. Its purpose is to create a uniformly smooth surface that will accept the finish evenly and provide optimal adhesion.
- Start Coarse, Progress Gradually: Begin with a coarser grit sandpaper, typically 80 or 100-grit, to remove any milling marks, scratches, or imperfections. Work your way up through progressively finer grits: 120, 150, 180, and finally 220-grit. For certain applications or extremely fine finishes, you might even go up to 320 or 400-grit.
- Tip: Never skip grits. Jumping from 80 to 220-grit will leave deeper scratches that finer grits can't remove, which will become glaringly obvious under a finish.
- Sand with the Grain: Always sand in the direction of the wood grain. Sanding across the grain will create cross-grain scratches that are very difficult to remove and will show prominently after finishing.
- Consistent Pressure: Apply consistent, even pressure during sanding. Uneven pressure can create dips and hollows in the wood.
- Dust Removal: After each grit, thoroughly remove all sanding dust. Dust left on the surface can embed in subsequent sanding efforts, creating new scratches, or mix with your finish, leading to imperfections. Use a vacuum cleaner, compressed air, and a tack cloth to ensure the surface is pristine.
- Raise the Grain (Optional but Recommended): For water-based finishes, which can cause the wood fibers to swell (raising the grain), it's a good practice to intentionally raise the grain before the final sanding. After sanding to 180-grit, wipe the surface with a damp cloth or sponge. Let it dry completely. The raised fibers will feel rough. Lightly sand again with 220-grit (or 320-grit if you plan to use a very thin topcoat) to knock down these fibers. This prevents them from raising again after the first coat of a water-based finish, ensuring a smoother result.
2. Pore Filling: Achieving a Mirror-Smooth Surface
Because mahogany is an open-grain wood, its natural pores can create a slightly textured surface even after extensive sanding. For a truly glass-smooth, high-gloss finish, pore filling is essential.
- What is Pore Filler? Also known as grain filler, this is a paste-like material designed to fill the microscopic pores of open-grain woods. It comes in various colors (clear, natural, or tinted to match/contrast the wood).
- Application:
- Prepare: Ensure the wood is sanded to at least 220-grit and completely dust-free.
- Apply: Using a squeegee, rubber spreader, or even a gloved hand, liberally apply the pore filler across the grain, forcing it into the pores. Work in small sections.
- Wait: Allow the filler to set up until it loses its wet sheen but is still slightly soft (read manufacturer's instructions for specific times, usually 10-30 minutes).
- Wipe Off: With a piece of burlap, coarse cloth, or a plastic scraper, wipe off the excess filler across the grain. This action removes excess from the surface while packing it into the pores.
- Clean Up: Once the bulk is removed, wipe with the grain using a clean, soft cloth to remove any remaining haze. Ensure all surface residue is gone.
- Dry & Sand: Allow the filler to dry completely (often 24 hours or more). Once dry, light sand with 220-grit sandpaper to remove any remaining surface residue and create a perfectly smooth, pore-filled surface.
- Stain Compatibility: Some pore fillers are designed to be applied after staining, while others can be applied before. Always check the product instructions for compatibility with your chosen stain.
3. Wood Conditioner (Optional): For Even Staining
While mahogany generally takes stain well, some pieces, especially those with varying grain density or sapwood, can still absorb stain unevenly. A pre-stain wood conditioner can help equalize absorption, leading to a more consistent color.
- Application: Apply the conditioner according to manufacturer directions, typically wiping it on and allowing it to penetrate for a specific time before wiping off the excess. Apply stain within the recommended window (e.g., within 2 hours).
Staining Mahogany: Enhancing its Natural Beauty
Mahogany's natural color is beautiful, but staining can deepen its richness, bring out hidden grain patterns, and protect it from UV degradation that can cause fading over time. When considering mahogany wood finishing techniques, staining is often a key step.
Types of Stains for Mahogany
- Oil-Based Stains: These are very popular for mahogany. They penetrate well, offer a long open time for application, and create a rich, warm glow. They typically require oil-based topcoats.
- Gel Stains: These are thicker and tend to sit more on the surface, which can be beneficial for open-grain woods as they are less likely to blotch. They offer more control over color depth.
- Water-Based Stains: Environmentally friendly and quick-drying, but can raise the grain more significantly and may not penetrate as deeply as oil-based options. Ensure proper grain raising and sanding for best results.
- Dye Stains: Offer vibrant, transparent colors that penetrate deeply without obscuring the grain. They can be tricky to apply evenly but produce stunning results, especially for intense colors.
Staining Process
- Test, Test, Test! Always test your chosen stain on a scrap piece of mahogany that has been prepared in the same way as your project. This is crucial for evaluating color and absorption. What looks good on a sample block might appear different on the entire piece.
- Apply Evenly: Using a clean rag, foam brush, or natural bristle brush, apply the stain generously and evenly to a section of the wood. Work with the grain.
- Allow Penetration: Let the stain penetrate for the manufacturer's recommended time (usually 5-15 minutes). The longer it sits, the darker the color will be.
- Wipe Off Excess: With a clean, lint-free cloth, wipe off all excess stain, working with the grain. Do not allow stain to dry on the surface, as this will lead to a sticky, uneven mess that is difficult to remove.
- Consistent Application: Maintain a "wet edge" to avoid lap marks. Work in sections that you can comfortably manage before the stain starts to dry.
- Dry Time: Allow the stain to dry completely according to the manufacturer's instructions. This is often 24-48 hours. Rushing the topcoat application can lead to adhesion issues or a cloudy finish.
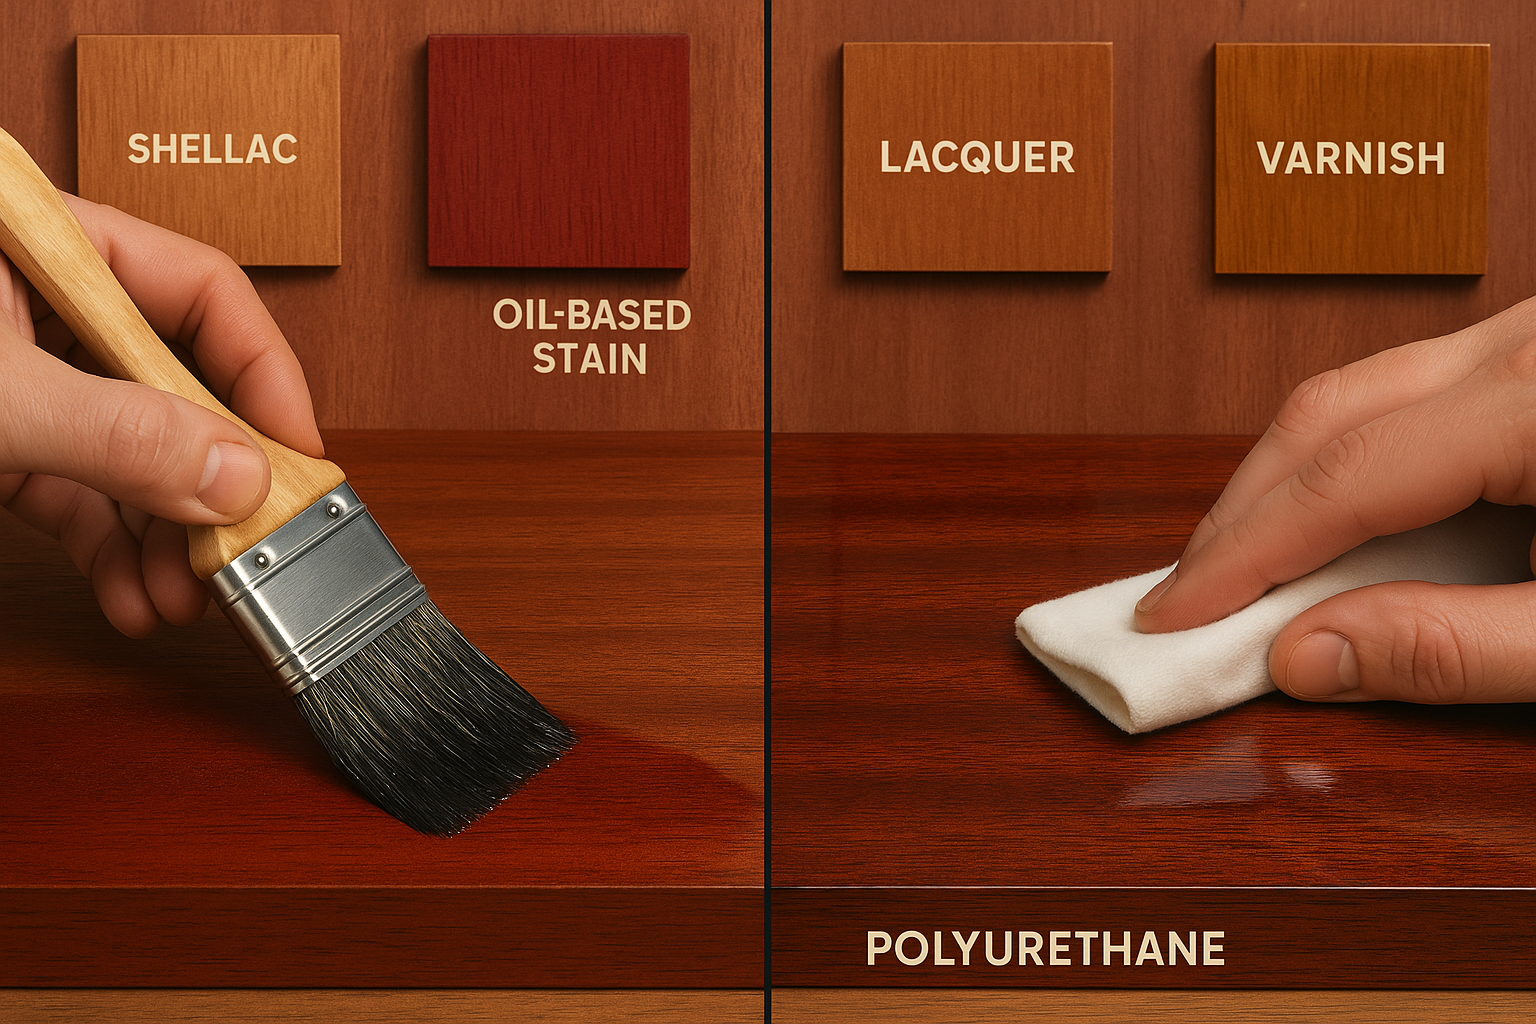
Topcoats: Protection and Aesthetic Appeal
The final step in mahogany wood finishing techniques is applying a topcoat. This layer protects the wood from moisture, scratches, and UV damage, while also providing the desired sheen (matte, satin, semi-gloss, or gloss).
Popular Topcoats for Mahogany
-
Polyurethane (Oil-Based & Water-Based):
- Oil-Based Polyurethane: Extremely durable, water-resistant, and provides a warm, amber tone that complements mahogany beautifully. It's slower drying but offers excellent protection for high-traffic surfaces.
- Water-Based Polyurethane: Dries faster, is less odorous, and stays clearer, which is ideal if you want to preserve the exact stain color without ambering. Less durable than oil-based but still provides good protection.
- Application: Apply thin, even coats with a high-quality brush, foam applicator, or sprayer. Lightly sand with 320-400 grit between coats (after each coat has dried completely) to ensure adhesion and smooth out any imperfections. Remove all dust before applying the next coat. Typically, 2-4 coats are recommended. For more details on applying polyurethane in high humidity, check out this guide on applying polyurethane in high humidity.
-
Varnish:
- Traditionally a mix of resin, oil, and solvent, varnish is known for its durability and resistance to water and UV light, making it excellent for outdoor mahogany furniture or marine applications. Spar varnish, specifically, is formulated for extreme outdoor conditions.
- Application: Similar to polyurethane, apply thin, even coats, sanding lightly between coats after full drying.
-
Lacquer:
- Dries incredibly fast, builds quickly, and provides a very hard, durable finish. It's often favored for furniture production due to its efficiency. It can be sprayed for the smoothest finish.
- Application: Best applied with a sprayer in several thin, even coats. Lacquer "burns in" to previous coats, creating a single, cohesive film. Light sanding with very fine sandpaper (400-600 grit) can be done between coats for ultimate smoothness.
-
Shellac:
- A natural resin dissolved in alcohol, shellac is a traditional finish that's easy to apply and repair. It dries very quickly and provides a beautiful, natural sheen. It's also an excellent sealer and barrier coat.
- Application: Apply with a brush or French polish technique for a very fine finish. Multiple thin coats are key. Sand lightly with 400-grit between coats.
-
Oil Finishes (Tung Oil, Linseed Oil, Danish Oil):
- These finishes penetrate the wood rather than forming a film on top. They enhance the natural look and feel of mahogany, offering a hand-rubbed, "in-the-wood" finish. They provide less protection against scratches and moisture than film-forming finishes but are easy to repair.
- Application: Apply generously, let penetrate, and wipe off all excess. Repeat multiple times over several days or weeks, allowing each coat to cure fully. For those curious about combining finishes, an article on can you stain over linseed oil provides useful insights.
Application Tips for All Topcoats
- Cleanliness: Ensure your workspace is as dust-free as possible. Dust nibs are a common issue with topcoats. A good shop vac, like the 14-gal RIDGID Shop Vac, can be incredibly helpful for maintaining a clean environment.
- Thin Coats: Multiple thin coats are always better than one thick coat. Thick coats can sag, wrinkle, or take excessively long to dry and cure.
- Even Application: Maintain an even film thickness across the entire surface. Overlapping strokes should be consistent.
- Proper Drying & Curing: Understand the difference between dry-to-touch and fully cured. While dry to touch might allow for sanding and recoating, full cure can take weeks. Avoid heavy use during the curing period.
- Sheen Control: Most topcoats come in various sheens. For a custom look, you can often mix different sheens of the same product (e.g., 50% gloss, 50% satin for a custom semi-gloss).
- Rubbing Out the Finish: For the ultimate smooth, high-gloss finish, after the topcoat has fully cured, you can "rub out" the finish. This involves wet-sanding with ultra-fine abrasives (2000-grit or higher) and then polishing with rubbing compounds to achieve a mirror-like surface.
Advanced Mahogany Wood Finishing Techniques
For those looking to push the boundaries of their mahogany projects, here are a few advanced techniques that can elevate your craftsmanship.
French Polish
French polishing is a traditional finishing technique that creates an incredibly thin, high-gloss finish with a deep, rich look. It's labor-intensive but yields spectacular results, often seen on antique furniture and musical instruments. It involves applying numerous very thin coats of shellac using a pad (rubber) in a circular motion, often incorporating a lubricant like mineral oil. This process builds a finish that seems to glow from within, truly highlighting mahogany's unique grain.

Glazing and Toning
- Glaze: A translucent colored finish that is applied over a sealed or stained surface and then partially wiped off. Glazing can enhance contrast, deepen color in recessed areas, and add an aged appearance. For mahogany, a dark brown or black glaze can really make the pores "pop" and add depth.
- Toner: A transparent layer of tinted finish (often lacquer or shellac with dye) applied between coats of clear finish. Toners subtly adjust the color of the wood without obscuring the grain, allowing for fine-tuning the hue or creating a more uniform appearance on multi-piece projects.
Fumed Mahogany
Fuming is a chemical process where mahogany is exposed to ammonia fumes in an enclosed chamber. The ammonia reacts with the natural tannins in the wood, darkening it to a rich, deep brown or almost black, similar to fumed oak. This technique produces a beautiful, natural color change that penetrates deep into the wood, rather than just on the surface like a stain. It requires careful safety precautions due to the ammonia fumes.
Maintaining Your Finished Mahogany
Once your mahogany piece is beautifully finished, proper maintenance is key to preserving its appearance for years to come.
- Regular Cleaning: Dust regularly with a soft, lint-free cloth. For deeper cleaning, wipe with a damp cloth and then immediately dry thoroughly. Avoid harsh chemical cleaners.
- Protect from Moisture and Heat: Use coasters under drinks and trivets under hot items. Spills should be wiped up immediately.
- Avoid Direct Sunlight: Prolonged exposure to direct sunlight can fade finishes and cause wood to dry out.
- Waxing (Optional): For film-forming finishes like polyurethane or lacquer, a thin coat of paste wax can add an extra layer of protection and a subtle sheen. Avoid silicone-based waxes. For specific advice on can you wax polyurethane, consult our guide.
- Repair Minor Scratches: Small scratches can often be buffed out with fine steel wool and paste wax, or by applying a touch-up pen or fine artist's brush with matching stain/finish. Deeper scratches may require more extensive repair.
Conclusion
Finishing mahogany is a rewarding process that, when done correctly, transforms beautiful raw lumber into a stunning piece of art. The key lies in meticulous surface preparation, thoughtful selection of stains and topcoats, and careful application of each layer. Remember, patience is a virtue in woodworking, especially when it comes to finishing. Take your time with each step, test your products on scrap wood, and always prioritize a clean working environment.
By understanding the unique characteristics of mahogany and diligently applying these proven mahogany wood finishing techniques, you'll be able to achieve professional-grade results in 2025 and beyond. Whether you opt for a classic oil-based finish, a durable polyurethane, or an intricate French polish, the deep, rich luster of mahogany will undoubtedly enhance any space it graces. For more woodworking wisdom and to expand your skills, be sure to visit WoodcraftWiz.com. Happy finishing!
SEO Meta
Meta Title: Mahogany Wood Finishing Techniques: A Pro's Guide (2025)
Meta Description: Master mahogany wood finishing techniques in 2025. Learn expert tips for preparing, staining, and topcoating mahogany for a stunning, durable finish.
