

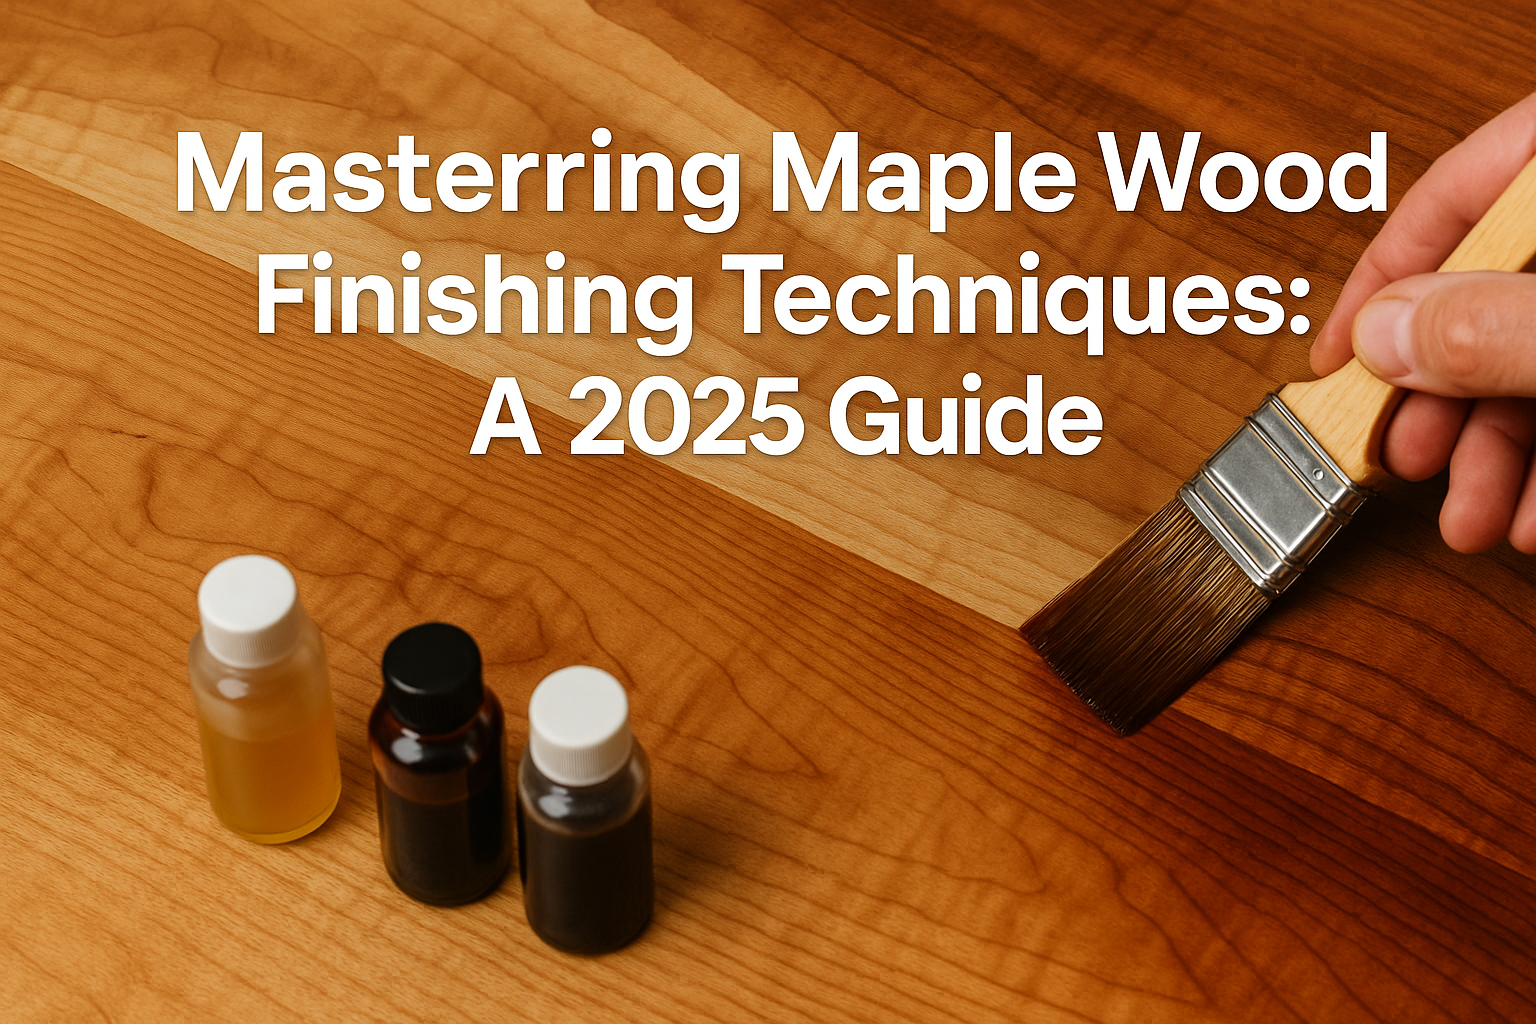
Mastering Maple Wood Finishing Techniques: A Comprehensive 2025 Guide
Maple wood, renowned for its incredible strength, fine grain, and light, often creamy color, is a cherished material in woodworking. From elegant furniture to durable flooring, its versatility is undeniable. However, working with maple presents unique challenges, especially when it comes to achieving a flawless finish. Its dense structure and tendency to blotch when stained unevenly can intimidate even seasoned woodworkers. This comprehensive guide will equip you with expert insights and practical maple wood finishing techniques to transform your maple projects into masterpieces, ensuring stunning, long-lasting results in 2025 and beyond.

Key Takeaways
- Surface Preparation is Paramount: Proper sanding and conditioning are non-negotiable for maple. Skipping steps leads to blotching and poor finish adhesion.
- Conditioning is Key for Staining: Maple's density makes it prone to blotching with stains. Pre-conditioners, gel stains, or dyes are vital for an even color.
- Clear Finishes Highlight Natural Beauty: For those who love maple's natural look, clear topcoats like polyurethane, lacquer, or shellac offer excellent protection without altering the wood's inherent beauty, though some ambering can occur.
- Test, Test, Test: Always test your chosen finishing technique on scrap pieces of the same maple wood to predict the final outcome and make adjustments.
- Layering and Patience: Achieving a professional-grade finish often involves multiple thin coats and adequate drying time between applications.
The Foundation: Essential Maple Wood Finishing Techniques Begin with Preparation
The secret to any outstanding wood finish, especially with maple, lies not in the final coat, but in the meticulous preparation that precedes it. I cannot stress this enough: your finish will only be as good as your surface preparation. Maple’s tightly packed grain, while beautiful, is notoriously unforgiving of imperfections and uneven sanding.
Understanding Maple's Unique Characteristics
Before diving into techniques, let's understand why maple demands such careful attention:
- Density: Maple is a very dense hardwood. This means it absorbs finishes less deeply and less evenly than softer woods. This density is a double-edged sword: it makes maple incredibly durable, but also prone to blotching when stain is applied, as some areas absorb more pigment than others.
- Light Color: Its light, often pale appearance means that any imperfections, scratches, or uneven sanding marks will be highly visible through a clear or light finish.
- Tight Grain: The fine, closed grain of maple contributes to its smooth appearance but can also resist deeper penetration of oil-based stains.
Step-by-Step Surface Preparation for Maple Wood
Our journey into maple wood finishing techniques begins with a detailed look at preparation. This is where you lay the groundwork for success.
1. Initial Cleaning and Inspection
Start by thoroughly cleaning your maple workpiece. Remove any dust, grease, pencil marks, or glue residue. A clean cloth dampened with mineral spirits or denatured alcohol can help identify hidden imperfections, as it temporarily wets the wood, mimicking the look of a clear finish.
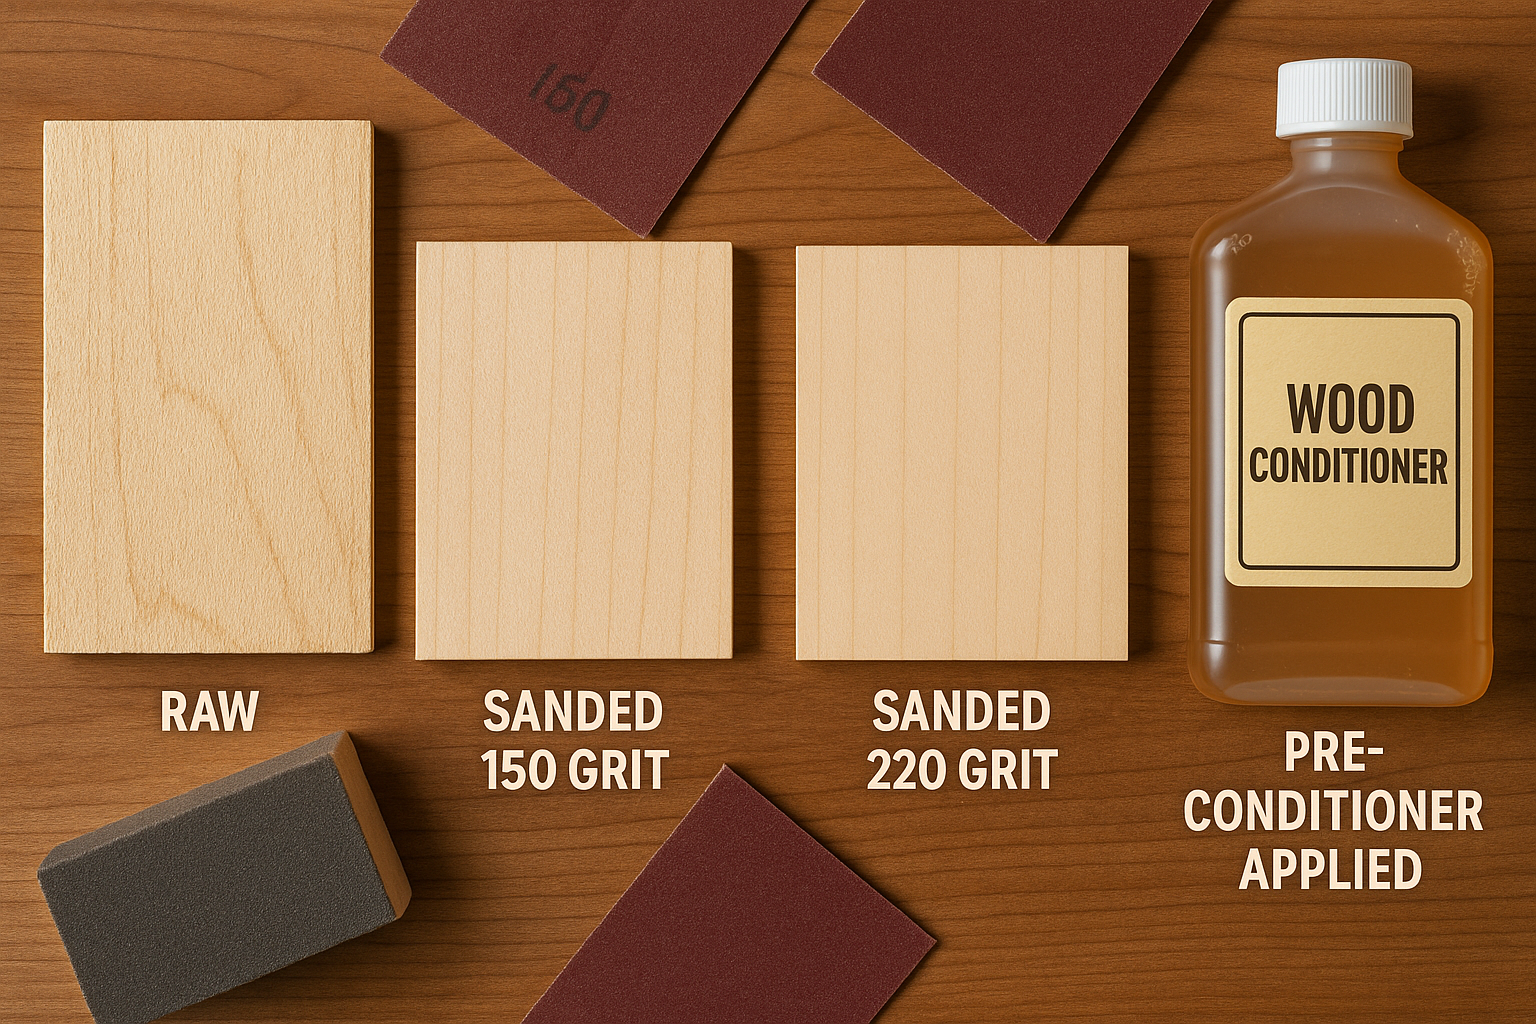
2. Sanding: The Art of Smoothness
Sanding maple is a process of gradual refinement. The goal is to create a uniformly smooth surface that will absorb finishes evenly and showcase the wood's beauty without scratches.
- Start Coarse (but not too coarse): Begin with 120-grit sandpaper. While some woods might start at 80-grit, maple's density makes deeper scratches harder to remove. Use an orbital sander for large, flat surfaces. Always sand with the grain.
- Progress Gradually: Move to 150-grit, then 180-grit, and finally 220-grit. The key here is to remove the scratch marks from the previous grit before moving to the next. If you skip a grit, you'll likely leave behind deeper scratches that will become glaringly obvious once a finish is applied.
- Pro Tip: After sanding with each grit, thoroughly vacuum the dust and wipe the surface with a tack cloth or a rag dampened with mineral spirits. This helps reveal any remaining scratches from the previous grit.
- Hand Sanding for Details: For edges, corners, and intricate areas, finish with hand sanding, always following the grain.
- Final Pass: For exceptionally smooth results, especially if you're aiming for a mirror-like clear finish, you can wet the wood surface lightly with distilled water after your final 220-grit sanding (this is called "raising the grain"). Once dry (usually a few hours), lightly sand again with 220-grit or even 320-grit. This removes any fibers that have stood up, preventing a rough feel after the first coat of finish.
3. Wood Conditioning: Your Stain's Best Friend
If you plan to stain your maple wood, a pre-conditioner is almost always a necessity to prevent blotching. Maple's varying pore density means some areas soak up stain more than others, leading to an uneven, splotchy appearance.
- How Conditioners Work: Wood conditioners are typically thin, clear liquids that partially seal the wood's most absorbent areas, allowing for more even stain penetration. They don't block the stain entirely but regulate its absorption.
- Application: Apply the conditioner liberally following the manufacturer's instructions. Usually, you apply it with a brush or rag, let it penetrate for a specified time (often 5-15 minutes), and then wipe off any excess. Don't let it dry completely; apply your stain within a window (e.g., 30 minutes to 2 hours) as recommended by the product.
- Alternatives to Commercial Conditioners:
- Thinned Clear Coat: A very thin coat of shellac (1 lb. cut) or a 50/50 mix of mineral spirits and your oil-based finish (like polyurethane) can also act as a pre-conditioner. Apply, let dry for an hour or two, and then lightly sand with 320-grit before staining.
- Gel Stains: Gel stains are thicker and sit more on the surface of the wood rather than soaking in deeply. This characteristic makes them excellent for maple as they naturally resist blotching, offering a more even color without pre-conditioning.
By mastering these fundamental preparation steps, you're well on your way to achieving professional-grade maple wood finishing techniques.
Unveiling Beauty: Diverse Maple Wood Finishing Techniques
Once your maple is meticulously prepared, the real fun begins: applying the finish! The choice of finish depends on the desired aesthetic, durability, and the intended use of the piece. Here, we'll explore various maple wood finishing techniques, from enhancing its natural hue to transforming it with color.
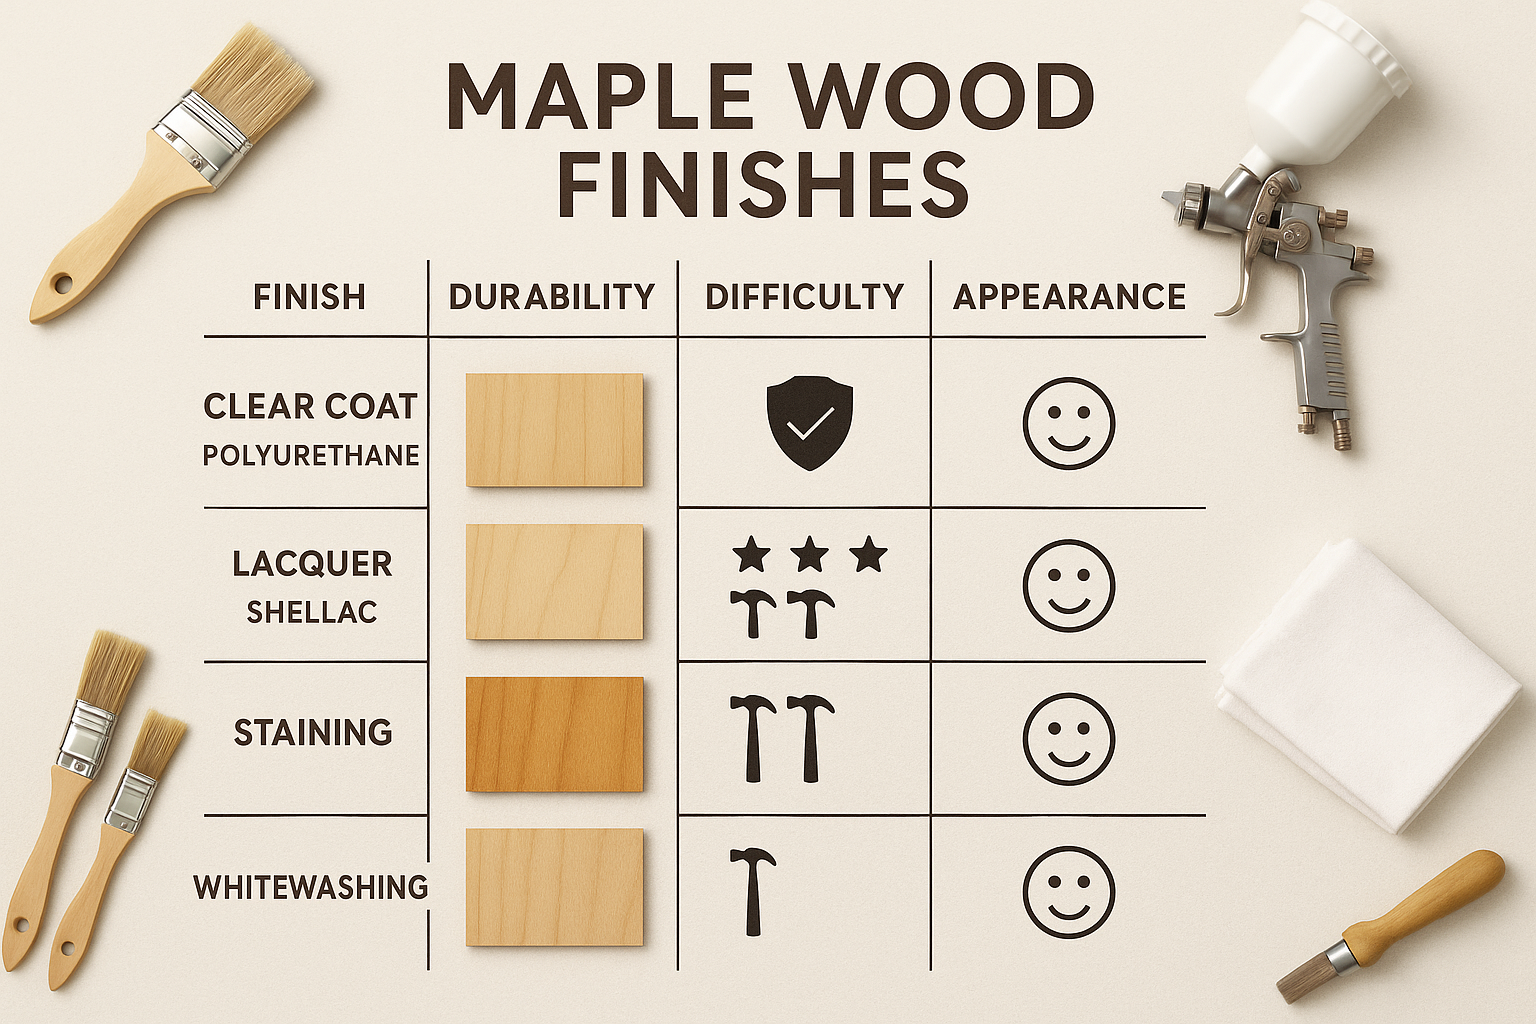
1. Clear Finishes: Celebrating Natural Maple
Many woodworkers prefer to let maple's natural beauty shine through. Clear finishes protect the wood while allowing its light color and subtle grain to be the star. Keep in mind that most clear finishes will add a slight amber tone to maple, though water-based options tend to be clearer.
- Polyurethane (Oil-Based):
- Pros: Extremely durable, water-resistant, and relatively easy to apply. Provides excellent protection for high-traffic items like tabletops. Adds a warm, amber glow to maple, which many find appealing.
- Cons: Slower drying time, requires good ventilation, can yellow over time, especially oil-based versions.
- Application Tips: Apply thin coats with a good quality brush or foam applicator. Allow ample drying time (check product instructions, usually 4-6 hours between coats). Lightly sand with 220-320 grit sandpaper between coats to ensure good adhesion and remove dust nibs. Aim for 3-4 coats for optimal protection. For best results, consider applying polyurethane in high humidity with specific techniques.
- Polyurethane (Water-Based):
- Pros: Dries much faster, low odor, cleans up with water, and stays clearer than oil-based versions, preserving maple's lighter tone. Still offers good durability.
- Cons: Not quite as durable as oil-based polyurethane, can sometimes raise the grain more aggressively on the first coat.
- Application Tips: Similar to oil-based, apply thin coats, sand lightly between coats. You might need an extra coat or two compared to oil-based for equivalent protection.
- Lacquer:
- Pros: Dries incredibly fast, allows for multiple coats in a single day, provides a very smooth, hard finish, and can be easily repaired. It creates a beautiful depth.
- Cons: Strong fumes require excellent ventilation and a respirator, best applied with a spray gun for professional results. Not as water-resistant as polyurethane for standing water.
- Application Tips: Apply many thin coats (5-7) rather than a few thick ones. Each coat partially melts into the previous one, creating a cohesive film. Light sanding with 320-400 grit is only necessary for imperfections, not typically between every coat for adhesion.
- Shellac:
- Pros: All-natural, non-toxic once cured, dries very fast, great as a sealer or barrier coat. Adds a beautiful, natural warmth to maple and is easily reversible with alcohol.
- Cons: Not as durable or water-resistant as polyurethane or lacquer, susceptible to heat rings and alcohol damage.
- Application Tips: Best applied in thin "washes" with a pad (French polish method) or brush. Ideal as a sanding sealer before other finishes or as a final finish for decorative items not subject to heavy wear. A 1 or 2 lb. cut is often ideal for a sealing coat.
- Oil Finishes (Tung Oil, Linseed Oil):
- Pros: Penetrates the wood, creating a natural, "in-the-wood" feel. Enhances maple's grain and offers a soft, satin sheen. Very easy to repair.
- Cons: Less protective against dents and scratches than film-building finishes, slower drying times, requires more maintenance (periodic reapplication).
- Application Tips: Apply generously, let soak for 15-30 minutes, then wipe off all excess. Repeat daily for a week, then weekly for a month, then monthly for a year, then annually. This builds up protection. Ensure all rags are thoroughly soaked in water and air-dried flat to prevent spontaneous combustion.
For maintaining maple's original light tone, especially for furniture or cabinetry, a clear finish for maple that prevents darkening is often sought after.
2. Staining Maple: Adding Color and Depth
Staining maple can be challenging but rewarding. If you're looking to add color, here are some effective maple wood finishing techniques using stains:

- Wood Dyes:
- Pros: Penetrate deeply, less prone to blotching than pigment stains because dyes color the wood fibers themselves rather than sitting in pores. Provide clear, vibrant colors and can be mixed to achieve custom shades.
- Cons: Can be difficult to apply evenly without lap marks, color can fade in direct sunlight, requires a topcoat for protection.
- Application Tips: Dilute dyes for the first coat, applying multiple thin coats for evenness. Use a rag or spray gun. Always test on scrap.
- Gel Stains:
- Pros: My personal favorite for maple staining! Gel stains are thick and do not penetrate deeply, instead sitting on the surface, making them highly resistant to blotching. They offer remarkably even color.
- Cons: Less "in-the-wood" look compared to traditional penetrating stains, can obscure some fine grain detail if applied too thickly.
- Application Tips: Apply a thin, even coat with a rag or foam brush. Wipe off excess carefully to avoid streaks. Allow sufficient drying time before applying a clear topcoat.
- Oil-Based Pigment Stains (with Conditioner):
- Pros: Widely available, range of colors, relatively easy to use.
- Cons: Extremely prone to blotching on maple without proper pre-conditioning.
- Application Tips: Always use a wood conditioner as described in the "Preparation" section. Apply stain generously, let penetrate for 5-15 minutes (or as directed), then wipe off all excess completely. Work in small sections. Apply a clear topcoat for protection.
Achieving a "Blonde" or Whitewashed Look
For a contemporary or farmhouse style, achieving a light, "blonde" or whitewashed look on maple is popular:
- Pickling or Whitewashing:
- Technique: This involves applying a very thin, diluted white paint or a specific pickling stain, often wiping most of it off immediately. It settles into the grain, muting the natural color while still allowing some wood texture to show through.
- Application Tips: Dilute white paint (latex or oil-based) with water or mineral spirits (depending on paint type) to a thin consistency. Apply with a rag, then quickly wipe off the excess. You can layer coats for more opacity. Finish with a clear topcoat to protect the surface and seal the white pigment.
- Lime Wax:
- Technique: Lime wax is a translucent white wax that is rubbed into the grain, giving a limed or bleached effect.
- Application Tips: Apply liberally with a cloth, rubbing into the grain. Allow to dry, then buff off excess. Provides a soft, matte finish. Not highly durable on its own; best for decorative items or with a clear topcoat.
3. Specialty Finishes and Considerations
- Distressing and Antiquing: For a rustic or aged look, maple can be distressed (dinged, scraped) before finishing. An antiquing glaze can then be applied over a base stain or paint, settling into the distressed areas and carving details to create an old-world appearance.
- High-Gloss vs. Satin: The sheen level of your topcoat significantly impacts the final look.
- High Gloss: Reflects light, provides a modern, formal look, and accentuates the depth of the wood. Reveals imperfections more readily.
- Satin/Semi-Gloss: Most popular choice, offers a softer look, good durability, and hides minor imperfections better.
- Matte: Very natural, understated look, minimal light reflection.
- Two-Tone Finishes: Consider combining different maple wood finishing techniques, such as staining a tabletop a darker shade while keeping the legs a natural clear-coated maple. This can create striking contrast and visual interest. For instance, you could use a gel stain on a tabletop and pair it with legs finished with a durable aerosol polyurethane for quick application.
| Finishing Technique | Aesthetic Outcome | Durability | Application Difficulty | Common Use Cases |
|---|---|---|---|---|
| Oil-Based Poly | Warm amber, deep sheen (gloss/satin) | Excellent | Medium | Tabletops, flooring, high-wear furniture |
| Water-Based Poly | Clear, minimal ambering, modern look | Very Good | Medium | Contemporary furniture, cabinets, light-colored projects |
| Lacquer | Crystal clear, smooth, high depth | Good | Hard (spray required) | Fine furniture, musical instruments |
| Shellac | Warm, natural luster, traditional | Moderate | Medium | Sealer, decorative items, antique restoration |
| Oil Finishes | Natural, "in-the-wood" feel, soft sheen | Moderate | Easy (but slow) | Cutting boards, natural-look furniture, reapplication |
| Wood Dyes | Vibrant, clear color, accentuates grain | Good (with topcoat) | Medium | Modern furniture, custom colors |
| Gel Stains | Even, opaque color, minimizes blotching | Good (with topcoat) | Easy | Cabinetry, furniture, achieving dark colors on maple |
| Whitewash/Pickling | Muted, lightened, rustic or modern farmhouse | Good (with topcoat) | Medium | Cabinets, decorative items, accent pieces |
Remember, the most crucial step after selecting your finishing technique is to always test it on a scrap piece of maple wood that has been prepared in the same way as your project. This will give you a true representation of how the finish will look and react before you commit to your main piece. You can find more general woodworking tips and projects on the main WoodcraftWiz site.
Addressing Specific Maple Finishing Challenges
Even with the best preparation, maple can present unique issues. Here are some common problems and solutions:
- Fuzziness after First Coat: This is common, especially with water-based finishes. The finish raises the grain. Lightly sand with 220-320 grit sandpaper after the first coat to knock down the raised fibers.
- Uneven Sheen: Often caused by uneven application, insufficient stirring of the finish, or variations in surface preparation. Ensure consistent, thin coats and thorough mixing of your finish.
- Bubbles in Finish: Too thick a coat, applying in high humidity, or shaking the can instead of stirring can cause bubbles. Apply thinner coats, avoid humid conditions if possible, and stir gently.
- Preventing Yellowing: For maple, clear water-based polyurethanes or lacquers will yellow less over time than oil-based polyurethanes. If you want the absolute clearest finish, these are your best bet. If you embrace the ambering, oil-based poly is excellent.
By understanding these maple wood finishing techniques, you empower yourself to achieve truly remarkable results, making your maple projects stand out with their professional and durable finishes. For those working on cabinetry, knowing about materials like 1/2 plywood for cabinets can also be beneficial in the broader context of woodworking. And when it comes to the tools of the trade, a good Craftsman table saw overview, tips, and tricks can always improve your workflow.
Conclusion
Mastering maple wood finishing techniques is a truly rewarding endeavor, transforming raw lumber into stunning, durable pieces that will be cherished for years to come. As we've explored, the journey from raw wood to a beautifully finished surface is paved with careful preparation, informed choices, and diligent application. From the crucial initial sanding and conditioning to selecting the perfect clear coat or stain, each step plays an indispensable role in the final outcome.
Remember the golden rules: always prioritize meticulous surface preparation, never skip a sanding grit, and almost always precondition maple before staining to prevent blotching. Whether you opt to celebrate maple's natural, creamy luminescence with a clear water-based polyurethane or transform its appearance with a rich gel stain, the key is patience, practice, and a willingness to test your chosen finish on scrap pieces.
In 2025, with these expert maple wood finishing techniques in your arsenal, you're ready to tackle any maple project with confidence.
Actionable Next Steps:
- Gather Your Supplies: Based on your desired finish, procure all necessary sandpaper (120, 150, 180, 220 grit), wood conditioner (if staining), chosen stain or clear finish, brushes, rags, tack cloths, and appropriate safety gear (respirator, gloves).
- Practice on Scraps: Before touching your main project, find a few scrap pieces of the same maple wood and practice your entire finishing process, from sanding to the final coat. This will build your confidence and help you perfect your technique.
- Create a Dedicated Workspace: Ensure you have a clean, dust-free, and well-ventilated area for finishing. Proper lighting is also crucial for spotting imperfections.
- Embrace Patience: Finishing wood is not a race. Allow ample drying time between coats and resist the urge to rush.
- Explore Further: Continue to expand your woodworking knowledge by visiting WoodcraftWiz.com for more guides and tips on various woodworking projects and techniques.
SEO Meta Title: Maple Wood Finishing Techniques: 2025 Expert Guide
SEO Meta Description: Master maple wood finishing techniques in 2025. Learn expert tips for preparing, staining, and clear-coating maple for stunning, durable results.
