

The year is 2026, and the once-daunting world of Computer Numerical Control (CNC) routing has become remarkably accessible to the home woodworker. No longer confined to industrial workshops, compact and affordable desktop CNC machines have revolutionized how enthusiasts approach woodworking, enabling unparalleled precision and intricate designs that were previously unimaginable. This article, “Mastering CNC Routing for the Home Woodworker: From Design Software to First Cuts on a Desktop Machine,” will demystify the process, guiding beginners through selecting the right equipment, navigating design software, and confidently executing their initial projects.
Key Takeaways
- Desktop CNC machines offer home woodworkers precision and complex design capabilities.
- Understanding CAD/CAM software is crucial for converting design ideas into machine instructions.
- Selecting the right desktop CNC involves balancing budget, workspace, and project needs.
- Safety protocols and proper material preparation are paramount for successful CNC operations.
- Starting with simple projects builds confidence and proficiency in CNC routing.
The Digital Workshop: Demystifying CAD/CAM Software for Home Woodworkers
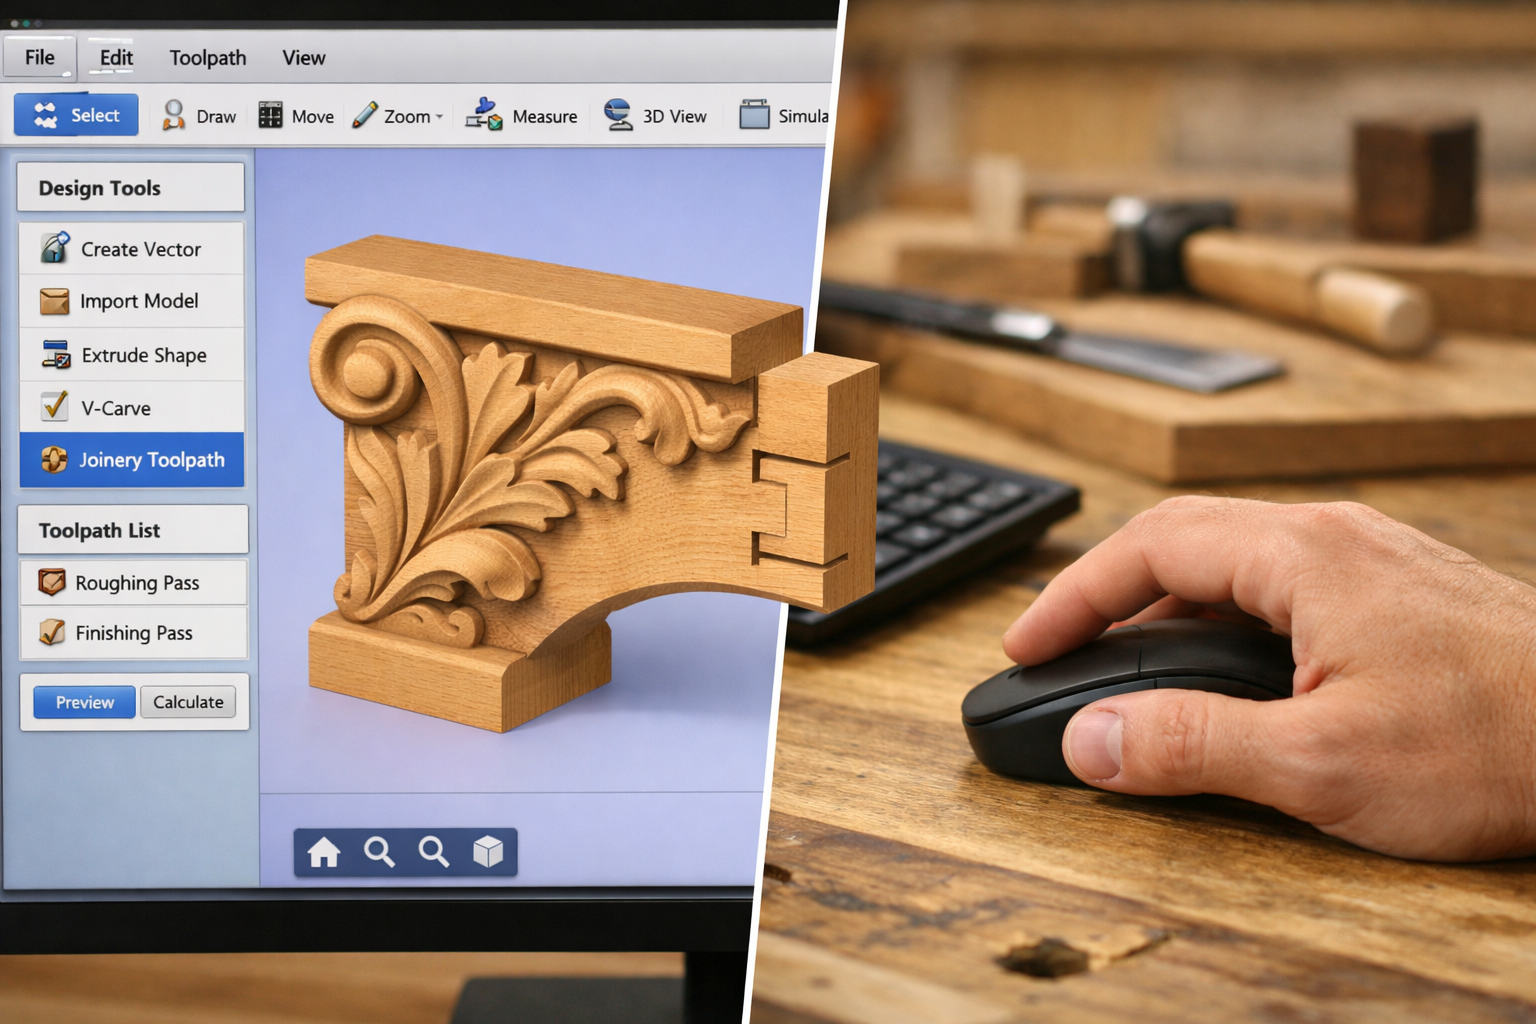
The heart of any CNC routing operation lies in its software. Before a single chip flies, your design must be digitally crafted and translated into instructions the machine can understand. This involves two primary types of software: Computer-Aided Design (CAD) and Computer-Aided Manufacturing (CAM). For the home woodworker keen on Mastering CNC Routing for the Home Woodworker: From Design Software to First Cuts on a Desktop Machine, understanding this digital workflow is critical.

CAD: Bringing Your Ideas to Life Digitally
CAD software allows you to create your project designs in a digital environment. Think of it as your virtual drawing board, but with infinite undo capabilities and unparalleled precision.
Popular CAD software options for home woodworkers include:
- Fusion 360 (Autodesk): A powerful, integrated CAD/CAM platform that is free for hobbyists and small businesses. It offers robust 3D modeling capabilities, perfect for complex parts, joinery, and artistic carvings. The learning curve can be steep, but the community support and tutorials are extensive.
- VCarve Desktop/Pro (Vectric): Specifically designed for CNC routing, VCarve is renowned for its user-friendliness and powerful 2D and 2.5D carving capabilities. It excels at decorative projects, sign-making, and parts with varying depths.
- Carbide Create (Carbide 3D): Often bundled with Carbide 3D machines, this software is very beginner-friendly for 2D and basic 3D designs. It’s a great starting point for those new to CAD.
- SketchUp: While primarily a 3D modeling program, SketchUp can be used for initial design concepts. However, it lacks integrated CAM features, so designs often need to be exported to another program for toolpath generation.
When choosing CAD software, consider your project complexity, budget, and desired learning curve. Many programs offer free trials, allowing you to experiment before committing. The goal is to feel comfortable transforming your woodworking ideas into precise digital models.
CAM: Translating Design to Machine Language
Once your design is perfect in CAD, CAM software takes over. This is where you define how the CNC machine will cut your material. CAM software generates “toolpaths,” which are the precise routes the router bit will take, including cutting depth, speed, and order of operations. The output of CAM software is G-code, a universal language that CNC machines understand.
Key aspects of CAM software to consider:
- Tool Selection: You’ll specify which router bit (end mill, V-bit, ball nose, etc.) you’re using.
- Cut Parameters: Define cutting speed (feed rate), plunge rate, depth of cut, and spindle speed. These settings are crucial for clean cuts and preventing damage to your material or machine.
- Toolpath Strategies: Choose different cutting methods (e.g., pocketing, profiling, V-carving, 3D roughing and finishing).
- Workholding: Plan how your material will be secured to the CNC bed (clamps, double-sided tape, vacuum table).
 Many CAD programs, like Fusion 360, have integrated CAM modules. Others, like VCarve, combine both functionalities. Starting with the simpler, integrated solutions often eases the learning process for beginners. For a deeper dive into the overall setup, refer to a beginner’s guide to CNC routers for small woodshops.
Equipping Your Home Workshop: Choosing and Setting Up a Desktop CNC Machine
The proliferation of desktop CNC machines has made Mastering CNC Routing for the Home Woodworker: From Design Software to First Cuts on a Desktop Machine a realistic goal for many. These compact machines offer a fantastic balance of capability, affordability, and size, fitting comfortably into most home workshops.
Factors to Consider When Choosing a Desktop CNC
When selecting your first desktop CNC router, several factors will influence your decision:
- Work Area (Build Volume): How large are the projects you plan to make? Desktop machines typically range from 12×12 inches to 24×36 inches. A larger work area allows for bigger projects but also requires more space and often a higher budget.
- Rigidity and Construction: A sturdier machine with less flex will offer greater precision and handle harder materials better. Look for models with robust frames (aluminum, steel) and quality linear rails.
- Spindle Power: The spindle is the motor that spins the router bit. Higher power allows for faster cutting and the ability to cut denser materials. Entry-level machines often have spindles around 300-500W, while more advanced desktop units might offer 1kW or more.
- Accuracy and Repeatability: These specs indicate how precisely the machine can cut and how consistently it can reproduce cuts. Look for machines with good stepper motors and sturdy lead screws or ball screws.
- Software Compatibility: Ensure the machine’s controller is compatible with your chosen CAM software’s G-code output. Most modern desktop CNCs use standard G-code, making them widely compatible.
- Cost: Desktop CNC machines range from a few hundred dollars for basic hobby kits to several thousand for more advanced, professional-grade units. Set a budget and research models that fit within it.
- Community Support: A strong online community can be invaluable for troubleshooting, sharing tips, and finding project ideas.
Popular desktop CNC brands known for their home woodworker appeal include:
- Shapeoko (Carbide 3D): Well-regarded for its robust build, ease of assembly, and excellent community support.
- X-Carve (Inventables): Another popular option, known for its user-friendliness and a large ecosystem of accessories and projects.
- SainSmart Genmitsu: Offers more budget-friendly options, great for dipping your toes into CNC without a significant investment.
- Onefinity: Known for its precise linear rails and sturdy construction, offering higher performance in a desktop footprint.
Setting Up Your Machine for Success
Once you’ve chosen your machine, proper setup is paramount for safety and successful operation.
- Assembly: Follow the manufacturer’s instructions meticulously. Ensure all connections are secure and components are correctly aligned.
- Workspace: Dedicate a stable, level surface for your CNC. Ensure adequate clearance around the machine for material loading and safe operation. Consider building a custom wood workbench with a dedicated area for your CNC.
- Dust Collection: CNC routing generates a significant amount of dust and chips. A good dust collection system is not optional; it’s essential for air quality, machine longevity, and clear visibility of cuts. Consider integrating a mobile dust collection cart into your setup.
- Safety Gear: Always wear eye protection and hearing protection. Have an emergency stop button readily accessible.
- Software Installation and Calibration: Install the necessary control software (e.g., Carbide Motion, UGS, Mach3/4) and perform any initial calibration steps as per your machine’s manual. This usually involves homing the machine and setting zero points.
 Taking the time to set up your machine correctly will prevent frustration and ensure a smoother learning experience as you begin your journey toward Mastering CNC Routing for the Home Woodworker: From Design Software to First Cuts on a Desktop Machine.
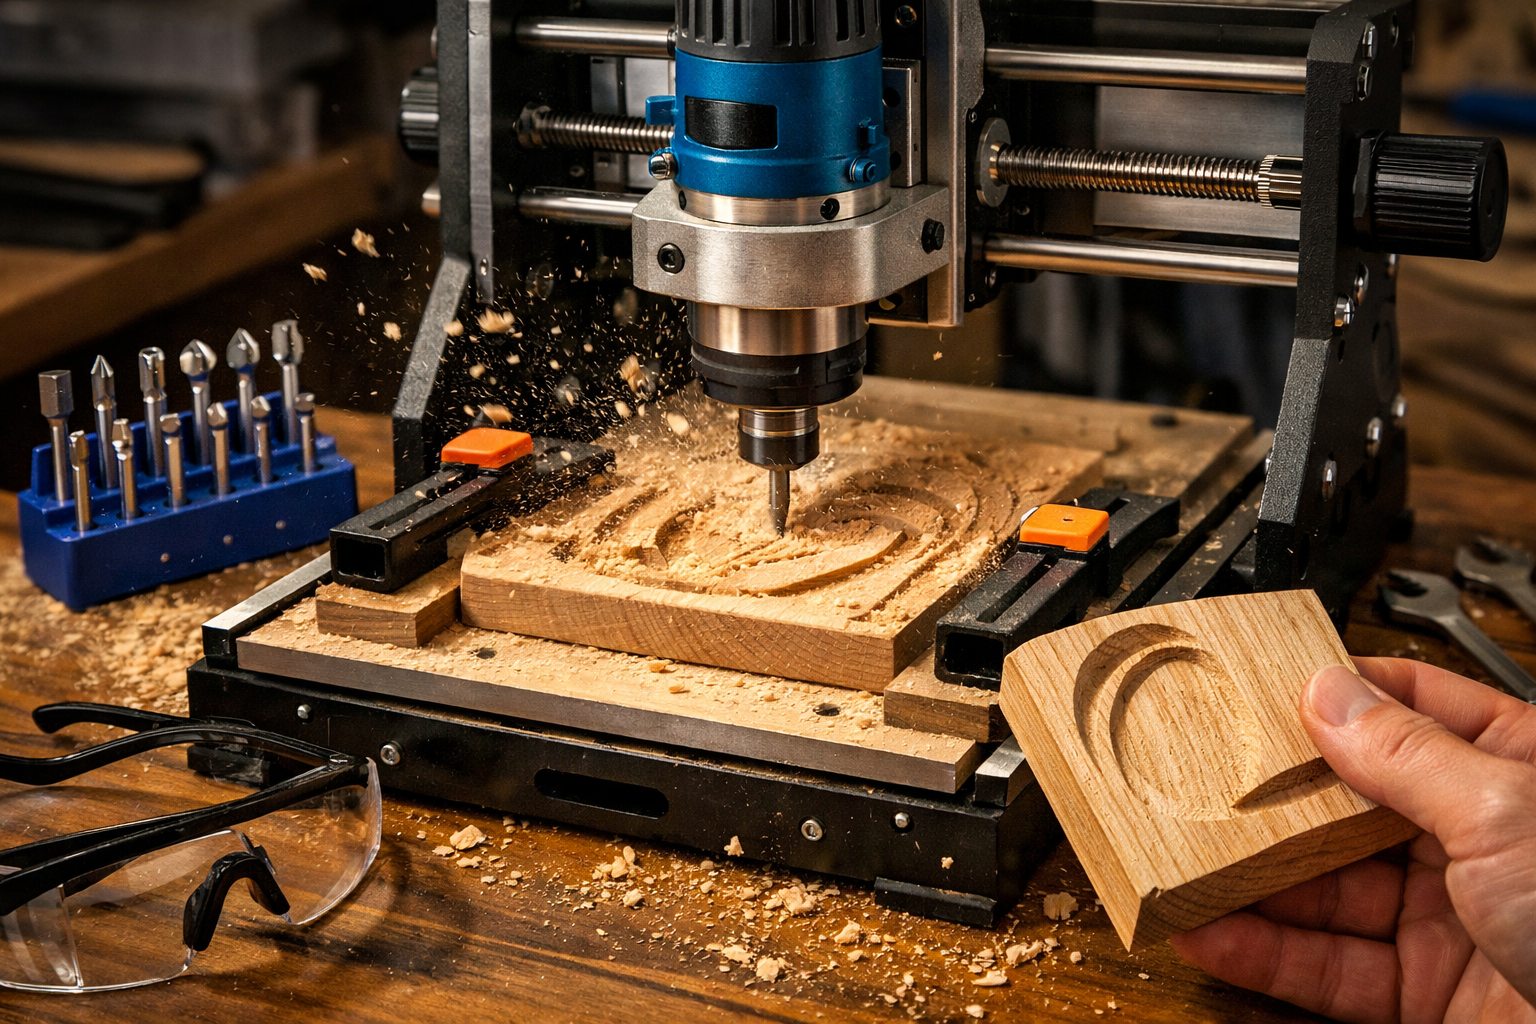
From Digital File to First Cut: Executing Your First CNC Project
The moment of truth arrives when your design is ready, your G-code generated, and your machine is set up. Executing your first cut can feel exhilarating and slightly nerve-wracking, but by following a structured approach, you’ll be well on your way to Mastering CNC Routing for the Home Woodworker: From Design Software to First Cuts on a Desktop Machine.
Material Preparation and Workholding
Before hitting “run,” proper material preparation is crucial:

- Material Choice: Start with soft, inexpensive materials like MDF, plywood, or pine. These are forgiving and easy to cut.
- Secure Workholding: Your material must be absolutely rigid on the wasteboard. Any movement during cutting will ruin your project and potentially damage the machine or bit. Use clamps, double-sided tape, or a combination. Ensure clamps are clear of the toolpath.
- Wasteboard: Protect your machine’s bed with a sacrificial wasteboard (typically MDF) that can be surfaced flat and will absorb any through-cuts.
Loading the Tool and Setting Z-Zero
- Install the Router Bit: Select the correct bit as specified in your CAM software. Insert it into the router’s collet, ensuring it’s seated firmly but not over-tightened.
- Set Z-Zero: This is critical. Z-zero tells the machine the top surface of your material. Most desktop CNCs use a touch plate for automatic Z-zeroing, while others require manual adjustment with a piece of paper or feeler gauge. An incorrect Z-zero will result in cuts that are too deep or too shallow.
The First Cut: A Step-by-Step Guide
- Load G-code: Open your CNC control software and load the G-code file generated by your CAM program.
- Home the Machine: Send the machine to its home position (X0, Y0, Z0).
- Set X and Y Zero: Manually jog the spindle to the desired starting point on your material. This is often a corner, but check your CAM setup for the origin point. Set X and Y zero in your control software.
- Perform Z-Zero: Use your touch plate or manual method to set the Z-zero on the material’s surface.
- Air Cut (Optional but Recommended): For complex projects or new G-code, run the job above the material (an “air cut”). This allows you to visually confirm the toolpaths and catch any errors without wasting material.
- Start the Spindle: Turn on the router spindle.
- Initiate Cut: Press “Start” or “Run” in your control software.
- Monitor Closely: Stay near the machine, watching for any issues like bit chatter, excessive smoke, or material movement. Be ready to hit the emergency stop button if something goes wrong.
- Dust Collection: Ensure your dust collection system is running efficiently throughout the cut.
 After the cut is complete, turn off the spindle, remove the material, and inspect your work. Don’t be discouraged by imperfections on your first few attempts. Each cut is a learning experience. As you gain confidence, you can move on to projects like crafting acoustic diffusers or even integrating custom woodwork into your DIY smart home. Remember, patience and practice are key to Mastering CNC Routing for the Home Woodworker: From Design Software to First Cuts on a Desktop Machine.
Conclusion
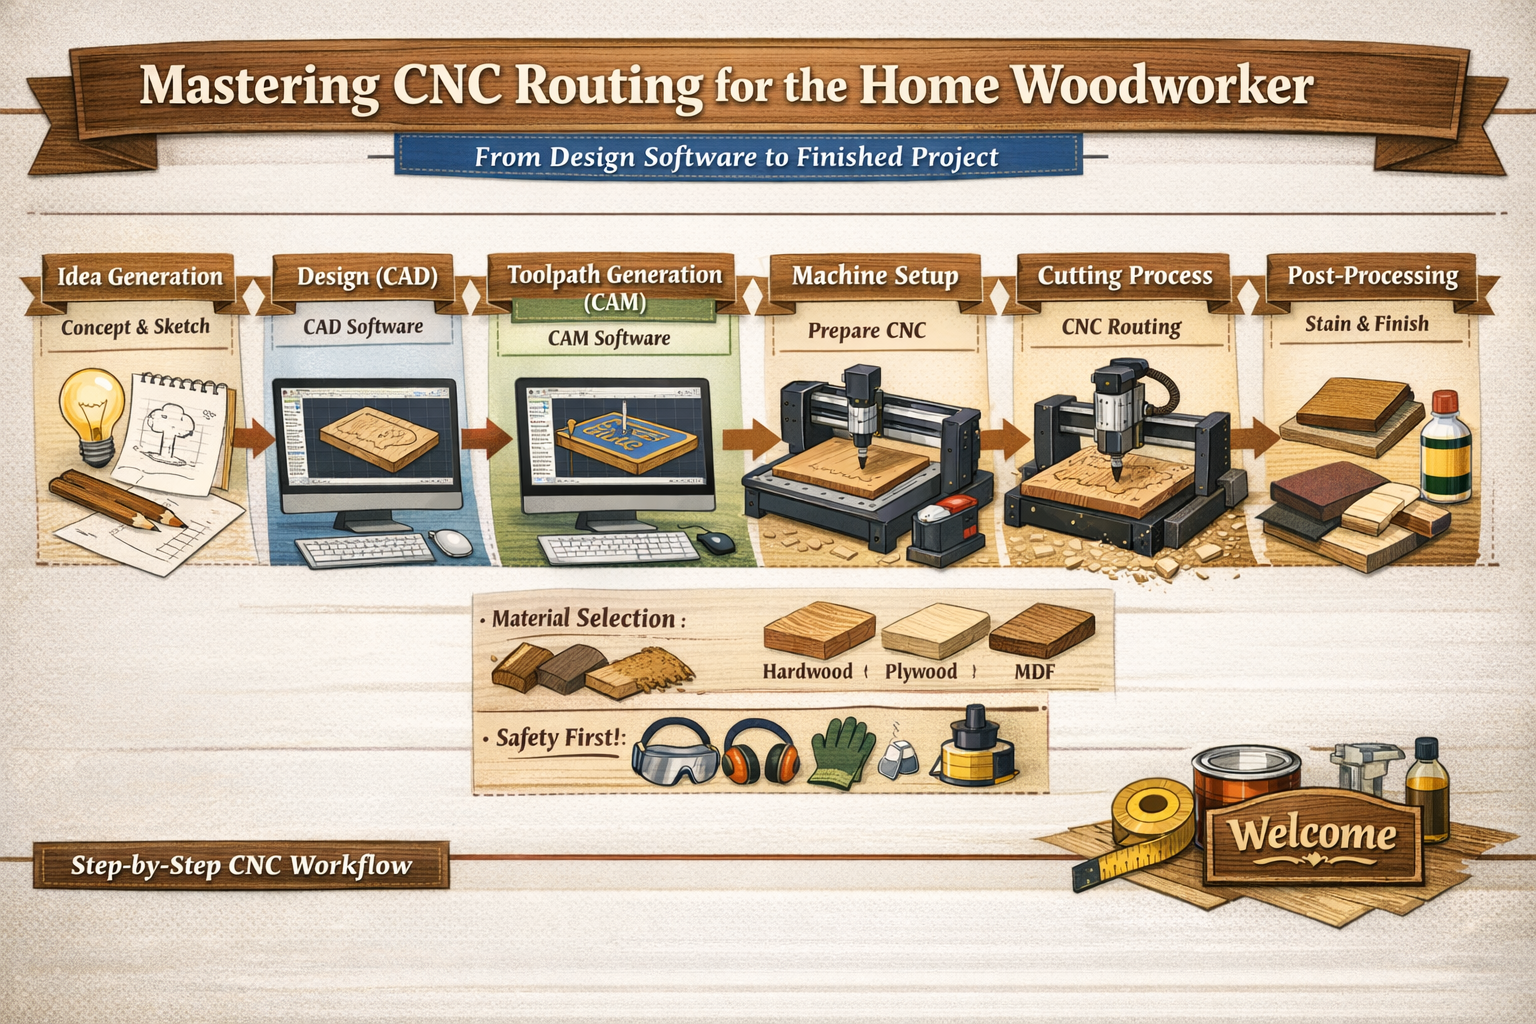
The journey of Mastering CNC Routing for the Home Woodworker: From Design Software to First Cuts on a Desktop Machine opens up a world of precision, intricate design, and creative possibilities that were once the exclusive domain of industrial manufacturing. From the initial spark of an idea transformed by CAD software, through the meticulous planning of toolpaths with CAM, to the satisfying hum of your desktop CNC bringing your designs to life, each step is a testament to the power of modern woodworking technology.
Embrace the learning curve, start with simple projects, and always prioritize safety. The wealth of online resources, vibrant communities, and accessible tools available in 2026 makes this the ideal time to delve into CNC routing. Your home workshop is poised for a technological upgrade, ready to produce everything from personalized gifts and custom furniture components to artistic carvings and functional jigs. The precision and repeatability offered by CNC will undoubtedly elevate your woodworking craft, allowing you to achieve results that hand tools alone simply cannot replicate. Take the leap, and prepare to unlock a new dimension of woodworking creativity.
Actionable Next Steps:
- Research Software: Download trials of Fusion 360, VCarve, or Carbide Create. Watch introductory tutorials and try to design a simple 2D shape.
- Evaluate Your Space & Budget: Determine how much room you have for a desktop CNC and set a realistic budget.
- Choose a Machine: Based on your budget, project needs, and available space, select a desktop CNC model. Look into user reviews and community support.
- Start Small: Plan your first project to be something straightforward, like a simple sign, a coaster, or a basic template cut from MDF.
- Prioritize Safety: Invest in proper eye and ear protection, and plan for dust collection from day one.
References Inventables. (n.d.). X-Carve. Retrieved from https://www.inventables.com/technologies/x-carve Carbide 3D. (n.d.). Shapeoko. Retrieved from https://carbide3d.com/shapeoko/ Autodesk. (n.d.). Fusion 360. Retrieved from https://www.autodesk.com/products/fusion-360/overview Vectric. (n.d.). VCarve Desktop. Retrieved from https://www.vectric.com/products/vcarve/desktop.htm SainSmart. (n.d.). Genmitsu CNC Routers. Retrieved from https://www.sainsmart.com/collections/genmitsu-cnc-routers
Meta Title: Mastering CNC Routing for Home Woodworkers: Design to First Cut Meta Description: Unlock precision woodworking! Learn CNC routing for home woodworkers, from design software to choosing a desktop machine and making your first cuts in 2026.
