


In the world of woodworking and furniture restoration, few finishes offer the unique charm, historical accuracy, and artistic versatility of milk paint and casein finishes. These natural, time-honored coatings provide an unparalleled ability to imbue wooden pieces with authentic distressed and period-specific looks, transforming ordinary wood into objects rich with history and character. In 2026, as interest in sustainable practices and handcrafted aesthetics continues to grow, understanding how to apply and manipulate these traditional paints is more valuable than ever. This comprehensive guide on Mastering Milk Paint and Casein Finishes: Achieving Authentic Distressed and Period-Specific Looks on Wood will delve into their historical roots, practical applications, and advanced techniques, enabling you to create stunning, durable, and truly unique finishes.
Key Takeaways

- Milk paint and casein finishes are historical, natural paints renowned for their authentic, matte appearance and versatility in creating distressed looks.
- Proper surface preparation is crucial, including cleaning and sanding, but also understanding when to skip adhesion promoters for intentional chipping.
- Achieving distressed effects involves strategic sanding, wet-distressing, and crackling techniques, requiring practice and an artistic eye.
- Sealing with a topcoat (oil, wax, or varnish) is essential to protect the finish and enhance durability, especially for high-traffic pieces.
- These finishes are ideal for restoring antique furniture, creating rustic farmhouse decor, or achieving specific historical aesthetics.
Understanding Milk Paint and Casein: History, Composition, and Characteristics
Before diving into application, it’s essential to grasp what milk paint and casein finishes truly are. Milk paint, one of the oldest known paint types, has been used for thousands of years, with recipes found in ancient Egyptian tombs. Its primary ingredients are milk protein (casein), lime, clay, and natural pigments. When mixed with water, these components form a durable, breathable, and biodegradable finish. Casein, the protein found in milk, is also the binding agent in casein paint, which is essentially milk paint without the lime, often resulting in a slightly different texture and working properties.
The beauty of these paints lies in their unique characteristics:
- Matte, Chalky Finish: Unlike modern acrylic or latex paints, milk paint dries to a distinctly flat, chalky surface that feels soft to the touch.
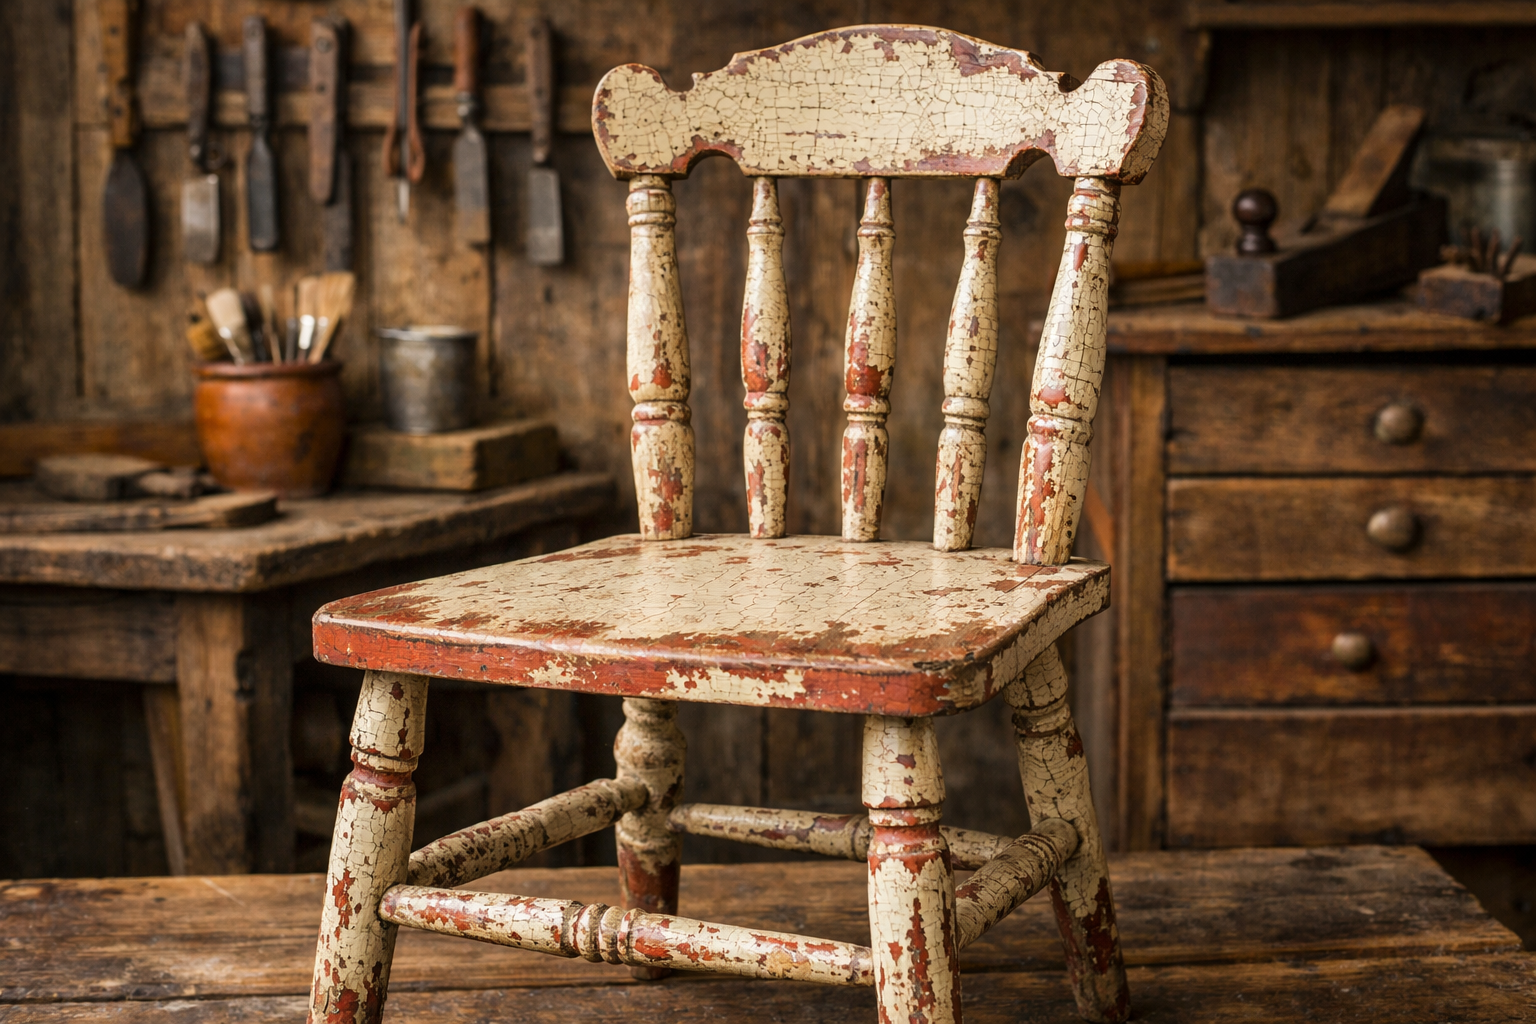
- Natural Chipping and Crackling: On unprepared or previously finished surfaces, milk paint often adheres imperfectly, leading to a charming, authentic chipped or crackled appearance that is difficult to replicate with synthetic paints. This is key to achieving a genuinely aged look.
- Deep, Rich Colors: Natural pigments provide colors with an unparalleled depth and earthiness.
- Non-Toxic and Eco-Friendly: Composed of natural ingredients, they are a fantastic choice for furniture in homes with children or pets, aligning with sustainable woodworking practices.
- Versatility: From subtle washes to heavily distressed layers, the possibilities are vast.
Preparing Your Wood for Authentic Finishes
Proper preparation is the foundation for any successful finish, and this holds true for milk paint and casein. However, “proper” can vary depending on your desired outcome.
For a Smooth, Adhered Finish:
If you want the milk paint to adhere well and not chip much, follow these steps:
- Clean: Thoroughly clean the wood surface to remove dirt, grease, and grime. A solution of warm water and a mild degreaser works well.
- Sand: Lightly sand the surface with 150-220 grit sandpaper to create a slight “tooth” for the paint to grip. For new wood, ensure it’s smooth and free of imperfections.
- Adhesion Promoter: For very smooth or previously sealed surfaces (like polyurethane or lacquer), consider adding a bonding agent (available from milk paint manufacturers) directly to your mixed paint, or using a separate primer.
For Intentional Chipping and Distressing:
To encourage the coveted chipped or crackled look, you might intentionally skip some adhesion steps:
- Minimal or No Sanding: On existing finishes, less sanding means less grip for the milk paint, encouraging it to chip.
- Wax as a Resist: Apply a thin layer of wax (like beeswax or a clear paste wax) in areas where you want the paint to chip away easily, such as edges, corners, or spots where natural wear would occur.
| Surface Type | Desired Outcome | Preparation Notes |
|---|---|---|
| Raw Wood | Smooth Adhesion | Sand 150-220 grit, clean thoroughly. |
| Raw Wood | Mild Distress | Sand lightly 220 grit, apply thin wax in specific areas. |
| Existing Finish | Smooth Adhesion | Clean, light sand 220 grit, use adhesion promoter in paint or primer. |
| Existing Finish | Heavy Chipping | Clean, minimal or no sanding, apply wax resist in target areas. |
| Previously Painted | Crackled/Aged Effect | Clean well. Paint directly over existing oil-based paint for best crackling potential. |
For those just starting in woodworking, gaining a good understanding of foundational skills like Profitable Woodworking for Beginners: Building and Selling H can provide a solid base before tackling specialized finishing techniques.
Mixing and Applying Milk Paint for Period-Specific Looks
Mastering Milk Paint and Casein Finishes: Achieving Authentic Distressed and Period-Specific Looks on Wood truly shines in the mixing and application phase. The dry powdered nature of traditional milk paint allows for incredible customization in consistency and color.
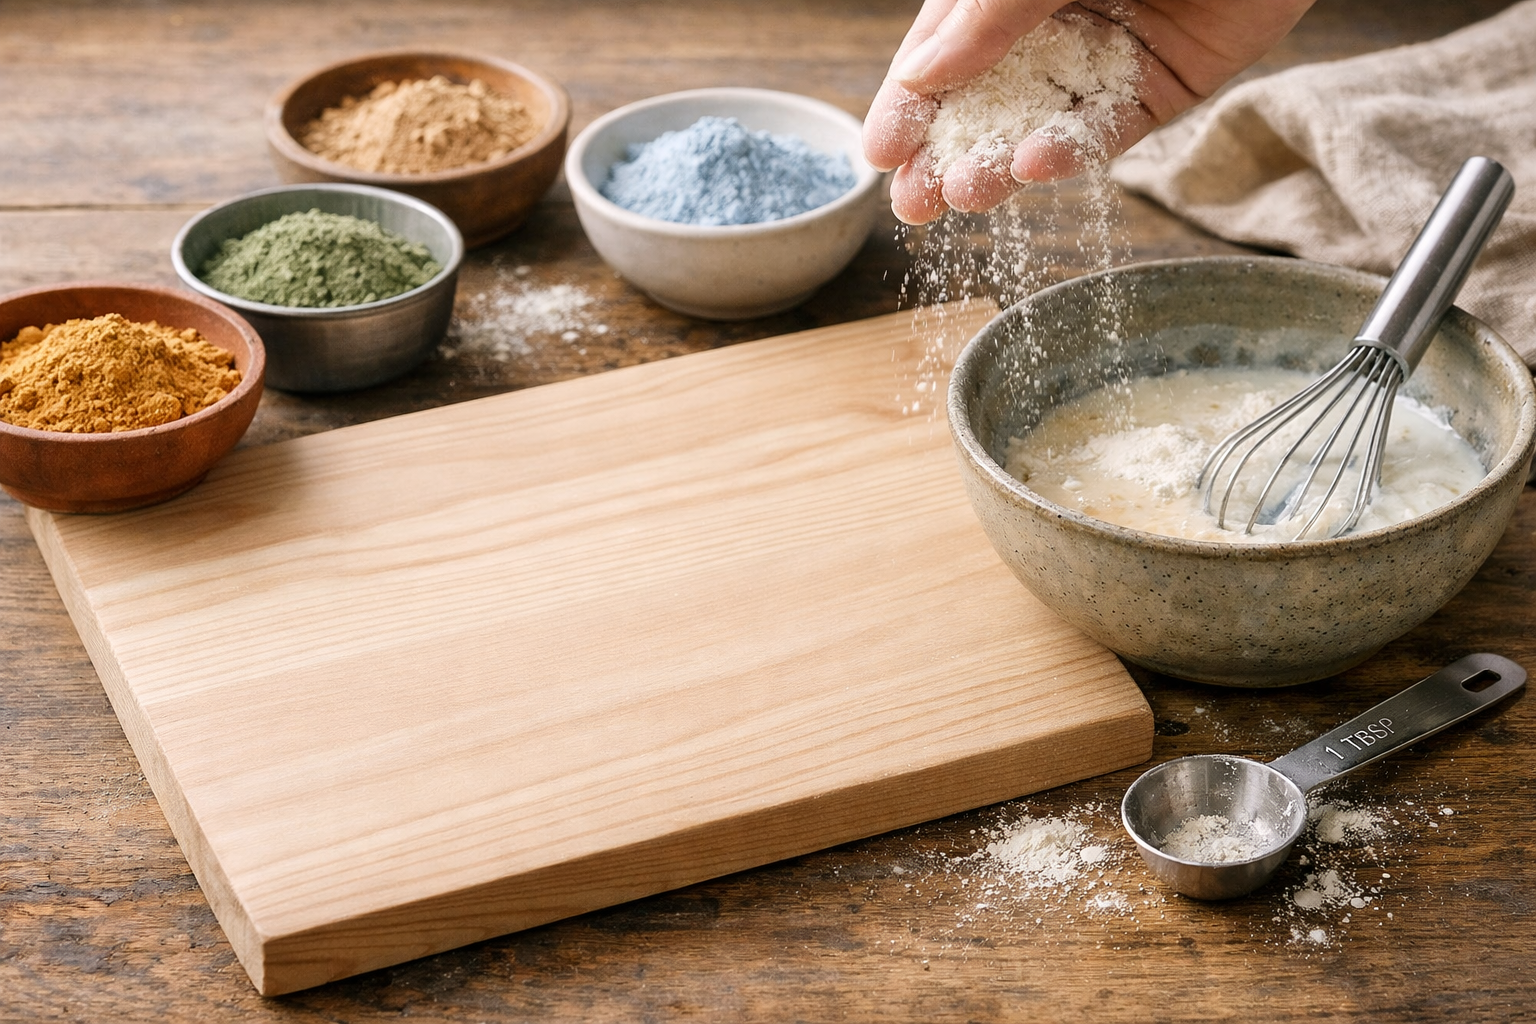
Mixing Milk Paint
Traditional milk paint comes as a powder. Mixing it is straightforward but requires patience:
- Water First: Start with warm water in a container.
- Add Powder Slowly: Gradually add the milk paint powder while stirring continuously.
- Achieve Desired Consistency:
- Thick Paste: For a rich, opaque coverage or stenciling.
- Creamy: Standard consistency for most applications, similar to thin latex paint.
- Thin Wash/Stain: More water creates a translucent finish that allows wood grain to show through, perfect for a pickled or limed effect.
- Let it Sit: Allow the mixed paint to sit for 10-20 minutes to fully dissolve the casein and pigments. Stir again before use.
- Strain (Optional but Recommended): For a super smooth finish, especially when using sprayers, straining through a fine mesh filter can remove any undissolved lumps.
- Tip: Mix only what you need. Traditional milk paint has a limited pot life (a few hours to a day) once mixed, as the organic proteins can spoil.
Application Techniques
The way you apply milk paint profoundly impacts the final look:
- Brushing: Use a good quality natural bristle brush. Apply thin, even coats. For an aged look, brush strokes can be left visible, mimicking historical application. For smooth pieces, a foam brush can minimize brush marks.
- Rolling: For larger, flat surfaces, a small foam roller can provide quick and even coverage.
- Spraying: Milk paint can be thinned further and sprayed with an HVLP sprayer for a super smooth, factory-like finish. Ensure thorough straining to prevent clogs.
Building Layers for Depth
For a truly authentic, period-specific look, consider layering different colors. Historically, furniture was often repainted many times over generations.
- Apply a base color (e.g., a dark red or blue).
- Allow it to dry completely.
- Apply a second, contrasting color (e.g., a creamy white or a lighter green).
- Distress, allowing the underlying color to peek through in areas of wear, replicating years of use.
This layering technique is a hallmark of antique wood finishing techniques and brings immense character to a piece.
Achieving Authentic Distressed and Aged Effects with Milk Paint
This is where the artistry of Mastering Milk Paint and Casein Finishes: Achieving Authentic Distressed and Period-Specific Looks on Wood truly comes to life. The ability to manipulate the finish to appear genuinely aged is what sets these paints apart.
Distressing Techniques
Wet Distressing:
- While the paint is still slightly damp (but not wet), use a damp rag or sponge to gently rub away paint from edges, corners, and raised details. This creates soft, natural-looking wear patterns.
- Best for: Subtle wear, revealing underlying wood or base coat.
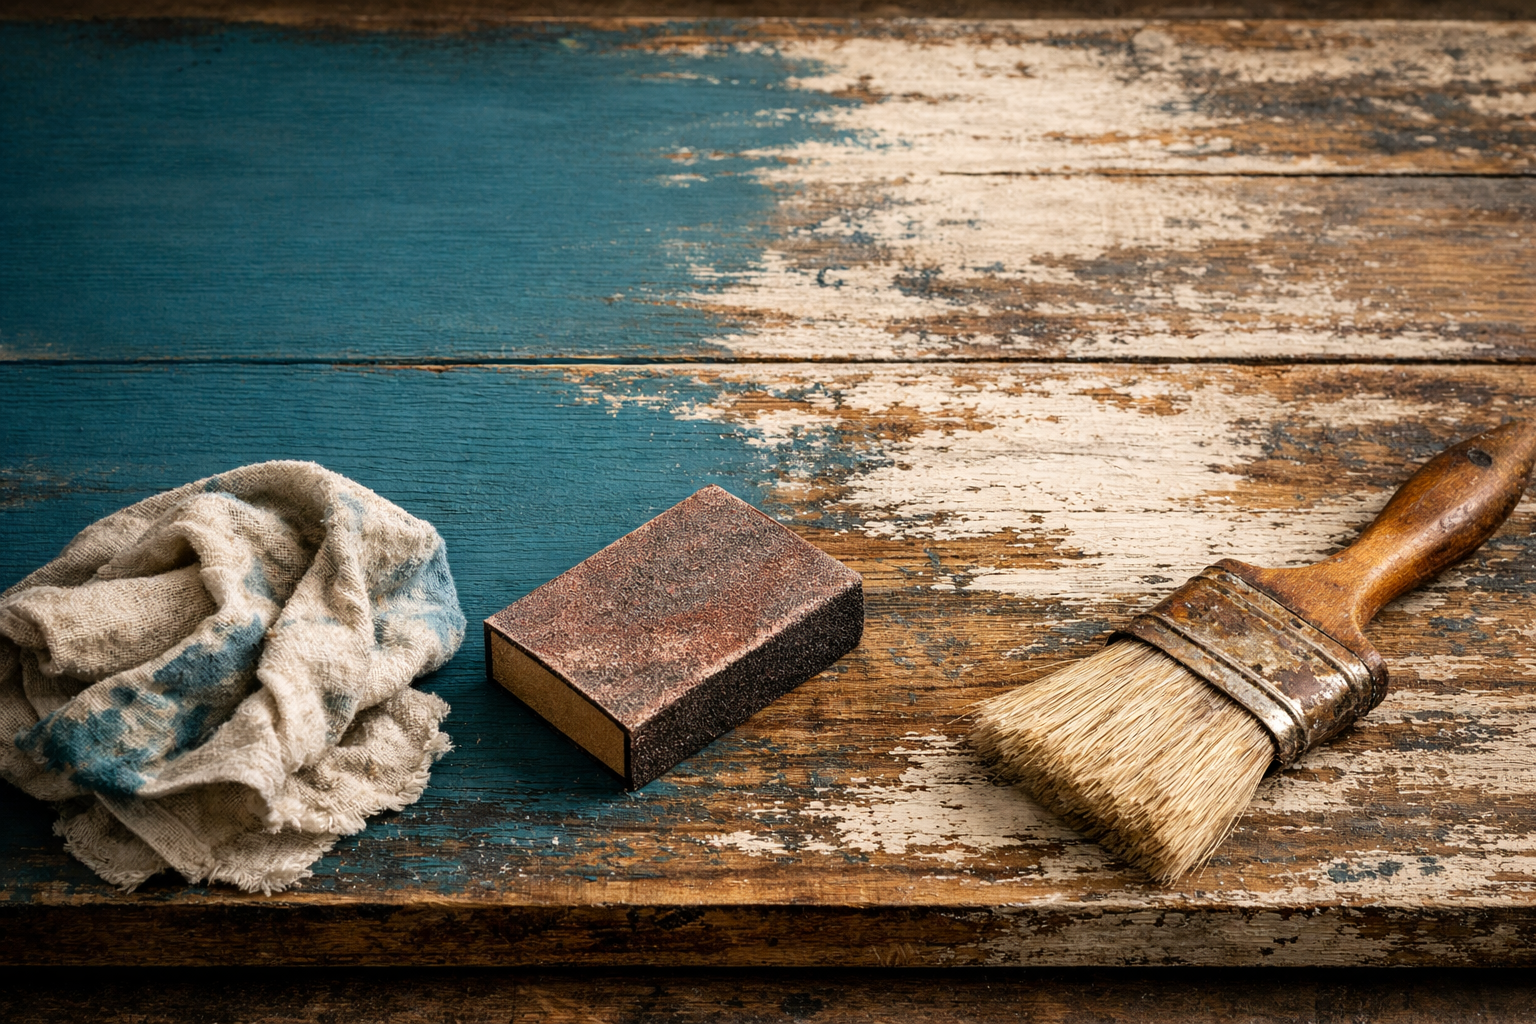
Dry Distressing (Sanding):
- Once the paint is completely dry, use fine-grit sandpaper (180-320 grit) to sand away paint from areas of natural wear: edges, corners, around hardware, and high-traffic spots.
- Vary your pressure and technique: Use light, circular motions for a subtle rub-through, or more focused pressure for deeper chipping.
- Best for: More pronounced chipping, revealing bare wood or a contrasting base color.
Chipping and Crackling:
- Natural Chipping: This occurs naturally when milk paint is applied over a non-porous or waxy surface without an adhesion promoter. The paint will simply flake and chip in random, organic patterns.
- Forced Crackling: Some techniques involve applying a crackle medium between coats, but milk paint often crackles naturally, especially when applied thickly or over certain existing finishes.
- Best for: Replicating the severe aging of very old pieces.
Glazing and Antiquing:
- After distressing, apply a thin coat of tinted glaze (e.g., dark brown or black) over the entire piece. Wipe off the excess, allowing the glaze to settle into cracks, crevices, and sanded areas. This enhances depth and accentuates the distressed features, mimicking grime and age.
- Best for: Adding an extra layer of age and character, particularly to rustic or farmhouse styles.
Sealing Your Milk Paint Finish
While milk paint is durable, it is porous. To protect it from moisture, stains, and daily wear, a topcoat is essential. The choice of topcoat significantly impacts the final look and feel.

Natural Oils (e.g., Hemp Oil, Tung Oil):
- Pros: Deepens the color, provides a soft sheen, is natural and non-toxic, easy to apply and reapply.
- Cons: Offers less protection against heavy wear than polyurethane.
- Look: A very natural, authentic, almost waxed appearance.
- Application: Apply generously, let penetrate, then wipe off excess. Repeat thin coats for more durability.
Waxes (e.g., Beeswax, Clear Paste Wax):
- Pros: Creates a beautiful, velvety feel and a subtle luster. Very natural.
- Cons: Offers the least protection, needs reapplication more frequently for high-traffic items.
- Look: A soft, muted glow.
- Application: Apply a thin layer with a cloth, allow to haze, then buff to a shine.
Water-Based Polyurethane or Varnish:
- Pros: Most durable, best protection against moisture and scratches.
- Cons: Can sometimes slightly alter the chalky look of milk paint, may not be as historically accurate.
- Look: Can range from matte to satin or gloss, depending on the product.
- Application: Apply thin, even coats with a brush or sprayer. Sand lightly between coats for a smooth finish.
For wooden pieces that will see a lot of use, like a Mastering Wooden Beer Caddy Builds: Portable Designs for Cra or a dining table, a more durable topcoat like a water-based poly is often recommended after achieving your distressed look. Alternatively, for smaller, decorative items like Engraved Wooden Coasters with Custom Designs: Laser and Hand or a Mastering Wooden Napkin Holders: Foldable Designs with Brass, a wax or oil finish provides sufficient protection while maintaining a soft, authentic feel.
Projects and Applications for Milk Paint and Casein Finishes
The versatility of milk paint and casein finishes makes them suitable for a vast array of woodworking projects in 2026, particularly those aiming for a vintage, rustic, or heirloom aesthetic.
Furniture Restoration and Upcycling
This is perhaps the most common application. Milk paint breathes new life into old, tired furniture pieces, giving them a charming, “found” quality without looking cheaply painted.
- Antiques: Restore an antique dresser or chair by mimicking the original finish or giving it a new, historically sympathetic look. The natural chipping blends seamlessly with existing wear.
- Modern Pieces: Transform a plain, inexpensive pine dresser into a farmhouse-chic statement piece with a couple of coats of milk paint and strategic distressing.
- Heirloom Recreation: If you’re building new furniture, such as those inspired by Crafting Custom Wooden Record Player Consoles: Integrating Modern or DIY Wooden Wall Clocks: Precision Joinery and Modern Designs, milk paint can immediately lend an aged, artisan feel, making them appear as if they’ve been cherished for generations.
Cabinetry and Built-Ins
For a kitchen or bathroom remodel that calls for a rustic, Shaker, or colonial feel, milk paint on cabinetry can be stunning. The soft matte finish reduces glare and provides a warm, inviting atmosphere. Distressing can be applied subtly to edges for a gently aged appearance.
Decorative Accents and Small Projects
Milk paint is perfect for smaller items where the finish is a key part of the appeal.
- Picture Frames: Give new picture frames an instant antique upgrade.
- Shelving: Achieve a farmhouse look on custom floating shelves or built-ins.
- Signage: Create vintage-style wooden signs with hand-painted lettering.
- Craft Items: Use on wooden toys, decorative boxes, or ornaments for a truly handcrafted, natural aesthetic.
Advanced Techniques for Specific Period Looks
- Colonial/Early American: Stick to muted, earthy tones like deep reds, blues, greens, and creams. Encourage natural chipping for a well-worn, utilitarian feel. A wax or oil finish is historically appropriate.
- Farmhouse/Rustic: Use softer pastels, whites, and light grays. Heavy distressing, exposing bare wood or a darker base coat, is common. Apply a dark wax or glaze for an “aged dirt” effect.
- Shabby Chic: Emphasize layers of white or light colors over a darker base. Focus on gentle, intentional distressing around edges and details, often sealed with a clear wax for a soft, romantic look.
- Swedish/Gustavian: Light, airy colors (pale blues, grays, whites) with very subtle distressing and a matte finish. Often paired with simple, elegant lines.
By experimenting with color combinations, layering, and distressing methods, you can tailor your milk paint and casein finishes to perfectly match any desired period or style. Remember that restoring antique wooden furniture often involves a blend of these techniques to achieve an authentic and respectful restoration.
Conclusion
Mastering Milk Paint and Casein Finishes: Achieving Authentic Distressed and Period-Specific Looks on Wood is an incredibly rewarding journey for any woodworker or DIY enthusiast. These historical paints offer a unique avenue for creativity, allowing you to transform ordinary pieces into works of art that tell a story. From their natural, non-toxic composition to their unparalleled ability to create genuinely aged and charming aesthetics, milk paint and casein are truly in a class of their own.
In 2026, as the demand for character-rich, sustainable, and custom-made items continues to rise, the skills learned here will equip you to create pieces that not only stand out but also resonate with a timeless appeal. Embrace the process, experiment with colors and distressing techniques, and don’t be afraid to let the paint do what it naturally does best: create beautiful imperfections. With practice, you’ll find yourself effortlessly crafting finishes that look as if they’ve graced homes for centuries, bringing warmth and authenticity to any space.
