
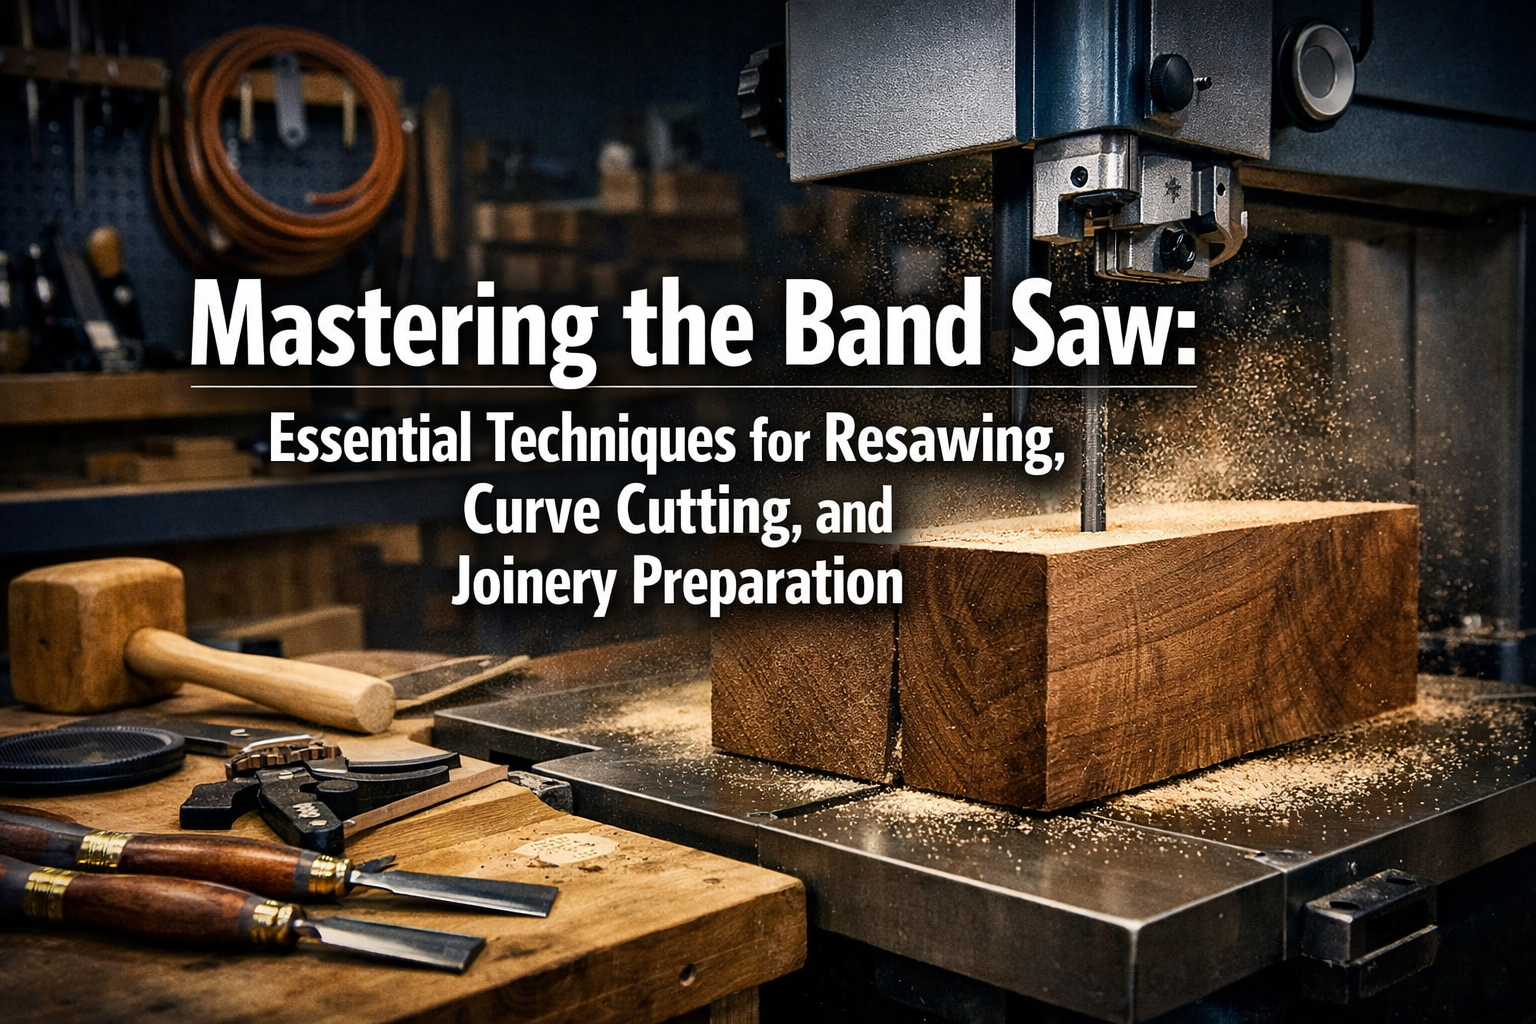

The band saw, often overshadowed by its flashier shop companions, is a true workhorse in any woodworking arsenal. From transforming rough lumber into delicate veneers to crafting intricate curves and precise joinery, this versatile machine is indispensable. Unlocking its full potential goes beyond basic cuts; it demands a deep understanding of blade selection, tensioning, and advanced techniques for intricate work and efficient material breakdown. This comprehensive guide to Mastering the Band Saw: Essential Techniques for Resawing, Curve Cutting, and Joinery Preparation will elevate your craftsmanship in 2026, enabling you to tackle projects with greater precision and confidence.
Key Takeaways
- Blade Selection is Paramount: Matching the blade type (width, TPI, material) to the specific task (resawing, curves, general cutting) is crucial for optimal performance and clean cuts.
- Proper Setup Ensures Success: Correct blade tension, guide alignment, and table squareness prevent drift, reduce blade breakage, and enhance accuracy across all operations.
- Resawing Saves Material and Money: Efficiently converting thick stock into thinner boards not only conserves expensive hardwoods but also opens up new design possibilities for veneers and panels.
- Curve Cutting Demands Technique: Mastering pivot points, relief cuts, and the right blade allows for smooth, complex curves, transforming design ideas into reality.
- Band Saws Excel in Joinery Prep: Utilizing jigs and precise settings, the band saw can accurately cut tenons, lap joints, and even rough out dovetails, streamlining the joinery process.
Optimizing Your Band Saw for Peak Performance
Before diving into advanced techniques, a well-tuned band saw is non-negotiable. Achieving precision in resawing, curve cutting, and joinery preparation begins with understanding and executing proper setup.

Blade Selection: The Right Blade for the Job
The band saw’s versatility largely stems from its ability to use a wide range of blades. Choosing the correct blade is the single most important factor for success.
- Resawing Blades: For Mastering the Band Saw: Essential Techniques for Resawing, opt for wider blades (3/4″ to 1″ or more) with fewer teeth per inch (TPI), typically 2-3 TPI. A “hook” or “skip” tooth pattern with a deep gullet is ideal for efficiently clearing sawdust from deep cuts, preventing binding and burning. Bimetal or carbide-tipped blades offer superior durability and longevity, especially with hardwoods.
- Curve Cutting Blades: Narrower blades are essential for intricate curves. A 1/8″ blade can handle very tight radii, while 1/4″ or 3/8″ blades are good for general curve cutting. The TPI should be higher (6-14 TPI) for smoother cuts, especially on softer woods or plywood. For very tight turns, consider a blade with a variable pitch or a narrow, flexible carbon steel blade.
- General Purpose & Joinery Blades: A 1/2″ blade with 3-6 TPI is often a good all-around choice for general cutting and initial joinery preparation. It offers a balance between straight-line stability and the ability to navigate gentle curves. For more precise joinery, a 1/4″ 10 TPI blade can be incredibly effective.
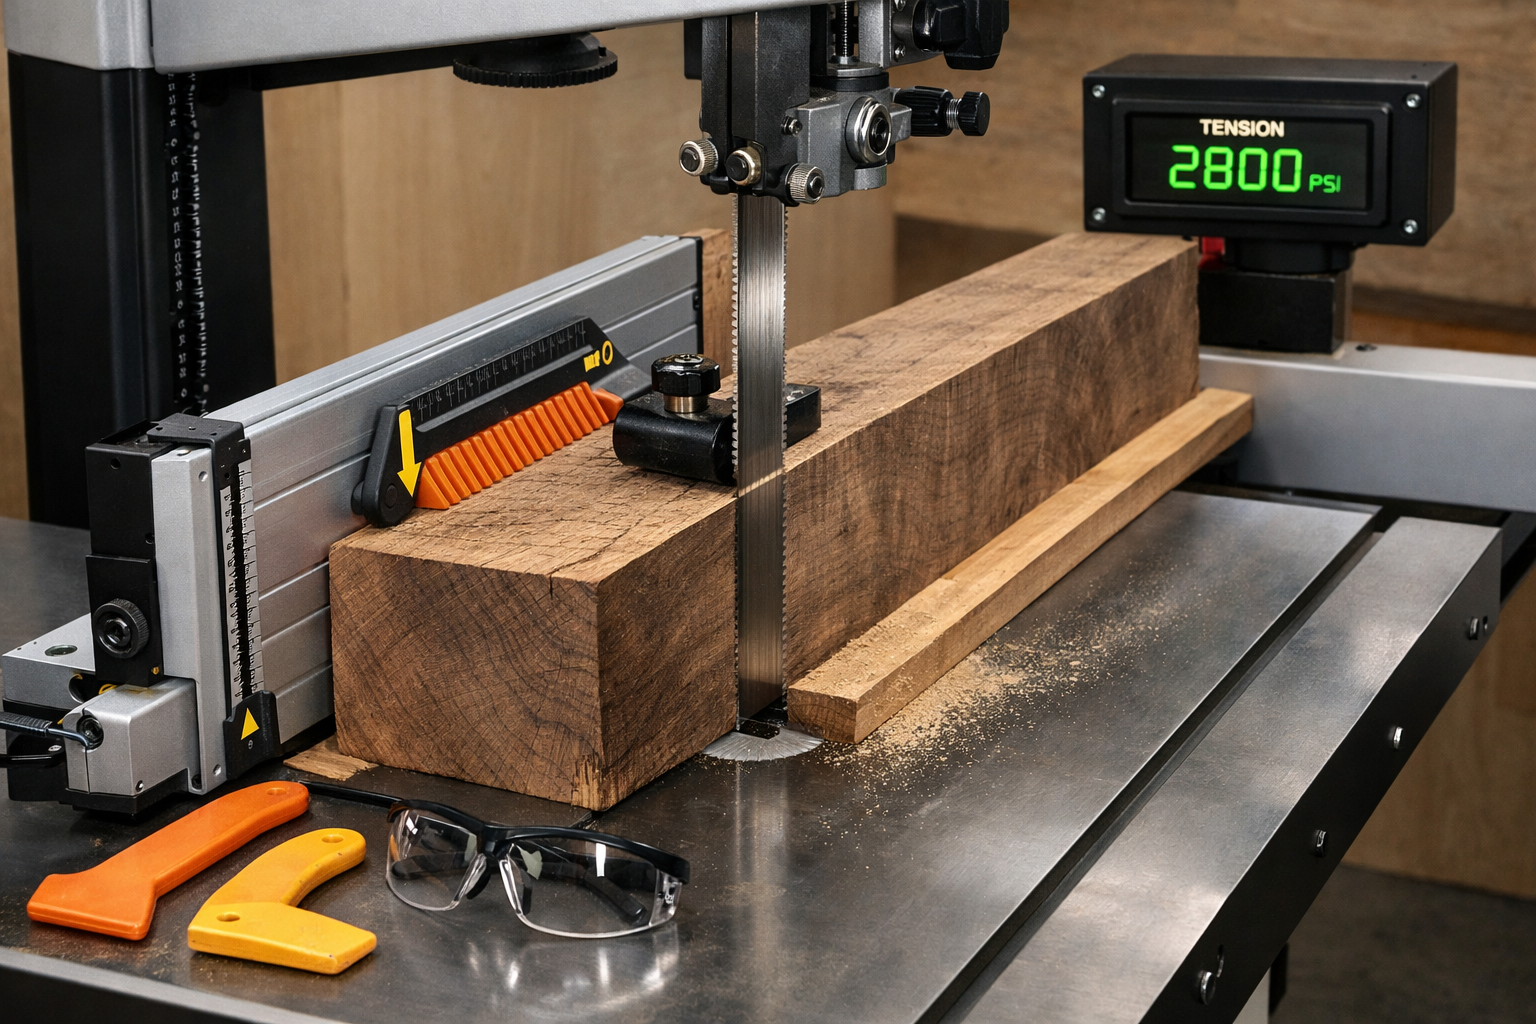
Blade Tensioning and Guide Alignment
Correct tension and guide alignment are critical for preventing blade drift, ensuring straight cuts, and maximizing blade life.
- Blade Tension: Follow your band saw manufacturer’s recommendations. Too little tension causes blade wander and poor cut quality; too much can lead to premature blade breakage or damage to the saw itself. Many saws have a tension scale; use it as a starting point and fine-tune by sight and sound – a properly tensioned blade should have a slight “thump” when plucked.
- Blade Guides: Set the thrust bearing just behind the gullet of the teeth, allowing the teeth to clear. The side guides (blocks or bearings) should be set just wide enough to allow the blade to pass freely without excessive side-to-side play. A piece of paper inserted between the blade and guide, then removed, often provides the right clearance.
- Table Squareness: Always ensure your band saw table is square to the blade. Use a reliable machinist’s square and adjust as needed. This is fundamental for accurate joinery and resawing.
“A sharp, properly tensioned blade with correctly set guides is the heart of precise band saw work. Neglect these steps, and you’ll fight your machine on every cut.”
Advanced Band Saw Techniques
With your band saw perfectly tuned, it’s time to explore the essential techniques that truly unlock its potential.
Resawing for Material Maximization and Aesthetics
Resawing is the process of cutting a thicker piece of wood into thinner planks or veneers. This technique is invaluable for maximizing expensive lumber, creating book-matched panels, or preparing material for curved laminations.

- Preparation: Select a wide, sharp resawing blade (as discussed above). Ensure the lumber is flat on one face and one edge square to that face. This forms your reference surfaces against the table and fence. Consider the article on Turning Shop Scraps into Design Features for ideas on utilizing thinner resawn pieces.
- Fence Setup: Use a tall, rigid fence positioned to cut the desired thickness. For boards wider than 6-8 inches, a custom tall fence often works better than the saw’s standard fence, providing more support. Some woodworkers prefer to offset the fence slightly to compensate for blade drift, but ideally, a well-tuned saw with a sharp blade should minimize drift.
- Technique:
- Start: Begin by making a shallow cut along the entire length of the board. This establishes a clean kerf.
- Passes: For wide boards, it’s often best to make two passes: cut halfway through, flip the board end-for-end, and cut from the opposite side. This helps to maintain a straight cut and reduces stress on the blade. For very wide or thick boards, you might even rotate the board 90 degrees and cut from both edges toward the center.
- Feed Rate: Maintain a consistent, moderate feed rate. Listen to the saw; if the motor is bogging down or the blade is heating excessively, reduce the feed rate. If the blade is wandering, you might be feeding too fast or your tension/guides need adjustment.
- Support: Use push sticks or featherboards for safety and consistent pressure. For longer boards, an outfeed support stand is highly recommended.
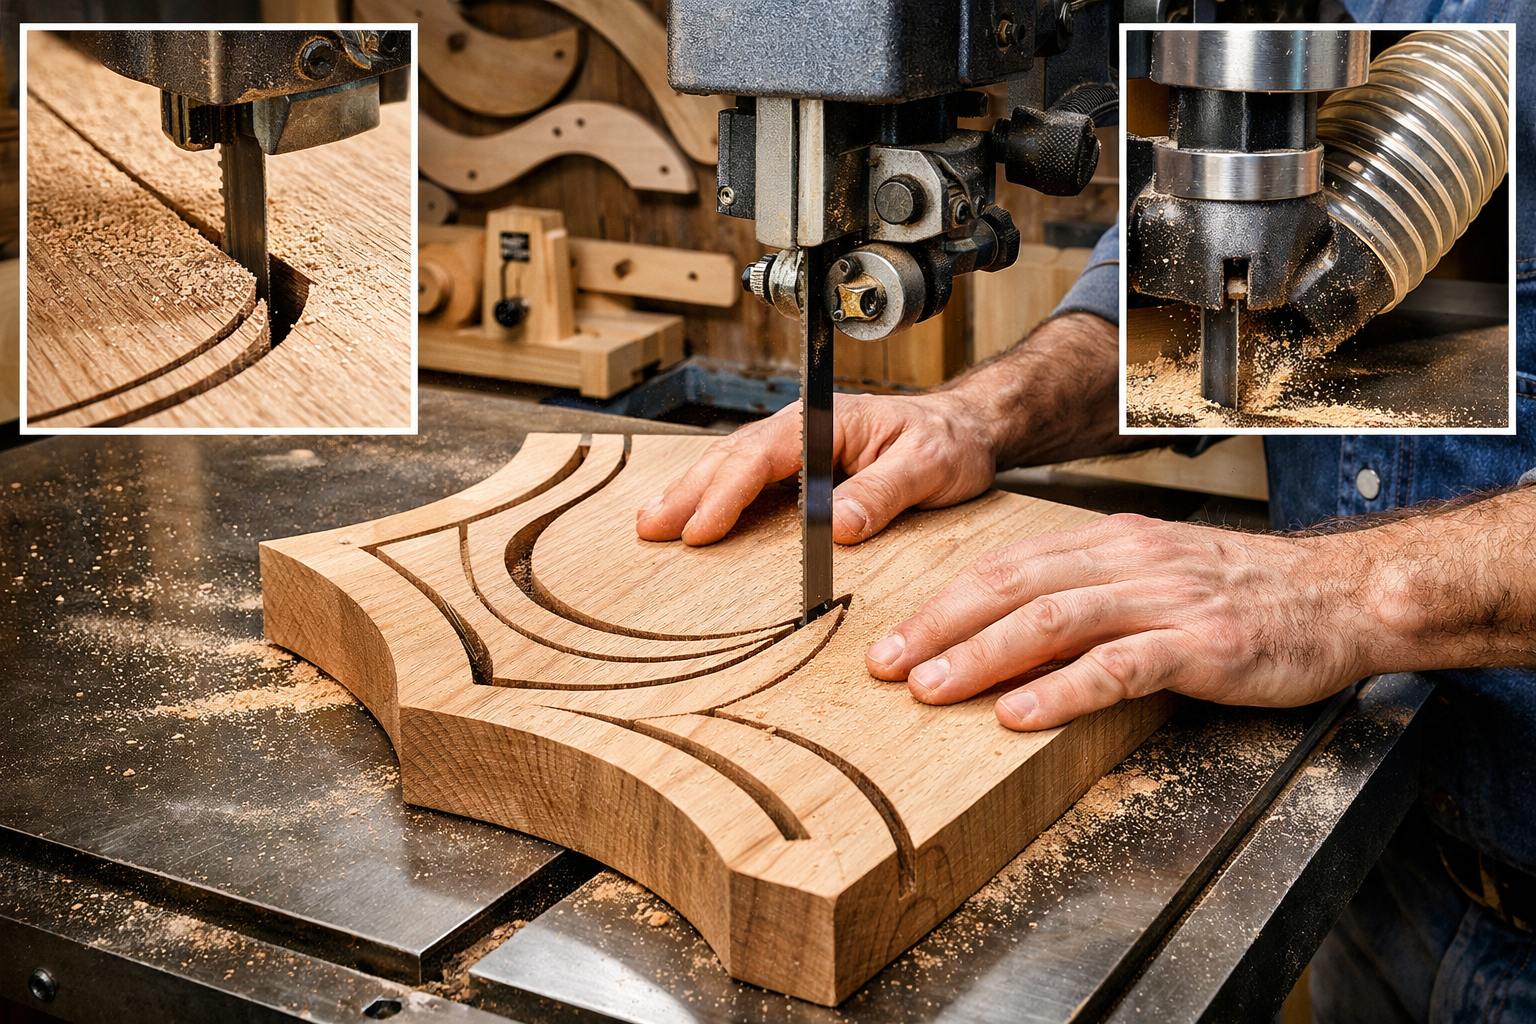
Mastering Curve Cutting
The band saw excels at cutting curves, allowing for endless design possibilities from intricate scrollwork to sweeping furniture components.
- Blade Choice: As noted, a narrower blade is key. The tighter the curve, the narrower the blade required.
- Layout: Accurately lay out your curve on the workpiece. Consider using templates for repeatable curves, especially for projects like custom wooden birdhouses, which often feature curved roofs or entryways (see DIY Wooden Birdhouses: Advanced Designs with Precision Joine).
- Relief Cuts: For tight inside curves, make a series of straight relief cuts from the edge of the board into the waste area, stopping just short of your layout line. This allows the waste material to fall away as you cut the curve, preventing the blade from binding.
- Pivot Points: Identify natural pivot points in your curve where you can momentarily stop feeding forward and rotate the workpiece. This helps maintain control and smooth transitions.
- Technique: Feed the workpiece slowly and steadily, allowing the blade to do the work. Avoid forcing the blade, as this can lead to deflection, burning, or blade breakage. Keep your eyes on the layout line and guide the wood with minimal pressure against the blade’s side.
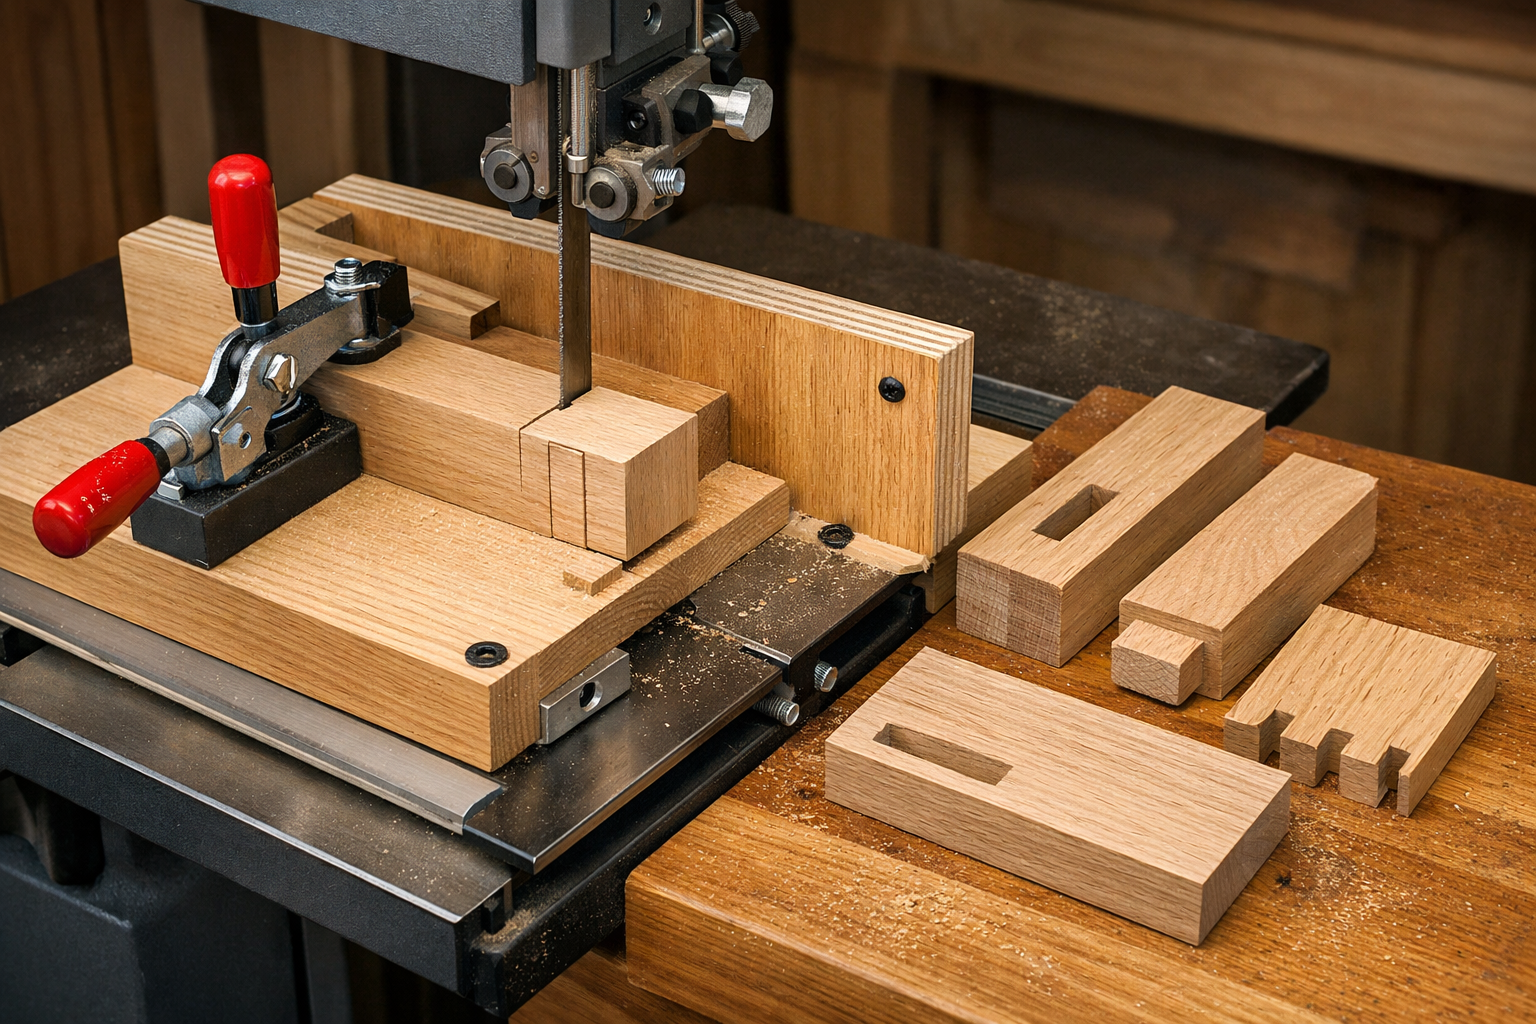
Precision Joinery Preparation
While a table saw or router typically handles final joinery, the band saw is excellent for roughing out or even completing certain joints, especially when working with larger stock or irregular shapes.
- Tenons: For cutting tenons, mark all shoulder and cheek lines accurately. Use a straight-edged jig or a simple block clamped to your table as a temporary fence to guide the shoulder cuts. Then, for the cheek cuts, use a push stick and ensure consistent pressure against the blade. A narrower, higher TPI blade (1/4″ or 3/8″, 10-14 TPI) can provide very clean tenon cheeks that require minimal cleanup. This is particularly useful for robust projects like Crafting Profitable Wooden Benches.
- Lap Joints: Similar to tenons, lay out your lap joint lines. The band saw can quickly remove the majority of the waste material, especially on wider stock. Use a stop block for repeatable cuts and clean up with chisels or a router.
- Dovetails (Roughing Out): While hand-cut or router-cut dovetails offer ultimate precision, the band saw can efficiently remove much of the waste material between pins and tails, significantly speeding up the process. A fine-toothed, narrow blade is best here. Cut to your baseline, then remove the bulk of the waste.
- Mortise and Tenon: The band saw can create the cheeks of tenons efficiently. For the mortise, especially when making floating tenons, the band saw can sometimes be used for initial waste removal if the mortise is open-ended or accessible. However, typically a router or mortiser is preferred for the mortise itself. Consider how precise joinery enhances projects like Wooden Storage Chests with Hinged Lids.
| Technique | Ideal Blade Type | Key Considerations | Applications |
|---|---|---|---|
| Resawing | Wide (3/4″+), Low TPI (2-3), Hook/Skip | Tall fence, consistent feed rate, multiple passes | Veneers, book-matching, dimensioning lumber, making cutting boards |
| Curve Cutting | Narrow (1/8″-3/8″), High TPI (6-14) | Relief cuts, smooth feed, templates, pivot points | Furniture elements, decorative accents, toy making, ergonomic designs |
| Joinery Prep | Medium (1/4″-1/2″), Medium-High TPI (6-14) | Jigs/sleds, accurate layout, slow controlled cuts | Tenons, lap joints, roughing dovetails, dados, half-lap joints |
Safety First
Regardless of the technique, always prioritize safety when operating a band saw.
- Wear appropriate personal protective equipment (PPE), including safety glasses and hearing protection.
- Keep your hands clear of the blade path. Use push sticks and featherboards.
- Ensure the blade guard is set just above the workpiece.
- Never attempt to clear sawdust or scraps from around the blade while the machine is running.
- Regularly inspect your blade for dullness or damage and replace it as needed.
Conclusion
Mastering the Band Saw: Essential Techniques for Resawing, Curve Cutting, and Joinery Preparation will undoubtedly transform your woodworking capabilities in 2026. By understanding the nuances of blade selection, fine-tuning your machine, and applying these specialized techniques, you can achieve remarkable precision, efficiency, and artistic freedom. The band saw is more than just a cutting tool; it’s a gateway to advanced craftsmanship and material optimization. Embrace its full potential, practice these methods, and watch your woodworking projects reach new heights of quality and innovation.
Actionable Next Steps:
- Assess Your Blades: Review your current blade inventory. Do you have the right blades for resawing, curve cutting, and joinery prep? Invest in high-quality blades that match your most frequent tasks.
- Tune Your Machine: Dedicate time to thoroughly clean and tune your band saw. Check blade tension, guide alignment, and table squareness.
- Practice Techniques: Start with scrap wood. Practice resawing a thick board, cutting a complex curve, and preparing a basic tenon. Focus on consistency and control.
- Explore Jigs: Research and build simple jigs for resawing and joinery. These can significantly improve accuracy and safety.
- Start a Project: Apply your newfound skills to a project that demands these techniques. Perhaps a DIY Wooden Wine Rack with curved elements, or a piece of furniture requiring resawn panels.
