
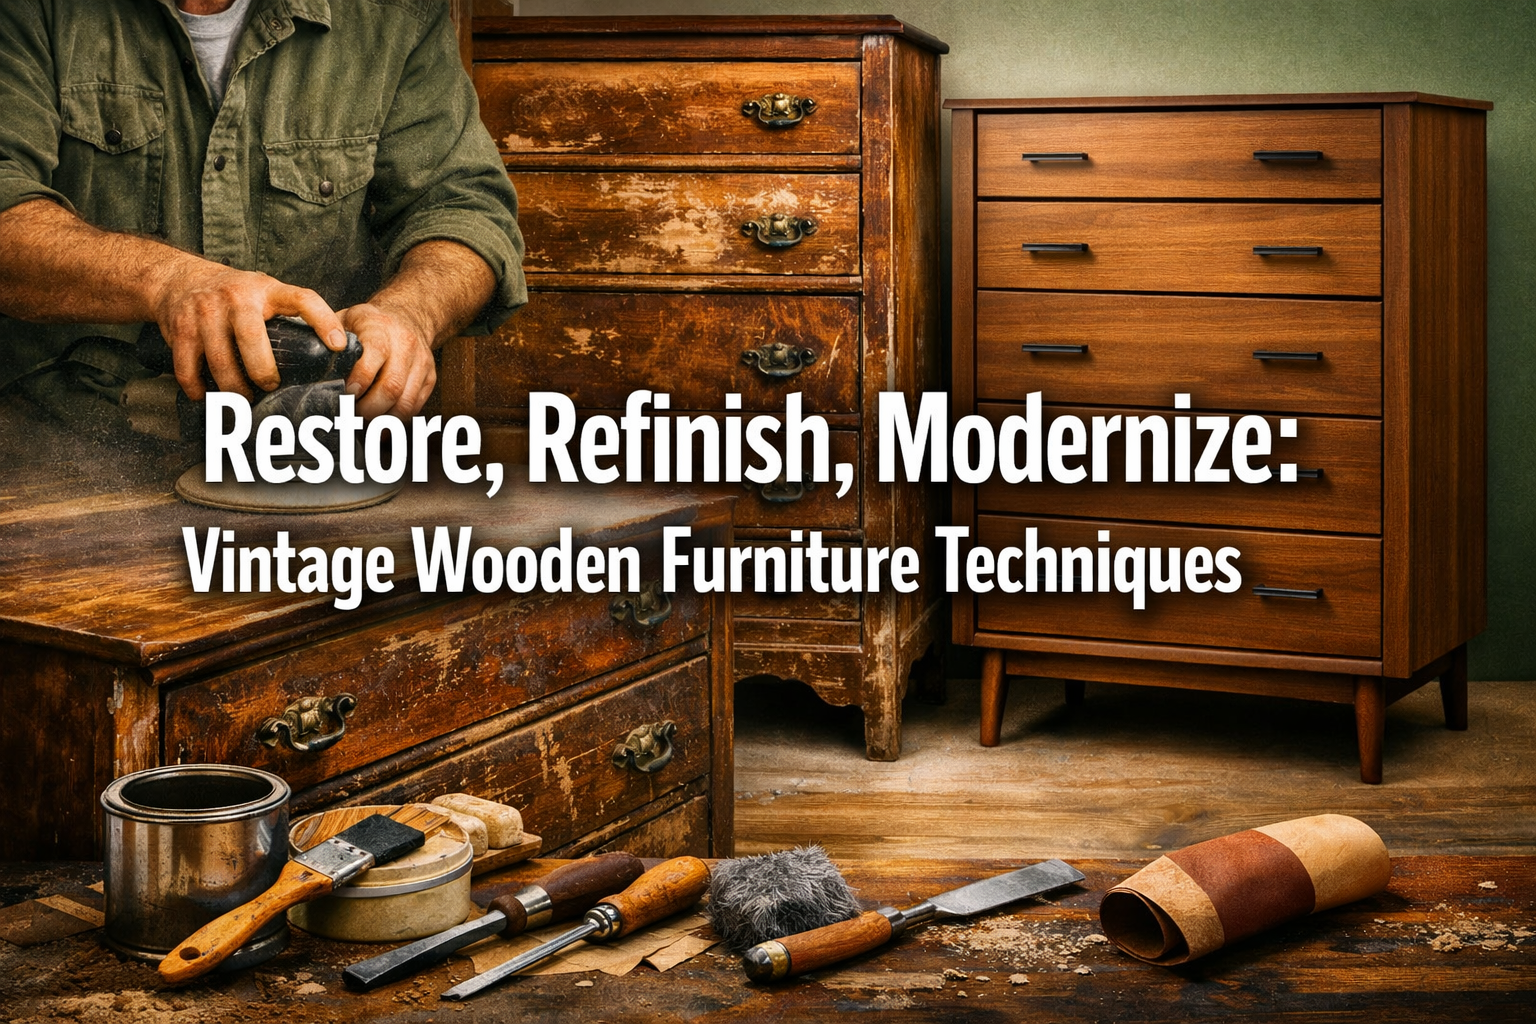

The allure of vintage wooden furniture is undeniable. Each piece tells a story, carrying the patina of time and the craftsmanship of a bygone era. In 2026, as sustainability and unique home decor become increasingly important, the art of Restoring and Repurposing Vintage Wooden Furniture: Techniques for Repair, Refinishing, and Modernization offers a rewarding pathway to breathe new life into these treasures. This comprehensive guide will walk you through essential repair techniques, various refinishing methods, and creative strategies for modernizing vintage pieces while preserving their inherent character and charm.
Key Takeaways
- Thorough Assessment is Crucial: Before any work begins, a detailed inspection for structural integrity, wood type, and existing finishes is paramount to guide your restoration plan.
- Master Foundational Repairs: Addressing loose joints, missing veneer, and structural damage is the cornerstone of a successful restoration, ensuring longevity and safety.
- Choose the Right Refinishing Method: From stripping and staining to painting and lacquering, selecting a finish depends on the desired aesthetic and the furniture’s original condition.
- Embrace Modernization Thoughtfully: Repurposing and adding contemporary elements can enhance functionality and style, but always aim to complement the piece’s historical integrity.
- Patience and Practice are Key: Furniture restoration is a craft that requires time, attention to detail, and a willingness to learn and refine your skills.
The Foundation: Assessment and Essential Repair Techniques
Before diving into the aesthetics of refinishing, a thorough assessment and structural repair are non-negotiable when Restoring and Repurposing Vintage Wooden Furniture. Neglecting fundamental issues can compromise the entire project and the longevity of the piece.

Initial Inspection: Uncovering the Past
Start by thoroughly examining the furniture. What kind of wood is it? Is it solid wood, veneer, or a combination? Look for signs of:
- Structural Damage: Loose joints, broken rails, wobbling legs.
- Wood Damage: Cracks, splits, gouges, water stains, mold, or insect infestations.
- Veneer Issues: Lifting, bubbling, or missing sections.
- Hardware Problems: Missing pulls, broken hinges, rusty casters.
- Existing Finish Condition: Is it flaking, sticky, or deeply scratched?
Take photos and make detailed notes. This initial assessment will dictate the scope of your project and the tools you’ll need.
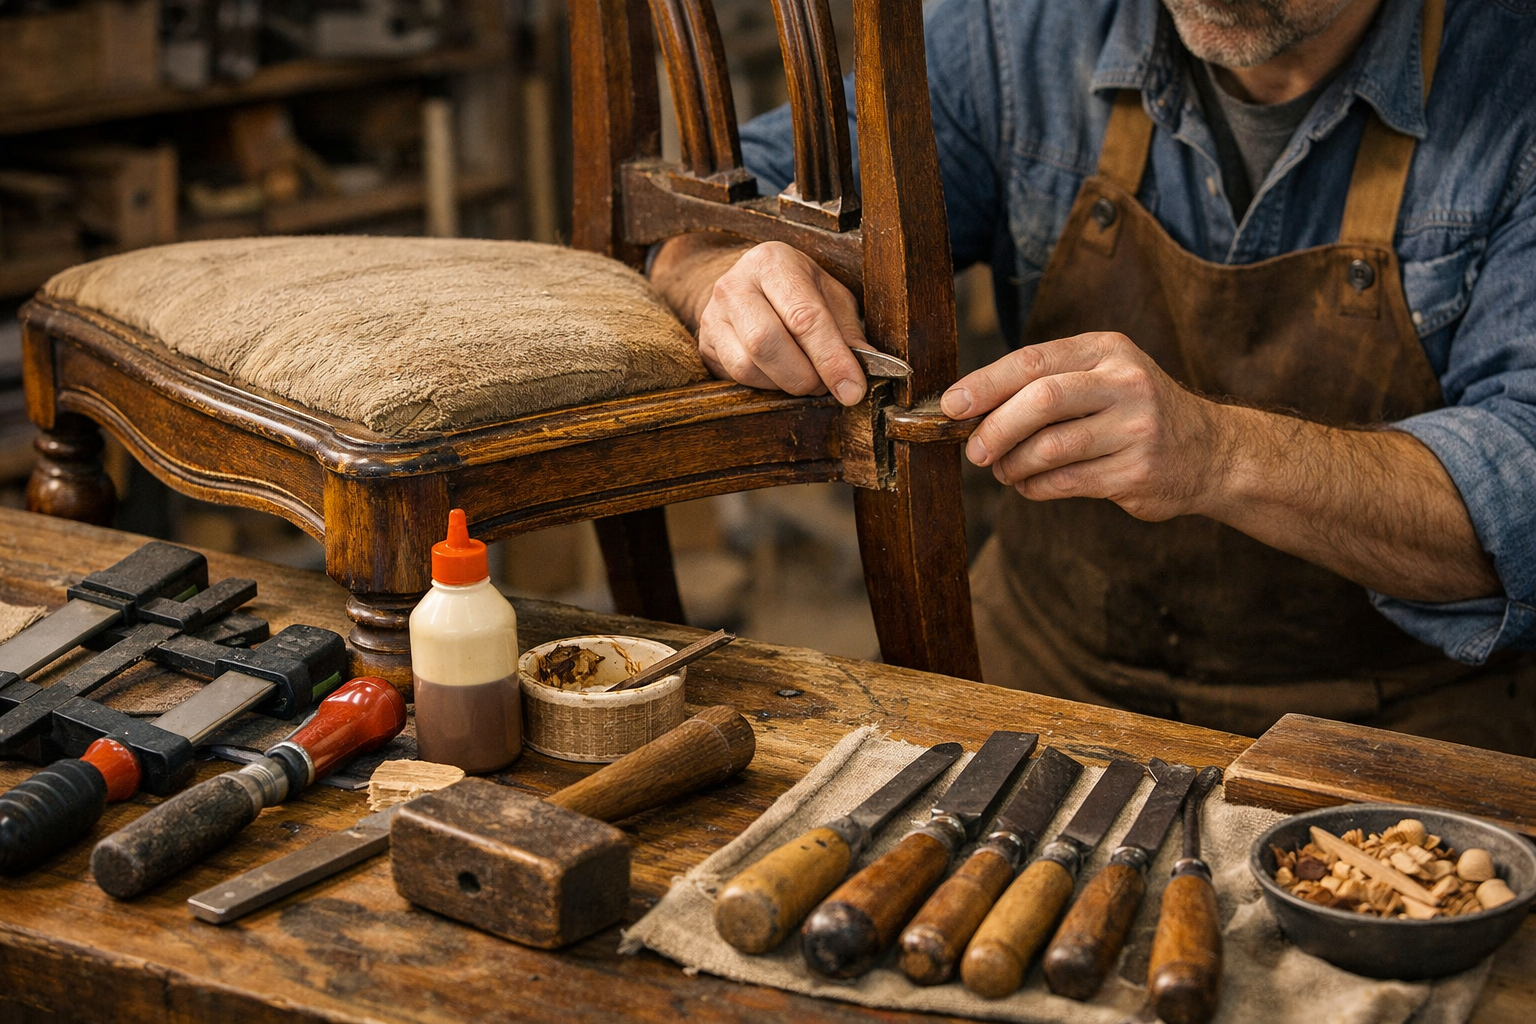
Addressing Structural Integrity: The Backbone of Restoration
A wobbly chair or a sagging table is not just an aesthetic issue; it’s a structural one.
- Disassembly (If Necessary): Sometimes, the best way to fix loose joints is to carefully disassemble the piece. Mark each joint clearly to ensure proper reassembly.
- Cleaning Old Glue: Scrape or sand away old, brittle glue from joints. New glue won’t adhere well to old residue.
- Regluing Joints: Use high-quality wood glue. Apply glue to both surfaces, clamp securely, and wipe away any squeeze-out immediately with a damp cloth. For more advanced joinery, consider exploring resources on mastering dovetail joints with hand tools for superior strength.
- Reinforcing Weak Points: Sometimes, adding discreet corner blocks or using dowels can reinforce weak areas without altering the vintage aesthetic.
Repairing Wood Damage
- Small Cracks and Holes: Wood filler or epoxy putty can be used for minor imperfections. Choose a color that matches the wood if you plan to stain, or a neutral color if you plan to paint.
- Deep Gouges and Splits: For larger damage, a wood patch or Dutchmen repair may be necessary. This involves cutting out the damaged section and inlaying a new piece of matching wood.
- Veneer Repair: Carefully lift loose veneer with a putty knife, apply wood glue underneath, and clamp it down with cauls (flat pieces of wood) to distribute pressure evenly. For missing veneer, a donor piece from an inconspicuous area or a suitable match from a lumber supplier can be cut and glued in place.
Addressing Hardware
Clean existing hardware with appropriate cleaners (e.g., vinegar for brass, rust remover for steel). If pieces are missing, try to find antique replicas that match the original style. Sometimes, modernizing means replacing old, broken hardware with new, stylish alternatives that complement the piece’s updated look.
Refinishing Techniques: Bringing Out the Beauty
Once the structural repairs are complete, the next step in Restoring and Repurposing Vintage Wooden Furniture is refinishing. This process can dramatically alter the appearance of a piece, from a subtle enhancement of natural wood grain to a complete color transformation.
Stripping the Old Finish
This is often the most labor-intensive part but essential for a clean slate.
- Chemical Strippers: Apply a gel or liquid stripper according to manufacturer instructions. Allow it to work, then scrape off the old finish with a plastic putty knife. Always work in a well-ventilated area and wear protective gear.
- Heat Guns: For stubborn finishes, a heat gun can soften the finish, making it easier to scrape. Use caution to avoid scorching the wood.
- Sanding: After stripping, thorough sanding is crucial. Start with a coarser grit (e.g., 80 or 100-grit) to remove any remaining finish and smooth out imperfections, then progressively move to finer grits (150, 220) for a silky smooth surface. Always sand with the grain of the wood. A good understanding of unique wood finishing techniques often starts with perfect preparation.
Staining: Enhancing Natural Grain
Staining accentuates the natural beauty of the wood grain.
- Types of Stains: Oil-based, water-based, and gel stains offer different application properties and finishes. Oil-based stains penetrate deeply and offer rich color, while water-based stains dry faster and have less odor. Gel stains are great for tricky woods or vertical surfaces as they don’t run.
- Application: Apply stain evenly with a brush, rag, or foam applicator. Allow it to penetrate for the recommended time, then wipe off excess with a clean cloth. Always test on an inconspicuous area first. For specific woods, consider specialized guides like mahogany wood finishing techniques or oak wood finishing techniques.
Painting: A Fresh New Look
Painting is an excellent option for pieces with damaged veneer, mismatched woods, or when a complete style transformation is desired.
- Primer: Always apply a good quality primer, especially on old wood, to ensure adhesion and block bleed-through from previous finishes or wood tannins.
- Paint Choice: Chalk paint, milk paint, and latex enamel are popular choices. Chalk paint offers a matte, distressed look, while enamel provides a durable, smooth finish.
- Technique: Apply thin, even coats, allowing each to dry thoroughly before the next. Light sanding between coats with a fine-grit sandpaper (e.g., 320-grit) can create a super smooth finish.
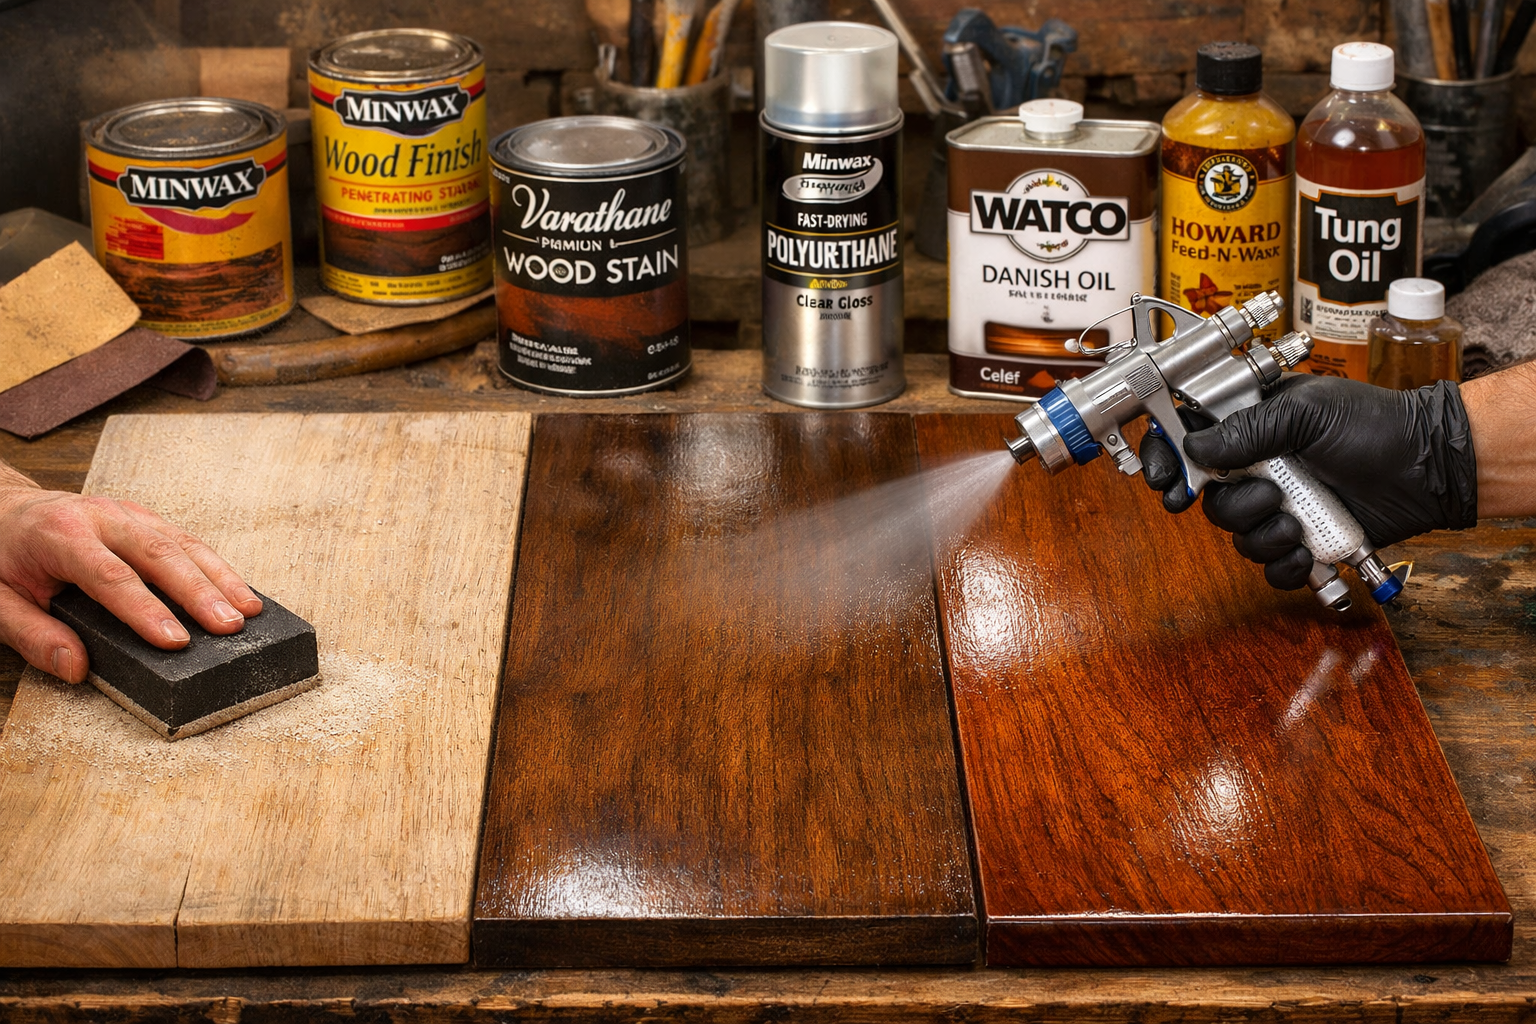
Topcoats: Protection and Durability
A topcoat protects your hard work and provides durability.
- Polyurethane: Highly durable, available in oil-based (ambering effect) and water-based (clear, non-yellowing) formulas.
- Lacquers: Fast-drying and build to a hard, clear finish. Best applied with a spray gun for an even coat.
- Varnishes: Provide excellent protection and a warm, traditional look.
- Oils (e.g., Tung, Linseed, Danish): Penetrate the wood, offering a natural, hand-rubbed finish. Less protective than film-building finishes but easy to repair. To learn more about this, check out our guide on Danish Oil vs. Linseed: The Ultimate Wood Finishing Guide.
When applying any topcoat, thin, even coats are key. Lightly sand with very fine grit sandpaper or steel wool between coats for optimal adhesion and smoothness.
Modernization and Repurposing: New Life, New Purpose
The true magic of Restoring and Repurposing Vintage Wooden Furniture lies in reimagining its function and integrating it into modern spaces. This not only gives the piece a second life but also adds a unique, sustainable touch to your home.
Repurposing for New Functionality
Think beyond the original intent of the furniture.
- Dressers to Vanities: An old dresser can become a charming bathroom vanity with a basin cutout and plumbing.
- Chests to Coffee Tables: A vintage trunk or chest can be repurposed into a coffee table with added storage.
- Bookcases to Bars: A narrow bookcase can be transformed into a stylish home bar or display cabinet. If you’re building new, our guide on a beginner’s guide to building a simple wooden bookshelf can offer foundational skills.
- Cabinets to Pet Beds: Larger cabinets can be modified into cozy pet sleeping areas.
Integrating Modern Elements
Subtle additions can dramatically update a vintage piece without sacrificing its character.

- Hardware Upgrade: Swapping out old pulls and hinges for sleek, modern designs in brass, black, or chrome can instantly refresh the look.
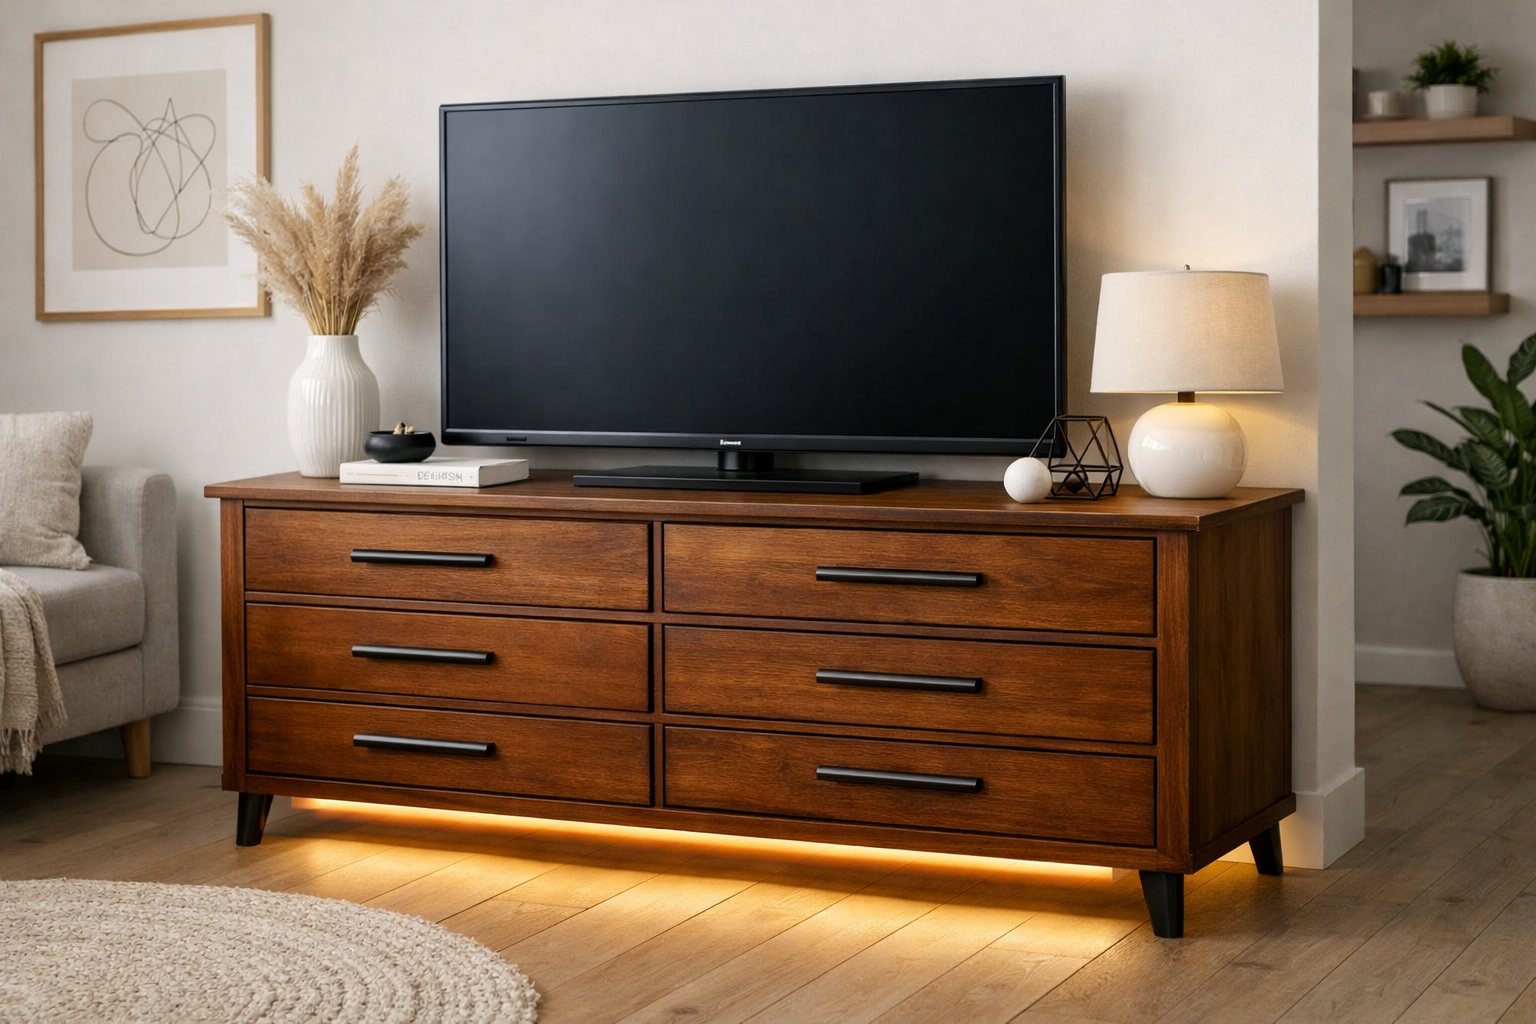
- Legs and Bases: Replace ornate or damaged legs with minimalist, tapered, or hairpin legs for a mid-century modern vibe.
- Color Blocking/Geometric Designs: Use paint to create modern geometric patterns or color-block sections, providing a contemporary contrast to the antique form.
- Lighting Integration: Adding LED strip lighting to shelves, under cabinets, or inside drawers can create ambiance and highlight features.
- Glass or Acrylic Tops: Protecting a beautifully refinished tabletop with a custom-cut glass or acrylic top adds a modern touch and durability.
- Smart Home Integration: Consider discreetly integrating charging stations, smart lighting, or even hidden speakers, turning a vintage piece into a functional smart furniture item. Learn more about DIY smart home integration with custom woodwork for inspiration.
Preserving Character While Modernizing
The key is balance. Avoid overly altering the original lines or unique features that make the piece special.
- Highlight Original Details: If a piece has intricate carvings or unique joinery, consider using a contrasting stain or paint color to make these features pop. Our article on advanced wood carving techniques can provide inspiration for enhancing such details.
- Distressing (Thoughtfully): If you’re going for a distressed look, do it sparingly and purposefully to mimic natural wear, rather than creating artificial damage.
- Mixing Styles: Don’t be afraid to mix vintage pieces with contemporary decor. A beautifully restored antique chest can serve as a striking focal point in a modern minimalist room.
The process of Restoring and Repurposing Vintage Wooden Furniture is a journey of discovery, skill development, and creative expression. Each step, from the initial repair to the final modern touch, contributes to reviving a piece of history for the present day.
Conclusion
Restoring and Repurposing Vintage Wooden Furniture: Techniques for Repair, Refinishing, and Modernization is more than just a hobby; it’s a sustainable practice that celebrates craftsmanship and allows for personal expression in home decor. By understanding the techniques for structural repair, mastering various refinishing methods, and applying thoughtful modernization strategies, anyone can transform forgotten pieces into cherished heirlooms or statement pieces for 2026.
Remember, patience is your greatest tool. Each scratch and imperfection tells a story, and your restoration journey adds a new chapter. Embrace the challenges, learn from each project, and enjoy the profound satisfaction of bringing a beautiful, functional piece of history back to life.
Actionable Next Steps:
- Start Small: Begin with a less valuable or simpler piece to build confidence and skills.
- Gather Your Tools: Invest in essential tools like clamps, scrapers, various grits of sandpaper, and good quality brushes.
- Research Wood Types: Understand the characteristics of different woods to choose appropriate finishes.
- Practice Finishing: Experiment with stains, paints, and topcoats on scrap wood before applying them to your main project.
- Seek Inspiration: Browse design magazines, online forums, and social media for ideas on repurposing and modernizing vintage furniture.
