
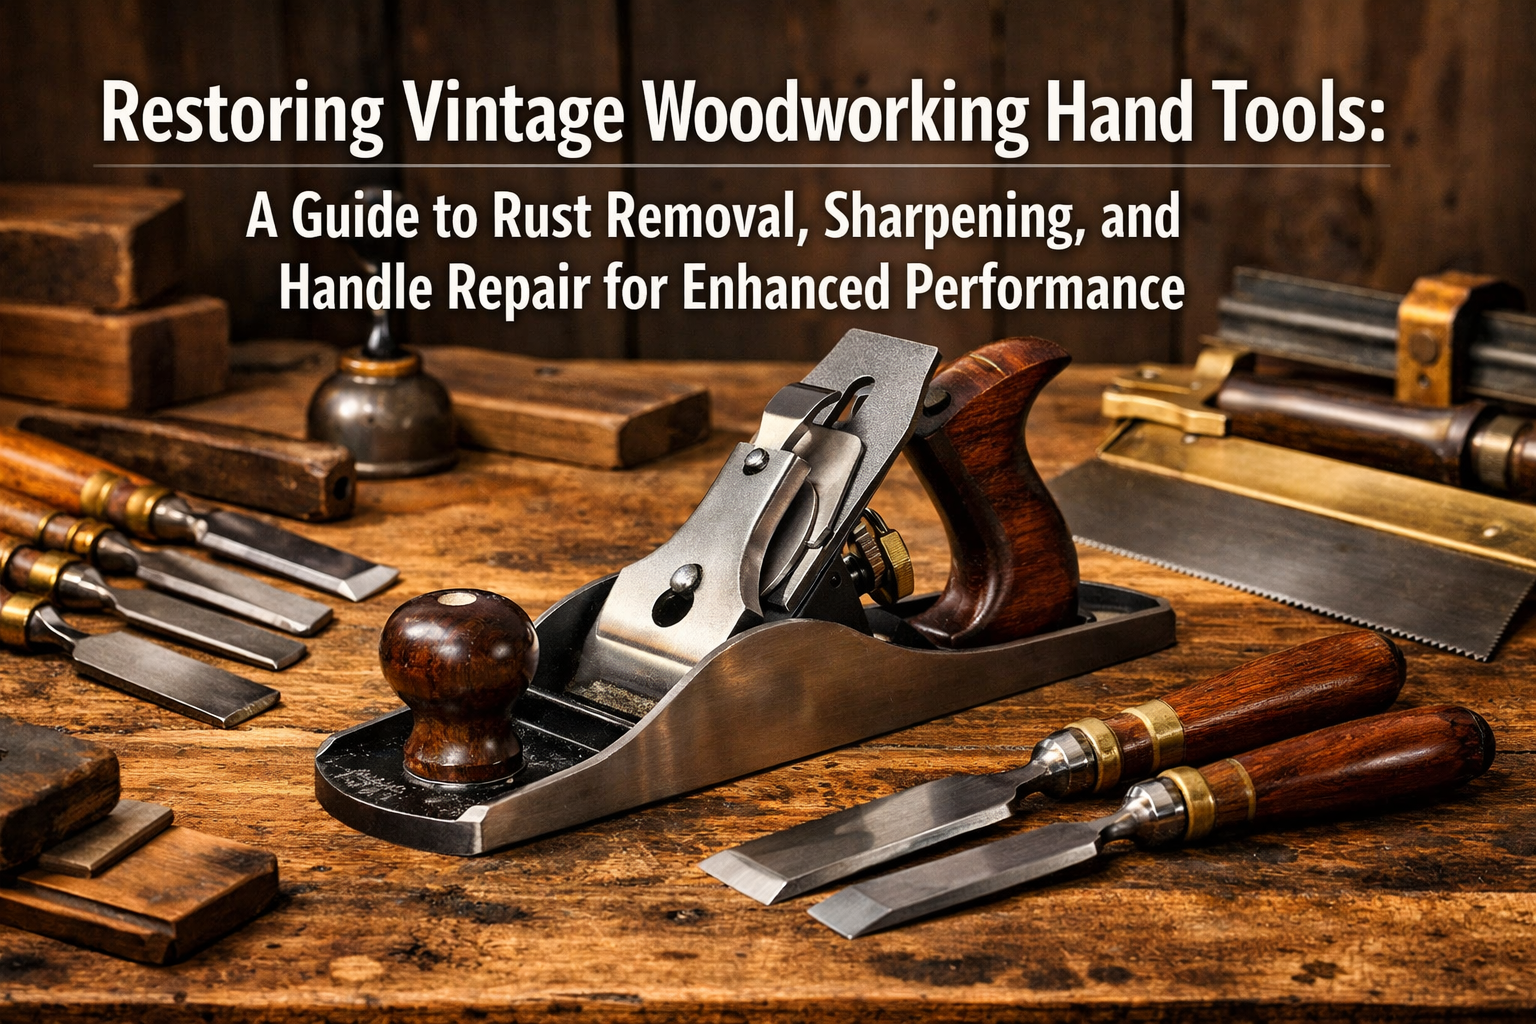

In the world of woodworking, few things connect an artisan to their craft’s rich history more profoundly than a well-preserved vintage hand tool. Antique planes, chisels, and saws, often discarded and overlooked, possess a quality and craftsmanship rarely found in modern counterparts. Revitalizing these instruments not only honors their legacy but also unlocks superior precision and a tangible connection to woodworking heritage. This comprehensive guide on Restoring Vintage Woodworking Hand Tools: A Guide to Rust Removal, Sharpening, and Handle Repair for Enhanced Performance covers essential techniques, from basic cleaning to advanced restoration, ensuring your old tools perform like new in 2026.
Restoring vintage tools is more than just a hobby; it’s a valuable investment in your woodworking journey. Properly restored tools offer unparalleled feel, balance, and the ability to produce exquisite results that power tools sometimes struggle to achieve. By learning to remove rust, sharpen blades, and repair handles, you’ll gain skills that enhance your overall craftsmanship and appreciation for the tools of the trade.

Key Takeaways
- Rust Removal is Crucial: Effective rust removal is the first step to uncovering a tool’s true potential and preventing further degradation.
- Sharpening Elevates Performance: A truly sharp edge is paramount for safety and precision, transforming a dull tool into a high-performance instrument.
- Handle Repair Restores Ergonomics: Repairing or replacing worn handles is essential for comfort, control, and the tool’s longevity.
- Patience and Persistence: Restoration is a process requiring dedication and careful attention to detail, yielding rewarding results.
- Safety First: Always use appropriate personal protective equipment (PPE) when handling chemicals, sharp objects, and during sanding.
Unearthing Potential: Rust Removal Techniques for Vintage Tools
Rust is the arch-nemesis of vintage metal tools, often obscuring their original luster and hindering performance. The goal of rust removal is to eliminate corrosion without damaging the underlying metal or crucial markings. This section provides a practical approach to rust removal, essential for Restoring Vintage Woodworking Hand Tools: A Guide to Rust Removal, Sharpening, and Handle Repair for Enhanced Performance.
Initial Assessment and Preparation
Before diving into rust removal, thoroughly assess the tool. Distinguish between surface rust, which is often easy to remove, and pitting, which indicates deeper corrosion. Disassemble the tool as much as possible, separating metal components from wooden handles. Photograph the disassembly process if the tool is complex, to aid reassembly.
Rust Removal Methods
Several methods can be employed, ranging from gentle abrasion to chemical treatments. The choice depends on the severity of the rust and the type of metal.
1. Mechanical Abrasion (for light to moderate rust)
This method involves physically removing rust using abrasives.
- Wire Brushes and Scrapers: For loose, flaky rust, a stiff wire brush (brass or steel) or a small scraper can be effective. Use brass brushes on softer metals like brass or bronze to avoid scratching.
- Abrasive Pads/Paper: Steel wool (0000 grade for delicate areas), Scotch-Brite pads, or fine-grit sandpaper (wet/dry, 220-400 grit) can be used with a lubricant like mineral spirits or WD-40. Work in small sections, always moving in the direction of the metal’s grain where possible.
- Rotary Tools: A Dremel or similar rotary tool with various brush attachments can be useful for intricate areas, but use with extreme caution to avoid excessive material removal or polishing.
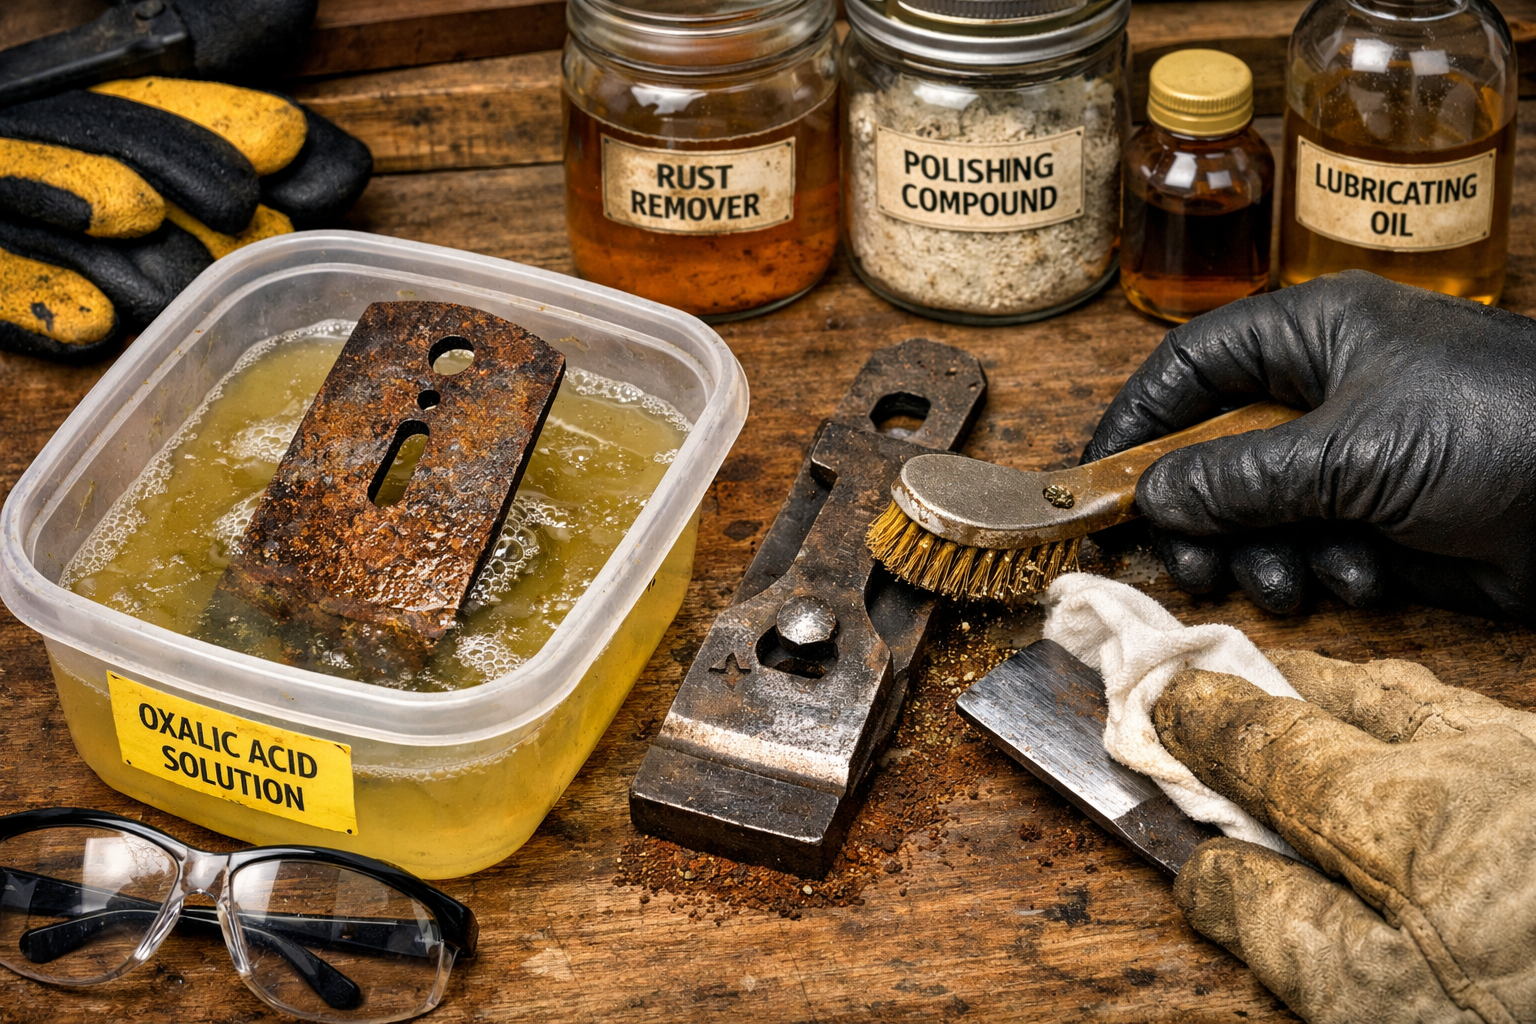
2. Chemical Treatments (for moderate to severe rust)
Chemical methods dissolve rust, making them effective for deeply embedded corrosion. Always work in a well-ventilated area and wear appropriate PPE (gloves, eye protection).
- Oxalic Acid (Wood Bleach): A highly effective and relatively safe method for steel and iron. Mix oxalic acid crystals with warm water (typically 1 part acid to 9-10 parts water) in a plastic container. Submerge rusted parts for several hours, or even overnight, checking periodically. The rust will turn into a black sludge. Rinse thoroughly with water, then neutralize with a baking soda solution, and dry immediately to prevent flash rust.
- Evapo-Rust or Similar Rust Removers: These non-toxic, biodegradable solutions are excellent for complete submersion. They work by chelating (binding to) the rust, leaving the base metal unaffected. Follow manufacturer instructions, typically soaking for 12-24 hours. They are reusable and safer for the environment.
- Vinegar Soak: White vinegar is a mild acid that can be used for rust removal. Submerge tools for a few hours to a day, checking regularly. The acetic acid will dissolve the rust. Be careful not to leave tools in for too long, as it can etch the metal. Thoroughly rinse, neutralize with baking soda, and dry immediately.
3. Electrolytic Rust Removal (for heavily rusted tools)
This method is highly effective for severely rusted items, using an electrical current to reverse the rusting process. It requires more setup but can save heavily pitted tools.
- Setup: You’ll need a plastic tub, washing soda (sodium carbonate, not baking soda), water, a battery charger (12V), and a sacrificial anode (rebar or stainless steel, not galvanized). Connect the negative terminal to the rusted tool and the positive terminal to the anode.
- Process: The current passes through the solution, causing rust to flake off the tool and deposit onto the anode. This is a slower process, taking 24-72 hours, but it’s very thorough.
- Caution: Never use stainless steel as an anode if you’re not using washing soda, as it can produce harmful chromium gas. Always ensure good ventilation and proper electrical safety.
Post-Rust Removal Care
Once rust is removed, the metal is vulnerable to flash rust. Immediately rinse, dry completely, and apply a rust preventative. Light machine oil, paste wax, or a dedicated rust inhibitor are excellent choices. For more on preserving materials, consider resources on reclaimed wood restoration.
Achieving Precision: Sharpening Blades for Optimal Performance
A dull tool is not just inefficient; it’s dangerous. Sharpening is arguably the most critical step in Restoring Vintage Woodworking Hand Tools: A Guide to Rust Removal, Sharpening, and Handle Repair for Enhanced Performance. A truly sharp edge ensures clean cuts, reduces effort, and enhances safety.
Understanding the Edge
Most woodworking tools require a bevel (primary cutting angle) and often a microbevel (a slightly steeper secondary bevel at the very tip). The angle varies by tool and wood type, but common angles are 25-30 degrees for chisels and plane irons.
Sharpening Equipment
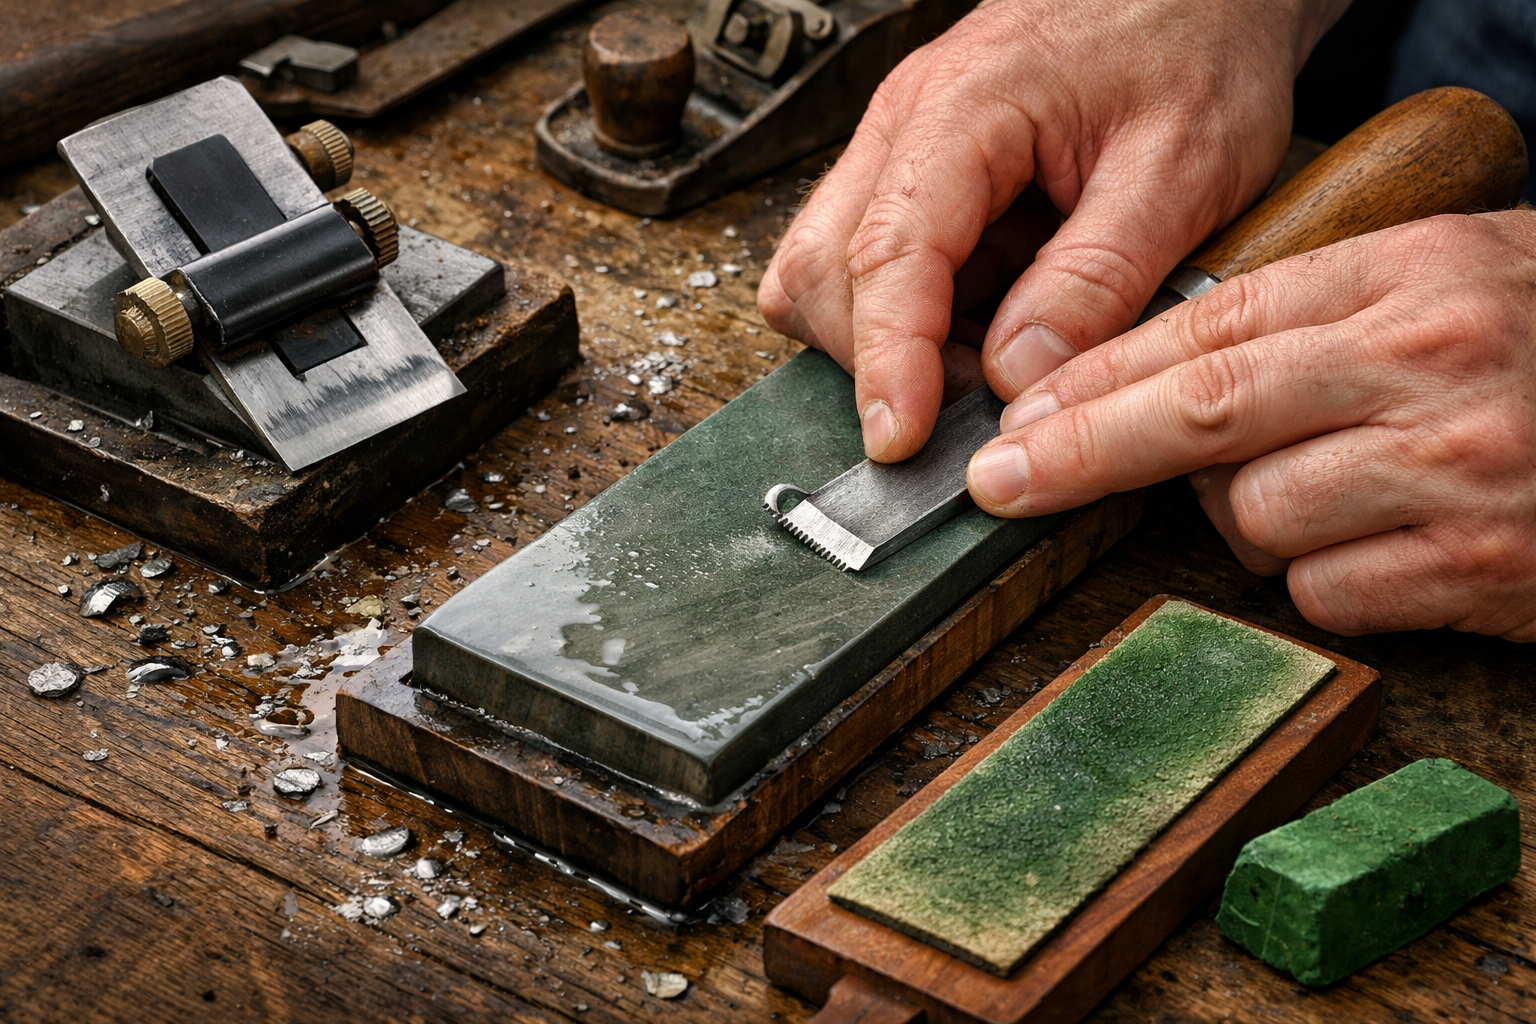
- Sharpening Stones:
- Waterstones: Popular for their fast cutting action and ability to create a very fine edge. They require soaking before use. Typically, you’ll need a coarse (200-800 grit), medium (1000-2000 grit), and fine (4000-8000+ grit) stone.
- Oilstones: Durable and effective, though slower cutting than waterstones. They use honing oil as a lubricant.
- Diamond Stones: Extremely durable and fast-cutting, suitable for flattening other stones and initial grinding. They can be used dry or with water.
- Honing Guides/Jigs: These devices hold the blade at a consistent angle, making sharpening easier and more precise, especially for beginners.
- Strops: A piece of leather (often glued to a flat surface) charged with a fine abrasive compound (e.g., green honing compound) for final polishing and burr removal.
The Sharpening Process
- Flatten the Back: For chisels and plane irons, the back of the blade must be perfectly flat. Use a coarse stone to flatten the first inch or two from the cutting edge. This is crucial for a keen edge.
- Establish the Bevel:
- Using a honing guide, set the desired angle (e.g., 25 degrees).
- Start with the coarse grit stone. Apply light, even pressure and push the blade across the stone, lifting it on the return stroke. Ensure the entire bevel makes contact.
- Continue until a “burr” (a tiny wire edge) forms along the entire length of the opposite side of the blade. You can feel this burr with your fingertip.
- Refine the Bevel (Progressive Grits):
- Move to the medium grit stone. Sharpen until the burr reforms. This refines the scratch patterns left by the coarser stone.
- Repeat with the fine grit stone, again until the burr is present. At this stage, the burr will be very fine.
- Remove the Burr (Stropping):
- Place the blade flat on the fine stone, bevel up. Make a few light passes to remove the burr.
- Alternatively, use a leather strop charged with honing compound. Lightly draw the blade backward (away from the cutting edge) across the strop, first bevel down, then flat on the back. This removes the final burr and polishes the edge to a razor-sharp finish.
- Test the Edge: A truly sharp edge will cleanly slice paper or shave hair. For more advanced techniques, our Ultimate Guide to Wood Lathe Turning also touches on tool maintenance.
Sharpening Saws
Saw sharpening is a specialized skill. Hand saws require filing individual teeth to specific angles (rake and fleam) and setting the teeth (bending them alternately to create clearance). This is a more involved process often requiring dedicated saw files and a saw set tool. For general maintenance, keeping saw plates rust-free and handles sound is a good start.
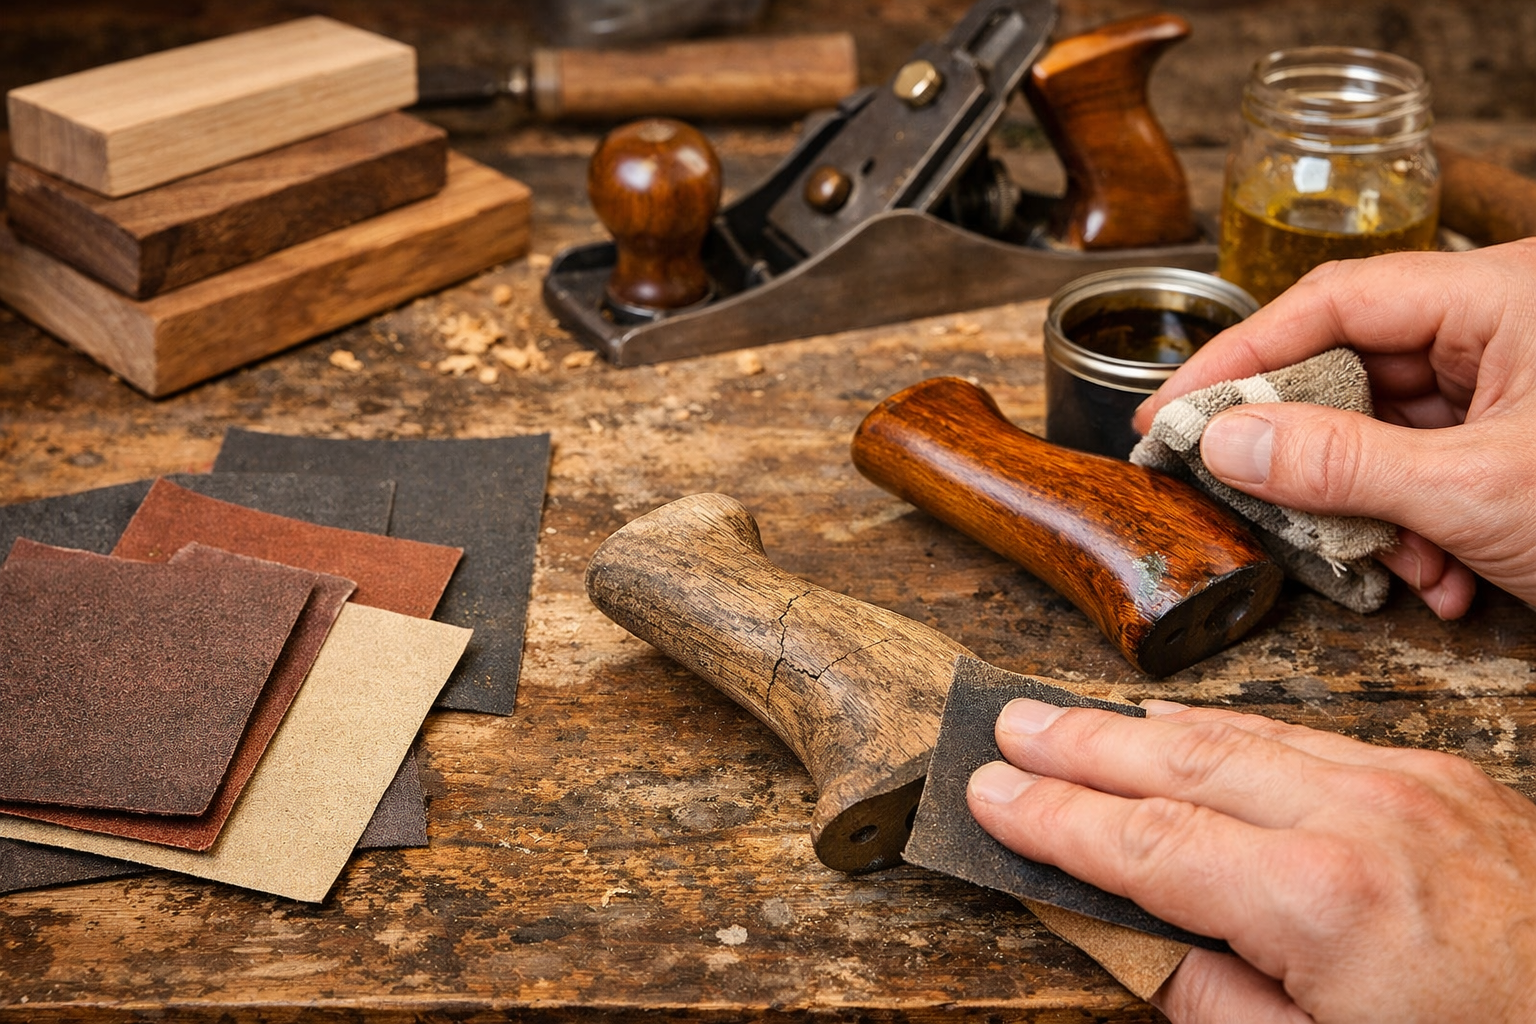
Restoring Comfort and Control: Handle Repair and Refinishing
The handles of vintage woodworking tools are often made from beautiful, durable woods like beech, rosewood, or cherry. However, years of use, neglect, and improper storage can lead to cracks, chips, and a loss of their original finish. Repairing and refinishing handles is crucial for both the aesthetics and ergonomics of Restoring Vintage Woodworking Hand Tools: A Guide to Rust Removal, Sharpening, and Handle Repair for Enhanced Performance.
Assessing Handle Condition
Examine handles for:
- Cracks and Splits: Minor cracks can often be repaired; major ones may require replacement.
- Chips and Dents: Cosmetic issues that can be sanded out or filled.
- Looseness: A handle that wiggles or spins needs to be re-secured.
- Original Finish: Determine if enough original finish remains to be revitalized or if a full strip and refinish is needed.
Handle Repair Techniques
1. Securing Loose Handles
- Chisel/Plane Handles: If the ferrule (metal band) is loose, remove it, clean the handle end, and apply epoxy or wood glue before reattaching. If the tang of the blade is loose in the handle, wick thin superglue (CA glue) into the joint, or carefully remove the handle, clean, and re-epoxy.
- Saw Handles: Often held with bolts or screws. Tighten these carefully. If the wood around the fastener is stripped, drill out, fill with a dowel, and redrill.
2. Repairing Cracks and Splits
- Small Cracks: Clean the crack thoroughly. Inject thin CA glue or wood glue into the crack using a syringe. Clamp the handle firmly until the glue dries. Remove excess glue.
- Larger Splits: For more significant splits, you may need to spread the split slightly (if safe to do so), apply wood glue, and clamp securely. Sometimes, reinforcing with small brass pins or wood splines can provide extra strength.
3. Filling Chips and Dents
- Wood Filler: For small chips, use a wood filler matched to the handle’s wood species or intended finish. Sand smooth once dry.
- Sawdust and Glue: Mix fine sawdust from a similar wood with wood glue to create a custom filler. This blends well with the existing grain.
4. Replacing Handles
If a handle is beyond repair, consider crafting a new one. This is an excellent project for practicing hand tool skills. Source suitable hardwood like ash, cherry, maple, or walnut. You can find inspiration and techniques for working with different wood types in our guide to Premium Wood Selection for 2026 Projects.

Handle Refinishing
1. Stripping Old Finish (if necessary)
If the old finish is badly degraded or painted, it might need stripping. Use a chemical stripper (follow safety precautions) or carefully scrape and sand off the old finish.
2. Sanding
Start with a medium grit sandpaper (150-180 grit) to remove scratches and shape the handle. Progress through finer grits (220, 320, 400 grit) until the wood is silky smooth. Always sand with the grain to avoid cross-grain scratches. For intricate shapes, sandpaper can be wrapped around a dowel or a soft block.
3. Applying Finish
The right finish protects the wood and enhances its natural beauty.
- Oil Finishes (Linseed Oil, Tung Oil, Danish Oil): These penetrate the wood, offering a natural feel and good protection. Apply several thin coats, wiping off excess after each, allowing ample drying time between coats. They bring out the grain beautifully.
- Shellac: A traditional finish that provides a thin, durable coating and a warm amber tone. Apply in thin coats using a pad or brush. It dries quickly.
- Varnish/Polyurethane: Offers a very durable, protective surface. Apply thin coats, sanding lightly between them. These are less traditional for hand tool handles but provide excellent protection.
No matter the finish, ensure complete drying before reassembling the tool. Proper handle restoration significantly improves the user experience and contributes to the overall longevity of your tool, a key part of Restoring Vintage Woodworking Hand Tools: A Guide to Rust Removal, Sharpening, and Handle Repair for Enhanced Performance. For more on applying finishes, explore Sustainable Finishes for Reclaimed Wood.
Conclusion
Restoring Vintage Woodworking Hand Tools: A Guide to Rust Removal, Sharpening, and Handle Repair for Enhanced Performance is a rewarding journey that connects you to the rich history of craftsmanship and equips you with superior tools. By meticulously removing rust, achieving razor-sharp edges, and revitalizing handles, you breathe new life into these old workhorses, making them invaluable assets in your workshop. The skills learned during this process – patience, precision, and attention to detail – will undoubtedly translate into improved woodworking projects.
As you embark on your restoration projects in 2026, remember that each vintage tool has a story to tell. By restoring it, you not only preserve its past but also ensure its future, allowing it to continue creating beautiful work for generations to come. Take pride in the transformation, and enjoy the enhanced performance and deeper connection to your craft that only a restored vintage hand tool can provide.
Actionable Next Steps:
- Start Small: Pick a less valuable, moderately rusted tool for your first project to build confidence.
- Gather Supplies: Assemble your rust removers, sharpening stones, and handle repair materials.
- Prioritize Safety: Always wear appropriate PPE.
- Document Your Process: Take photos before, during, and after to appreciate your progress and learn.
- Practice Consistently: Sharpening is a skill that improves with practice.
