

In the bustling heart of any home – the kitchen – efficient organization is not merely a convenience; it’s a necessity. As 2026 trends emphasize both functionality and aesthetic appeal, the demand for intelligently designed storage solutions continues to rise. Among these, Spice Racks That Sell: Wall-Mounted and Pull-Out Designs with Adjustable Dividers for Modern Kitchens stand out, offering custom woodworking opportunities to create versatile, beautiful, and highly practical pieces. This comprehensive guide explores how to build these desirable spice racks, focusing on the craftsmanship, adjustability, and durability that modern homeowners seek. We’ll delve into designs that not only declutter countertops but also enhance the kitchen’s visual appeal by artfully displaying organized spice collections.
Key Takeaways
- Design for Modern Kitchens: Focus on sleek aesthetics, clean lines, and premium wood selection (e.g., walnut, maple) that align with 2026 home trends.
- Emphasize Versatility: Wall-mounted and pull-out designs offer distinct space-saving advantages and cater to different kitchen layouts.
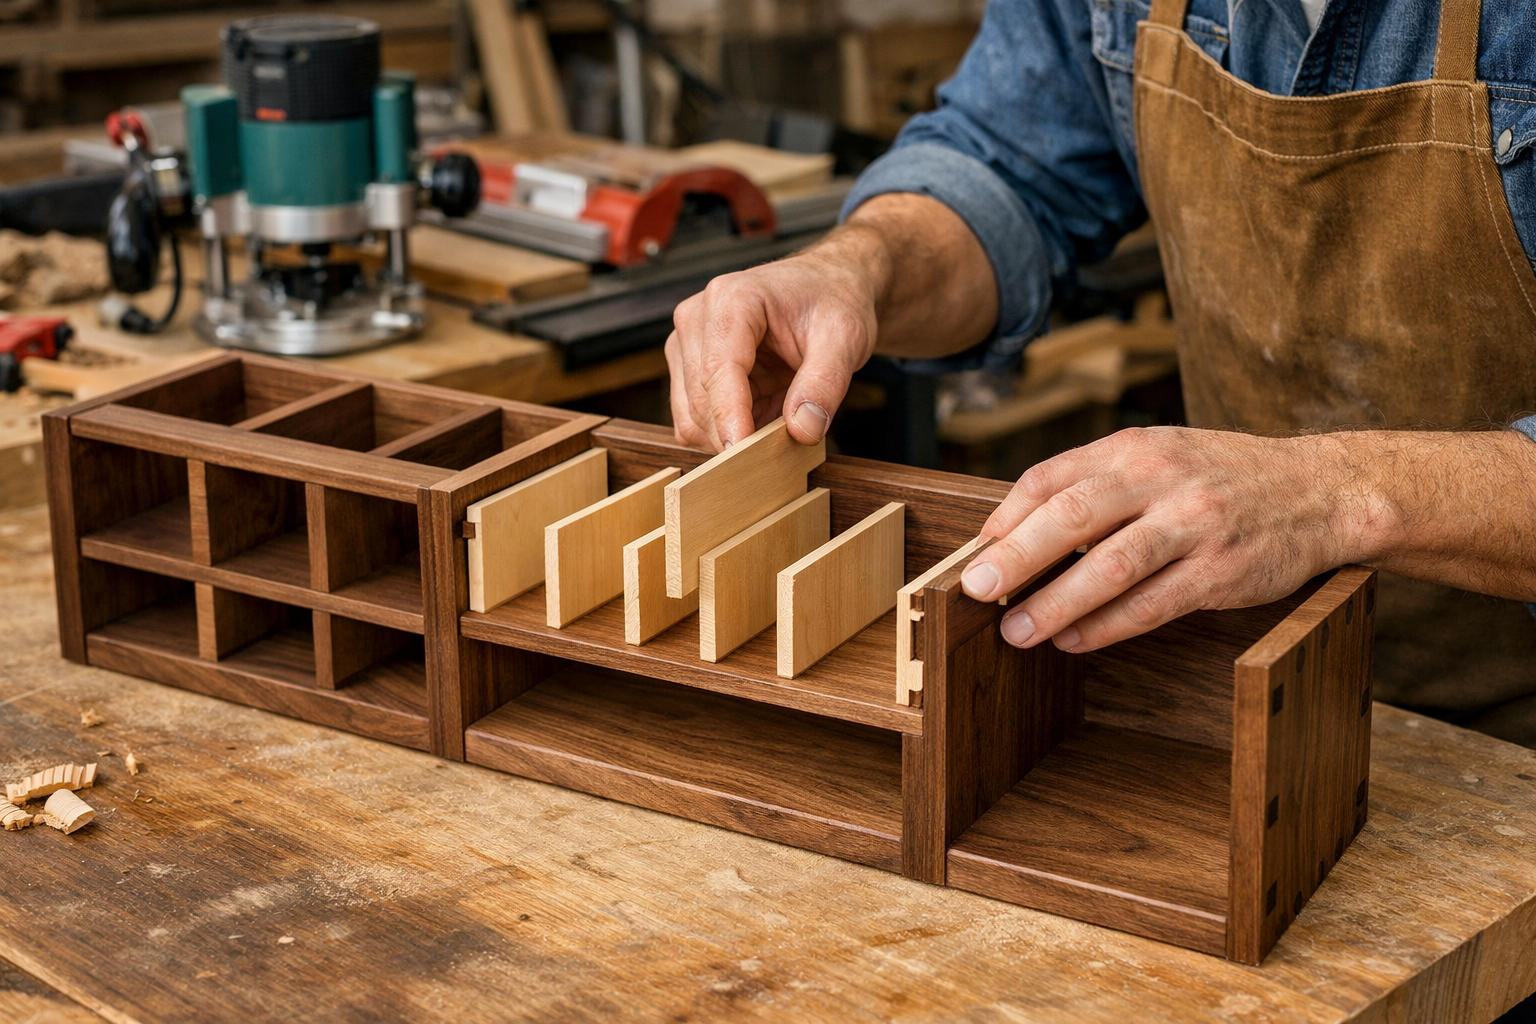
- Incorporate Adjustable Dividers: This feature is crucial for accommodating various spice jar sizes and is a major selling point for customization and user flexibility.
- Utilize Strong Joinery: Employ robust joinery techniques for durability and stability, especially for pull-out mechanisms and wall-mounted installations.
- Apply Durable Finishes: Select finishes that can withstand kitchen environments (heat, moisture, grease) while enhancing the wood’s natural beauty.
Crafting Versatile Spice Racks: Wall-Mounted & Pull-Out Designs
Creating Spice Racks That Sell: Wall-Mounted and Pull-Out Designs with Adjustable Dividers for Modern Kitchens begins with understanding the distinct advantages of each type and how to integrate features that appeal to today’s homeowners. Whether building for personal use or as profitable woodworking projects, versatility and thoughtful design are paramount.

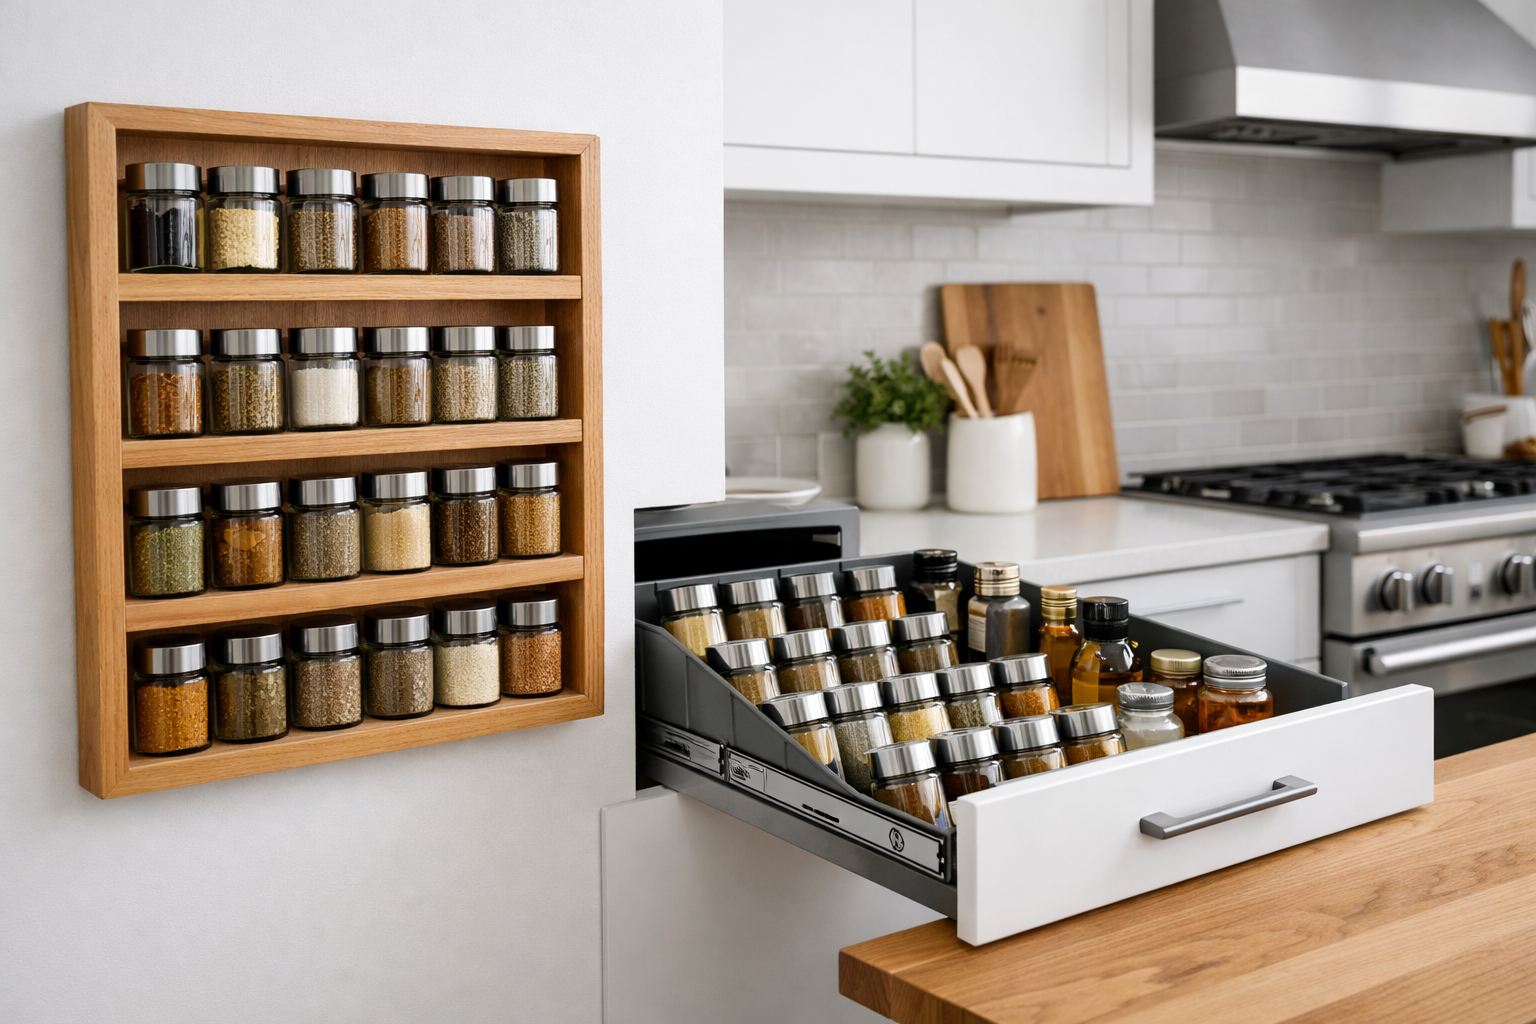
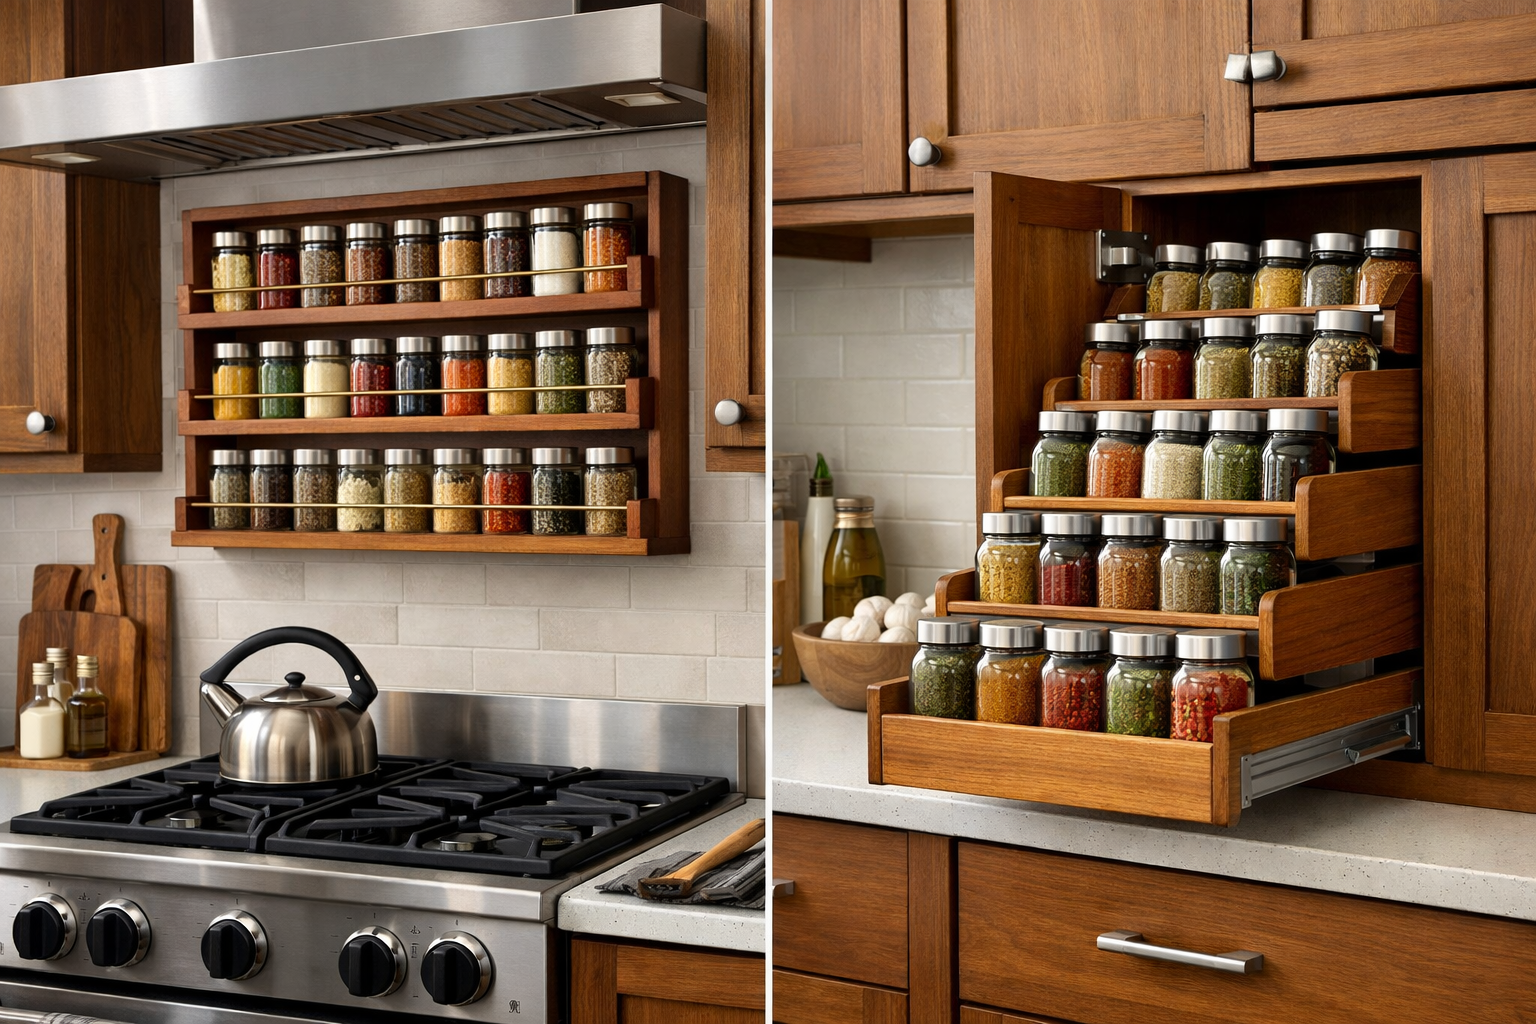
Wall-Mounted Spice Racks: Display and Accessibility
Wall-mounted spice racks are excellent for kitchens with limited drawer or cabinet space, providing vertical storage that keeps spices within easy reach and often acts as a decorative element.
Design Considerations for Wall-Mounted Units
- Materials: Opt for durable hardwoods like maple, cherry, or walnut for their beauty and longevity. Premium Wood Selection for 2026 Projects: Walnut, Cherry, an delves into material choices that resonate with current trends. Consider reclaimed wood for a unique, rustic-modern appeal.
- Dimensions: Standard spice jars are roughly 2 inches in diameter and 4-5 inches tall. Shelves should be deep enough to hold jars securely (around 3-4 inches) and tall enough to accommodate common jar heights, plus an allowance for easy access (6-8 inches per shelf).
- Aesthetics: Modern kitchens favor clean lines and minimalist designs. Integrate these elements by using hidden fasteners or sleek joinery.
- Installation: Ensure the design allows for secure mounting into wall studs. Robust Floating Shelves with Hidden Fasteners: Power Tool Te techniques can be adapted for a seamless, floating spice rack appearance.
Building Techniques for Wall-Mounted Racks
Cutting the Components:
- Back Panel: Cut a ¾-inch thick piece of plywood or solid wood to the desired height and width. This provides stability and a mounting surface.
- Shelves: Cut shelves from solid wood, ensuring consistent dimensions. Edge banding can be applied to plywood shelves for a cleaner look.
- Side Supports (Optional): If not using a full back panel, side supports can define the rack’s structure.
- Rails/Guards: Thin strips of wood or dowels can act as front guards to prevent jars from falling off.
Joinery:
- Dado Joints: For a strong, clean look, cut dadoes into the back panel or side supports to house the shelves. A table saw with a dado stack is ideal for this.
- Rabbet Joints: Used for attaching the back panel to side pieces or securing rails.
- Screws & Glue: For simpler constructions, wood glue and screws are effective, with screw heads counter-sunk and plugged for a finished look.
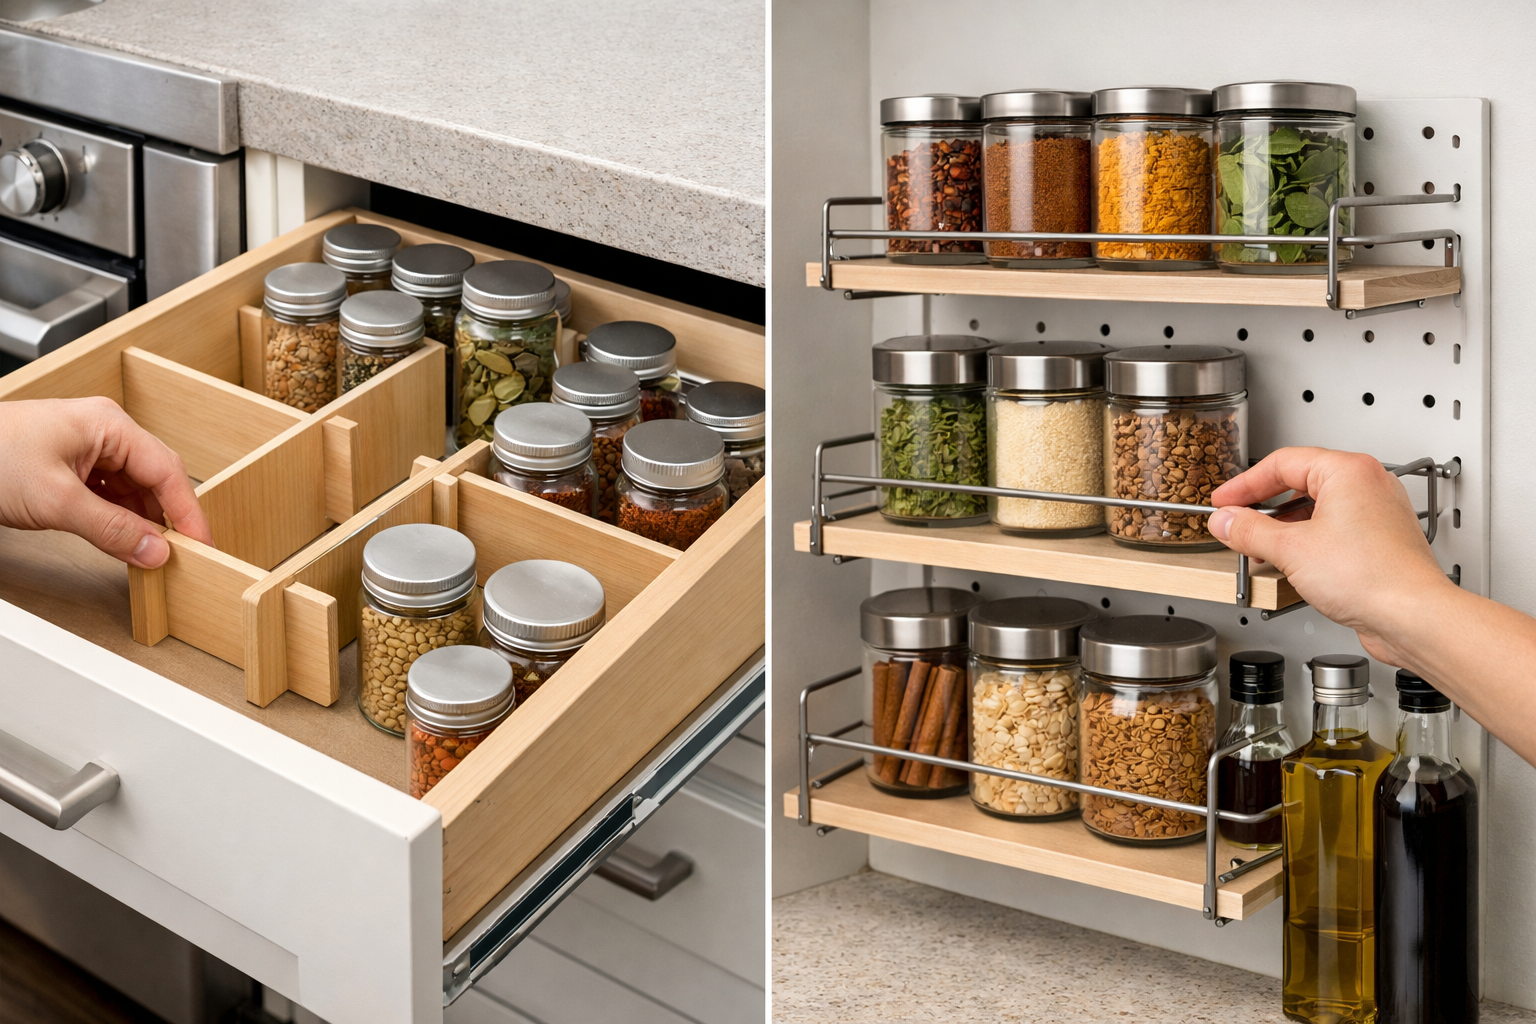
Adjustable Dividers for Wall-Mounted Racks:
- Peg System: Drill a series of evenly spaced holes (e.g., ¼-inch diameter, 1 inch apart) along the shelf bottoms and corresponding holes in the top of the shelf below. Small wooden dowels act as adjustable pegs to create compartments.
- Grooved Shelves: Rout shallow grooves across the shelves at regular intervals. Thin divider pieces with a corresponding tongue can then slide into these grooves, allowing for flexible spacing.
Pull-Out Spice Racks: Integrated & Concealed Storage
Pull-out spice racks offer the ultimate in discreet, organized storage, fitting seamlessly into existing cabinetry or custom kitchen islands. These designs are highly sought after for their ability to keep spices out of sight but easily accessible.
Design Considerations for Pull-Out Units
- Cabinet Integration: Measure the internal dimensions of the cabinet opening precisely. Account for drawer slide thickness and any internal obstructions.
- Drawer Slides: Heavy-duty, full-extension drawer slides are essential. These allow the rack to slide out completely, providing full access to all spices. Heavy-duty slides for drawers are critical for smooth operation and weight capacity.
- Clearance: Ensure sufficient clearance for jars on each shelf and between shelves, especially for taller containers.
- Aesthetic Integration: If designed to be part of a Kitchen Islands from Scratch: Adding Storage Drawers and But, ensure the wood and finish match the surrounding cabinetry.
Building Techniques for Pull-Out Racks
Constructing the Frame/Box:
- Sides, Bottom, Back: Build a sturdy box using ¾-inch thick solid wood or high-quality plywood.
- Dovetail Joints: For strength and a professional finish, consider using dovetail joints for the corners of the box. This is a skill highlighted in many woodworking projects that sell.
- Shelves: Create multiple tiered shelves within the box. These can be fixed or made adjustable.
Installing Drawer Slides:
- Precision is Key: Install the drawer slides perfectly parallel and level to ensure smooth operation. Use a spacer block to maintain consistent height.
- Side-Mount vs. Under-Mount: Side-mount slides are simpler for DIY. Under-mount slides offer a cleaner look but are more complex to install.
Adjustable Dividers for Pull-Out Racks:
- Perforated Bottom: Drill a grid of small holes (e.g., ⅛-inch diameter) into the bottom of each shelf. Small, movable pins or dowels can then be inserted to create custom compartments for each spice jar.
- Sliding Partitions: Similar to the grooved shelves for wall-mounted units, rout shallow, parallel grooves (e.g., ¼-inch wide, ⅛-inch deep) along the length of each shelf. Thin wooden strips can then slide into these grooves to form adjustable sections. This method is particularly effective for keeping jars from tipping over when the rack is pulled out.
“Modern kitchen design in 2026 is all about seamless integration and personalized functionality. Custom spice racks with adjustable dividers are not just storage; they’re an extension of a well-organized culinary workflow.”
Incorporating Adjustable Dividers for Optimal Organization
The feature that truly makes Spice Racks That Sell: Wall-Mounted and Pull-Out Designs with Adjustable Dividers for Modern Kitchens stand out is the ability to customize storage. Spices come in countless jar sizes and shapes, making fixed compartments impractical. Adjustable dividers ensure every jar has a snug, organized spot.
Benefits of Adjustable Dividers
- Customization: Accommodate a wide range of jar sizes, from small tins to large containers.
- Flexibility: Reconfigure compartments as spice collections grow or change.
- Maximized Space: Eliminate wasted space by tailoring sections precisely to contents.
- Enhanced Organization: Prevents jars from tipping over, creating a tidy and visually appealing display.
- Future-Proofing: The rack remains functional even if new, irregularly sized spice jars are acquired.
Techniques for Adjustable Dividers
Routed Groove System
This method involves routing shallow, parallel grooves into the shelves or the bottom of the pull-out drawer. Thin divider strips, typically made from ¼-inch thick wood, are then cut to fit snugly into these grooves.
- Tools: A router with a straight bit or a table saw with a thin kerf blade can be used to create the grooves.
- Process:
- Mark out the desired spacing for grooves (e.g., every 1-2 inches).
- Set the router bit depth to about ⅛-inch.
- Use a fence or straightedge to guide the router for consistent, parallel grooves.
- Cut divider strips to the correct height and thickness to fit the grooves.
- Advantages: Clean, elegant look; very secure once dividers are in place.
Peg & Hole System
Ideal for a more rustic or adaptable aesthetic, this system uses small dowels or pegs inserted into a series of drilled holes.
- Tools: A drill press for precision, or a hand drill with a shank hole basics guide.
- Process:
- Lay out a grid of holes (e.g., ¼-inch diameter) on the shelf bottom, spaced 1-2 inches apart.
- Drill the holes to a depth of about ½-inch.
- Cut ¼-inch dowels to the height of the spice jars.
- Insert dowels into holes to create barriers.
- Advantages: Highly flexible; easy to reconfigure on the fly.
Magnetic Strips
For a truly modern and minimalist approach, magnetic strips can be embedded into the shelves. Small metal plates adhered to the bottom of spice jars then stick to these strips, holding them in place.
- Tools: Router for creating recesses for the magnetic strips.
- Process:
- Route shallow channels into the shelves where the magnetic strips will sit.
- Glue the magnetic strips into the channels, ensuring they are flush with the surface.
- Affix small metal discs to the bottom of spice jars.
- Advantages: Invisible organization; very clean aesthetic.
Finishing and Durability for Long-Lasting Spice Racks
The final steps in crafting Spice Racks That Sell: Wall-Mounted and Pull-Out Designs with Adjustable Dividers for Modern Kitchens involve applying a finish that protects the wood, enhances its natural beauty, and ensures longevity, especially in a kitchen environment. Kitchens are exposed to heat, steam, grease, and occasional spills, so the finish must be robust.
Selecting the Right Finish
- Polyurethane (Water-Based or Oil-Based):
- Oil-based: Provides excellent durability, warmth, and a slightly amber tone. It’s highly resistant to moisture and abrasion.
- Water-based: Dries faster, has low VOCs, and stays clear, preserving the natural wood color. Offers good durability.
- Both are great choices for kitchen items due to their protective qualities. Consider sprayable water-based polyurethane for an even application.
- Shellac: A natural, food-safe finish that provides a beautiful, clear coat. While not as durable as polyurethane against water, it offers good stain resistance and can be easily repaired.
- Rubio Monocoat (or similar hardwax oils): These finishes penetrate the wood fibers, offering excellent protection while maintaining a natural, matte look and feel. They are often food-safe and very durable, making them popular for items like Ultimate Guide to Wooden Cutting Boards: End-Grain Patterns,.
- Stain (Optional): If a specific color is desired, apply a wood stain before the topcoat. Ensure the stain is compatible with your chosen topcoat. For example, dark stain on birch can create a dramatic look, while gray stain on maple offers a contemporary feel.
Application Best Practices
Surface Preparation:
- Sanding: Begin sanding with 120-grit sandpaper, progressing to 180-grit, then 220-grit for a smooth surface. This is crucial for proper finish adhesion and a professional look.
- Dust Removal: Thoroughly remove all sanding dust using a vacuum, tack cloth, or compressed air. Any lingering dust will be trapped under the finish.
- Wood Conditioning (Optional): For woods prone to blotching (e.g., pine, birch), apply a pre-stain wood conditioner to ensure even stain absorption.
Stain Application (if using):
- Apply stain evenly following the grain.
- Wipe off excess stain according to manufacturer instructions.
- Allow adequate drying time.
Topcoat Application:
- Thin Coats: Apply multiple thin coats rather than one thick coat. This ensures better adhesion, faster drying, and a more durable finish.
- Sanding Between Coats: Lightly sand with 320-400 grit sandpaper between coats (after drying) to ensure adhesion of subsequent layers and a smooth final finish. Remove all dust.
- Ventilation: Always work in a well-ventilated area, especially with oil-based products.
- Curing Time: Allow the finish to fully cure before heavy use. While dry to the touch quickly, many finishes take several days or even weeks to reach full hardness.
Maintenance Tips for Longevity
- Regular Cleaning: Wipe down with a damp cloth and mild soap. Avoid harsh chemical cleaners that can damage the finish.
- Avoid Excessive Moisture: Quickly wipe up any spills. Avoid placing wet items directly on the wood.
- Heat Protection: While the finish offers some resistance, avoid placing very hot items directly on the rack.
- Re-finishing: Over time, if the finish shows wear, it can often be lightly sanded and re-coated to restore its appearance and protection.
By focusing on high-quality materials, robust construction, and durable, appropriate finishes, your custom-built wall-mounted and pull-out spice racks will not only sell but will also become cherished, long-lasting additions to modern kitchens in 2026 and beyond.
Conclusion
The pursuit of an organized, aesthetically pleasing kitchen remains a top priority for homeowners in 2026. Custom-designed Spice Racks That Sell: Wall-Mounted and Pull-Out Designs with Adjustable Dividers for Modern Kitchens offer an unparalleled solution, combining practicality with refined craftsmanship. By integrating features such as versatile wall-mounted displays and discreet pull-out systems, coupled with crucial adjustable dividers, woodworkers can create pieces that meet a genuine need. The emphasis on high-quality materials, precision joinery, and durable finishes ensures these spice racks are not just functional but also enduring elements of modern home decor.
For those looking to enhance their kitchens or embark on profitable woodworking ventures, understanding the nuances of these designs is essential. Investing time in careful planning, selecting premium wood, mastering joinery techniques, and applying a robust finish will yield spice racks that are both beautiful and incredibly efficient. Begin by assessing the specific needs of a kitchen space, then select a design (wall-mounted or pull-out) that maximizes organization, and finally, bring it to life with attention to detail and a commitment to quality.
