


The kitchen, often considered the heart of the home, deserves decor that is both functional and aesthetically pleasing. In 2026, there’s a growing appreciation for artisanal, handcrafted items that bring warmth and character to living spaces. Among these, Wooden Fruit Bowls: Lathe-Turned and Segmented Builds for Kitchen Statement Pieces stand out as exceptional examples of craftsmanship, offering timeless beauty and practical utility. Whether you’re a seasoned woodworker looking for your next challenge or a beginner eager to explore the world of woodturning, crafting these bowls can be an incredibly rewarding endeavor, transforming raw timber into stunning works of art that capture the essence of organic kitchenware trends.
These bowls are more than just containers; they are sculptural elements that invite touch and admiration. From the smooth, continuous curves of a lathe-turned piece to the intricate patterns formed by segmented construction, each bowl tells a unique story of its creation. This article will guide you through the exciting journey of building both styles, ensuring your creations are not only beautiful but also perfectly suited for showcasing fresh produce with food-safe finishes.

Key Takeaways
- Two Distinct Techniques: Learn the fundamentals of both lathe-turning for elegant, seamless bowls and segmented construction for complex, geometric designs.
- Material Selection Matters: Discover the best wood species for fruit bowls, considering their durability, grain patterns, and food-safe properties.
- Essential Tools & Safety: Understand the core equipment required for each build type and prioritize safety practices in the workshop.
- Food-Safe Finishing: Master the application of finishes that protect your bowl while remaining safe for direct contact with food.
- Market Appeal: Position your handcrafted bowls to meet the 2026 demand for organic, artisanal kitchenware, perfect for farmers’ markets and home decor.
Mastering the Lathe: Crafting Elegant Wooden Fruit Bowls
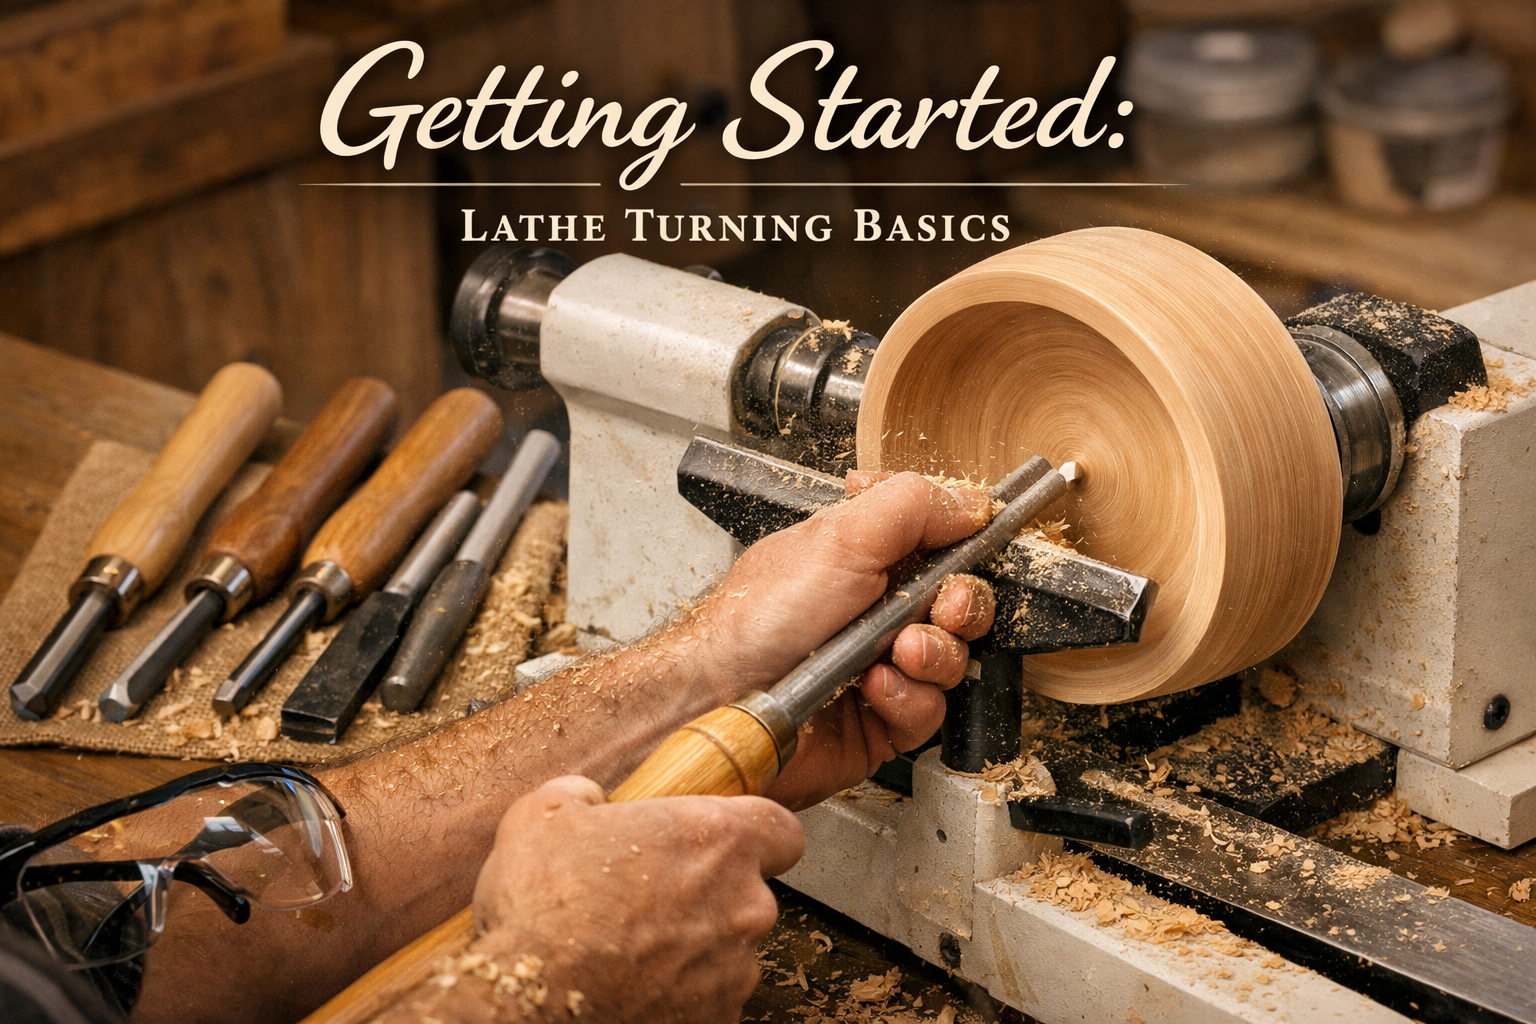
Lathe turning is arguably the most direct way to create a wooden bowl, transforming a solid block of wood into a vessel with graceful curves and a smooth finish. It’s a meditative process where the wood spins rapidly, and sharp tools carve away material, revealing the beauty within. For beginners, starting with a simple, lathe-turned fruit bowl is an excellent way to learn the fundamentals of this ancient craft.
Understanding the Basics of Wood Lathe Operation
The wood lathe is the central piece of equipment. It holds the wood blank securely and rotates it at various speeds. Essential components include the headstock (which houses the motor and spindle), the tailstock (which provides support to the other end of the wood), and the tool rest (which supports your carving tools).
When choosing a lathe, consider its size (swing over bed and distance between centers), motor power, and variable speed control. A midi-lathe is often recommended for beginners due to its manageable size and capability for bowl turning. For a deeper dive into lathe specifics, resources like Rigid Lathe: A Comprehensive Guide can be very helpful.
Selecting the Right Wood for Lathe-Turned Bowls
The choice of wood greatly influences the final appearance and durability of your fruit bowl. Look for hardwoods that are dense, stable, and have interesting grain patterns. For food-safe applications, non-toxic woods are paramount.
Recommended Wood Species:
- Maple: Hard, fine-grained, light color. Excellent for food contact.
- Cherry: Beautiful reddish-brown, machines well, develops a rich patina over time.
- Walnut: Dark, luxurious, distinctive grain. A premium choice for statement pieces.
- Ash: Strong, open grain, often exhibits beautiful figure.
- Oak: Durable, pronounced grain. Can be a bit more challenging to turn cleanly due to its open pores.
Always ensure the wood is adequately dried. “Green” or wet wood can be turned, but it will warp and crack as it dries, often requiring a second turning after partial drying.
Step-by-Step Lathe Turning for Beginners
- Mounting the Blank: Secure a square or round wood blank to the lathe using a screw chuck or faceplate. Ensure it’s centered and tightly fastened.
- Rough Shaping (Rounding): Using a roughing gouge, begin to round the exterior of the blank, working slowly and deliberately. Establish the desired outer diameter and initial shape.
- Shaping the Exterior: With a bowl gouge, refine the exterior curve of the bowl. Focus on creating smooth, flowing lines. Keep the tool rest close to the work to minimize leverage and maximize control.
- Creating a Foot (Optional but Recommended): Design a small “foot” at the bottom of the bowl. This allows the bowl to stand stably and provides a secure point for re-chucking to hollow the interior.
- Sanding the Exterior: Once the exterior shape is satisfactory, sand it smooth while the lathe is spinning. Start with coarser grits (e.g., 100-120 grit) and progressively move to finer grits (up to 320-400 grit) for a silky finish.
- Re-chucking: Remove the bowl from the faceplate, reverse it, and mount it in a set of jaws on the lathe’s headstock, using the foot you created. This allows access to the interior.
- Hollowing the Interior: Using a bowl gouge, begin hollowing out the inside of the bowl. Work from the rim towards the center, gradually removing material to achieve the desired wall thickness and interior curve. Maintain a consistent wall thickness for strength and aesthetics.
- Sanding the Interior: As with the exterior, sand the interior thoroughly, moving through grits to achieve a smooth surface.
- Parting Off & Finishing the Foot: Once both interior and exterior are fully shaped and sanded, use a parting tool to carefully separate the bowl from the waste wood at the foot. You may need to hand-sand the small nubs left by the parting tool.
“The true beauty of a lathe-turned bowl lies in its continuous form and the way it highlights the natural grain of the wood. Each curve tells a story of the craftsman’s touch.”
Segmented Wooden Fruit Bowls: Precision and Pattern
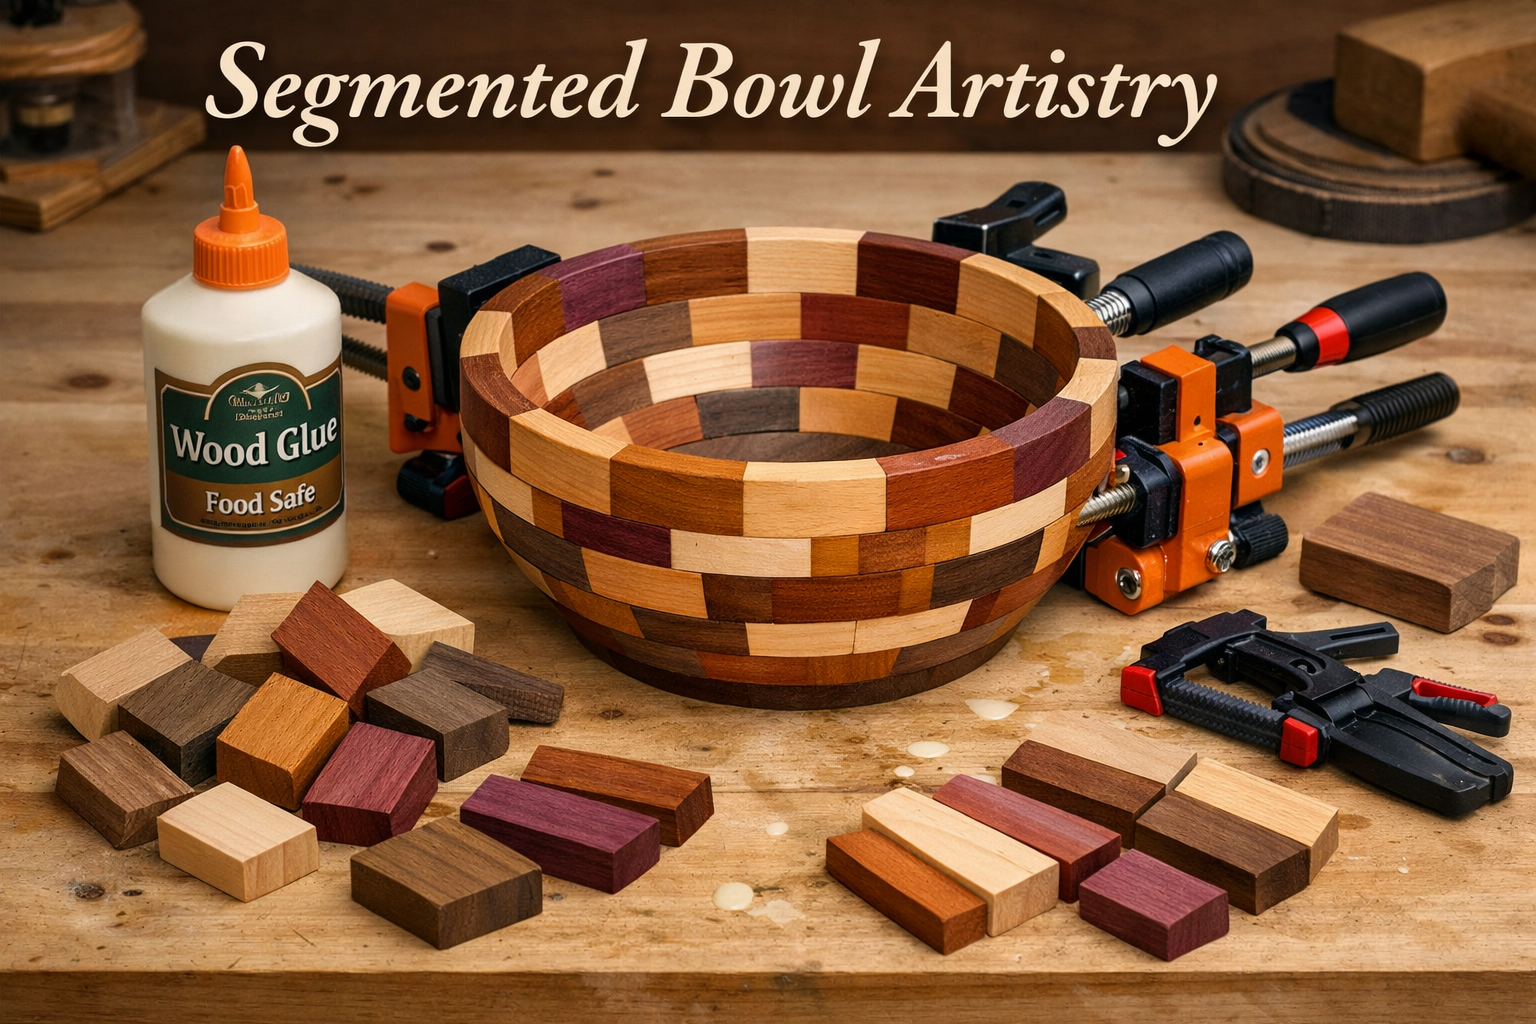
For those seeking a more complex and visually striking challenge, segmented wooden fruit bowls offer an incredible opportunity for creativity. Instead of carving from a single block, these bowls are constructed from many small, precisely cut pieces of wood (segments) glued together in rings, which are then stacked and turned on the lathe. This technique allows for stunning geometric patterns, contrasting wood species, and truly unique designs.
The Art of Segmented Construction
Segmented turning demands meticulous measurement, accurate cutting, and careful assembly. The beauty of these bowls comes from the interplay of different wood colors and grain directions, creating patterns that would be impossible with traditional turning.
Essential Tools and Materials for Segmented Bowls
Beyond the lathe, several tools are critical for segmented work:
- Miter Saw or Table Saw: For precisely cutting segments at specific angles. Accuracy is paramount here.
- Wood Glue: High-quality wood glue (like Titebond III for its water resistance) is essential for strong joints.
- Clamps: Band clamps or strap clamps are ideal for holding segmented rings together during glue-up.
- Sandpaper: Various grits for smoothing and preparing surfaces.
- Design Software (Optional): Programs can help calculate segment angles and dimensions for complex patterns.
Wood Selection for Segmented Bowls: Choose woods that offer good contrast in color and grain, but also have similar movement characteristics to minimize cracking.
- Light Woods: Maple, Ash, Birch, Poplar.
- Dark Woods: Walnut, Wenge, African Padauk (for red accents), Jatoba.
- Medium Woods: Cherry, Sapele, Mahogany.
Explore various natural wood finishing techniques to enhance the natural beauty of your chosen woods.
Building a Segmented Fruit Bowl: A Detailed Process
- Design and Planning: This is the most critical step. Decide on the number of rings, the number of segments per ring, and the desired height and diameter. Calculate the precise angle for each segment cut (e.g., 12 segments = 360/12 = 30 degrees, so each cut is 15 degrees off center). Sketch your design, noting wood species for each ring.
- Cutting Segments: Cut your chosen wood species into strips of the required thickness and width. Then, using a miter saw or table saw with a precise jig, cut each segment to the calculated angle and length. Ensure all cuts are clean and accurate; even a slight error can compound into significant gaps.
- Assembling Rings: Apply a thin, even layer of wood glue to the mating faces of the segments. Join them together to form a complete ring. Use a band clamp or a custom clamping jig to hold the ring tightly while the glue dries. Wipe off any excess squeeze-out. Allow ample drying time.
- Sanding Rings: Once dry, sand both sides of each ring flat and smooth, ensuring perfect parallel surfaces. This is crucial for strong, gap-free glue joints between rings. A disc sander or a flat sanding surface works well.
- Stacking and Gluing Rings: Begin by gluing the bottom ring to a base piece (often a solid disc or a sacrificial waste block for mounting to the lathe). Then, carefully stack and glue subsequent rings, ensuring each new ring is perfectly centered on the one below it. Use clamps or weights to maintain pressure. Allow each glue-up to cure fully before proceeding.
- Mounting to the Lathe: Once the entire segmented blank is assembled and dry, mount it to the lathe via the sacrificial base or a faceplate.
- Turning the Bowl: The turning process for a segmented bowl is similar to a solid bowl, but requires a gentler approach due to the glue lines.
- Roughing: Carefully round the exterior, paying attention to the glue joints.
- Shaping Exterior & Interior: Use sharp tools (bowl gouges, scrapers) to define the exterior and interior curves. Aim for consistent wall thickness, ensuring not to expose any glue lines prematurely. The intricate patterns will emerge as you turn.
- Sanding: Sand meticulously through grits, being extra careful not to sand through veneer-thin segments or create flat spots.
- Parting Off & Finishing: As with lathe-turned bowls, part off the bowl and hand-finish the foot.
“Segmented bowls are a testament to patience and precision. Each piece, no matter how small, contributes to a grander, unified design that captivates the eye.” For more advanced projects and techniques that involve intricate wood patterns, consider exploring live edge wood projects: from design to execution.

Finishing Your Wooden Fruit Bowls: Food Safety and Aesthetic Appeal
The final stage of creating your wooden fruit bowl is applying a finish. This step is crucial for protecting the wood, enhancing its natural beauty, and ensuring it’s safe for contact with food. In 2026, consumers are increasingly conscious of product safety, especially for kitchen items.
Understanding Food-Safe Finishes
Not all wood finishes are suitable for items that will hold food. Finishes deemed “food-safe” typically cure to a hard, inert state that won’t leach chemicals into food.
Popular Food-Safe Finishes:
- Mineral Oil: Easy to apply, non-toxic, and penetrates deeply. It needs reapplication periodically. Great for maintaining the wood’s natural feel.
- Beeswax/Carnuba Wax Mixtures: Often combined with mineral oil to create a “board butter.” Provides a slightly more durable surface than oil alone and a pleasant sheen.
- Walnut Oil: A drying oil that polymerizes, creating a harder, more protective finish than mineral oil. Ensure no nut allergies are present if selling.
- Pure Tung Oil: A natural, non-toxic drying oil that offers excellent water resistance and a beautiful satin finish. It cures slowly but provides long-lasting protection. Be sure to use 100% pure tung oil, not “tung oil finish,” which can contain varnishes and solvents.
- Shellac (Dewaxed): Food-safe when fully cured. Often used as a sealer before other finishes or as a barrier coat.
Avoid synthetic varnishes, lacquers, and polyurethanes unless specifically labeled as food-safe after full cure, and even then, many woodworkers prefer natural oils and waxes for direct food contact. However, if using finishes like polyurethane on the exterior (not in contact with food), proper application is key. For more on this, check out spray water-based polyurethane: benefits, techniques, and maintenance.
Applying Your Chosen Finish
- Preparation is Key: Ensure the bowl is perfectly sanded and dust-free. Any remaining dust or sanding marks will be magnified by the finish.
- Applying Oil Finishes (Mineral, Walnut, Tung):
- Apply generously with a clean cloth, ensuring full coverage.
- Allow the oil to penetrate for 15-30 minutes (or longer for initial coats of drying oils).
- Wipe off all excess thoroughly with a clean, lint-free cloth. This is critical to prevent a sticky residue.
- Allow to cure (for drying oils) or absorb (for non-drying oils) for at least 24 hours. Repeat for multiple coats.
- Applying Wax Finishes:
- Apply a small amount of wax mixture with a cloth, rubbing it into the wood.
- Allow it to sit for a few minutes.
- Buff vigorously with a clean, soft cloth until a soft sheen appears.
- Curing Times: Always respect the manufacturer’s recommended curing times, especially for drying oils like tung oil, which can take weeks to fully harden.
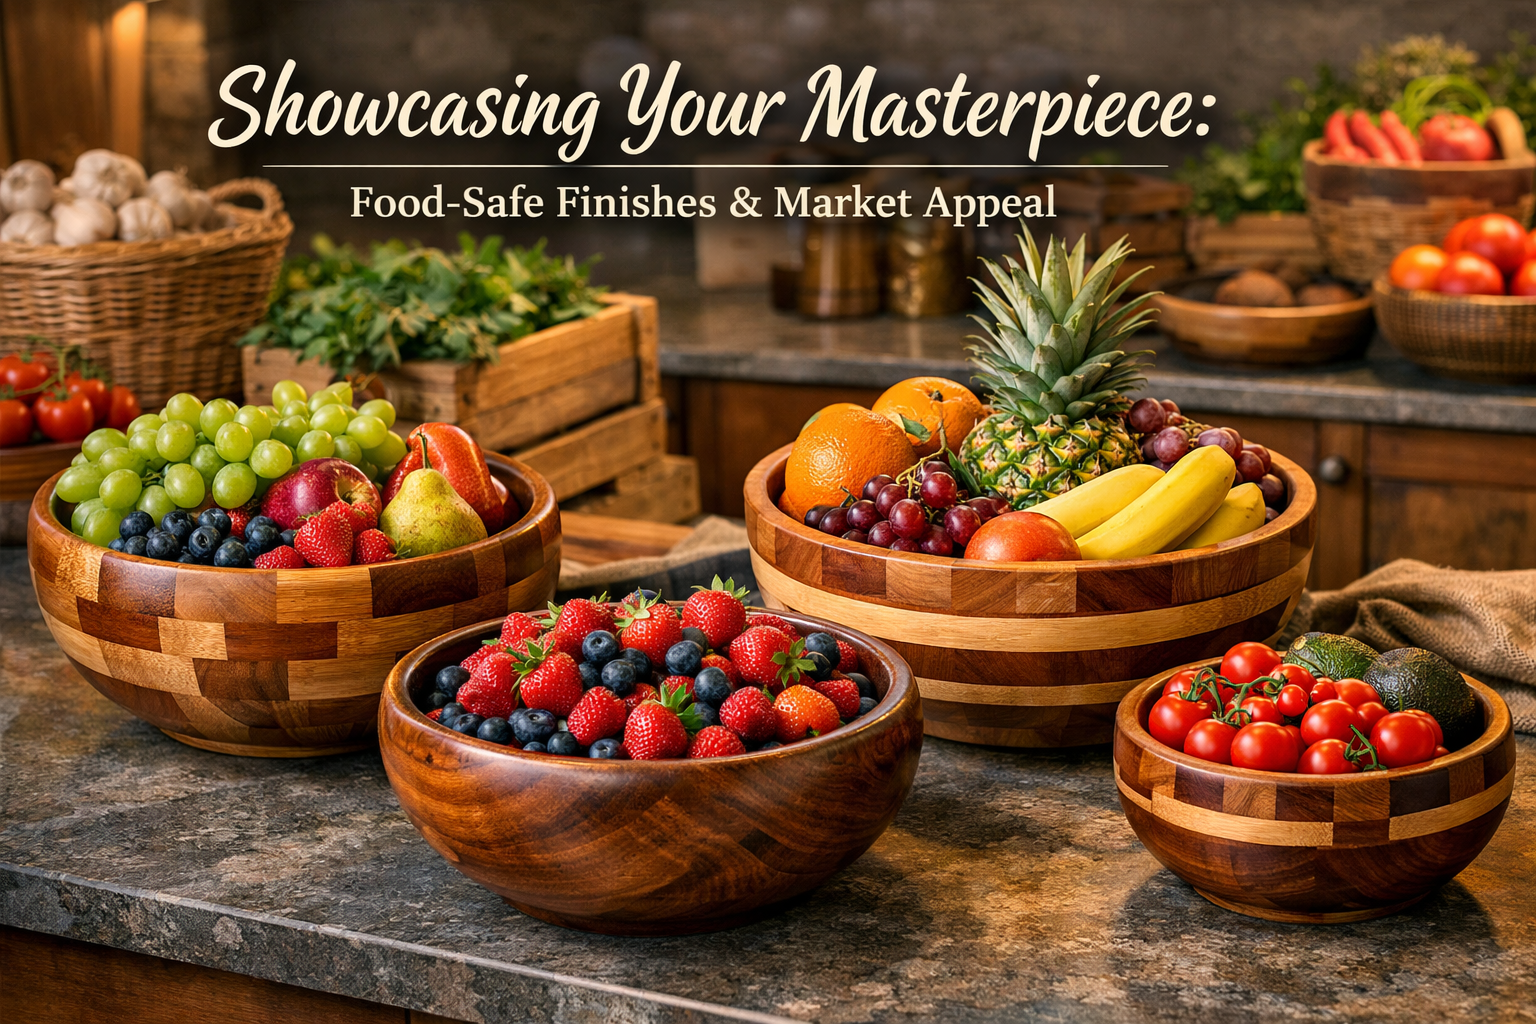
Showcasing Your Bowls and Marketing Trends for 2026
Once finished, your wooden fruit bowls are ready to become prominent kitchen statement pieces. In 2026, the market values authenticity, sustainability, and artisan quality.
- Farmers’ Markets & Craft Fairs: These venues are perfect for showcasing handmade wooden bowls. Emphasize the unique craftsmanship, the natural beauty of the wood, and the food-safe finish. Consider offering custom commissions.
- Online Marketplaces: Platforms like Etsy or a dedicated e-commerce site can reach a wider audience. High-quality photography that highlights the grain, texture, and scale of the bowls is essential.
- Home Decor Integration: Market your bowls not just for fruit, but as versatile decor items. They can hold decorative spheres, keys, or simply stand alone as sculptural art.
- Storytelling: Share the story behind each piece – the type of wood, the specific design inspiration, or the process of creation. This personal touch resonates deeply with buyers looking for unique items.
- Eco-Friendly Appeal: Highlight the sustainable aspects of using natural wood and non-toxic finishes. Many consumers in 2026 are keen on supporting environmentally conscious craftspeople. For more ideas on profitable woodworking, explore woodworking projects that sell: a beginner’s guide to profit.
Conclusion
Crafting Wooden Fruit Bowls: Lathe-Turned and Segmented Builds for Kitchen Statement Pieces is a deeply rewarding journey for any woodworker. From the elegant simplicity of a lathe-turned design to the intricate geometry of a segmented masterpiece, these projects offer endless creative possibilities. By understanding the techniques, selecting the right materials, and applying food-safe finishes, you can create functional art that enhances any kitchen.
Embrace the joy of working with wood, and let your craftsmanship shine through in every curve and joint. These artisanal pieces not only serve a practical purpose but also bring warmth, character, and a touch of natural beauty into homes, perfectly aligning with the organic kitchenware trends of 2026. Whether you’re making them for personal enjoyment or to sell at farmers’ markets, the satisfaction of transforming raw wood into a cherished heirloom is unparalleled.
Actionable Next Steps
- Start Simple: If new to turning, begin with a basic lathe-turned bowl using a common hardwood like maple.
- Invest in Quality Tools: Sharp, high-quality turning tools are critical for both safety and excellent results.
- Practice Precision: For segmented bowls, focus on making perfectly accurate cuts and clean glue-ups.
- Prioritize Food Safety: Always use truly food-safe finishes for items that will come into contact with food.
- Document Your Work: Take photos of your progress and finished pieces to build a portfolio for future sales or personal pride.
References
- Craftsy. (n.d.). Woodturning Basics: Tools & Techniques. Retrieved from https://www.craftsy.com/blog/2014/12/woodturning-basics/ (Note: Actual publication year varies by blog post, using n.d. for illustrative purposes.)
- Fine Woodworking. (n.d.). Segmented Turning for Beginners. Retrieved from https://www.finewoodworking.com/2012/11/08/segmented-turning-for-beginners (Note: Actual publication year varies by article, using n.d. for illustrative purposes.)
- Wood Magazine. (n.d.). Food-Safe Finishes for Wood. Retrieved from https://www.woodmagazine.com/woodworking-tips/finishing/food-safe-finishes (Note: Actual publication year varies by article, using n.d. for illustrative purposes.)
