


In the dynamic world of interior design, trends constantly evolve, yet some core principles endure. For 2026, warm minimalism continues its reign, emphasizing clean lines, natural materials, and functional elegance. A pivotal element in achieving this aesthetic is the judicious use of shelving, and the demand for robust floating shelves with hidden fasteners has never been stronger. Shifting from the delicate, thin shelves of yesteryear, homeowners and designers in 2026 are increasingly gravitating towards substantial, solid wood versions that exude permanence and sophistication, particularly in kitchens and home offices. This comprehensive guide delves into the essential power tool techniques required to craft and install these premium shelves, ensuring both structural integrity and a flawless, seamless finish. We will explore everything from sustainable wood selection to advanced finishing for durability, empowering you to integrate these stunning features into any contemporary space with precision and confidence.
Key Takeaways
- 2026 Design Focus: Warm minimalism drives the trend towards robust, solid wood floating shelves with hidden fasteners for a clean, sophisticated look.
- Material Selection: Prioritize sustainable, durable hardwoods like white oak, walnut, or maple for longevity and aesthetic appeal.
- Precision is Paramount: Power tools like routers, drill presses, and jigs are crucial for accurate joinery and fastener installation.
- Hidden Fastener Systems: Understand the various hidden bracket types and how to integrate them seamlessly for a “floating” effect.
- Durability and Finish: Proper preparation and application of protective finishes are essential for long-lasting beauty and easy maintenance.
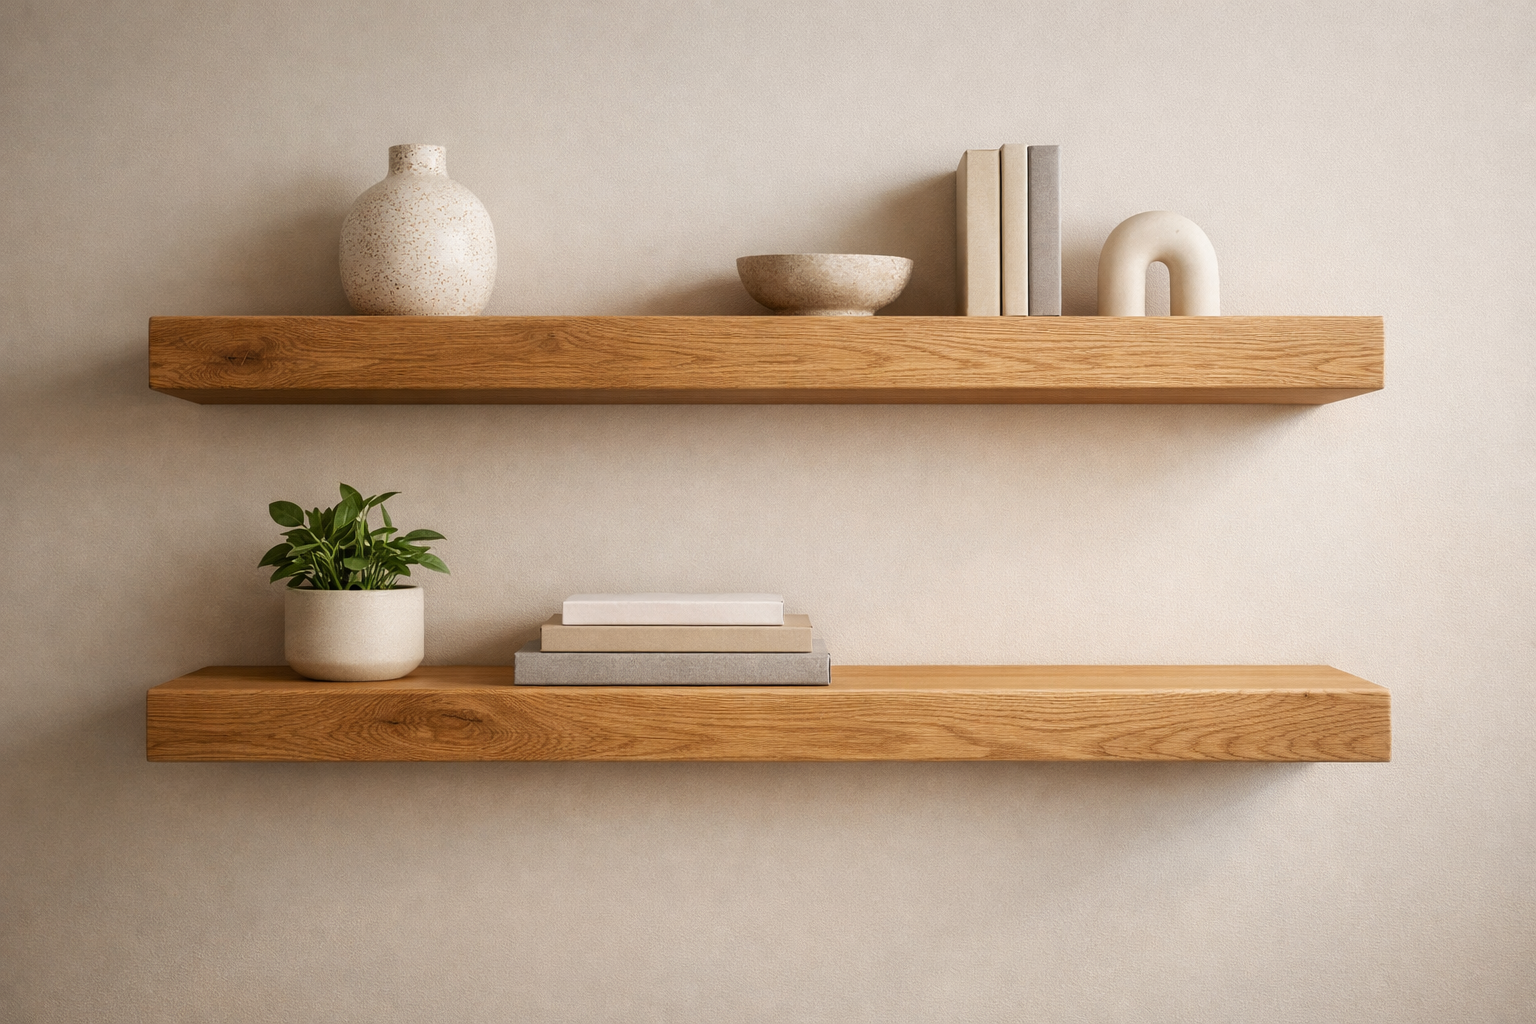
Embracing 2026 Warm Minimalism with Robust Floating Shelves
The design philosophy of warm minimalism in 2026 champions spaces that are uncluttered, inviting, and highly functional. It’s about creating an environment that feels serene without being sterile, where every element serves a purpose and contributes to a calm atmosphere. Robust floating shelves with hidden fasteners perfectly embody this principle. Their clean, uninterrupted lines complement the minimalist aesthetic, while their substantial nature (often 1.5 to 2.5 inches thick) provides a sense of grounding and strength that lighter shelves lack. The “floating” aspect, achieved through sophisticated hidden fastener systems, eliminates visible hardware, creating a streamlined look that is highly coveted.

This move towards thicker, more substantial floating shelves is not merely aesthetic; it’s also practical. These shelves are designed to hold more weight, making them ideal for displaying collections, storing kitchen essentials, or organizing office supplies without sagging or compromising structural integrity. Crafting these shelves requires a blend of traditional woodworking wisdom and modern power tool precision.
Choosing the Right Wood: Sustainability and Durability
The foundation of any robust floating shelf is the wood itself. For 2026, the emphasis is on both durability and sustainability. Homeowners are increasingly conscious of their environmental footprint, seeking materials that are responsibly sourced and built to last.
Popular Wood Choices for 2026 Floating Shelves:
- White Oak: A classic choice, known for its strength, beautiful grain, and resistance to wear. It takes stains wonderfully and offers excellent stability. Sourced from sustainably managed forests, white oak is a top contender for its longevity.
- Walnut: Prized for its rich, dark color and elegant grain patterns. Walnut is a luxurious option that adds significant warmth and sophistication to any minimalist space. It’s also quite durable, though generally softer than oak.
- Maple: A light-colored hardwood with a fine, even grain. Maple is exceptionally hard and resistant to dents and scratches, making it perfect for high-traffic areas like kitchens. Its uniform texture provides a clean canvas for various finishes.
- Cherry: Known for its reddish-brown hue that deepens beautifully over time. Cherry is moderately hard and offers a warm, inviting aesthetic.
- Reclaimed Wood: For those seeking a unique character and ultimate sustainability, reclaimed wood offers a story and a rustic charm that can be integrated into warm minimalist designs through careful finishing.
When selecting lumber, look for kiln-dried wood that is straight, free of major defects, and has consistent grain. This attention to detail at the outset will prevent issues like warping and twisting down the line, ensuring your robust floating shelves maintain their beauty for years to come.
Essential Power Tools for Precision Shelf Construction
Creating robust floating shelves with hidden fasteners demands precision. Modern power tools are indispensable for achieving the tight tolerances and seamless fit required for these installations. Investing in quality tools and mastering their use is critical.
Key Power Tools and Their Applications:
- Table Saw: Essential for ripping lumber to width and cross-cutting to length with perfect squareness. A high-quality blade is crucial for clean cuts that minimize sanding. For optimal precision, ensure your table saw is well-calibrated. Rigid TS2424: Overview, Advantages, Features | Ultimate Buying Guide – Wood Craft Wiz provides insights into a capable table saw.
- Miter Saw: Ideal for making accurate crosscuts and angle cuts, especially when dealing with longer shelf pieces or creating decorative end caps. Miter Saw Height: Exploring the Ideal Setup for Precision and Accuracy – Wood Craft Wiz can help optimize your setup.
- Router (Table or Handheld): Indispensable for creating dadoes, grooves, and intricate profiles. For hidden fastener systems, a router is often used to cut recesses for mounting plates or to shape the back of the shelf to fit over a cleat.
- Drill Press: Provides unparalleled accuracy for drilling straight, consistently deep holes. This is vital for installing certain types of hidden shelf supports, such as those relying on metal rods or pins. A Ryobi DP100 Drill Press: Overview, Operating Tips, Pros, and Cons offers a good starting point for understanding its utility.
- Orbital Sander: For achieving glass-smooth surfaces, an orbital sander is a must. Start with a coarser grit (e.g., 80 or 100) and progressively work your way up to fine grits (220 or higher) for a professional finish.
- Stud Finder: Absolutely critical for locating wall studs, which are the only secure mounting points for robust floating shelves.
- Level and Straightedge: Essential for marking cutting lines, checking for flatness, and ensuring your shelves are perfectly level during installation.
Mastering these tools will elevate your woodworking projects, making the creation of high-quality, durable floating shelves an achievable goal.
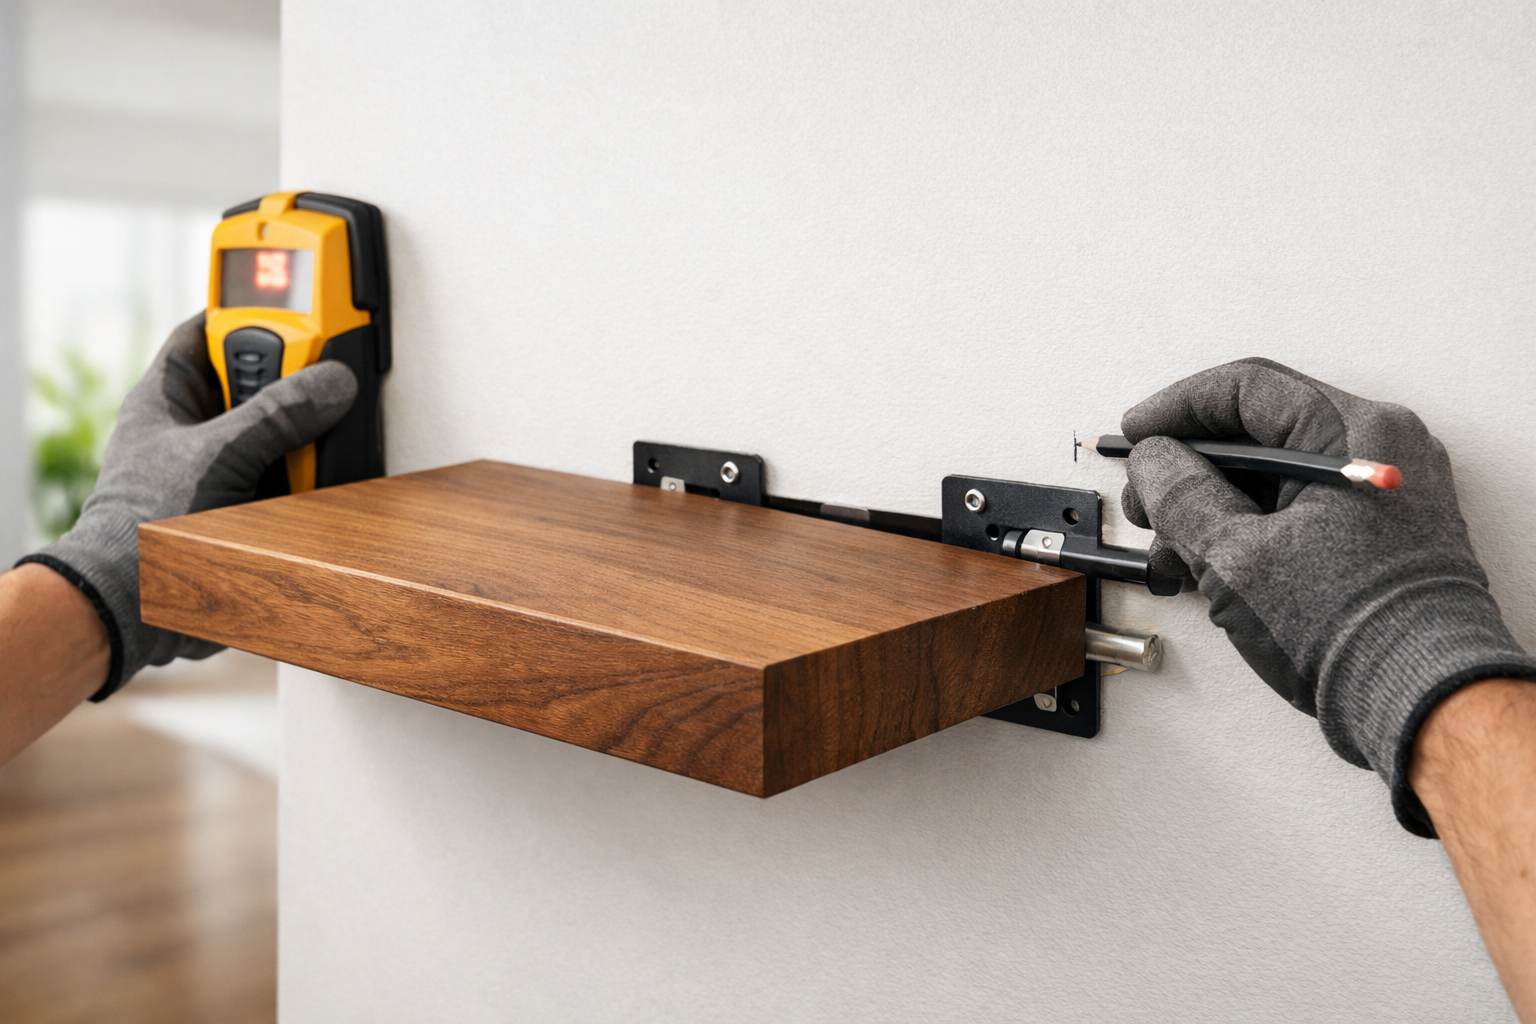
Power Tool Techniques for Seamless Hidden Fastener Integration

The “hidden” aspect of floating shelves is what truly defines their minimalist appeal. Achieving this requires meticulous planning and precise power tool techniques. The goal is to make the shelf appear as though it’s emerging directly from the wall, with no visible supports.
Understanding Hidden Fastener Systems
Several types of hidden fastener systems are available, each with its own installation requirements:
- Rod or Pin Brackets: These typically involve metal rods that are inserted into precisely drilled holes in the back of the shelf and into a wall cleat or directly into wall studs.
- Technique: A drill press is paramount here. The holes in the shelf must be perfectly straight and parallel to ensure the shelf slides onto the rods without binding. A jig can be fashioned or purchased to guide the drill press for repetitive, accurate hole placement. The diameter of the holes should match the rods precisely for a snug fit.
- Plate or Cleat Systems: These use a metal plate or a sturdy wooden cleat secured to the wall, with the shelf designed to slide over it. The shelf often has a routed channel or hollowed-out section that fits snugly over the wall-mounted component.
- Technique: A router is your best friend for this system. For a wooden cleat, a dado bit can be used to create a channel in the back of the shelf. If using a metal plate, careful measurements and routing are needed to create a cavity that matches the plate’s dimensions. Precision is key to prevent the shelf from wobbling.
- Heavy-Duty Concealed Brackets: These are robust metal brackets with multiple anchor points, designed for heavier loads. They often feature an L-shaped profile where the vertical arm is screwed into studs and the horizontal arm slides into a corresponding channel in the shelf.
- Technique: Installation involves both accurate stud location and precise routing. A handheld router with a straight bit and an edge guide will be essential for creating the deep, consistent channels required for these brackets. Mastering Woodworking Screws: Your Ultimate Guide for 2026 – Wood Craft Wiz offers valuable insights on securing components effectively.
Step-by-Step Power Tool Application
Let’s break down the power tool techniques for a common hidden fastener system: the rod/pin bracket.
- Prepare the Shelf Blank:
- Cutting to Size: Use a table saw to rip the chosen wood to the desired width and a miter saw to crosscut to the exact length. Ensure all cuts are perfectly square.
- Edge Treatment: Depending on your design, you might use a router with a chamfer or round-over bit to soften the edges, contributing to the warm minimalist aesthetic.
- Sanding: Thoroughly sand all surfaces, progressing through grits (e.g., 80, 120, 180, 220) to achieve a smooth finish. This is easier to do before installation.
- Marking for Fasteners:
- Measure and Mark: Precisely mark the locations for the hidden fastener rods on the back edge of the shelf. These marks should correspond to the locations of your wall studs.
- Center Punch: Use a center punch to create small indentations at each mark. This prevents the drill bit from wandering at the start.
- Drilling Holes for Rods (Shelf):
- Drill Press Setup: Mount a drill bit (matching the rod diameter) into your drill press. Adjust the depth stop to ensure consistent, accurate hole depth, which is crucial for full engagement of the rods.
- Jig for Accuracy: For optimal results, create a simple jig that holds the shelf blank securely and guides it perfectly square under the drill bit. This ensures all holes are parallel to each other and perpendicular to the shelf’s back edge.
- Drilling: Carefully drill each hole, taking care to clear chips regularly to prevent overheating and ensure a clean cut. A 3/16 Forstner Bit: Basics, Usage Tips, and Safety Techniques provides guidance on specific bit types, although larger bits are likely needed for robust floating shelf rods.
- Preparing the Wall:
- Locate Studs: Use a reliable stud finder to locate and mark the center of the wall studs where the shelf will be installed. Mark the desired height and use a level to draw a perfectly straight line across the wall.
- Mark Fastener Locations (Wall): Transfer the exact spacing of the holes from the back of the shelf to the marked stud centers on the wall.
- Drill Pilot Holes: Using a drill/driver, carefully drill pilot holes into the wall studs for the mounting screws of your hidden bracket system (if using a cleat) or for the wall-side anchors/rods directly.
- Mounting the Hidden Brackets/Cleat:
- Securely Fasten: Following the manufacturer’s instructions, use appropriate screws to securely fasten the hidden brackets or wooden cleat to the wall studs. This step is critical for the shelf’s stability. Over-tightening can strip screws or damage drywall, so proper torque is essential.
- Check Level: Continuously check for levelness as you install the brackets/cleat. Minor deviations here will result in a visibly crooked shelf.
- Test Fit and Final Installation:
- Slide On: Carefully slide the prepared shelf onto the installed rods or over the cleat. It should fit snugly without excessive force. If it’s too tight, minor sanding or reaming of the shelf holes might be necessary. If too loose, the holes might be oversized, requiring shims or a different approach.
- Secure (if applicable): Some systems include small set screws or adhesive to permanently secure the shelf to the hidden brackets. Follow instructions carefully.
By employing these power tool techniques with precision, you can achieve a truly seamless installation of robust floating shelves with hidden fasteners, perfectly aligning with the warm minimalist aesthetic of 2026.
Finishing and Maintenance for Lasting Beauty in 2026
Once your robust floating shelves with hidden fasteners are expertly installed, the final crucial step is applying a finish that enhances their natural beauty and protects them for years to come. In 2026, the trend leans towards natural-looking finishes that allow the wood’s character to shine through, while also offering high durability and low maintenance.
Selecting the Ideal Finish for Warm Minimalism
The choice of finish significantly impacts both the aesthetic and longevity of your floating shelves. For warm minimalism, consider finishes that offer a matte, satin, or semi-gloss sheen, avoiding anything too high-gloss unless it complements a specific design element.

Popular Finish Options:
- Polyurethane (Water-based or Oil-based): A highly durable and protective finish that comes in various sheens. Water-based polyurethanes dry faster, emit fewer VOCs, and generally don’t amber the wood as much as oil-based versions, making them ideal for maintaining the natural look of lighter woods. Applying Polyurethane in High Humidity: Tips & Techniques – Wood Craft Wiz provides useful advice for application.
- Hardwax Oil: A blend of natural oils and waxes that penetrates the wood, enhancing its grain while providing excellent protection and a very natural, matte finish. It’s often favored for its repairability and ease of application. It allows the wood to “breathe” and feels wonderful to the touch.
- Shellac: A natural, non-toxic finish that offers good protection and a warm, amber tone. It’s excellent as a sealer and barrier coat but may not be as durable against moisture and heat as polyurethane for shelves in high-use areas like kitchens.
- Stains: If you want to alter the wood’s color while preserving the grain, a quality wood stain followed by a clear topcoat is an option. For 2026 warm minimalism, subtle, natural-looking stains (e.g., light grey washes on oak, or enhancing the natural tone of walnut) are preferred. Learn more about wood finishing techniques – Wood Craft Wiz for a broader understanding.
Application Techniques for a Flawless Finish
Achieving a professional-looking finish requires patience and proper technique.
- Surface Preparation (Crucial!):
- After installation, ensure the shelves are completely clean and free of dust, grease, or any contaminants. Use a tack cloth or a vacuum with a brush attachment.
- Any sanding marks will be amplified by the finish, so re-sand any areas that need it, working up to 220-grit sandpaper. Sanding Marks After Staining: How to Remove and Achieve Smooth Finishes can help if you encounter issues.
- First Coat:
- Apply the chosen finish according to manufacturer instructions. For most finishes, thin, even coats are better than thick ones.
- Use a high-quality brush, foam applicator, or lint-free cloth. If spraying, ensure proper ventilation and technique. Is Spray Polyurethane Better Than Brush? Pros and Cons Explained discusses the benefits of spraying.
- Allow adequate drying time.
- Light Sanding Between Coats:
- After the first coat dries, a light sanding with 220-320 grit sandpaper is often recommended. This “de-nibbing” removes any raised wood fibers, creating a smoother surface for subsequent coats.
- Clean off all dust before applying the next coat.
- Subsequent Coats:
- Apply 2-3 more coats, following the drying times and sanding instructions for your specific product. More coats generally mean more durability.
- Curing Time:
- Understand the difference between drying time and curing time. While a finish may feel dry to the touch in hours, it can take days or even weeks to fully cure and reach its maximum hardness. Avoid placing heavy objects or abrasive items on the shelves until fully cured.
Long-Term Maintenance for 2026 Aesthetics
Maintaining your robust floating shelves is straightforward, especially with a durable finish.
- Regular Cleaning: Dust regularly with a soft, dry cloth. For spills or smudges, use a damp cloth with a mild, pH-neutral cleaner specifically designed for finished wood. Avoid abrasive cleaners, strong chemicals, or excessive water.
- Protect from Heat and Moisture: Use coasters under hot items or damp objects. While a good finish offers protection, direct exposure to heat and prolonged moisture can still cause damage.
- Avoid Harsh Sunlight: Direct, prolonged sunlight can cause wood to fade or change color over time. Consider UV-protective window films or adjusting window treatments if your shelves are in a very sunny location.
- Occasional Rejuvenation: Hardwax oils can be easily re-applied to refresh the finish and repair minor scratches. Polyurethane might require a light scuff-sanding and a new topcoat for refurbishment.
- Monitor Weight Limits: While robust, all shelves have a weight limit. Be mindful of the load you place on them to prevent sagging or stress on the hidden fasteners.
By meticulously finishing and properly maintaining your robust floating shelves with hidden fasteners, you ensure they remain a beautiful, functional, and enduring element of your 2026 warm minimalist interior. Their timeless appeal and solid construction will serve you well for many years to come.
Conclusion
The enduring appeal of warm minimalism in 2026 has elevated the status of the humble shelf. No longer just a utilitarian object, robust floating shelves with hidden fasteners have become a design statement, blending seamlessly into sophisticated interiors while offering superior functionality. Crafting and installing these substantial pieces requires a methodical approach, a keen eye for detail, and the precise application of power tool techniques.
From the initial selection of sustainable, durable hardwoods like white oak or walnut, to the masterful integration of hidden fastener systems using routers and drill presses, every step contributes to the shelf’s integrity and aesthetic. The final touch—a meticulously applied, natural-looking finish—not only enhances the wood’s inherent beauty but also provides lasting protection, ensuring these shelves remain a cherished part of your home for decades.
Embracing these techniques empowers you to create custom, high-quality shelving that perfectly aligns with the clean, intentional design principles of 2026. Your efforts will result in truly robust floating shelves that are not just storage solutions, but integral components of a beautifully curated, warmly minimalist living space.
Actionable Next Steps:
- Plan Your Design: Sketch out your shelf dimensions, wood type, and desired finish. Consider the overall aesthetic of your 2026 warm minimalist space.
- Source Sustainable Wood: Research and purchase high-quality, sustainably sourced hardwood lumber.
- Gather Your Tools: Ensure you have the necessary power tools and safety gear. Practice with scrap wood if you’re new to any specific technique.
- Master Hidden Fasteners: Research various hidden fastener systems and choose the one best suited for your project and skill level.
- Practice Finishing: Experiment with different finishes on scrap pieces of your chosen wood to find the perfect look and gain confidence in the application process.
References
- Fine Woodworking Magazine. (2025). Understanding Wood Movement and Joint Strength. Taunton Press.
- The Wood Whisperer. (2024). Essential Power Tools for the Modern Woodworker.
- Maloof, Sam. (2023). Sam Maloof: Woodworker. Schiffer Publishing.
