
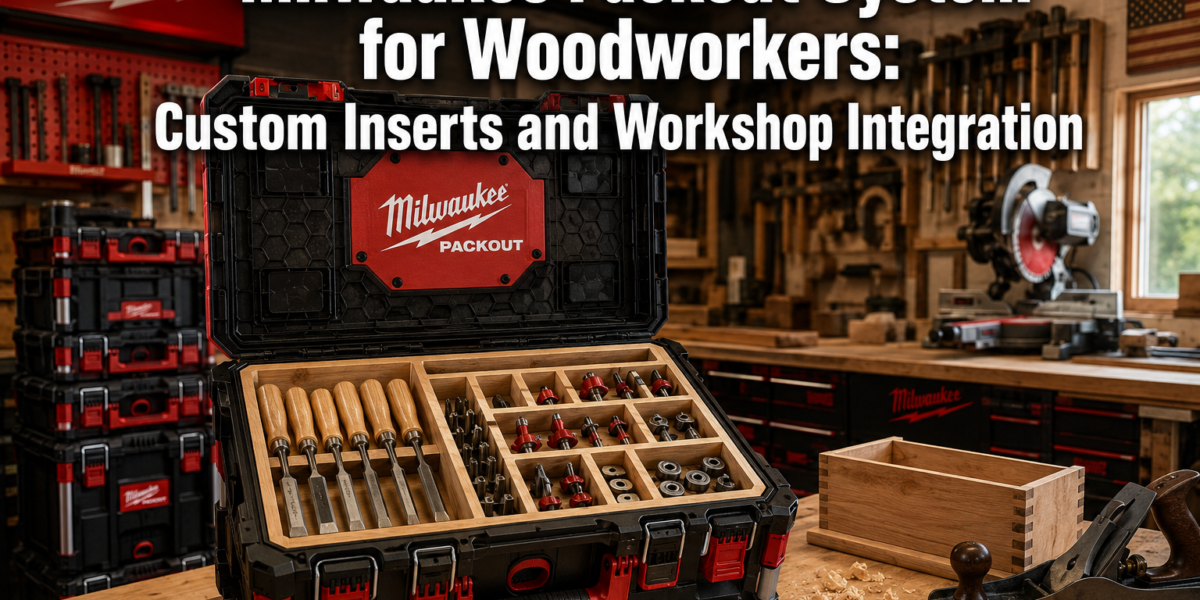
Over 60% of woodworkers struggle with tool organization, leading to lost time, damaged equipment, and diminished productivity. For those seeking to revolutionize their workspace efficiency and tool protection, the Milwaukee Packout System offers a robust, modular foundation. However, its true potential for woodworkers is unlocked not merely by stacking boxes, but by meticulously crafting custom inserts and seamlessly integrating the system into their unique workshop environments. This article will dive deep into optimizing the Milwaukee Packout System for Woodworkers: Custom Inserts and Workshop Integration, transforming it from a general storage solution into a purpose-built organizational powerhouse.
Key Takeaways
- The Milwaukee Packout System provides a durable, modular foundation for woodworking tool organization.
- Custom inserts, whether 3D-printed, foam, or DIY wood, are essential for tailored tool protection and access.
- Integrating Packout into a workshop can involve mobile carts, dedicated storage stations, and wall-mounted solutions.
- Strategic organization enhances efficiency, protects tools, and creates a more professional woodworking environment.
- Planning and executing custom solutions maximize the system’s benefits for any woodworking specialty.
The Foundation: Understanding the Milwaukee Packout System for Woodworkers
The Milwaukee Packout system has gained immense popularity across trades due to its interlocking modular design, robust construction, and weather-sealed capabilities. For woodworkers, these attributes translate into significant advantages. The ability to stack and lock various sizes of toolboxes, organizers, and crates means a highly customizable and expandable storage solution that can adapt to evolving tool collections and project needs. From job site portability to static workshop organization, the system offers unparalleled versatility. Its high-impact polymer construction ensures tools are protected from dust, debris, and moisture, critical for maintaining sensitive woodworking equipment.
Choosing the right Packout components is the first step. The system offers a wide array, including:
- Rolling Tool Boxes: Provide a mobile base for larger tools and stacked units.
- Tool Boxes (Large, Medium, Small): Ideal for power tools, hand tools, and bulk storage.
- Organizers: Feature removable bins, perfect for fasteners, small hardware, and drill bits.
- Crates: Open-top solutions for quick access to frequently used items or work-in-progress materials.
- Drawers: Offer convenient access to tools without unstacking other units.
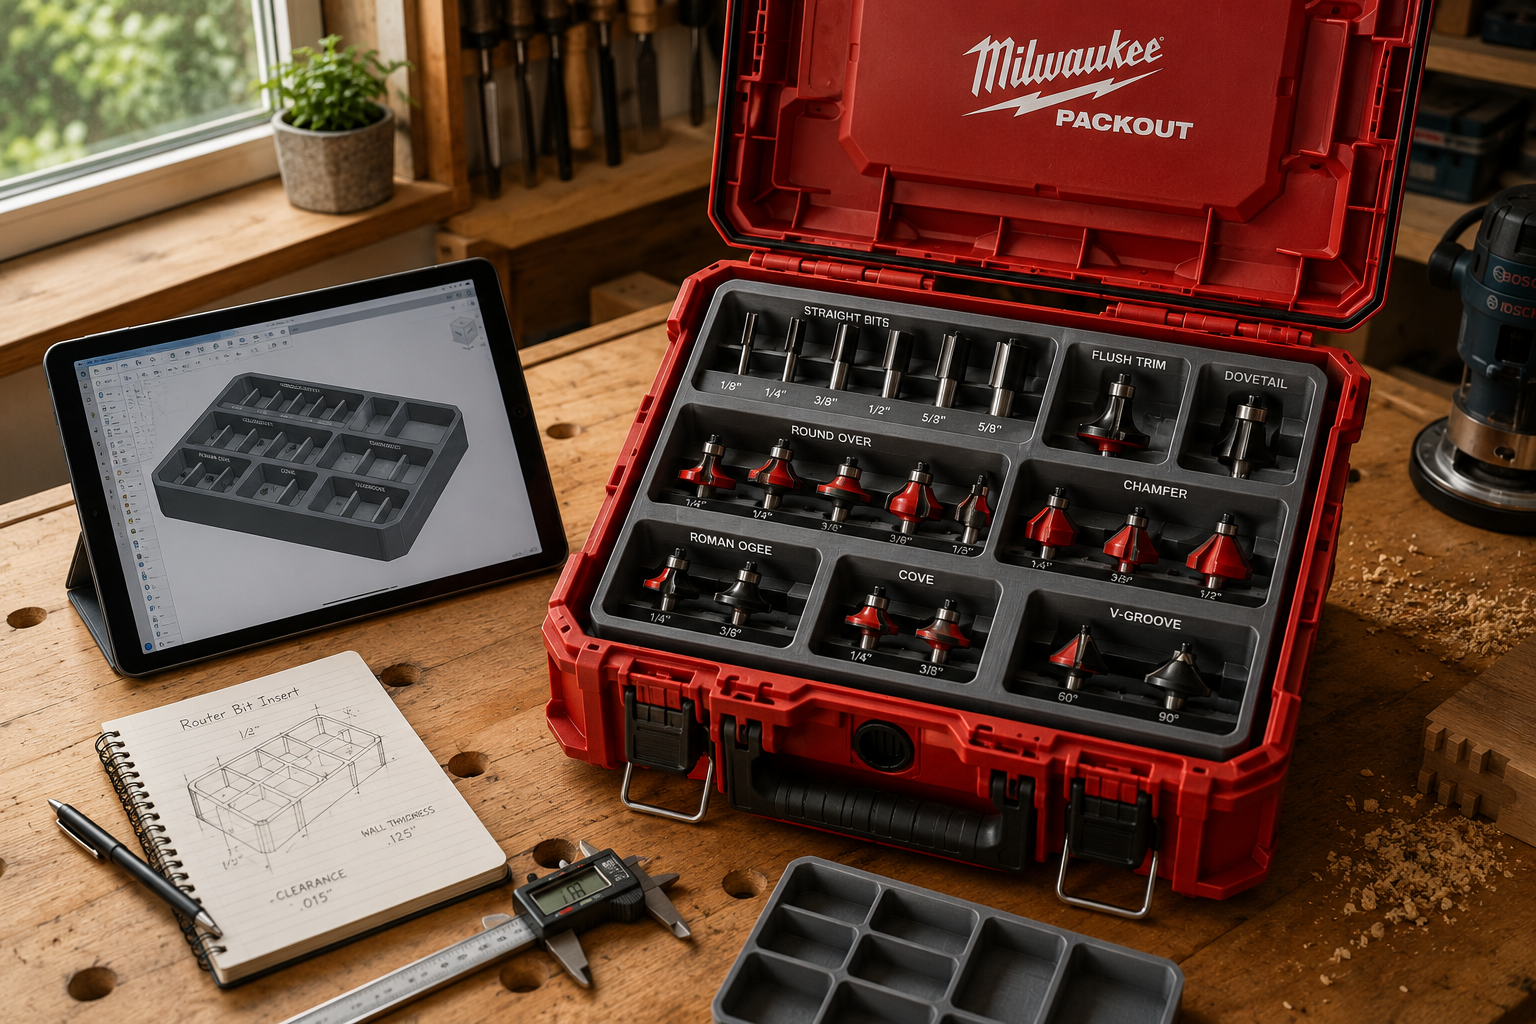
A common challenge for woodworkers is the sheer diversity of tools, from delicate carving chisels to bulky cordless drills, tiny screws to large saw blades. Generic storage solutions often leave tools rattling loose, unprotected, or difficult to find. This is where custom inserts become invaluable, transforming general storage containers into specialized homes for each tool.
Why Custom Inserts are Crucial for Woodworkers
Custom inserts address the specific needs of woodworking tools, offering:
- Tool Protection: Preventing damage from impact or abrasion, especially for sharp edges, precision instruments, and delicate electronics.
- Efficient Organization: Ensuring every tool has a designated spot, eliminating clutter and wasted search time.
- Quick Access: Tools are presented clearly, making selection faster and workflow smoother.
- Portability: Securely holding tools in place during transport, whether across the shop or to a job site.
- Space Optimization: Maximizing the usable volume within each Packout box.
Consider a woodworker with a collection of router bits. Without a custom insert, these can easily get mixed up, leading to frustration and potential damage to cutting edges. A custom insert, however, can individually cradle each bit, often with labels indicating profiles or sizes, drastically improving efficiency. Similarly, hand planes, chisels, and even specialized jigs can benefit immensely from tailored compartments.
Crafting Custom Inserts for the Milwaukee Packout System
The creation of custom inserts is where the Milwaukee Packout system truly shines for woodworkers, allowing for hyper-specialized organization. There are several popular methods, each with its own advantages.
1. 3D-Printed Inserts
For precision and intricate designs, 3D printing offers unparalleled customization. Woodworkers can design exact molds for specific tools, incorporating features like finger cutouts for easy retrieval, integrated labels, and even tool diagrams.
Process:
- Measure Tools: Accurately measure each tool and the internal dimensions of the target Packout box.
- Design in CAD: Use CAD software (e.g., Fusion 360, SketchUp, TinkerCAD) to design the insert. Many pre-designed Packout trays and bins are available on platforms like Thingiverse.
- Print: Use a 3D printer and durable filament (e.g., PETG, ABS for higher durability, or PLA for general use).
Advantages:
- Extremely precise fit for unique tools.
- Allows for complex internal structures and features.
- Reproducible designs.
Considerations:
- Requires access to a 3D printer and CAD skills.
- Print time can be lengthy for larger inserts.
- Material cost can add up.
2. Foam Inserts
Foam is an excellent choice for protecting delicate tools due to its shock-absorbing properties. Multi-layer foam, particularly Kaizen foam, is popular for its ease of customization.
Process:
- Trace Tools: Place tools on the foam and trace their outlines.
- Cut Foam: Use a sharp utility knife, hot wire cutter, or specialized foam cutting tool to cut out the shapes. Multi-layer foam allows you to peel away layers to create desired depths.
- Fit: Ensure the tools sit snugly within their cutouts.
Advantages:
- Excellent shock absorption and tool protection.
- Relatively easy to work with.
- Affordable for many applications.
Considerations:
- Less rigid than 3D-printed or wood inserts.
- Can collect dust or shavings, though often easily cleaned.
3. DIY Wooden Inserts and Dividers
For woodworkers, crafting inserts from wood is a natural and often cost-effective solution. This method allows for sturdy, custom compartments and can even incorporate small joinery techniques.
Materials: Plywood (3mm to 6mm), MDF, or thin solid wood stock.
Process:
- Measure and Plan: Carefully measure the internal dimensions of the Packout box and the tools to be stored. Sketch a layout.
- Cut Components: Cut pieces of wood to create dividers, trays, or shelves. A table saw or bandsaw is ideal for this. For precise cuts and repeatable results, a well-tuned saw and accurate measurements are key.
- Assemble: Use wood glue and small brad nails or screws to assemble the dividers. You might consider finger joints or dadoes for added strength and a refined look.
- Finish (Optional): Light sanding or a clear coat can protect the wood.
Advantages:
- Durable and long-lasting.
- Leverages existing woodworking skills and tools.
- Aesthetic appeal, integrating naturally into a woodworking environment.
- Can be customized with specific joinery for unique tool configurations.
Considerations:
- Can be heavier than foam or 3D-printed options.
- Requires woodworking tools and basic joinery knowledge.
For inspiration, consider creating a dedicated insert for a set of carving tools, a tray for sandpaper grits, or a modular system for frequently used router bits. For more advanced joinery techniques that could be adapted for these inserts, check out our guide on Mastering Dovetail Joints with Hand Tools: A Step-by-Step Guide for Flawless Wood Joinery.
Workshop Integration: Maximizing the Milwaukee Packout System
Integrating the Milwaukee Packout System into a woodworking workshop goes beyond simply stacking boxes. It involves creating a cohesive, efficient, and adaptable storage and workflow solution.
1. Mobile Workstations and Carts
One of the most powerful integrations for woodworkers is building custom mobile workstations or carts designed specifically around the Packout system. This leverages the portability of Packout while providing a dedicated workspace.
Design Considerations:
- Base: A sturdy base with locking casters is essential.
- Packout Stacking: Design specific slots or platforms for Packout boxes to sit securely. Consider mounting Packout mounting plates directly to the cart.
- Integrated Features: Add features like a small workbench top, dog holes, a vise, or dedicated storage for frequently used tools that don’t fit into Packout.
- Dust Collection: Integrate a dust collection port or a space for a shop vacuum. For ideas on smart workshop dust collection, explore Building a DIY Smart Workshop Dust Collection System: Integrating IoT.
Benefits:
- Brings tools directly to the work area.
- Reduces trips across the shop.
- Provides a flexible additional workspace.
- Allows for easy reorganization of the workshop layout.
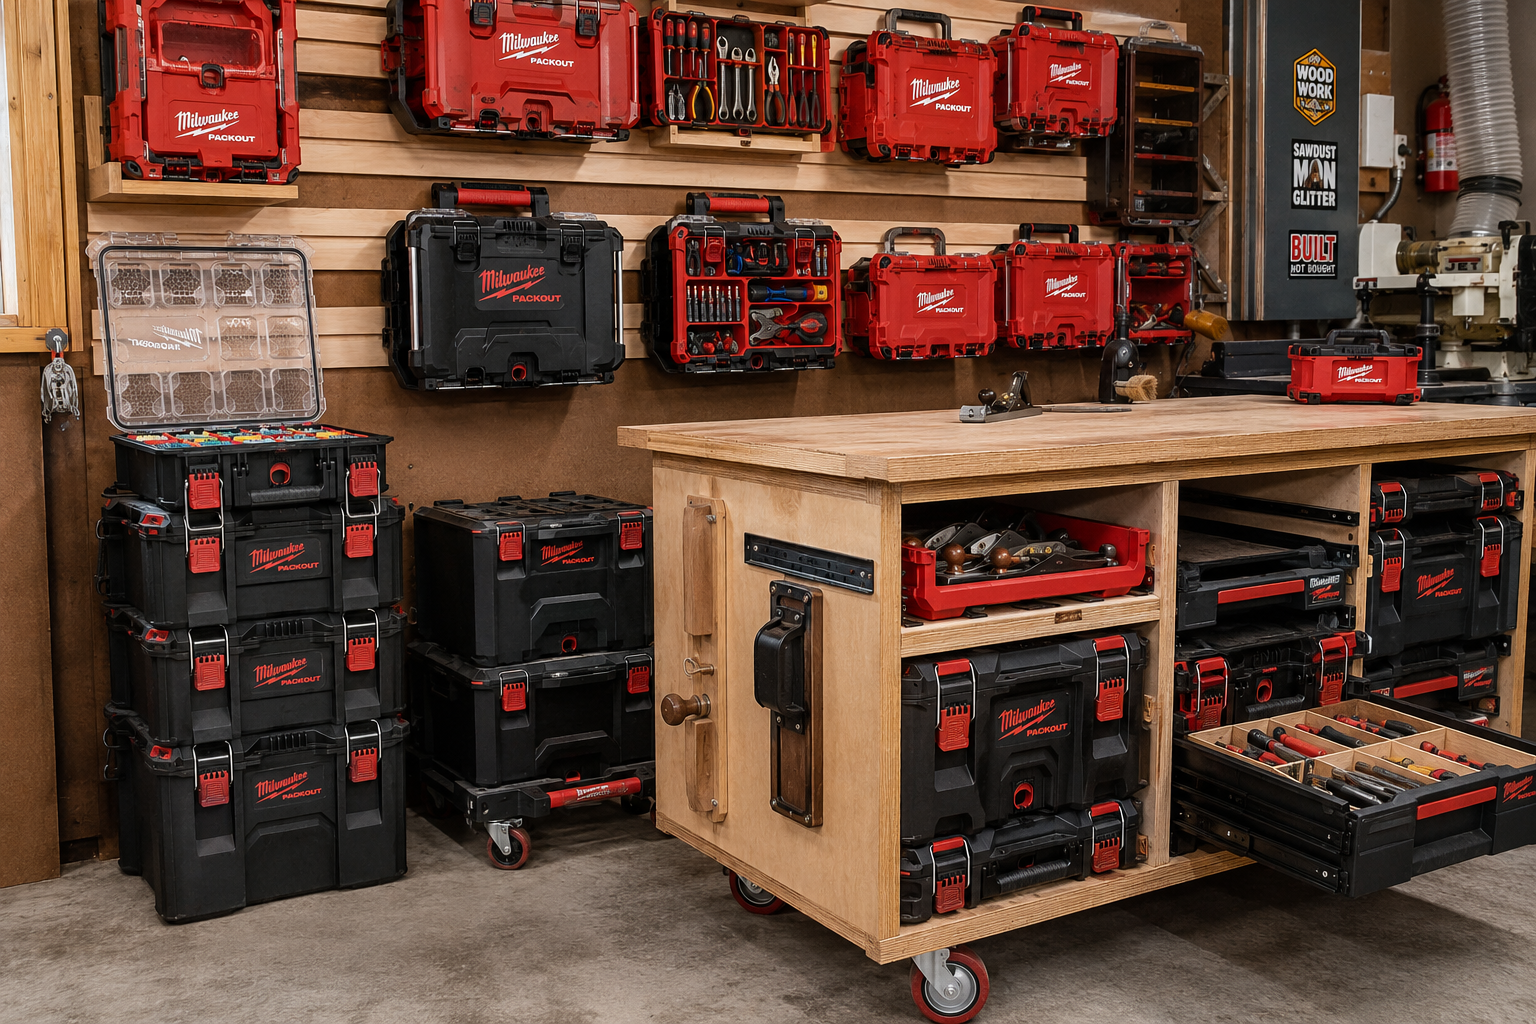
2. Dedicated Storage Stations
For tools or accessories that don’t need to be mobile, creating static Packout storage stations can significantly improve organization.
Examples:
- Wall-Mounted Racks: Use Milwaukee’s own Packout mounting plates or build custom wooden shelves with recesses for Packout feet. This keeps the boxes off the floor, freeing up valuable space.
- Under-Bench Storage: Integrate Packout drawers or low-profile boxes into existing workbench designs. Consider creating ergonomic workshop furniture, as detailed in Creating Ergonomic Workshop Furniture: Building Custom Workbenches, which can also incorporate Packout solutions.
- Tool-Specific Towers: Create a dedicated stack for a particular type of tool, such as a “router station” with all router bits, guides, and accessories, or a “sanding station” with sanders, sandpaper, and dust masks.
3. Optimizing for Workflow and Tool Accessibility
Effective integration is about more than just storage; it’s about optimizing the workflow.
- Categorization: Group tools logically. All joinery tools in one stack, all finishing supplies in another, all cordless tools and batteries together.
- Accessibility: Place frequently used items in easily accessible drawers or upper sections of stacks. Less-used tools can be stored in lower boxes.
- Labeling: Clear, consistent labeling on the outside of each Packout box helps quickly identify contents, especially when combined with a well-designed custom insert.
- Expansion: Plan for future tool acquisitions. The modularity of Packout means you can always add more units.
| Integration Strategy | Description | Best For |
|---|---|---|
| Mobile Packout Cart | A wheeled cart built to house several Packout units, often with an integrated work surface. | Active projects, small workshops, moving tools to different zones |
| Wall-Mounted System | Utilizing Packout mounting plates or custom shelves to hang boxes on walls, keeping them off the floor. | Space-saving, static storage, frequently accessed items |
| Dedicated Tool Station | A specific stack or series of Packout boxes organized around a particular tool or task (e.g., sanding, drilling, routing). | Workflow optimization, specialized tasks |
| Under-Bench Integration | Designing Packout units (especially drawers or low-profile boxes) into the structure of a workbench or assembly table. | Permanent storage, quick access during work |
| Hybrid Solutions | Combining elements, such as a mobile cart for cordless tools that docks into a wall-mounted system when not in use. | Maximum flexibility and space utilization |
Ultimately, the goal is to create a workshop where every tool has a home, is protected, and is readily available when needed. The Milwaukee Packout System, augmented with thoughtfully designed custom inserts, offers a powerful platform to achieve this. For broader strategies on workshop organization, consider our comprehensive guide on DIY Smart Workshop Storage Solutions: Maximizing Space and Organization for Every Tool.
Advanced Customization and Best Practices for Woodworkers
Taking the Milwaukee Packout System to its fullest potential involves thinking beyond basic storage and considering advanced customization techniques and operational best practices. This ensures not only organization but also enhanced tool longevity and an optimized workflow for every woodworking task.
1. Integrating Power and Charging Stations
For woodworkers heavily invested in cordless tools, integrating charging solutions directly into or alongside the Packout system is a game-changer.
Ideas:
- Dedicated Battery Boxes: Create custom inserts within a Packout box to hold multiple batteries and chargers. Ensure proper ventilation if charging inside.
- Packout-Mounted Power Strips: Attach a small power strip to the side of a Packout box or a custom Packout cart to provide convenient access to outlets for chargers or small corded tools.
- Mobile Charging Hub: Design a mobile Packout stack specifically for batteries and chargers, allowing you to roll it to wherever it’s needed in the shop.
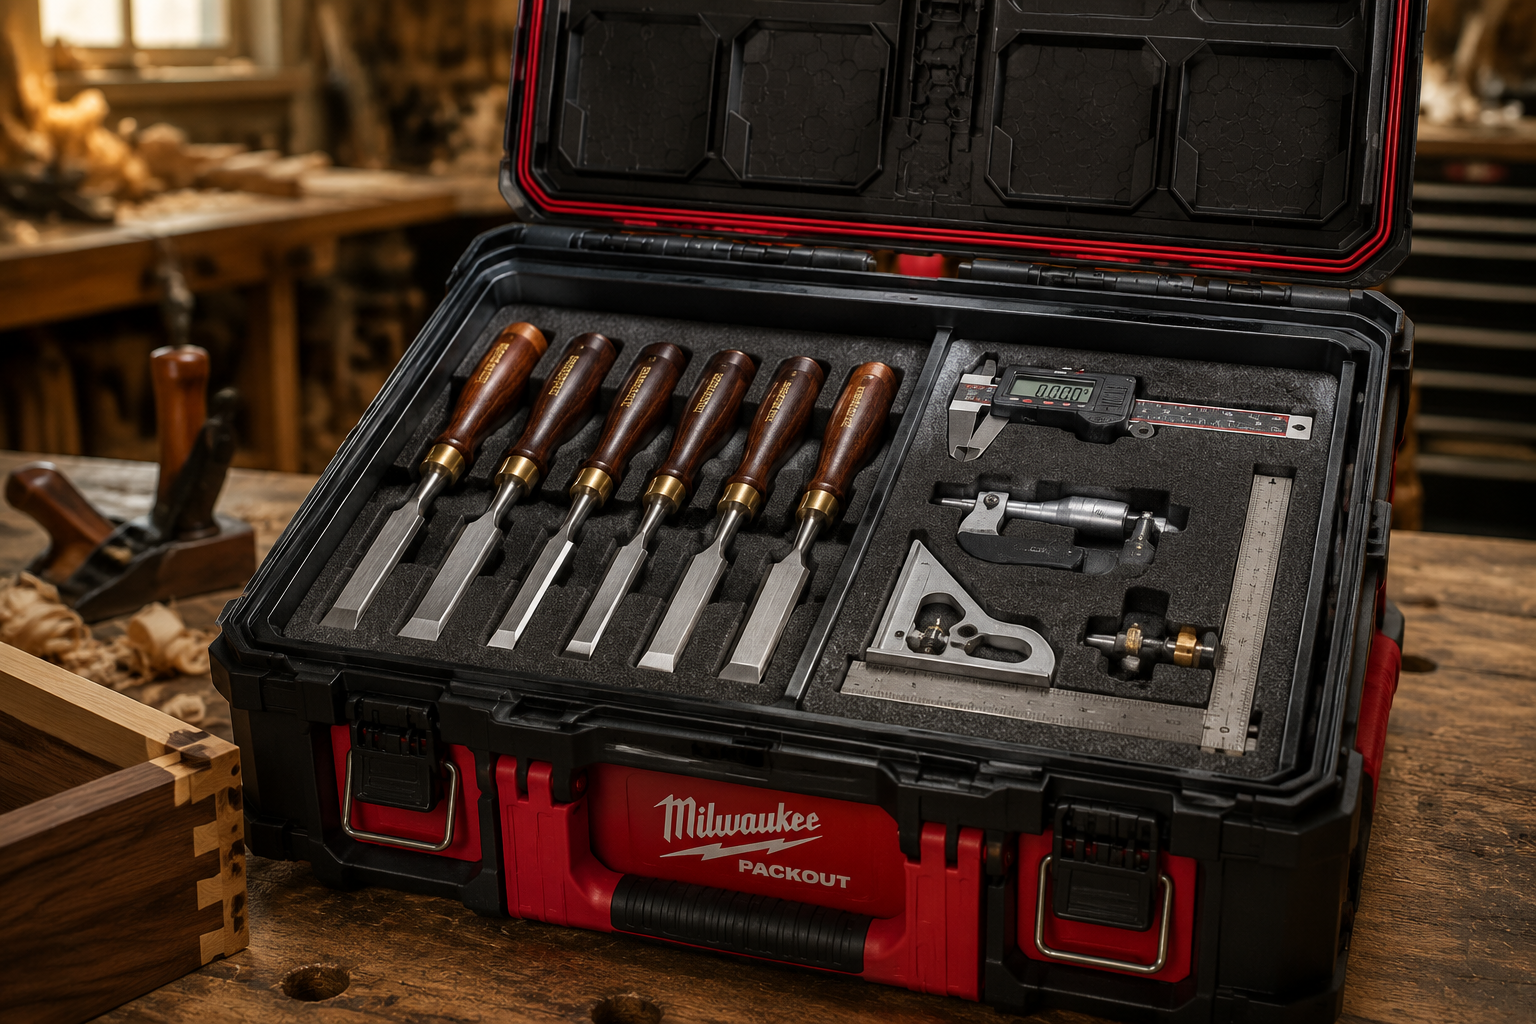
2. Specialized Inserts for Hand Tools and Precision Instruments
While power tools often get the spotlight, hand tools and precision measuring devices require equally meticulous organization and protection.
- Chisel Racks: Custom wooden inserts with individual slots or foam cutouts to protect sharp edges.
- Plane Cradles: Shaped foam or wood inserts that perfectly fit specific hand planes, preventing jostling and blade dulling.
- Measuring Tool Storage: Dedicated spots for combination squares, calipers, marking gauges, and digital levels, often with a soft lining.
“A place for everything, and everything in its place, is not just a saying; it’s the foundation of an efficient and productive woodworking shop.”
3. Leveraging Packout for Dust Management and Material Handling
The versatility of the Packout system extends beyond tool storage.
- Dust Collection Accessories: Dedicate a Packout organizer for dust collection hoses, adapters, clamps, and bags.
- Fastener and Hardware Organizers: The smaller Packout organizers are ideal for screws, nails, dowels, biscuits, and other small consumables. Labeling each bin is crucial.
- Project-Specific Packouts: For ongoing projects, dedicate a Packout crate or box to hold all the necessary tools, fasteners, and plans for that single project. This keeps project-specific items together and minimizes setup time.
4. Continuous Improvement and Iteration
As your woodworking skills evolve and your tool collection grows, your Packout system should evolve too.
- Regular Review: Periodically assess your organization. Are there tools that are still hard to find? Are some inserts no longer optimal?
- Feedback Loop: Note what works well and what doesn’t. This feedback is invaluable for refining future custom inserts and system layouts.
- Modularity Advantage: The Packout system’s modularity allows for easy rearrangement, addition of new units, or repurposing existing ones without overhauling your entire setup.
By implementing these advanced customization strategies and best practices, woodworkers can transform their Milwaukee Packout system into an indispensable asset. It becomes more than just storage; it becomes an integral part of an optimized, efficient, and enjoyable woodworking experience.
Conclusion
The Milwaukee Packout System, when strategically customized and integrated, offers woodworkers an unparalleled solution for tool organization, protection, and workflow efficiency. By moving beyond off-the-shelf configurations and embracing the power of custom inserts, whether 3D-printed, foam, or crafted from wood, woodworkers can create a storage ecosystem perfectly tailored to their specific tools and projects. Integrating these modular units into mobile workstations, dedicated storage stations, and wall-mounted solutions transforms a cluttered shop into a highly organized, productive environment.
The initial investment in time and resources for planning and creating custom solutions pays dividends through reduced tool damage, minimized search times, and a smoother, more enjoyable woodworking process. In 2026, embracing smart organization with the Milwaukee Packout System for Woodworkers: Custom Inserts and Workshop Integration is not just a luxury but a fundamental step towards a more professional and efficient workshop.
Actionable Next Steps:
- Inventory Your Tools: Catalogue your most frequently used and delicate woodworking tools.
- Assess Your Packout Needs: Determine which Packout boxes, organizers, or crates best suit your tool inventory and workshop space.
- Choose an Insert Method: Decide whether 3D printing, foam, or DIY wooden inserts are most appropriate for your first custom project.
- Start Small: Begin with one or two critical tool sets (e.g., router bits, chisels) to gain experience with custom insert creation.
- Plan Workshop Integration: Sketch out ideas for a mobile cart or a dedicated storage station, considering how it aligns with your workflow.
Milwaukee Packout System for Woodworkers: Custom Inserts and Workshop Integration | Optimize Your Shop Transform your woodworking shop in 2026 with the Milwaukee Packout System! Learn to craft custom inserts and seamlessly integrate Packout for ultimate tool organization and efficiency.