
The dream of owning a pool table often collides with the reality of limited living space. While full-sized tables require significant room, a compact pool table offers an accessible solution, bringing the joy of billiards to smaller homes and apartments. This Beginner’s Guide to Building a Compact Pool Table: Materials, Assembly, and Leveling for Small Spaces simplifies the construction process, providing clear, actionable steps for DIY enthusiasts without requiring extensive woodworking expertise or a massive workshop. Imagine transforming an underutilized corner into a fun-filled game area, proving that big fun can indeed come in a smaller package.
Key Takeaways
- Compact design is achievable: Even with limited space, a functional and enjoyable pool table can be built using readily available materials.
- Essential tools are common: You don’t need a professional workshop; basic woodworking tools are sufficient for most steps.
- Precision in cutting and assembly is crucial: Accurate measurements and careful joint construction ensure a sturdy and true playing surface.
- Felt application requires patience: Proper stretching and adhesion of the felt are key to a smooth, playable surface.
- Leveling is non-negotiable: A perfectly level playing surface is paramount for fair gameplay and can be achieved with simple adjustments.
Selecting Materials for Your Compact Pool Table
Building a compact pool table begins with selecting the right materials. The goal is to balance durability, cost-effectiveness, and ease of workability for a beginner. Opting for readily available lumber and composite boards will simplify the process significantly.
Essential Materials and Why They Matter
The foundation of your compact pool table will dictate its stability and longevity. Here’s a breakdown of the primary materials you’ll need:
- Plywood (¾-inch or 1-inch thick): This will form the playing surface (bed) and the main frame components. Baltic birch or high-quality hardwood plywood is recommended for its stability and resistance to warping. Avoid particle board or MDF for the bed, as they can sag over time or be damaged by moisture. For the frame, structural-grade plywood or even good quality pine can be used.
- Solid Wood for Rails and Legs: Hardwoods like oak, maple, or even sturdy pine are excellent choices for the table’s rails and legs. These components need to withstand impacts and provide a stable base. Dimensions will vary based on your design, but commonly 2x4s or 4x4s for legs and 1x4s or 1x6s for rails are suitable.
- Billiard Felt: Standard billiard felt, typically made from wool or a wool-nylon blend, is essential for the playing surface. Green is traditional, but other colors are available. Purchase enough felt to cover the playing surface with ample overhang for trimming.
- Rubber Rail Cushions: These are crucial for realistic ball rebound. K-66 profile cushions are standard for most tables. Measure the perimeter of your playing area to determine the length needed.
- Pocket Liners and Drop Pockets: Six pocket liners are required (four corner, two side). Plastic or rubber liners are common. You can opt for simple drop pockets (where balls collect in a mesh or plastic basket) or a more complex ball return system if your design allows.
- Hardware:
- Wood screws (various lengths, 1.5-inch to 2.5-inch are common)
- Wood glue (waterproof recommended for durability)
- Carriage bolts with nuts and washers (for attaching legs securely)
- Adjustable leg levelers (critical for achieving a perfectly flat playing surface)
- Staple gun with staples (for attaching felt)
- Small nails or brads (for securing rail caps)
- Finishing Supplies: Wood filler, sandpaper (various grits), wood stain or paint, polyurethane or lacquer for protection.
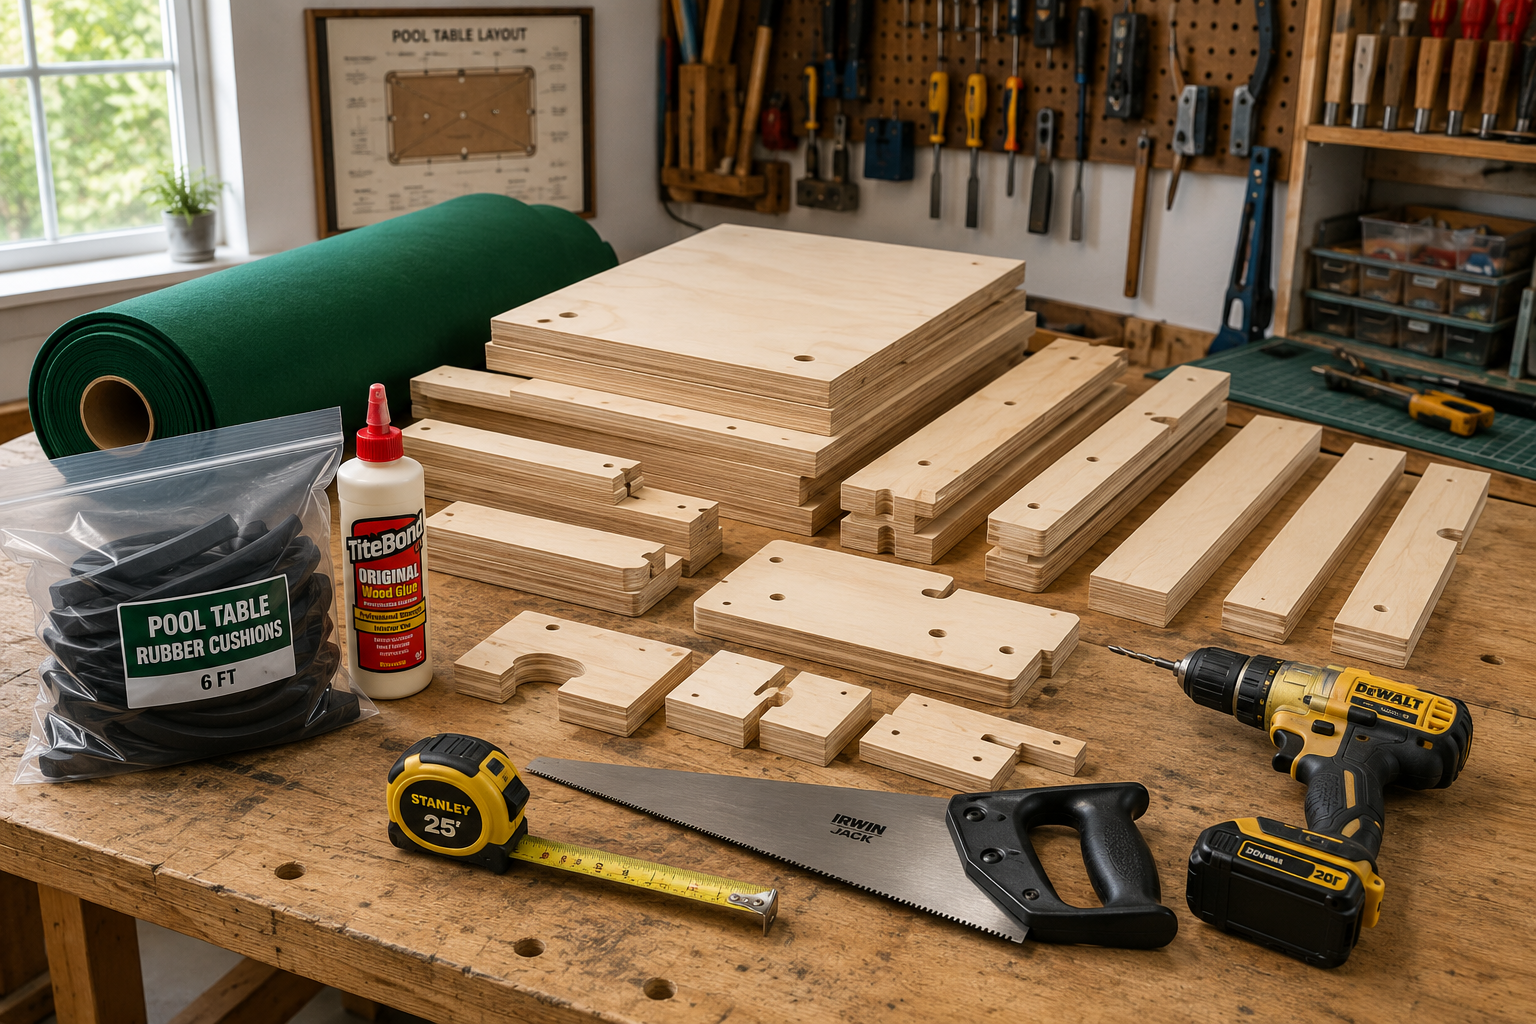
When selecting wood, ensure it is straight, free from significant knots, cracks, or warps. This attention to detail at the material selection stage will save considerable effort during assembly and lead to a higher quality finished product. For intricate joinery, consult resources like “Beginner’s Guide to Essential Woodworking Joints: When to Use Which” for techniques that enhance strength and appearance.
Step-by-Step Assembly of Your Compact Pool Table
With your materials gathered, the assembly process can begin. This section breaks down the construction into manageable steps, focusing on precision and stability.
Building the Frame and Legs
The table’s frame provides the structural support for the playing surface.
- Cut Plywood Components: Using a circular saw or table saw, cut the main playing surface (bed) from ¾-inch or 1-inch plywood. Then cut the side and end aprons (frame pieces) from ¾-inch plywood or solid wood according to your chosen dimensions. Remember, a smaller table size makes the project more manageable for beginners.
- Assemble the Frame: Create a rectangular frame using your cut apron pieces. Use wood glue and screws to join the pieces at the corners, ensuring they are perfectly square. For added strength, consider using simple butt joints reinforced with corner blocks or metal L-brackets. For more advanced techniques, explore building a custom wood workbench for inspiration on sturdy construction.
- Attach the Legs: Cut your leg material (e.g., 4×4 posts) to the desired height, accounting for the frame and playing surface thickness. Attach the legs to the inside corners of the frame using strong corner braces and carriage bolts. Using carriage bolts allows for a robust, adjustable connection. Ensure all legs are aligned and securely fastened.
- Install Cross Bracing: Add cross bracing between the legs to prevent wobble and enhance stability. These can be simple wooden stretchers, secured with wood glue and screws. This is crucial for creating a sturdy base for your compact pool table.
Installing the Playing Surface and Rails
This stage brings your table closer to its final form.
- Secure the Playing Bed: Place the cut plywood playing bed onto the assembled frame. Ensure it sits flush and is perfectly centered. Secure it to the frame using screws every 6-8 inches along the perimeter. Countersink the screw heads so they are flush with the surface.
- Attach Rail Backing: Cut strips of wood (e.g., 1x2s or 1x3s) to form the backing for your rubber rail cushions. These should be precisely cut to fit the inner perimeter of the playing surface, leaving gaps for the pockets. Secure them firmly with glue and screws.
- Apply Billiard Felt: This is a critical step requiring patience. Lay the felt over the playing surface, ensuring it hangs evenly over all sides. Starting from the center of one long side, staple the felt to the underside of the playing bed, stretching it taut as you go. Work your way around the table, continually pulling the felt tight and smooth to avoid wrinkles. When you reach the pockets, make careful cuts to allow the felt to wrap down into the pocket opening. The goal is a perfectly smooth, wrinkle-free surface. For visual guidance, there are many online tutorials specifically for applying pool table felt.
- Install Rubber Cushions: Using a strong adhesive (like contact cement), carefully glue the rubber rail cushions to the rail backing strips you installed earlier. Ensure the cushion face is flush with the playing surface. Let the adhesive cure completely.
- Build and Attach Rails (with Pockets): Construct the wooden rails that will cover the rubber cushions. These typically consist of a rail base, the rubber cushion, and a top rail cap. Cut the rail pieces from your chosen hardwood, precisely miter-cutting the corners for a clean fit. Create the pocket openings in the rail pieces. Once assembled, attach the rails to the table frame using screws from the underside of the frame, or by bolting them through the rail backing if your design allows.
- Install Pocket Liners and Drop Pockets: Insert the plastic or rubber pocket liners into the designated pocket openings. Attach the drop pockets beneath the liners, securing them to the table frame.
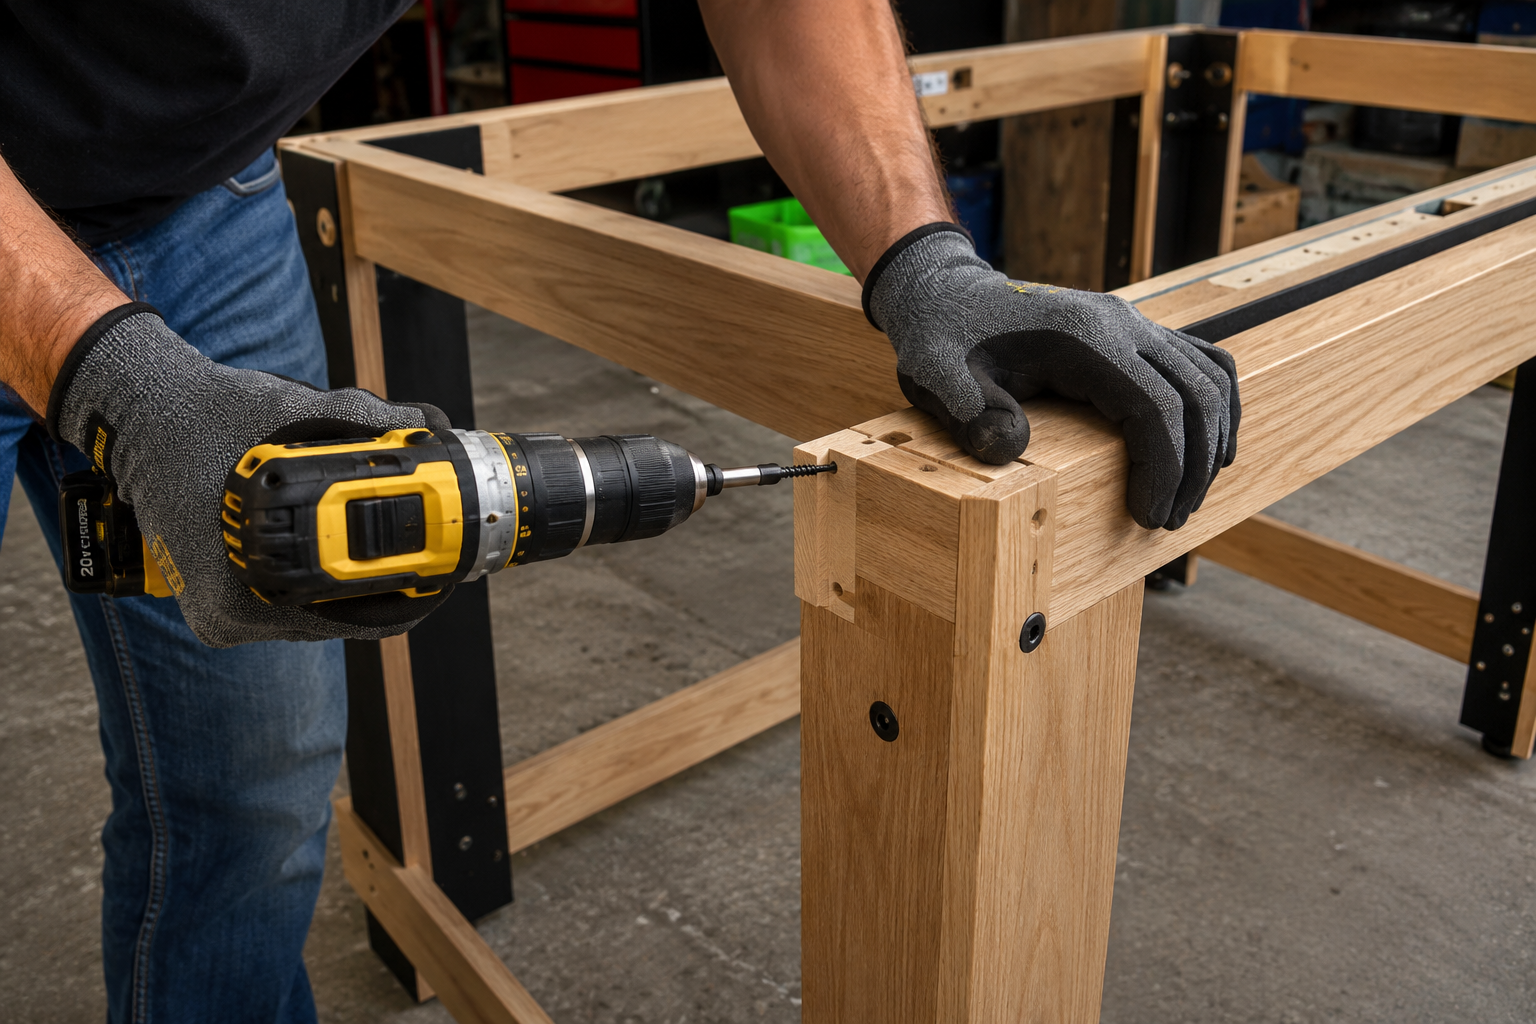
This methodical approach to assembly ensures that each component contributes to a robust and playable compact pool table.
Leveling Your Compact Pool Table for Optimal Play
A perfectly level playing surface is non-negotiable for a fair and enjoyable game of pool. Even a slight incline can significantly alter ball trajectory. This final step is crucial for transforming your DIY project into a functional game table.
The Importance of Leveling
Think of leveling as the calibration process for your pool table. Without it, balls will naturally drift towards the lowest point, making precise shots impossible and frustrating for players. Fortunately, achieving a perfect level is straightforward with the right tools and technique.
Step-by-Step Leveling Process
- Initial Placement: Position your newly assembled compact pool table in its intended location. Ensure the floor itself is as stable and level as possible. If placing on carpet, consider using small, firm pads under the legs to prevent sinking.
- Install Leg Levelers: If you haven’t already, install the adjustable leg levelers into the bottom of each table leg. These usually screw into pre-drilled holes. Ensure they are threaded in far enough initially so you have room to adjust upwards.
- Use a Spirit Level: Place a high-quality spirit level (at least 24 inches long) on the playing surface.
- Lengthwise Check: First, place the level down the center of the table, parallel to the long rails. Observe the bubble. If it’s not centered, identify which end is lower.
- Widthwise Check: Next, place the level across the center of the table, parallel to the short rails. Check the bubble again.
- Diagonal Checks: For thoroughness, place the level diagonally from one corner pocket to the opposite corner pocket. Repeat for the other diagonal. These checks reveal any twists or warps in the frame.
- Corner to Corner: You can also check individual quadrants by placing the level from a corner pocket to a side pocket.
- Adjust the Leg Levelers:
- Start with the lowest corner or side you identified from your level checks.
- Slowly turn the adjustable leg leveler clockwise to raise that corner/side, or counter-clockwise to lower it (though usually you’ll be raising to meet the highest point).
- Make small adjustments, a quarter or half turn at a time.
- Recheck with your spirit level after each adjustment.
- Work systematically around the table, constantly rechecking both lengthwise and widthwise as you go. Raising one leg will affect the balance of others.
- It’s often easier to start by getting the table generally level, and then fine-tune with smaller adjustments.
- Test with a Ball: Once the spirit level indicates a perfectly flat surface in all directions, place a pool ball in the center of the table. If it rolls, the table is not truly level. Gently push the ball towards each rail, observing if it drifts. Repeat the leg leveler adjustments until the ball remains stationary when placed anywhere on the playing surface (excluding slopes into the pockets).
- Final Tightening: Once perfectly level, ensure all leg levelers are snug and locked in place if they have a locking mechanism.
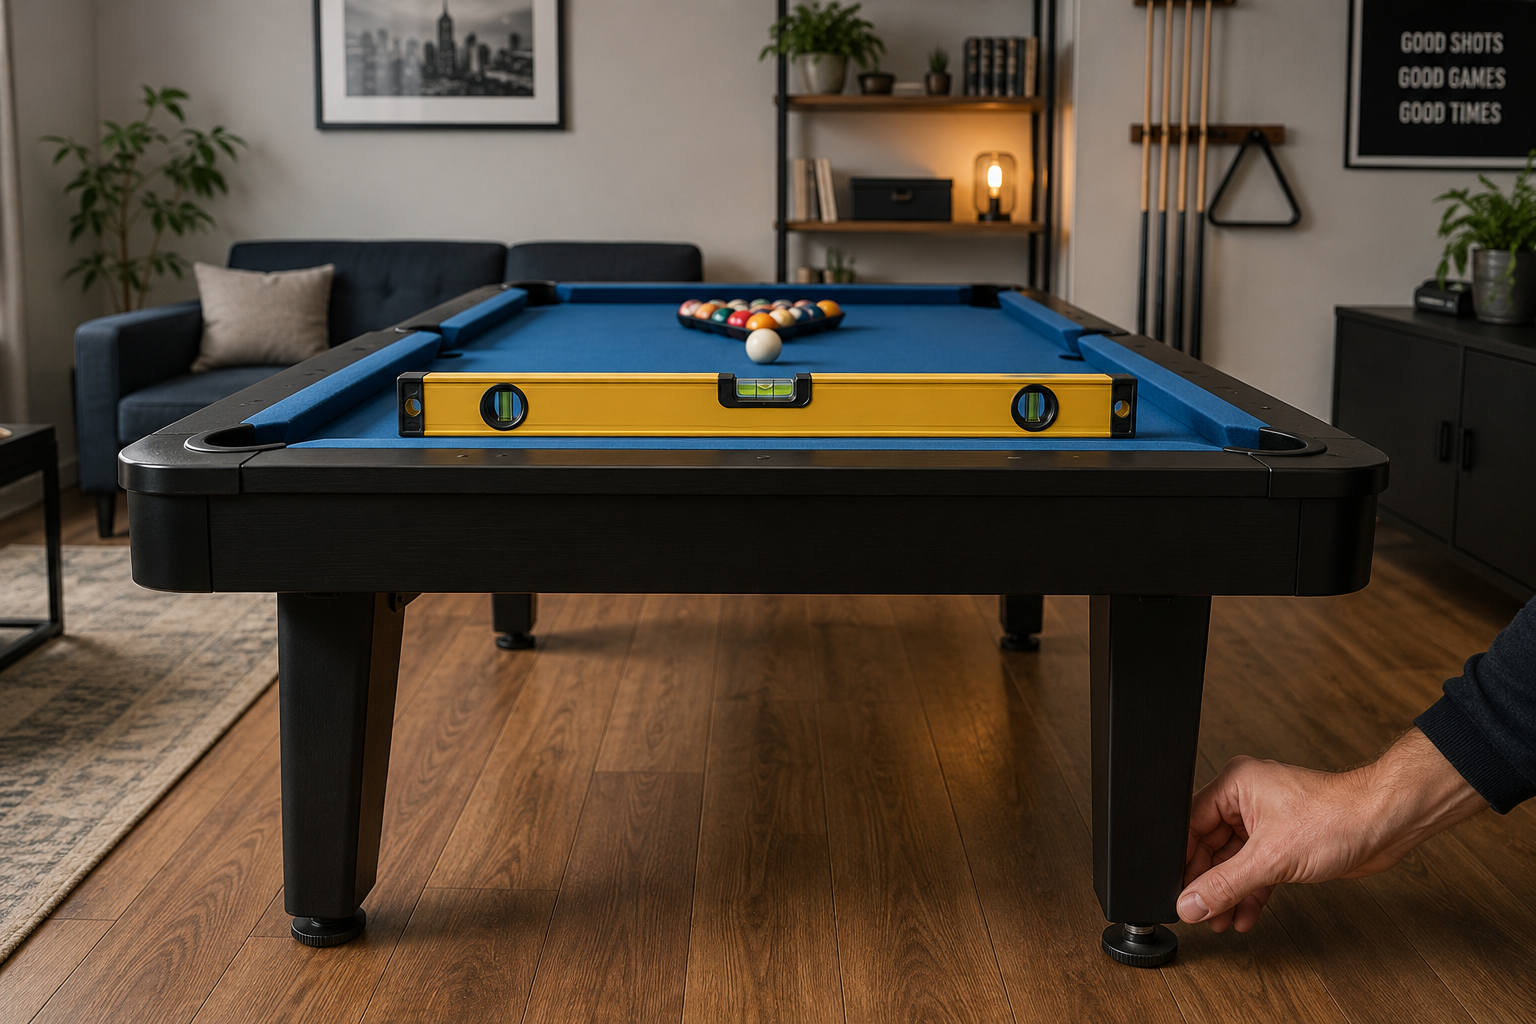
Achieving a perfectly level playing surface can take some time and patience, but it’s arguably the most important step for an enjoyable compact pool table experience. This attention to detail will elevate your beginner’s project into a truly functional game piece.
Conclusion
Building a compact pool table for small spaces is a rewarding woodworking project that brings the excitement of billiards into your home without demanding excessive room. This Beginner’s Guide to Building a Compact Pool Table: Materials, Assembly, and Leveling for Small Spaces has provided a comprehensive, step-by-step roadmap, from selecting accessible materials to mastering the crucial art of leveling. You’ve learned how to choose durable plywood and solid wood, assemble a sturdy frame and rails, apply billiard felt with precision, and meticulously level the playing surface for optimal gameplay.
The beauty of a DIY compact pool table lies not just in the savings, but in the satisfaction of crafting a functional, fun piece that perfectly fits your unique space and style. With patience, attention to detail, and the techniques outlined here, you can successfully create a durable and enjoyable compact pool table. Remember, precise measurements and careful execution are your best friends in this endeavor.
Now that you have the knowledge, gather your materials, clear a workspace, and embark on this exciting woodworking journey. Your compact pool table awaits, promising countless hours of entertainment for family and friends. For future projects, consider exploring related woodworking guides such as building custom wooden key holders or DIY compact entryway organizers to further enhance your home’s functionality and aesthetic.