
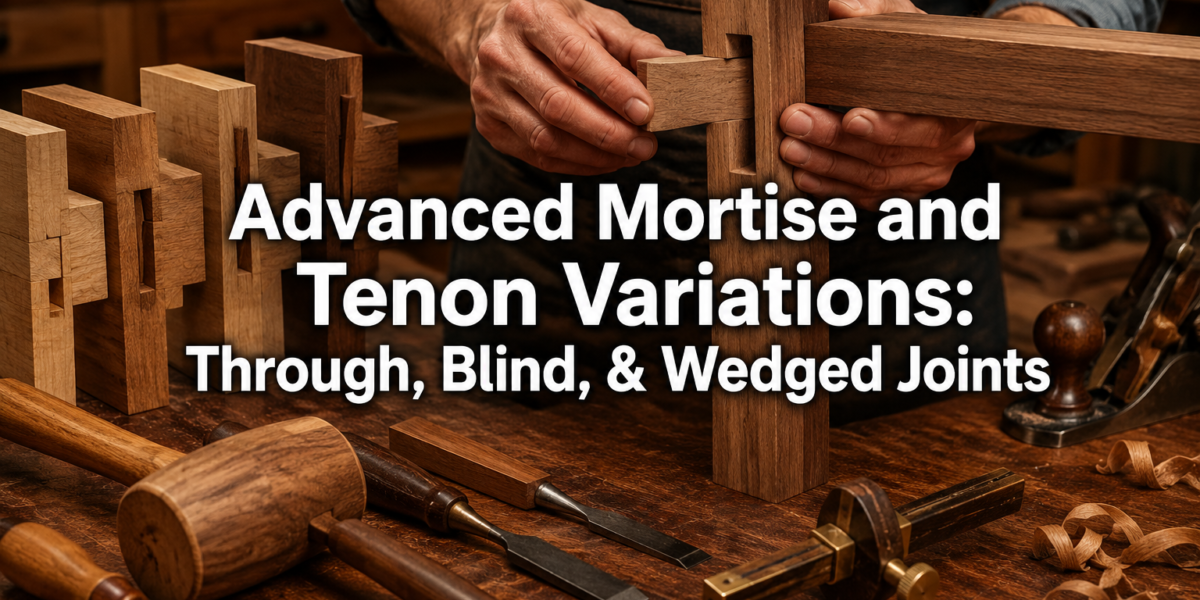
The average household in 2026 demands furniture that is not only aesthetically pleasing but also built to endure, a testament to craftsmanship that transcends fleeting trends. While basic joinery techniques suffice for many projects, the discerning woodworker understands that the true mark of heirloom-quality furniture lies in the mastery of Advanced Mortise and Tenon Variations: Through, Blind, and Wedged Joints for Fine Furniture. These sophisticated connections offer unparalleled strength, stability, and a refined appearance that elevates a piece from mere utility to a work of art. This article delves into the nuances of these advanced variations, providing detailed insights into their application and construction for crafting furniture that will last for generations.
Key Takeaways
- Advanced mortise and tenon joints significantly enhance furniture strength and longevity.
- Through mortise and tenon joints offer maximum mechanical strength and a distinctive visual element.
- Blind mortise and tenon joints provide hidden strength, ideal for maintaining clean, uninterrupted surfaces.
- Wedged tenon joints, both through and blind, mechanically lock the joint, resisting withdrawal and movement.
- Precision in marking, cutting, and fitting is paramount for the success and aesthetics of all advanced mortise and tenon variations.
Understanding the Foundation: The Basic Mortise and Tenon Joint
Before exploring the advanced variations, it’s crucial to grasp the fundamental principles of the basic mortise and tenon joint. At its core, this joint consists of two primary components: the mortise (a rectangular hole or slot cut into one piece of wood) and the tenon (a projecting tongue on another piece of wood, designed to fit snugly into the mortise). When properly executed, glued, and clamped, this joint forms an incredibly strong and stable connection, resisting forces from multiple directions.
The strength of the mortise and tenon joint comes from several factors:
- Long Grain to Long Grain Glue Surface: This provides an exceptionally strong bond.
- Mechanical Interlock: The tenon physically occupies the mortise, preventing movement.
- Shoulders: The shoulders of the tenon bear against the face of the mortised piece, resisting racking and providing a clean aesthetic.
However, even the basic mortise and tenon has limitations, particularly when extreme strength or a specific aesthetic is desired. This is where advanced variations come into play, offering solutions for a wider range of design and structural requirements in fine furniture making. Mastery of these techniques requires patience, precision, and an understanding of wood movement, which is critical for designing joints that will not fail over time. For more information on this, consider exploring our guide on Understanding Wood Movement: How to Design and Build Furniture That.
Through Mortise and Tenon Joints: Maximum Strength and Visual Impact
The through mortise and tenon joint is perhaps the most visually expressive of the advanced variations, where the tenon extends completely through the mortised piece and is visible on the opposite side. This design is not only a hallmark of superior craftsmanship but also offers exceptional mechanical strength, often without the need for extensive clamping pressure once the glue has set. The visible end of the tenon can be left flush, slightly proud, or even shaped for decorative effect, making it a powerful design element.
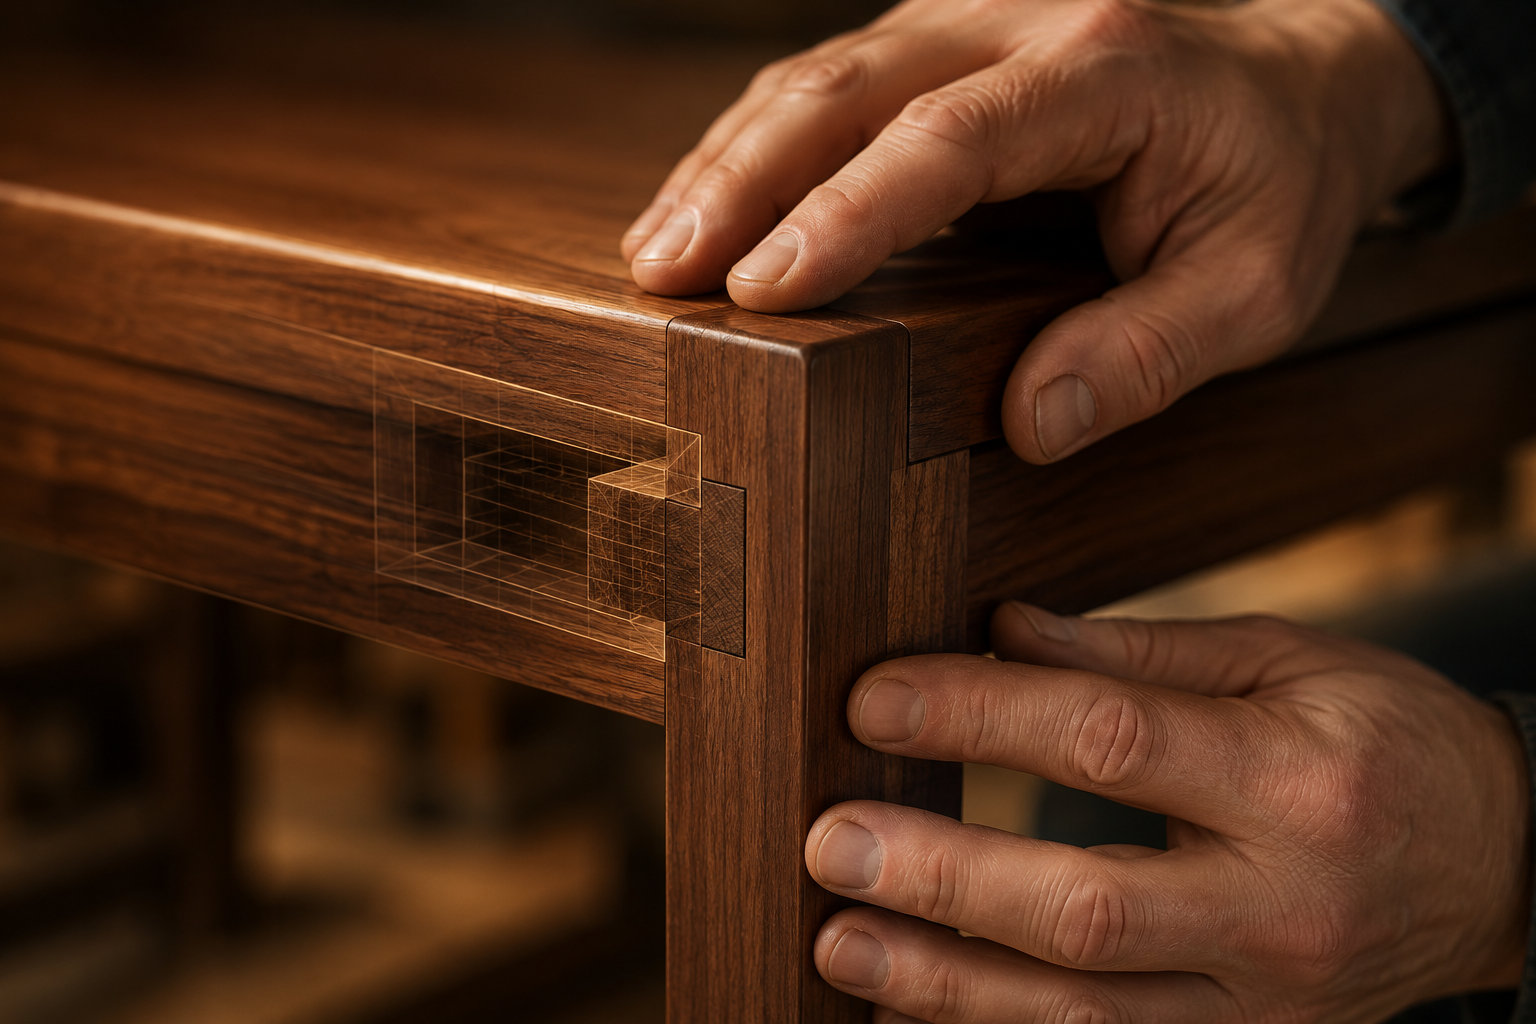
Benefits of the Through Mortise and Tenon
- Unrivaled Strength: The full length of the tenon provides a larger glue surface area and a more robust mechanical lock.
- Distinctive Aesthetic: The visible tenon end adds character and clearly communicates the method of construction, often associated with Arts and Crafts, Shaker, or contemporary designs.
- Ease of Assessment: The fit of the joint can be easily inspected from both sides, ensuring precision.
- Opportunity for Wedging: The visible tenon end makes it an ideal candidate for wedging (discussed later) to further increase strength and prevent withdrawal.
Crafting a Through Mortise and Tenon
The process demands meticulous attention to detail.
- Layout: Accurately mark the mortise and tenon dimensions. The mortise should be slightly smaller than the desired width to allow for a tight fit.
- Cutting the Mortise:
- Chisels and Mallet: For traditionalists, a sharp mortise chisel and mallet are the tools of choice. Chop out the waste in stages, working from both sides of the stock to prevent blowout.
- Mortising Machine: A dedicated mortising machine or a drill press attachment can create clean, square mortises quickly and efficiently.
- Router: A router with a mortising jig can also produce precise mortises, especially for larger production runs.
- Cutting the Tenon:
- Table Saw: A table saw with a dado stack or a standard blade and tenoning jig is excellent for cutting accurate tenon cheeks and shoulders.
- Band Saw and Chisel: Rough cut on the band saw, then refine with chisels for a perfect fit.
- Router: Router tables can also be used to cut tenons with specialized bits. For more on router techniques, see our guide on Choosing and Using Router Tables: Maximizing Precision and Safety for.
- Fitting: Test the fit dry. The tenon should slide into the mortise with firm hand pressure, without excessive force. Adjust as necessary with a plane or chisel.
- Assembly: Apply glue to both the mortise and tenon. Assemble the joint, ensuring the shoulders are tight against the mortised piece. Wipe away excess glue immediately. Allow ample time for the glue to cure.
| Aspect | Traditional Method | Modern Method |
|---|---|---|
| Mortise | Chisels, Mallet | Mortising Machine, Router Jig |
| Tenon | Hand Saw, Chisel | Table Saw (Jig), Router |
| Precision | High (skilled craftsman) | High (machine dependent) |
| Speed | Slower | Faster |
| Tool Cost | Lower (hand tools) | Higher (power tools) |
Blind Mortise and Tenon Joints: Hidden Strength and Seamless Design
The blind mortise and tenon joint provides the significant structural benefits of a mortise and tenon while maintaining an uninterrupted, clean aesthetic on the exterior surface of the furniture piece. In this variation, the mortise does not pass completely through the wood, and consequently, the tenon is fully concealed within the joint. This makes it a popular choice for tabletops, cabinet doors, and anywhere a smooth, unbroken line is desired.
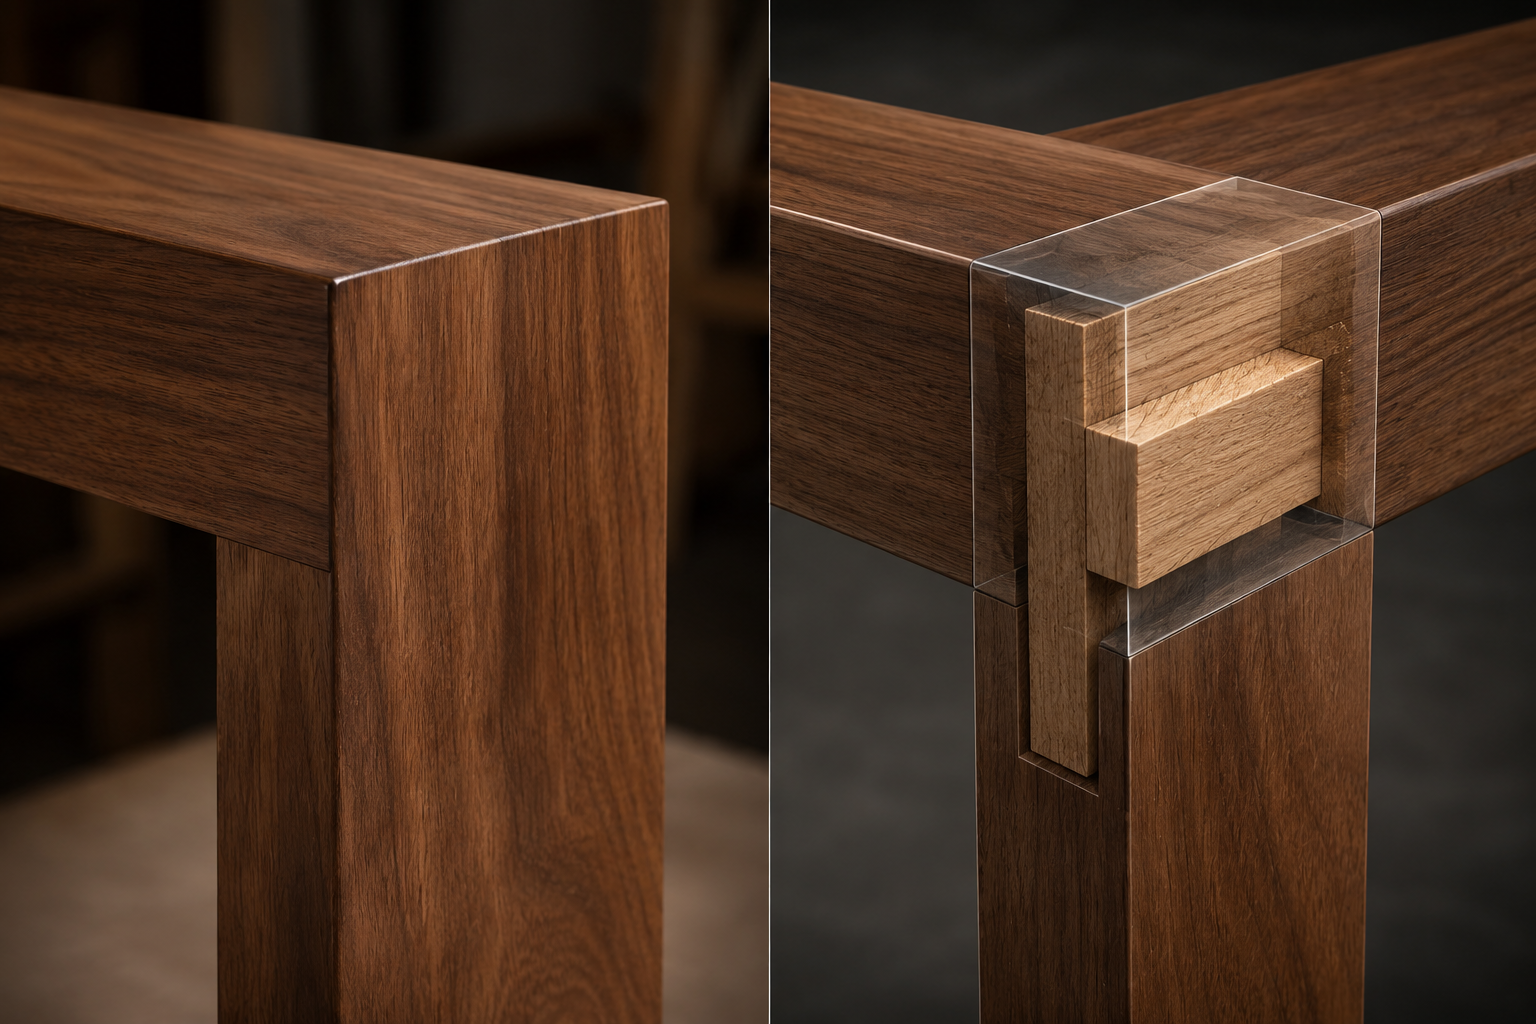
Advantages of the Blind Mortise and Tenon
- Clean Aesthetics: The joint is invisible from the exterior, preserving the natural beauty of the wood grain and design lines.
- Strong Connection: Despite being hidden, it still provides substantial mechanical strength, preventing racking and twisting.
- Versatile Application: Ideal for joinery in legs, rails, stiles, and any application where the end grain of the tenon would be unsightly or unwanted.
- Allows for Wood Movement: The hidden nature can sometimes allow for controlled wood movement within the joint, if designed correctly, reducing stress on the furniture.
Executing a Blind Mortise and Tenon
Precision is even more critical here since there’s no visible tenon to gauge the fit from the opposing side.
- Accurate Layout: Mark the mortise depth and dimensions carefully. The tenon length must be precisely cut to match this depth, allowing a small clearance for glue.
- Cutting the Mortise:
- Drill Press and Chisels: Use a drill press to remove the bulk of the waste, staying within the marked lines. Finish squaring the corners and cleaning the mortise walls with sharp chisels. This is a common and effective method for creating clean blind mortises.
- Router with Plunge Base: A router with a plunge base and a straight bit, guided by a jig, can create very accurate and clean blind mortises. Set the depth stop precisely.
- Hollow Chisel Mortiser: A dedicated hollow chisel mortiser is ideal for production work, creating perfect square-ended mortises.
- Cutting the Tenon:
- The tenon is cut in the same manner as for a through mortise and tenon, using a table saw, band saw, or router. The critical difference is the tenon length, which must be accurately measured to prevent it from bottoming out in the mortise or being too short.
- Shoulder Definition: Ensure crisp shoulders on the tenon, as these will register against the face of the mortised piece and dictate the flushness of the joint.
- Test Fit and Assembly: Perform a dry fit. The tenon should slide fully into the mortise, and the shoulders should meet flush with the mating surface. If it’s too tight, carefully pare down the tenon cheeks. If too loose, the joint’s strength will be compromised. Apply glue to both surfaces and assemble.
Pro Tip: When cutting blind mortises, always cut them slightly deeper (1/32″ to 1/16″) than the tenon length. This provides a small glue reservoir at the bottom, preventing hydraulic lock when assembling and ensuring the shoulders meet perfectly.
Wedged Mortise and Tenon Joints: Engineering Ultimate Security
Wedged mortise and tenon joints represent the pinnacle of mechanical reinforcement in traditional joinery. By introducing wedges into the tenon, the joint is physically expanded within the mortise, creating an incredibly strong and almost irreversible lock. This technique dramatically increases the joint’s resistance to withdrawal and racking, making it ideal for high-stress applications in fine furniture, such as chair legs, table aprons, or any joint that needs to withstand significant shear forces.
There are primarily two types of wedged tenon joints:
- Through Wedged Tenon (Keyed or Drawbore): Here, the tenon passes through the mortised piece, and wedges are driven into the end of the tenon. This expands the tenon within the mortise, effectively locking it in place.
- Blind Wedged Tenon (Fox-Wedge): In this more complex variation, wedges are inserted into saw kerfs in the tenon before assembly. As the tenon is driven into the blind mortise, the wedges contact the bottom of the mortise and are forced into the tenon, expanding it internally.
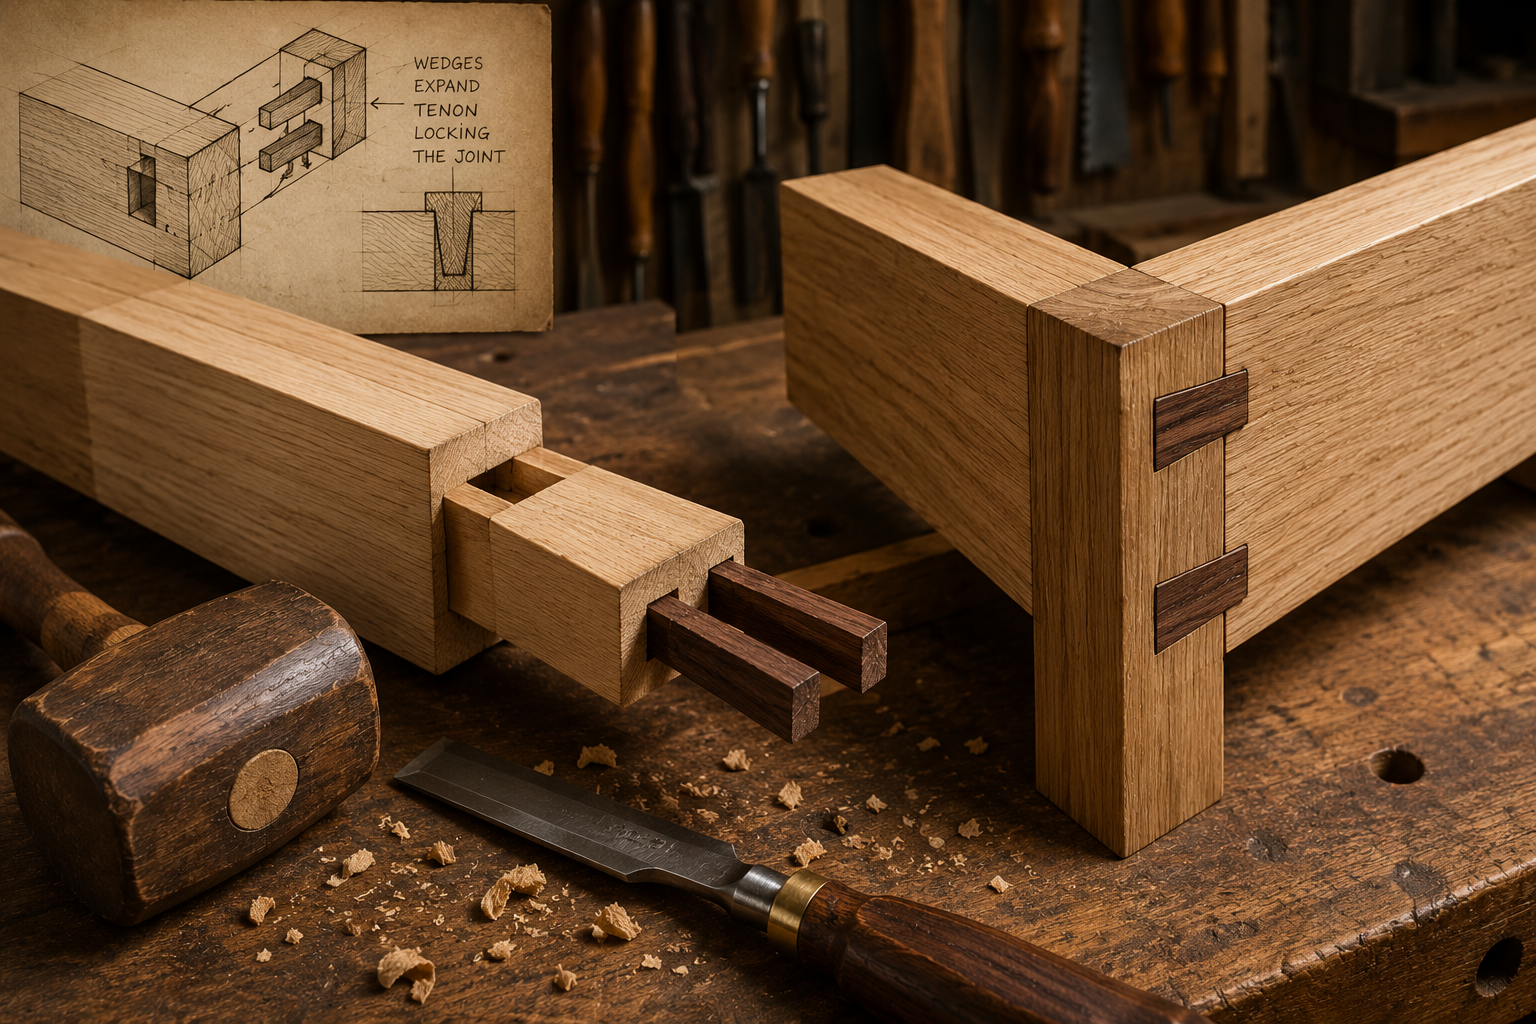
The Power of the Wedge
The principle behind wedged joints is simple yet profound: by expanding the tenon inside the mortise, the contact pressure between the tenon cheeks and the mortise walls is significantly increased. This greatly enhances the glue bond and creates a formidable mechanical lock.
- Resistance to Withdrawal: The expanded tenon acts like an anchor, making it virtually impossible to pull the joint apart without destroying the wood.
- Increased Racking Strength: By filling the mortise tightly, the wedged tenon dramatically improves the joint’s resistance to sideways forces.
- Decorative Potential: For through wedged tenons, contrasting wood species for the wedges can add a beautiful, intentional design element.
Constructing Wedged Tenon Joints
A. Through Wedged Tenon (Visible Wedges)
This is the more common and generally easier type to execute.
- Prepare the Tenon: Cut the tenon as you would for a standard through tenon. Before assembly, cut one or more saw kerfs (slots) into the end of the tenon. These kerfs should extend roughly 1/2 to 2/3 of the tenon’s length. The kerfs should be slightly wider at the opening to accommodate the wedge easily.
- Prepare the Wedges: Mill thin, tapered wedges from a strong, stable wood (often a contrasting species for aesthetic appeal). The taper should be gentle, not too steep, to prevent splitting the tenon. The thickness of the wedge should fit snugly into the saw kerf at its thickest point.
- Assemble and Wedge:
- Apply glue to the mortise and tenon.
- Drive the tenon fully into the mortise, ensuring the shoulders are tight.
- Insert the prepared wedges into the saw kerfs at the end of the tenon.
- Carefully tap the wedges into place with a mallet. As the wedges are driven in, they will spread the tenon, locking it into the mortise. Drive them until they are tight and secure, but avoid over-driving, which could split the mortise piece.
- Once the glue is dry, trim the protruding wedges and tenon end flush with the surface or shape them as desired. A Beginner’s Guide to Japanese Hand Saws might be useful for precise flush cutting.
B. Blind Wedged Tenon (Fox-Wedge)
This technique is more challenging but results in a completely hidden, incredibly strong joint.
- Prepare the Tenon: Cut the tenon to length, ensuring it’s slightly shorter than the depth of the blind mortise (allow for glue and wedge expansion). Cut one or more saw kerfs into the end of the tenon, stopping short of the tenon’s shoulders.
- Prepare the Wedges: Create wedges similar to the through tenon, but they must be slightly shorter than the depth of the mortise.
- Assemble and Force-Wedge:
- Crucially: Insert the wedges into the saw kerfs in the tenon, but do not glue them. The wedges should extend slightly beyond the end of the tenon.
- Apply glue to the mortise and tenon.
- As you drive the tenon into the blind mortise, the bottom of the mortise will act as a ramp, forcing the wedges into the tenon. This expands the tenon inside the mortise, creating the hidden lock.
- This method requires careful planning of tenon length, mortise depth, and wedge thickness to ensure the wedges expand the tenon fully without bottoming out too early or late.
Table: Comparative Characteristics of Mortise and Tenon Variations
| Feature | Basic Mortise & Tenon | Through Mortise & Tenon | Blind Mortise & Tenon | Wedged Through Tenon | Wedged Blind Tenon (Fox-Wedge) |
|---|---|---|---|---|---|
| Strength | Good | Excellent | Very Good | Superior | Superior |
| Aesthetics | Clean | Visible/Decorative | Hidden/Seamless | Visible/Decorative | Hidden/Seamless |
| Complexity | Moderate | Moderate to High | High | High | Very High |
| Withdrawal Resist. | Moderate | Good | Good | Excellent | Excellent |
| Racking Resist. | Good | Excellent | Very Good | Superior | Superior |
| Ease of Repair | Moderate | Difficult | Difficult | Extremely Difficult | Extremely Difficult |
| Tooling Req. | Standard | Standard/Specialized | Specialized | Standard/Specialized | Specialized |
| Application Examples | Frames, Doors | Chairs, Tables, Beds | Cabinet Doors, Legs | Heavy Frames, Benches | High-end Case Goods, Chairs |
Precision and Preparation: The Keys to Success
Regardless of the advanced mortise and tenon variation you choose, the success of the joint hinges on precision and thorough preparation.
- Sharp Tools: Dull chisels, saws, and router bits will tear wood fibers, leading to sloppy joints and frustration. Invest in good quality tools and keep them razor sharp. This is particularly important for delicate work, as detailed in our guide on Essential Hand Tools for Every Woodworker: A Comprehensive Guide to.
- Accurate Layout: “Measure twice, cut once” is not just a cliché; it’s a golden rule. Use sharp pencils, marking knives, and combination squares to ensure your lines are precise and square.
- Test Pieces: Especially when attempting a new variation or working with an unfamiliar wood species, create a test joint from scrap material. This allows you to fine-tune your cuts and adjust your technique without risking your project pieces.
- Grain Direction: Always consider grain direction when cutting mortises and tenons. Cutting against the grain can lead to tear-out, particularly at the edges of mortises.
- Glue Selection: Choose a high-quality wood glue appropriate for your project. For joints that require maximum strength, a PVA glue like Titebond III is often recommended.
- Clamping: Ensure even clamping pressure across the joint. Use cauls to protect your furniture surfaces from clamp marks.
By dedicating time to these fundamental practices, you lay the groundwork for flawless execution of Advanced Mortise and Tenon Variations: Through, Blind, and Wedged Joints for Fine Furniture, transforming your woodworking projects into durable, beautiful heirlooms.
Conclusion
The journey into advanced mortise and tenon variations is a rewarding one, unlocking new levels of strength, stability, and aesthetic sophistication in your fine furniture projects. Whether you opt for the honest, robust presence of a through tenon, the seamless elegance of a blind tenon, or the unyielding mechanical lock of a wedged joint, each technique offers distinct advantages that can elevate your craftsmanship. In 2026, as appreciation for handcrafted, durable goods continues to grow, mastering these classic joints is more relevant than ever.
To truly excel, embrace meticulous layout, maintain razor-sharp tools, and practice on scrap material. These advanced techniques require patience and attention to detail, but the resulting joints are a testament to the woodworker’s skill, providing heirloom quality and lasting beauty. By thoughtfully applying these advanced mortise and tenon variations, you are not just building furniture; you are crafting legacies that will be cherished for generations.
Advanced Mortise and Tenon Variations: Through, Blind, and Wedged Joints for Fine Furniture, mortise and tenon, fine woodworking, furniture joinery, through tenon, blind tenon, wedged tenon, fox-wedge, heirloom furniture, woodworking techniques, joinery strength