
The average outdoor wooden table succumbs to the elements within 3-5 years without proper construction and finishing. Imagine instead a beautiful, durable round table gracing your patio for a decade or more, a testament to thoughtful craftsmanship. Building a DIY Round Table for Outdoor Patios: Weather-Resistant Wood and Finishing for Longevity is not merely a woodworking project; it’s an investment in enduring outdoor living, requiring specific material choices and application techniques to defy nature’s wear. This guide will equip you with the knowledge to create a piece that stands strong against sun, rain, and fluctuating temperatures for years to come.
Key Takeaways
- Selecting truly weather-resistant wood like teak, cedar, or redwood is paramount for outdoor furniture longevity.
- Robust joinery techniques, such as mortise and tenon or bridal joints, are crucial for structural integrity against environmental stresses.
- Proper sealing and finishing with outdoor-specific products like spar varnish or marine-grade oils are essential for water and UV protection.
- Regular maintenance, including cleaning and reapplication of finishes, significantly extends the life of your DIY outdoor table.
- Careful planning, from design to material selection, ensures your round patio table will endure and look great for many years.
Selecting Weather-Resistant Wood for Your Outdoor Patio Table
The foundation of any long-lasting outdoor furniture project lies in the choice of wood. Not all wood species are created equal when it comes to battling the relentless forces of nature, moisture, UV radiation, insects, and rot. For a DIY Round Table for Outdoor Patios: Weather-Resistant Wood and Finishing for Longevity, opting for the right material is the first and most critical step.
Top Wood Choices for Outdoor Durability
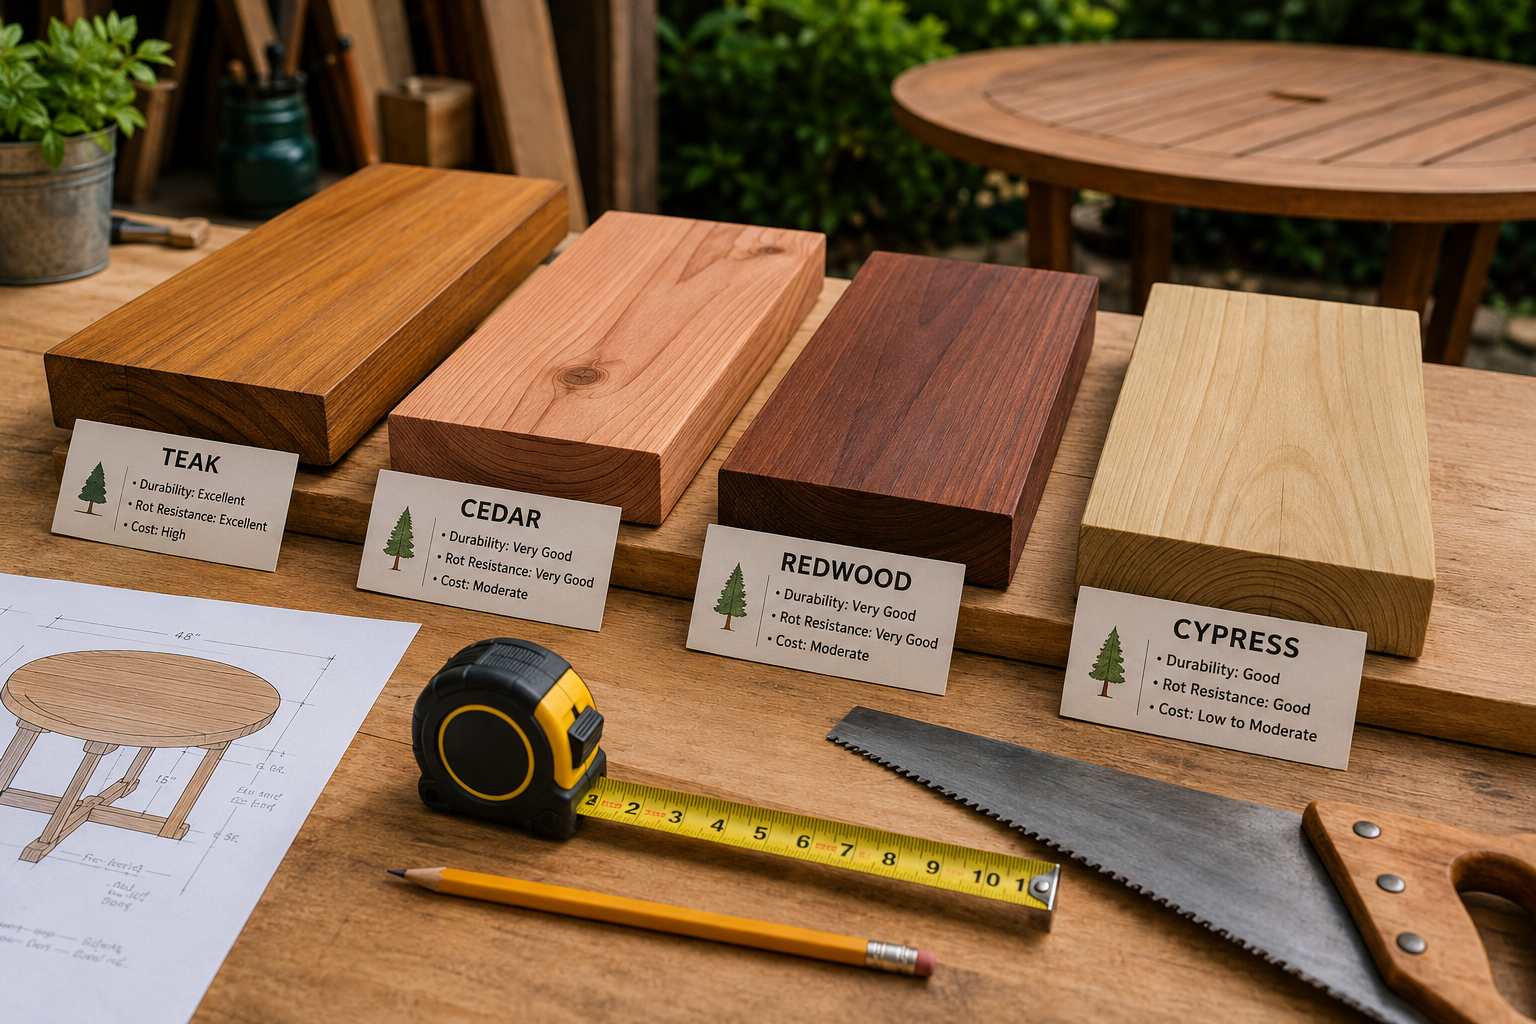
Several wood species naturally possess properties that make them highly resistant to decay and insect infestation, crucial for outdoor applications.
- Teak: Widely considered the gold standard for outdoor furniture, teak is exceptionally durable, resistant to rot, pests, and even fire. Its high oil content provides natural waterproofing. While expensive, its longevity often justifies the initial investment.
- Cedar (Western Red Cedar): A popular and more affordable option, Western Red Cedar is lightweight, naturally resistant to decay and insects, and weathers beautifully to a silvery-gray patina if left untreated. It’s also relatively easy to work with.
- Redwood: Similar to cedar in its natural resistance to decay and insects, redwood is another excellent choice. It’s known for its striking red hue and straight grain. Sustainable sourcing is a consideration with redwood.
- Cypress: Often overlooked, cypress shares many of the desirable traits of cedar and redwood, offering good decay and insect resistance due to its natural preservative oils. It’s a durable option, especially for humid environments.
- Pressure-Treated Lumber: While not a specific wood species, pressure-treated lumber (typically pine, spruce, or fir) is infused with chemical preservatives to resist rot and insects. It’s an economical choice but requires specific handling and finishing due to its chemical treatment. Ensure it’s rated for ground contact for maximum durability, though it’s best to avoid direct ground contact even then.
Understanding Wood Properties for Outdoor Use
When evaluating wood, consider these key properties:
- Density: Denser woods tend to be stronger and more durable.
- Natural Oils/Resins: Woods with high natural oil content (like teak) are inherently more water-repellent and rot-resistant.
- Heartwood vs. Sapwood: Heartwood, the older, inner wood, is generally more durable and resistant to decay than sapwood, the younger, outer wood. Prioritize heartwood when possible.
- Stability: Woods that are less prone to warping, twisting, or checking (cracking) due to moisture fluctuations are better for outdoor furniture.
| Wood Type | Durability Rating (1-5, 5 being highest) | Cost ($, $ $$, $ $ $$, $ $$$) | Natural Rot/Insect Resistance | Maintenance Needs (Low/Med/High) | Workability (Easy/Med/Hard) |
|---|---|---|---|---|---|
| Teak | 5 | $$$$ | Excellent | Low (if left to weather) | Medium |
| Western Red Cedar | 4 | $$ | Very Good | Low | Easy |
| Redwood | 4 | $$$ | Very Good | Low | Easy |
| Cypress | 4 | $$ | Very Good | Low | Easy |
| Pressure-Treated | 3-4 (due to treatment) | $ | Good (due to treatment) | Medium | Easy |
For those looking to craft custom pieces, understanding the inherent qualities of different wood types can significantly impact the final product’s longevity and aesthetic appeal. Explore resources on sourcing and selecting reclaimed urban lumber if you’re interested in unique, character-rich materials that can also be weather-resistant with proper treatment.
Essential Joinery and Construction for an Enduring Round Patio Table
Beyond material selection, the structural integrity of your DIY Round Table for Outdoor Patios: Weather-Resistant Wood and Finishing for Longevity hinges on robust joinery and thoughtful construction. Outdoor furniture is subjected to constant expansion and contraction due to temperature and humidity changes, making strong, flexible joints paramount.
Designing the Round Table Top
A round tabletop can be constructed in several ways:
- Segmented Top: This involves cutting individual wedges or segments that are then glued together to form a circle. This method can create intricate patterns and is very stable if done correctly.
- Laminated Strips: Straight boards are glued edge-to-edge to form a large square, which is then cut into a circle. This is a common and relatively straightforward method for achieving a solid top. Ensure the grain direction alternates between boards to minimize warping.
- Plywood Base with Solid Wood Veneer: For larger tables, a marine-grade plywood base can provide stability, with solid wood planks or veneer glued on top. This reduces weight and material cost but requires meticulous sealing of all edges.
When joining boards for the tabletop, consider using the ultimate guide to wood glue to select a waterproof, outdoor-rated adhesive. Titebond III or epoxy resins are excellent choices for their water resistance and strength.
Strong Joinery for Legs and Aprons
The connection between the legs and the tabletop apron (the frame directly beneath the top) is a critical stress point. Weak joints here will lead to wobbling and eventual failure.
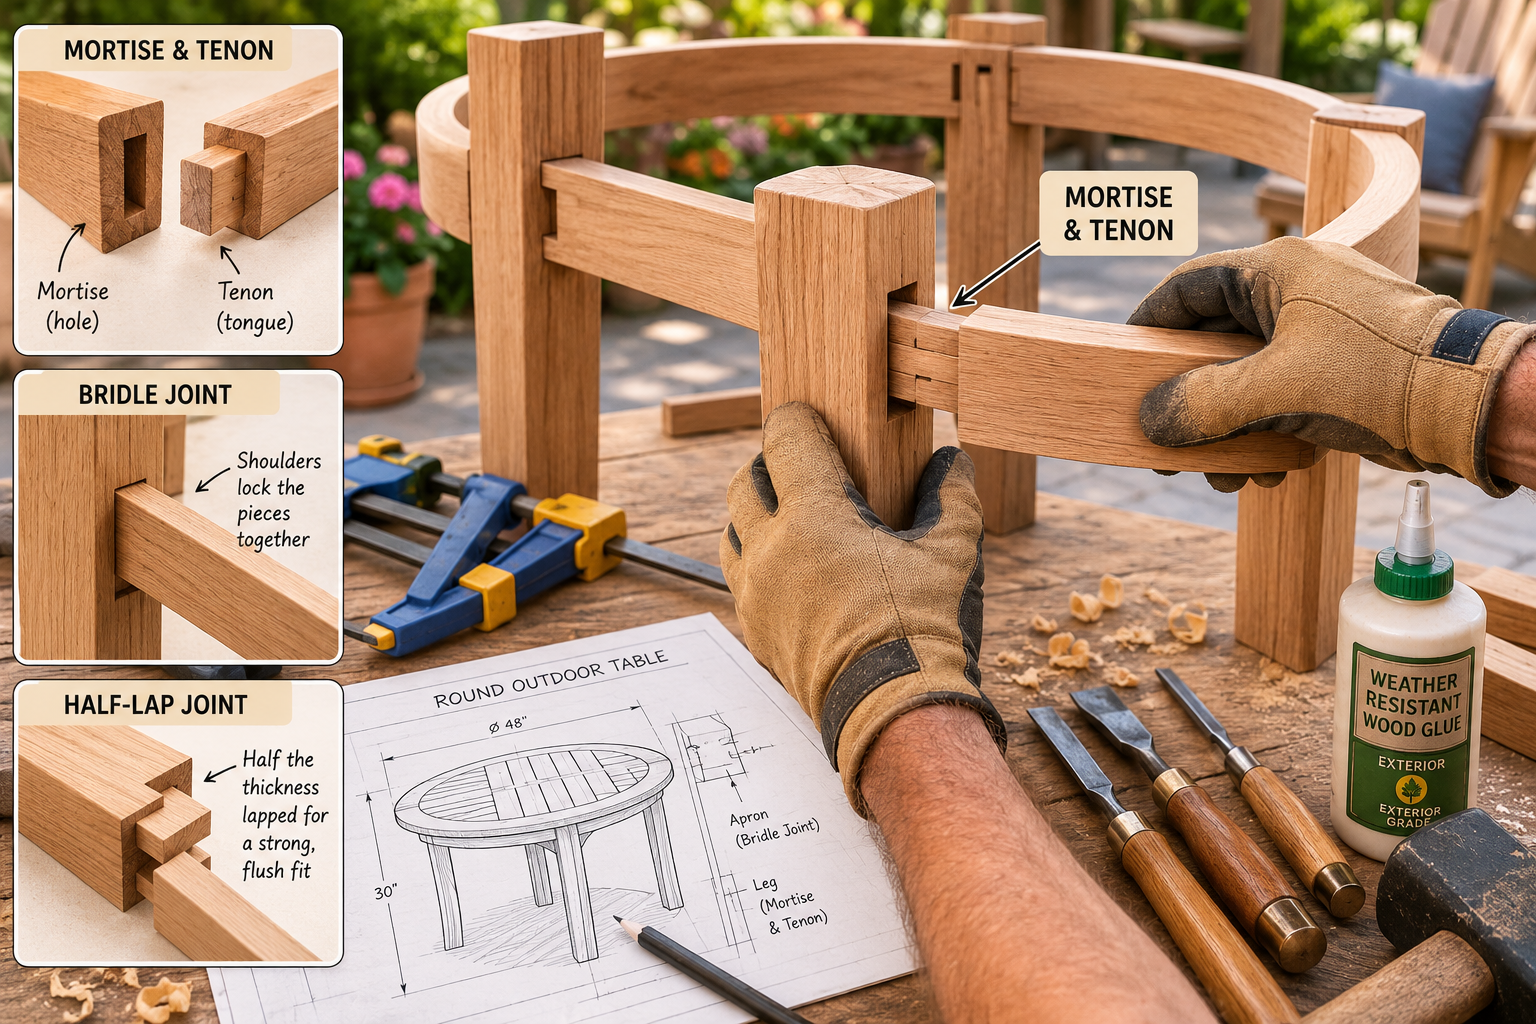
- Mortise and Tenon Joints: This classic woodworking joint offers exceptional strength and resistance to racking. A tenon (a projection) on one piece fits precisely into a mortise (a cavity) in the other. For outdoor use, ensuring a tight fit and using waterproof glue is essential.
- Bridle Joints: Similar to mortise and tenon but with an open-ended mortise, bridle joints provide significant surface area for gluing, making them very strong. They are often used for connecting rails to legs.
- Half-Lap Joints: Where pieces cross or meet at an angle, half-lap joints offer a good balance of strength and ease of construction. They involve removing half the thickness from each piece, allowing them to interlock flush.
- Pocket Hole Joinery: While often used for convenience, pocket hole screws alone may not provide sufficient long-term strength for heavy outdoor tables under constant environmental stress. If used, supplement them with wood glue and consider reinforcing with additional joinery or larger screws.
Always use stainless steel or exterior-grade screws and hardware to prevent rust and staining on your beautiful wood. Rust can quickly compromise the integrity of the structure and mar the aesthetics.
Stability Considerations for Round Tables
Round tables, particularly those with a central pedestal or fewer than four legs, require careful attention to base design to prevent tipping.
- Central Pedestal Base: If opting for a single, central pedestal, ensure the base spread is wide enough to provide ample stability. A good rule of thumb is that the base diameter should be at least 60-70% of the tabletop diameter. Heavy construction and wide feet are crucial.
- Four-Leg Design: For a four-leg design, ensure the legs are adequately splayed outwards or connected with robust stretchers (lower rails) to enhance stability. The apron system connecting the legs directly under the tabletop also contributes significantly to stability. For guidance on appropriate support, consider our article on table base width for stability.
Key Construction Tips:
- Dry Fit Everything: Before applying any glue, assemble all components without adhesive to ensure proper fit and alignment.
- Use Clamps Liberally: Clamps are your best friend for joinery, ensuring tight bonds while glue sets.
- Square and Plumb: Regularly check for squareness and plumb during assembly to avoid a wobbly or uneven table.
- Sanding: Sand all surfaces thoroughly before assembly and finishing, progressively moving to finer grits for a smooth, inviting feel.
By focusing on these structural elements and joinery techniques, you can ensure your DIY Round Table for Outdoor Patios: Weather-Resistant Wood and Finishing for Longevity is not only beautiful but also built to last.
Finishing Techniques for Maximum Longevity and Weather Resistance
The final step in ensuring your DIY Round Table for Outdoor Patios: Weather-Resistant Wood and Finishing for Longevity endures is the application of a high-quality, weather-resistant finish. This protective layer shields the wood from moisture, UV radiation, and mildew, which are the primary culprits in outdoor furniture deterioration.
Choosing the Right Outdoor Finish
Several types of finishes are suitable for outdoor wood furniture, each offering different levels of protection and aesthetic qualities:
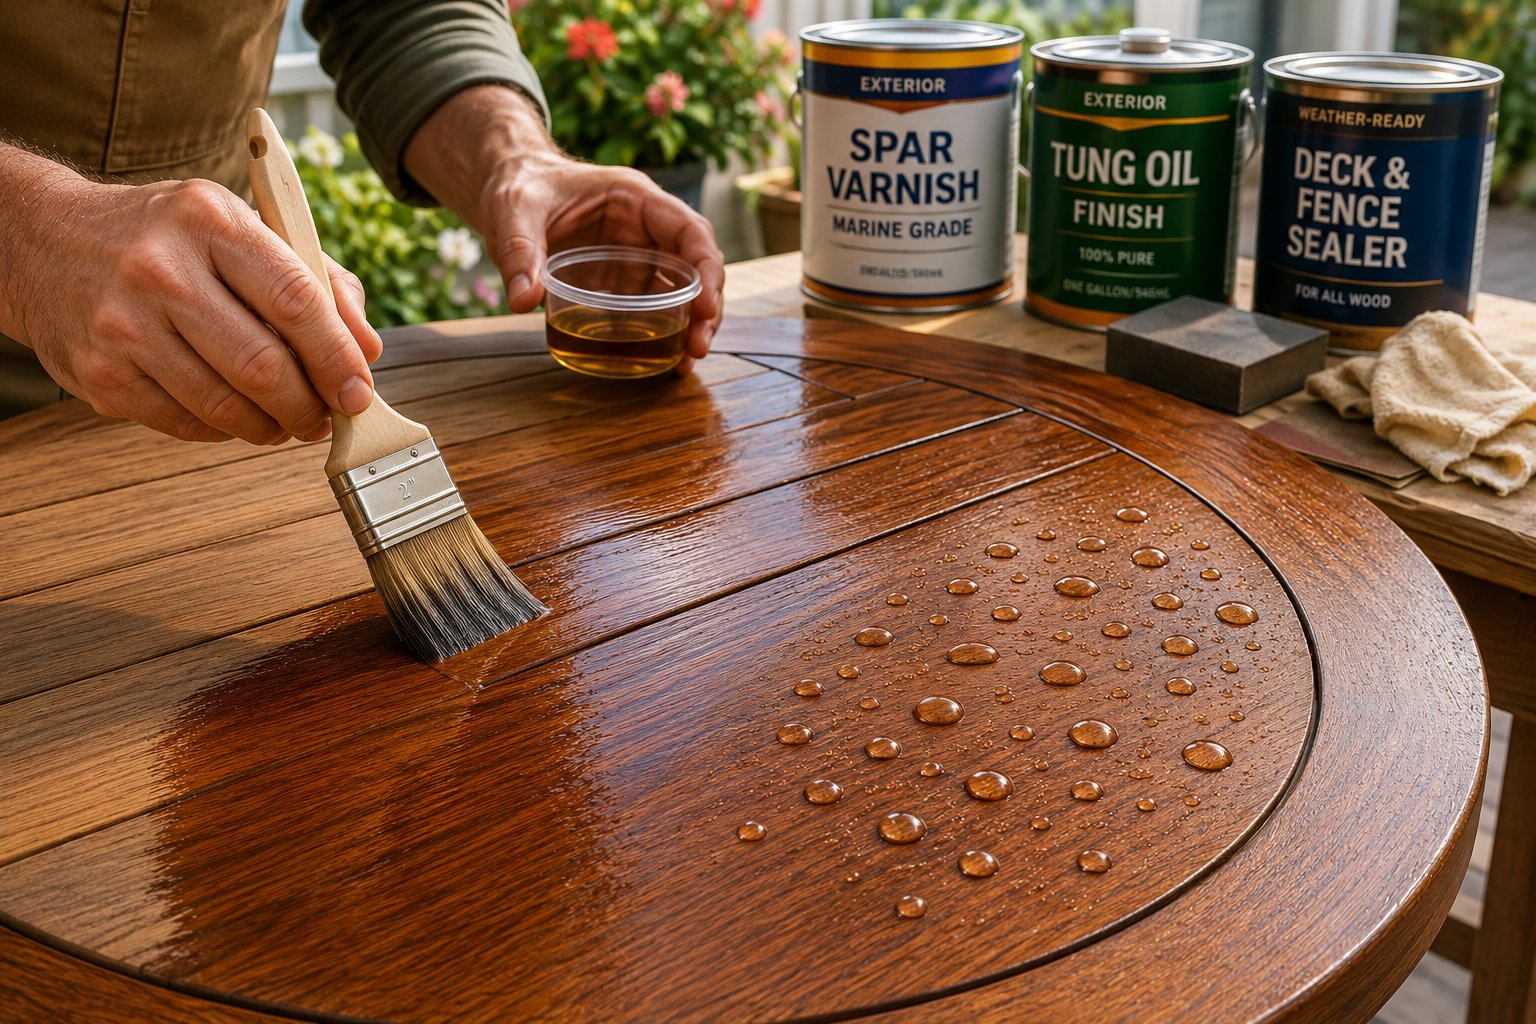
- Spar Varnish: Originally developed for marine applications, spar varnish is an excellent choice. It contains resins that allow it to flex with the wood’s natural expansion and contraction, preventing cracking and peeling. It offers superb UV protection and creates a durable, glossy, or satin film. Multiple coats are essential for maximum protection.
- Exterior Oil Finishes: Penetrating oil finishes (like teak oil or tung oil blends) soak into the wood rather than forming a surface film. They enhance the wood’s natural color and provide good water repellency. They are easier to reapply than film-forming finishes, as you simply clean and re-oil, without needing to strip. However, they may require more frequent reapplication (annually) compared to varnish.
- Exterior Paint: While paint offers opaque color, it creates a thick, protective barrier. Ensure you use exterior-grade paint with a good primer. The main drawback is that paint can chip and peel over time, requiring sanding and re-painting. However, it completely shields the wood from UV rays.
- Wood Sealers/Preservatives: These products contain fungicides and water repellents that penetrate the wood, preventing rot and mildew. They can be clear or tinted and are often used as a base coat before other finishes or as a standalone finish for a more natural look.
Application Best Practices
Proper application is as important as the finish itself.
- Cleanliness is Key: Ensure the wood is absolutely clean, dry, and free of dust or grease before applying any finish. Sand all surfaces smoothly, then wipe with a tack cloth or mineral spirits.
- Temperature and Humidity: Apply finishes in a shaded area with moderate temperatures (typically 50-85°F or 10-30°C) and low to moderate humidity. Avoid direct sunlight, which can cause finishes to dry too quickly and improperly.
- Thin Coats: Apply several thin coats rather than one thick coat. Thin coats cure more effectively, adhere better, and are less prone to problems like bubbles or drips. Lightly sand between coats with a fine-grit sandpaper (e.g., 220-320 grit) to ensure good adhesion.
- Edge Sealing: Pay particular attention to end grain (the cut ends of the wood), as it absorbs moisture much faster than face grain. Apply extra coats of finish to all end grain to seal it thoroughly.
- Drying Time: Allow ample drying time between coats and before putting the table into service. Rushing this step can compromise the durability of the finish.
For a deeper dive into various finishing techniques that can enhance both protection and aesthetic, our guide on wood finishing techniques offers valuable insights. Also, consider specialized techniques discussed in cool wood finishing techniques for unique effects.
Ongoing Maintenance for Longevity
Even with the best wood and finish, outdoor furniture requires ongoing care.
- Regular Cleaning: Wash your table periodically with mild soap and water to remove dirt, pollen, and mildew. Rinse thoroughly and allow to dry completely.
- Inspect Annually: Once a year, inspect the table for any signs of wear on the finish, such as peeling, cracking, or dullness. Address these promptly.
- Reapply Finish:
- Oil Finishes: Reapply typically every 6-12 months, or when the wood starts to look dry and dull.
- Varnish: Reapply every 2-5 years, depending on sun exposure and wear. Lightly sand the old finish before applying new coats.
- Winter Storage: If possible, store your outdoor table indoors or under a protective cover during harsh winter months to significantly extend its life.
By diligently following these finishing and maintenance guidelines, your DIY round patio table will remain a beautiful and functional centerpiece for your outdoor space for many seasons to come.
Conclusion
Creating a DIY Round Table for Outdoor Patios: Weather-Resistant Wood and Finishing for Longevity is a rewarding project that blends practical woodworking skills with the joy of crafting a lasting piece for your home. By meticulously selecting weather-resistant wood, employing robust joinery techniques, and applying appropriate, high-quality outdoor finishes, you can build a table that not only withstands the elements but also becomes a cherished part of your outdoor living area for years.
The journey from raw lumber to a finished, durable patio table emphasizes the importance of informed choices at every stage. From the inherent durability of teak or cedar to the structural integrity provided by mortise and tenon joints, and finally, the protective shield of spar varnish, each decision contributes to the table’s resilience.
Actionable Next Steps
- Research Wood Suppliers: Begin by identifying local or online suppliers for your chosen weather-resistant wood. Compare prices and availability.
- Gather Tools and Materials: Ensure you have all necessary woodworking tools, outdoor-rated glues, fasteners, and finishing products before you start. Consider referencing guides like building a custom wood workbench to ensure your workspace is ready.
- Develop a Detailed Plan: Sketch your design, including dimensions, joinery types, and leg configuration. This will prevent costly mistakes and streamline the building process.
- Practice Joinery: If you’re new to specific joinery techniques, practice on scrap wood until you’re confident in your execution. For complex joints, our article on mastering dovetail joints with hand tools can provide foundational skills relevant to other precise joinery.
- Commit to Maintenance: Plan for annual inspections and finish reapplication to maximize your table’s lifespan.
By embracing these principles and dedicating attention to detail, you won’t just build a table; you’ll create an heirloom that enhances your outdoor living experience for countless seasons.
SEO Meta Title: DIY Round Outdoor Table: Weather-Resistant Wood & Finish SEO Meta Description: Build a lasting DIY round outdoor patio table with weather-resistant wood and durable finishing techniques for longevity. Expert guide for 2026.