
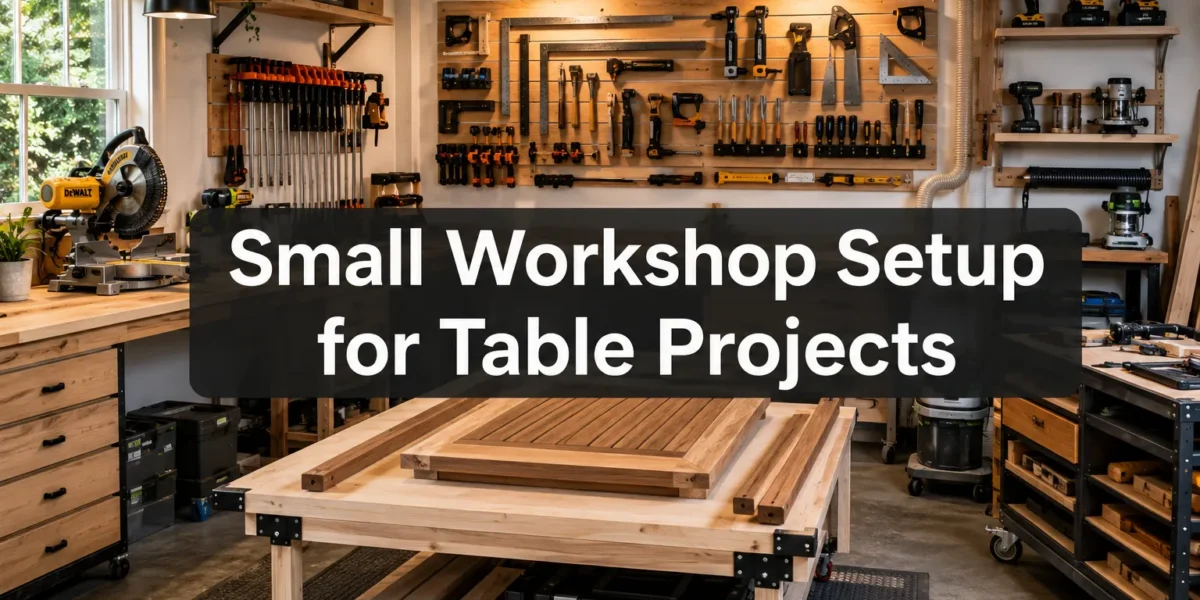
The seemingly simple act of building a table can quickly transform a small workshop into a chaotic jumble of tools, lumber, and sawdust if the layout isn’t meticulously planned. Many woodworkers, even those with limited square footage, struggle with optimizing their space to support the often-large and multi-stage process of table construction, from initial milling to final assembly and finishing. A well-considered Small Workshop Setup for Table Projects: How to Arrange Your Tools Around a Central Assembly Table is not merely about tidiness; it’s about establishing an efficient workflow, maximizing productivity, and ensuring safety, all while making the most of every available inch. This guide will explain how to design a compact yet highly functional workshop focused on the unique demands of building tables, ensuring your tools are always within reach and your projects progress smoothly.
Key Takeaways
- A central, multi-functional assembly table is the cornerstone of an efficient small workshop for table projects.
- Arrange primary milling tools (table saw, planer, jointer) in a workflow path that feeds directly towards the assembly table, considering infeed and outfeed clearance.
- Prioritize mobile tool bases and multi-use tools to adapt the workshop layout for different project stages.
- Implement smart, accessible storage solutions, keeping frequently used tools close to the central workspace.
- Integrate effective dust collection and task lighting to maintain a safe, clean, and productive environment.
The Central Assembly Table: The Heart of Your Small Workshop Setup for Table Projects
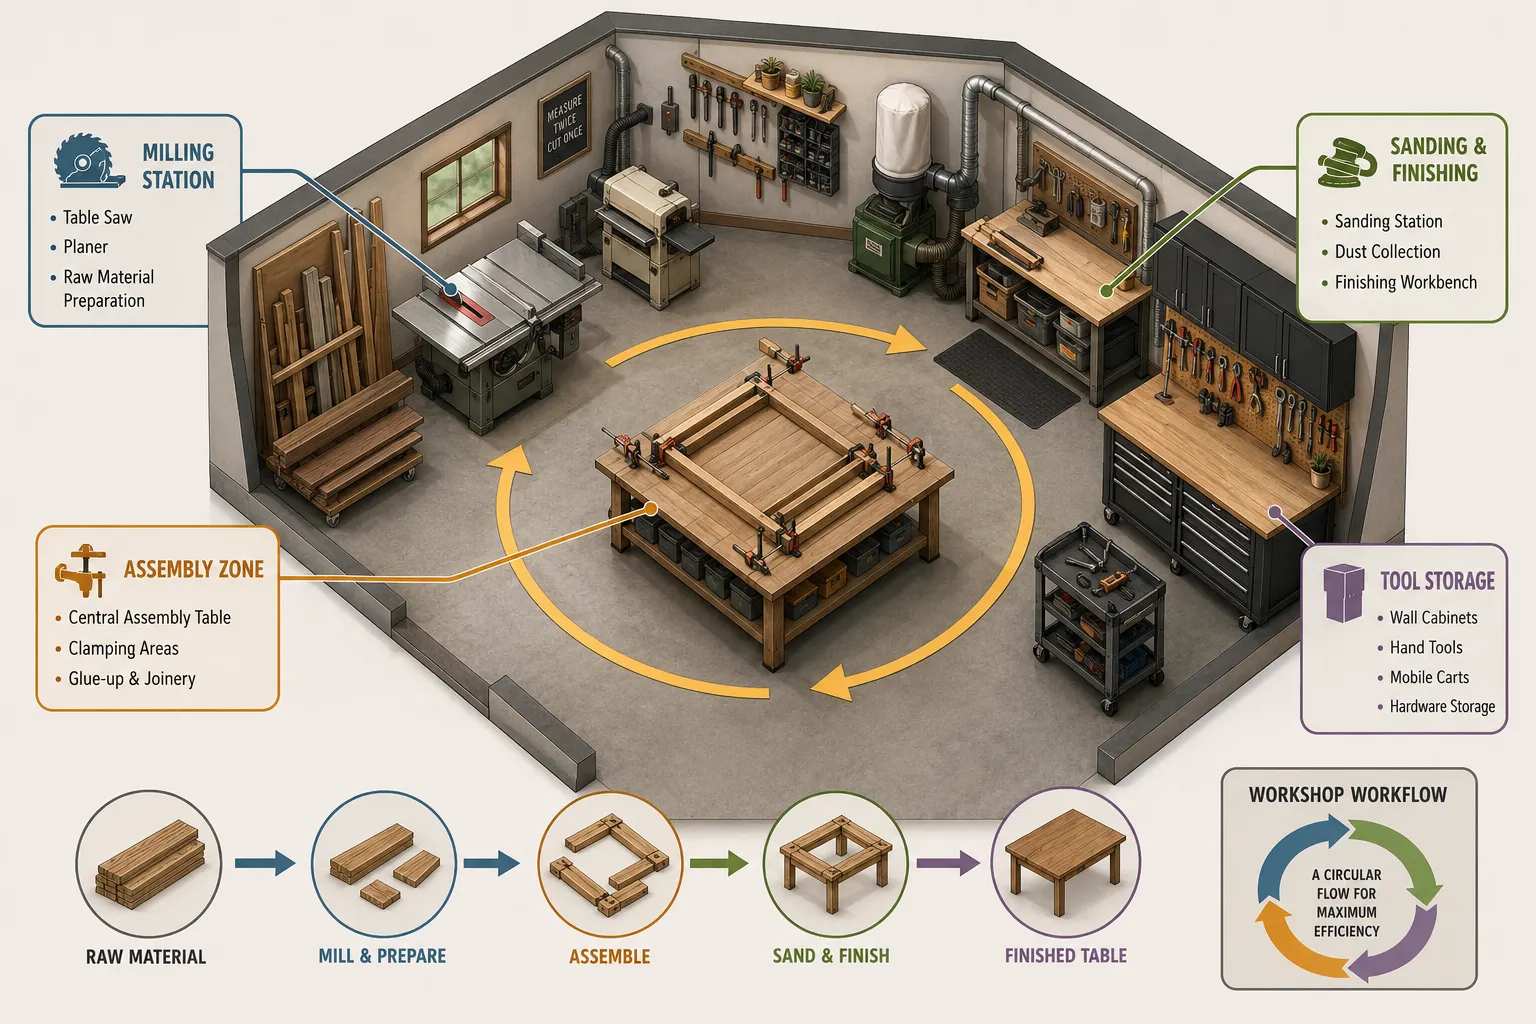
For anyone tackling table projects in a confined space, the central assembly table is arguably the most critical piece of workshop furniture. It’s more than just a surface; it’s the command center where components come together, joinery is refined, and glue-ups are executed. Optimizing its placement and features directly impacts the efficiency of your Small Workshop Setup for Table Projects: How to Arrange Your Tools Around a Central Assembly Table.
Design Principles for Your Central Table
A truly effective central assembly table should embody several key characteristics:
- Size and Mobility: Aim for the largest table that allows for comfortable movement around all four sides. If space is severely limited, consider a collapsible or folding design, or one on heavy-duty casters so it can be moved or temporarily stored against a wall. The ability to move the table is invaluable when you need extra room for long material breakdown or when connecting with other stationary tools.
- Stability and Flatness: Crucial for accurate work, the table must be incredibly stable and have a perfectly flat surface. Any wobbles or unevenness will compromise joinery and assembly. A torsion box design is often recommended for its rigidity.
- Integrated Features: Consider building in dog holes, T-track channels, or cam clamps directly into the tabletop. These features make clamping irregular shapes or large assemblies much easier and more secure. A built-in vise can also be incredibly useful for smaller tasks or holding components during assembly.
- Storage and Accessibility: The area beneath your central assembly table is prime real estate. Incorporate drawers, shelves, or even custom compartments to store frequently used hand tools, glues, clamps, and project-specific hardware. This keeps essential items within arm’s reach without cluttering the main work surface.
Positioning the Central Table for Optimal Flow
The placement of your central assembly table dictates the overall workflow. It should be located to facilitate material flow from milling and preparation stages, through assembly, and finally to finishing.
Consider a layout where raw lumber enters a processing zone (e.g., near a miter saw or panel saw), then moves to thicknessing and jointing (planer, jointer), then to precision cuts (table saw, router table), and finally to the central assembly table. This “U” or “L” shaped flow minimizes unnecessary movement and material handling.
When building large items like a DIY Live Edge Dining Table Step By Step Build For 2026 Trends or a Craft Your Dream Farmhouse Dining Table The Ultimate 2025 Diy Guide, having the central table readily accessible from multiple sides is essential for clamping and alignment.
Arranging Your Tools Around a Central Assembly Table
Once your central assembly table is positioned, the next critical step is to arrange your other tools to support it effectively. The goal is to create a seamless workflow that prioritizes safety, efficiency, and ergonomic access, especially within a limited footprint. This is paramount for a functional Small Workshop Setup for Table Projects: How to Arrange Your Tools Around a Central Assembly Table.
Stationary Tools: Strategic Placement for Flow
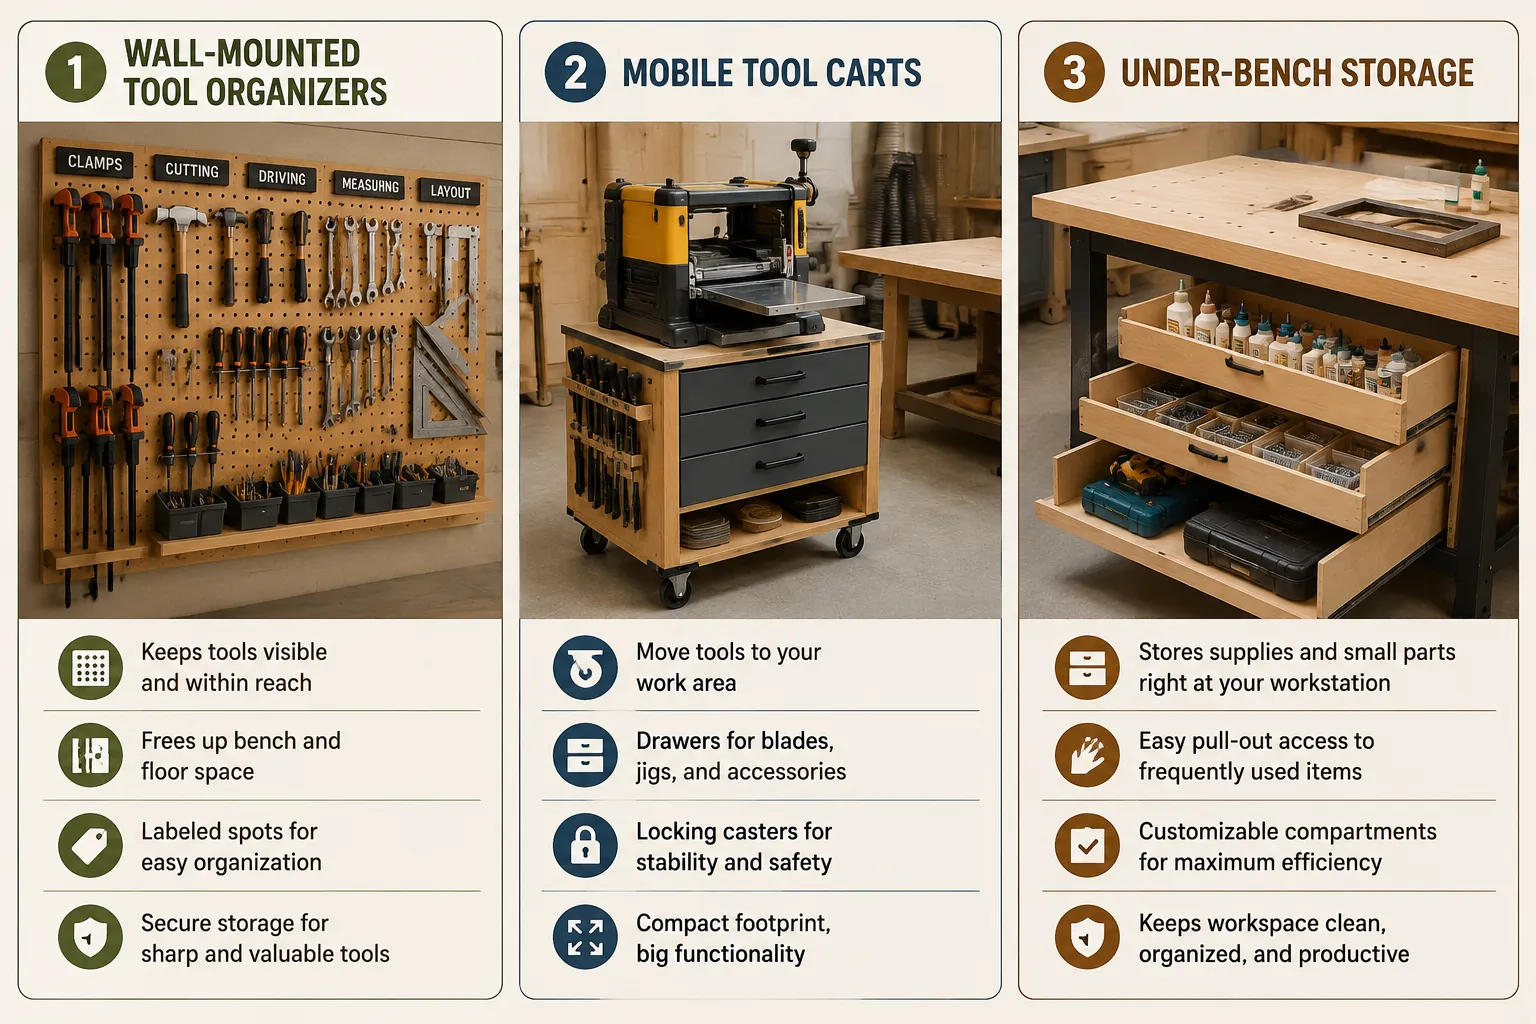
Stationary power tools form the backbone of your milling process. Their placement should consider infeed and outfeed requirements, as well as their relationship to the central assembly table.
- Table Saw: Position your table saw (e.g., a Craftsman 12 Inch Table Saw Overview Comparisons Setup Tips And More) so that its outfeed can be supported by your central assembly table or a dedicated outfeed table. This is crucial for safely handling long or wide panels, common in table construction. Ensure ample space in front and behind for material handling. Mobile bases are incredibly useful for moving a table saw out of the way when not in use, or closer to the assembly table for specific cuts.
- Jointer and Planer: These are often used in sequence. If space allows, place them near each other. Consider small, portable models or combo machines to save space. Again, ensuring enough clearance for long boards is vital. Their output should ideally be directed towards the assembly area.
- Miter Saw: Often used for cross-cutting components before assembly. A dedicated miter saw station with integrated storage and flip-up extensions can save space and improve accuracy. It can be placed along a wall, allowing for long stock to be processed without obstructing the central area.
- Router Table: A dedicated router table, possibly integrated into a workbench or on a mobile cart, should be easily accessible. For detailed joinery or edge profiling, you might want it close to your assembly table. For ideas on building one, see Building Your First Router Table Essential Features And Diy Construction For Precision Routing.
Hand Tools and Portable Power Tools: Keep Them Close
Hand tools and portable power tools are used constantly during assembly. They should be stored within an arm’s reach of your central assembly table.
| Tool Category | Storage Strategy | Examples |
|---|---|---|
| Measuring & Marking | Easily accessible, dedicated spots | Combination squares, tape measures, marking gauges, pencils. |
| Clamping | Under or next to the assembly table | Bar clamps, pipe clamps, F-clamps, specialized edge clamps. |
| Assembly Tools | Drawers or wall storage near the central table | Drills, drivers, impact drivers, chisels, mallets, screwdrivers, wrenches. |
| Sanding & Finishing | A dedicated mobile cart or corner workstation | Orbital sanders, sanding blocks, sandpaper, finishing supplies. |
Mobile carts are invaluable for keeping portable tools organized and easily moved to different workstations. A rolling cart with drawers or shelves can hold drills, batteries, chargers, and frequently used jigs, allowing you to bring everything you need directly to the assembly table. This flexibility is a hallmark of an effective Small Workshop Setup for Table Projects: How to Arrange Your Tools Around a Central Assembly Table.
Optimizing Storage and Workflow in a Compact Workshop
Efficient storage and a streamlined workflow are not luxuries but necessities in a small workshop dedicated to table projects. Maximizing every square foot requires thoughtful planning and often creative solutions.
Vertical Storage and Mobile Solutions
When floor space is limited, the walls become your most valuable real estate.
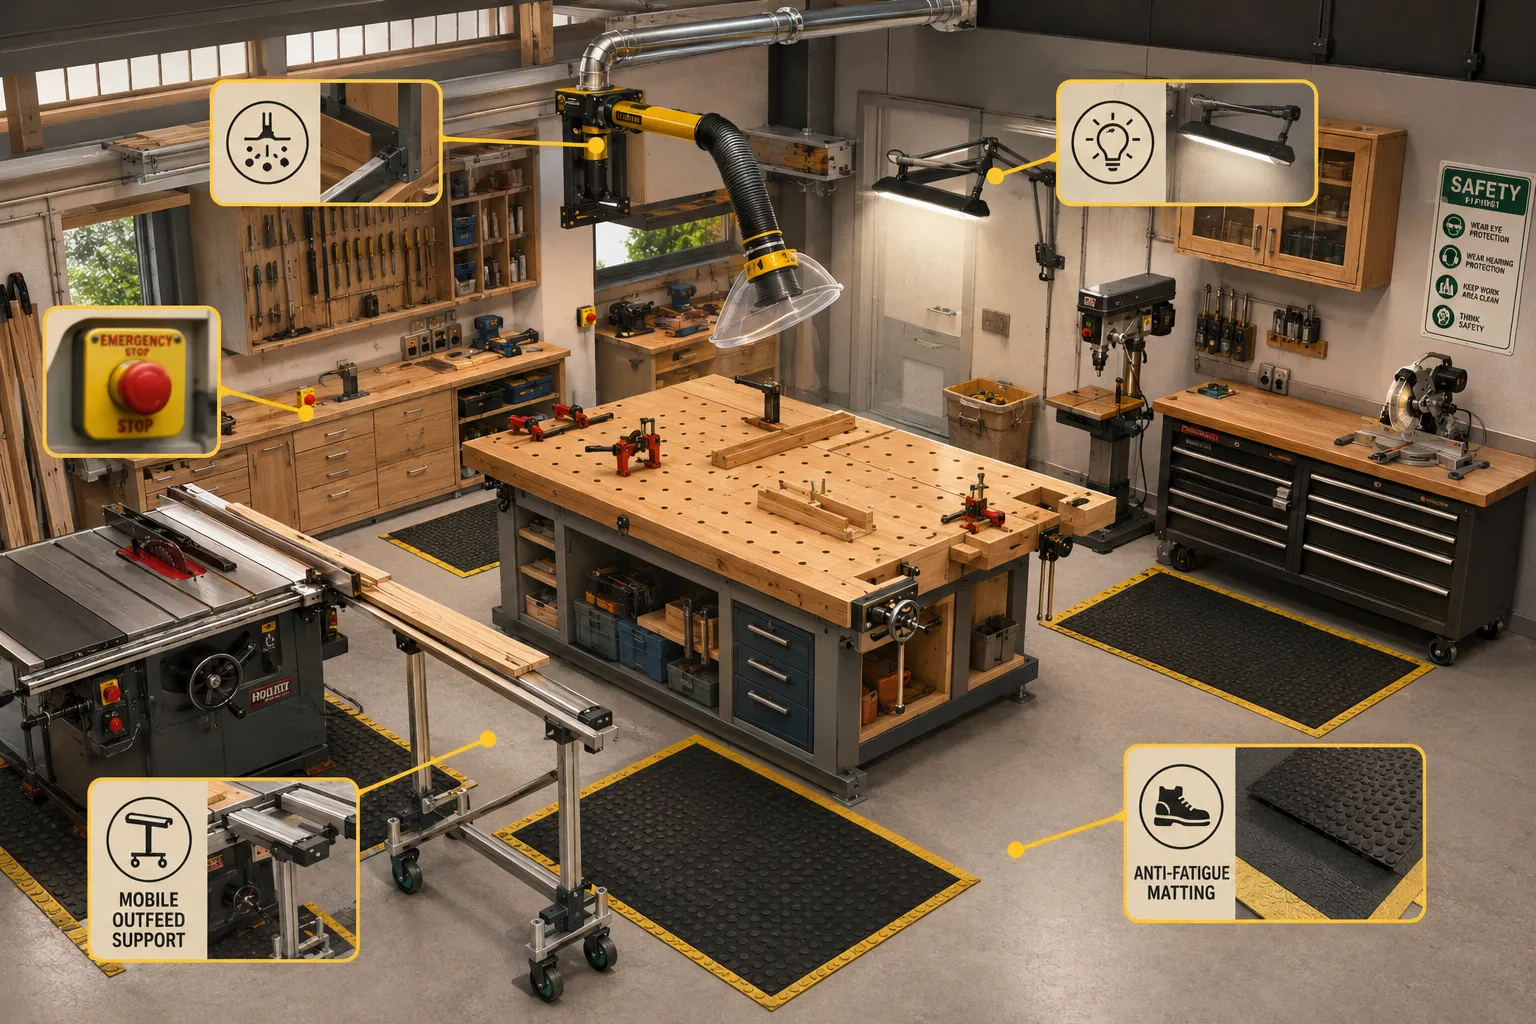
- Wall-Mounted Storage: Pegboards, slat walls, and custom-built cabinets or shelves should be utilized extensively. Hang clamps, hand saws, measuring tools, and frequently used power tools directly on the wall near their point of use. This keeps them off your precious workbench space.
- Mobile Tool Carts: Beyond primary stationary tools, consider building or buying mobile carts for specific tasks or tool groups. A dedicated “sanding station” cart could hold sanders, sandpaper, and a shop vacuum. A “router cart” could house your router, bits, and jigs. These can be rolled out when needed and tucked away when not, maintaining a flexible workspace. For more ideas, explore Diy Smart Workshop Storage Solutions Maximizing Space And Organization For Every Tool.
- Under-Bench Storage: The space beneath your central assembly table, workbenches, or miter saw station can be fitted with drawers, pull-out bins, or enclosed cabinets. This is ideal for fasteners, glues, finishes, and less frequently used hand tools.
Workflow Enhancements and Ergonomics
A well-arranged workshop goes beyond just tool placement; it considers the human factor, how you move, reach, and interact with your tools and materials.
- Dust Collection: Woodworking generates a lot of dust, especially during milling and sanding. A robust dust collection system is vital for health and cleanliness. Position your main dust collector to connect easily to your primary dust-producing tools (table saw, planer). Consider a dedicated branch or small shop vac for your central assembly table when doing hand sanding or light routing. An Automated Dust Collection System can significantly improve air quality.
- Lighting: Good lighting prevents errors and reduces eye strain. Supplement overhead ambient lighting with task lighting (LED strip lights, adjustable lamps) over your central assembly table, table saw, and other precision workstations.
- Ergonomics: Design your workspace to minimize bending, reaching, and heavy lifting. Adjustable-height benches or a central assembly table at a comfortable working height can make a significant difference. Consider anti-fatigue mats around areas where you stand for extended periods. For more on creating ergonomic spaces, see Creating Ergonomic Workshop Layouts Maximizing Space And Workflow In Small To Medium Sized Woodworking Shops.
- Power Access: Ensure sufficient outlets are available and safely located. Consider retractable power reels or strategically placed power strips to avoid tripping hazards.
- Safety Gear: Designate a specific, easily accessible spot for safety glasses, hearing protection, and respirators. Safety should always be a top priority in any woodworking environment.
By systematically addressing each of these elements, even a small space can be transformed into a highly productive and enjoyable woodworking workshop, perfectly tailored for creating beautiful tables and other furniture pieces in 2026.
Conclusion
Creating an efficient Small Workshop Setup for Table Projects: How to Arrange Your Tools Around a Central Assembly Table is an iterative process of planning, building, and refining. The core principle lies in establishing a central, multi-functional assembly table as the anchor, around which all other tools and processes intelligently revolve. By prioritizing strategic tool placement for optimal workflow, investing in mobile and vertical storage solutions, and integrating essential features like effective dust collection and task lighting, woodworkers can transform even the most constrained spaces into highly productive environments.
The journey of building tables, from milling raw lumber to the final glue-up, demands a workspace that minimizes wasted motion and maximizes accessibility. As you continue to build, observe your workflow, identify bottlenecks, and adapt your layout. A well-organized, ergonomic workshop not only enhances your efficiency but also elevates the enjoyment and precision of your craft.
Actionable Next Steps:
- Map Your Space: Draw a scaled diagram of your workshop.
- Define Your Central Table: Determine the ideal size and features for your central assembly table, considering its mobility and integrated clamping options.
- Plot Workflow Zones: Sketch out the logical flow of material processing from rough stock to final assembly.
- Prioritize Tool Placement: Experiment with different arrangements for your stationary and mobile tools on your diagram, focusing on infeed/outfeed and proximity to the central table.
- Implement Smart Storage: Identify opportunities for wall-mounted, under-bench, and mobile cart storage to clear your work surfaces.
- Assess Ergonomics & Safety: Plan for improved lighting, dust collection, and comfortable working heights.
References
- Fine Woodworking. (2020). Shop Layout Solutions: Making the Most of Any Space. The Taunton Press.
- Schwartz, A. (2012). The Workbench Book. The Taunton Press.
- Underhill, R. (1993). The Woodwright’s Shop: A Practical Guide to Traditional Woodcraft. The University of North Carolina Press.