


In the evolving landscape of home design, one trend has not only endured but has skyrocketed in demand: the live edge dining table. Far from being just a rustic accent, these pieces have cemented their status as sophisticated centerpieces, seamlessly blending raw nature with the sleek lines of modern architecture and cabinetry. As we navigate 2026, the allure of a unique, handcrafted live edge dining table is stronger than ever. This comprehensive guide will empower you to embark on Building 2026’s Hottest Trend: DIY Live Edge Dining Tables for Modern Homes, transforming a slab of timber into a stunning focal point for your living space.
The beauty of a live edge table lies in its inherent imperfections – the natural contours, bark inclusions, and unique grain patterns tell a story that no mass-produced furniture can replicate. It’s an ode to authenticity, a conversation starter, and a testament to the maker’s skill and vision. Whether you’re a seasoned woodworker or a passionate DIY enthusiast looking for a rewarding project, crafting your own live edge dining table offers unparalleled satisfaction and a truly bespoke piece for your home.

Key Takeaways
- Live Edge Appeal: Live edge dining tables are a dominant design trend in 2026, offering a unique blend of natural beauty and modern sophistication.
- Sourcing is Key: Selecting the right wood slab (species, size, moisture content) is crucial for a durable and aesthetically pleasing table. Options range from exotic hardwoods to affordable local timbers.
- Essential Tools & Skills: Basic woodworking tools and techniques, including milling, flattening, sanding, and finishing, are required, but beginner-friendly alternatives exist.
- Finishing for Durability: Proper finishing protects the wood and enhances its natural beauty, with various options available depending on desired look and durability.
- Customization: DIY allows for complete control over design, leg selection, and overall aesthetic, ensuring the table perfectly complements a modern home.
The Allure of Live Edge: Why It’s 2026’s Must-Have Furniture
The modern home of 2026 is defined by clean lines, minimalist aesthetics, and a deep appreciation for natural materials. In this context, a live edge dining table serves as a powerful anchor, injecting warmth, organic texture, and a touch of the wild into an otherwise structured environment. It’s a design statement that speaks volumes about connection to nature and individuality.
Imagine a striking walnut slab, its rich, dark tones and intricate grain patterns contrasting beautifully with a crisp white kitchen or minimalist concrete floors. Or perhaps a lighter maple or oak slab, bringing brightness and a sense of Scandinavian design to your dining area. The “live edge” refers to the natural, untrimmed edge of the wood slab, often retaining the bark or the organic undulating shape of the tree. This raw edge is what gives these tables their distinctive character, ensuring that no two pieces are ever exactly alike.
Blending Nature with Modernity
One of the primary reasons for the sustained popularity of live edge furniture is its ability to bridge the gap between rustic charm and contemporary elegance. Modern homes, while often embracing sleek design, can sometimes feel cold or impersonal. A live edge table introduces an element of natural imperfection and warmth that softens the aesthetic without compromising on sophistication.
“A live edge table isn’t just furniture; it’s a piece of art, a slice of nature brought indoors to ground and enrich your modern living space.”
This synergy makes it an ideal choice for various interior styles, from industrial chic and urban farmhouse to minimalist and bohemian designs. The key is in the pairing: combining the raw, organic top with sleek, often geometric, bases made from steel, glass, or even contrasting wood types.
The DIY Advantage: Customization and Cost-Effectiveness
While high-end live edge tables can command significant prices in showrooms, opting for a DIY approach offers substantial benefits. Firstly, you gain complete control over every aspect of the project, from selecting the perfect slab to choosing the ideal finish and base. This allows for a truly personalized piece that fits your space, style, and budget precisely.
Secondly, the cost savings can be considerable. By sourcing your own materials and investing your time and effort, you can create a piece of furniture that rivals custom-made alternatives at a fraction of the cost. This makes Building 2026’s Hottest Trend: DIY Live Edge Dining Tables for Modern Homes an accessible and rewarding endeavor for many.
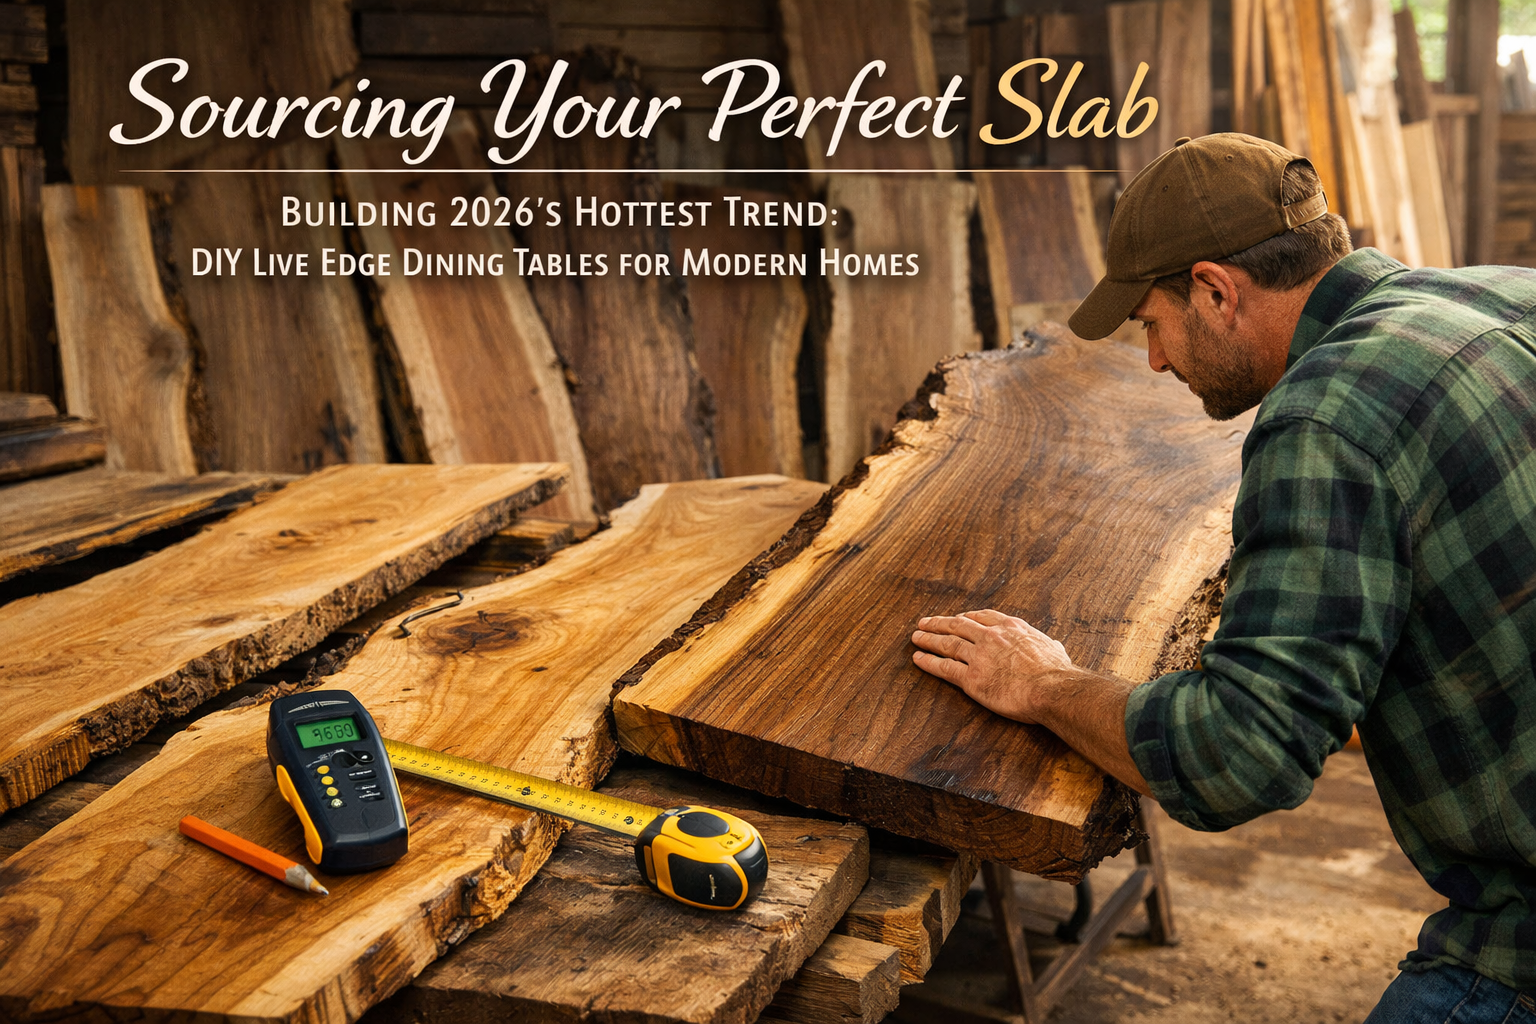
Sourcing Your Slab: The Foundation of Your Live Edge Masterpiece
The success of your live edge dining table project hinges significantly on the quality and characteristics of the wood slab you choose. This is where your table’s journey truly begins, and careful selection will pay dividends in the final outcome.
Choosing the Right Wood Species
The market offers a wide array of wood species, each with unique properties and aesthetic appeal. Your choice will depend on several factors:
- Durability: Dining tables endure daily use, so a durable hardwood is essential.
- Aesthetics: Consider the grain pattern, color, and natural features.
- Availability & Cost: Some species are more readily available and affordable locally than others.
Here’s a comparison of popular choices:
| Wood Species | Characteristics | Best For | Pros | Cons |
|---|---|---|---|---|
| Walnut | Rich dark brown, striking grain, highly durable | Elegant, high-end modern homes | Stunning aesthetics, excellent workability, very stable | Expensive, can be heavy |
| Oak | Light to medium brown, prominent grain, very strong | Traditional, farmhouse, rustic-modern | Abundant, durable, takes stain well, more affordable | Can be prone to splitting if not dried properly |
| Maple | Pale cream to light brown, subtle grain, hard | Contemporary, minimalist, bright spaces | Very hard, smooth finish, takes light stains/natural finishes well | Can be prone to tear-out during planing, less distinct grain |
| Cherry | Light reddish-brown, darkens with age, fine grain | Warm, classic, elegant | Beautiful aging process, smooth finish, good workability | Softer than oak/maple, more expensive, can scratch easier |
| Sycamore | Light color, unique lacy figure | Unique, artistic pieces | Distinctive appearance, good for statement pieces | Can be prone to warping, requires careful drying |
For those new to woodworking or on a tighter budget, exploring local, more affordable wood options like salvaged urban trees (e.g., ash, elm, or even large pine slabs if properly sealed and reinforced) can be an excellent starting point. These often have unique character marks and can be surprisingly beautiful.
Where to Source Your Slab
Sourcing a quality slab is paramount. Here are common avenues:
- Local Sawmills: Often the best place for fresh-cut or air-dried slabs. You might get a better price and a wider selection. They can also offer milling services.
- Specialty Lumberyards: These often cater to woodworkers and typically have a good selection of kiln-dried live edge slabs. Prices might be higher, but quality and readiness for use are usually assured.
- Online Retailers: A convenient option for a broad selection, but shipping costs can be substantial, and you can’t inspect the slab in person. Always ask for detailed photos and moisture content readings.
- Arborists/Tree Removal Services: Sometimes, you can find recently felled trees that an arborist might be willing to mill for you or point you to someone who can. This is a highly sustainable and often cost-effective route for beginner-friendly alternatives.
Essential Slab Considerations
When selecting your slab, keep these critical points in mind:
- Moisture Content (MC): This is perhaps the most important factor. Wood must be properly dried to prevent warping, cracking, and movement after your table is built. For indoor furniture, aim for an MC of 6-8%. A moisture meter is an essential tool for checking this.
- Size: Measure your dining area carefully. Account for overhangs and comfortable seating. Remember, larger slabs are heavier and more challenging to work with.
- Thickness: A thickness of 2-3 inches is common for dining tables, offering stability and presence. Thicker slabs are often preferred for their grand appearance.
- Live Edge Quality: Examine the edges. Do you want the bark on or off? Is the live edge intact or crumbly? Consider how the natural shape will integrate with your modern design.
- Fissures and Voids: Small cracks and voids are common and add character. Larger ones might need epoxy filling, which can be a project in itself. Decide if you want to embrace or minimize these natural features.
- Figure and Grain: Look for interesting grain patterns, burls, or other unique characteristics that will make your table stand out.
Pro Tip: When sourcing, don’t be afraid to ask the supplier about the wood’s history, how it was dried, and if they offer milling or flattening services.
For those interested in exploring different wood types and their characteristics, our guide on blonde walnut offers insights into lighter tones and design trends, which can be adapted for live edge projects.

Crafting Your Tabletop: From Raw Slab to Polished Surface
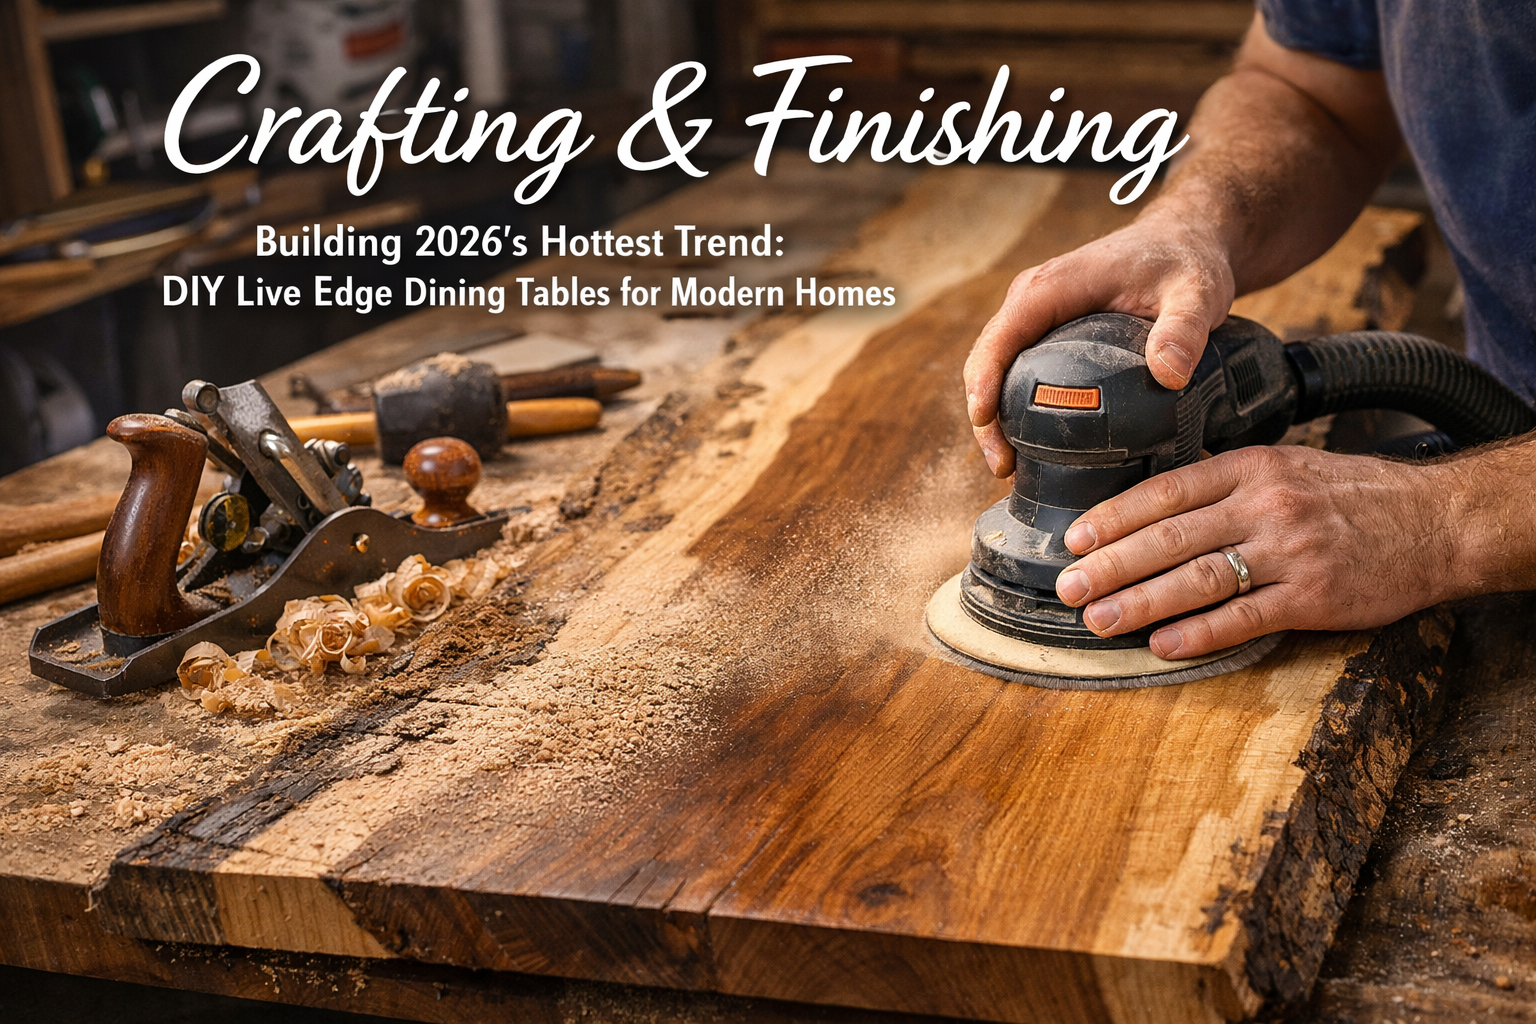
Once you have your ideal wood slab, the real work of Building 2026’s Hottest Trend: DIY Live Edge Dining Tables for Modern Homes begins. This phase involves transforming the rough timber into a smooth, stable, and stunning tabletop.
Tools and Equipment
While a full woodworking shop offers advantages, many tasks can be accomplished with a combination of power and hand tools.
Essential Tools:
- Slab Flattening Router Sled: Crucial for achieving a perfectly flat surface if your slab is rough.
- Planer (Optional but Recommended): If your slab is already relatively flat, a large planer can refine the thickness. For smaller slabs, a Delta 22-560 planer or similar can be a game-changer.
- Orbital Sander: For smooth finishing. A belt sander can also be useful for initial material removal.
- Chisels and Mallet: For bark removal and minor shaping.
- Scrapers: For final smoothing before sanding.
- Clamps: Essential for securing the slab during various operations.
- Measuring Tape, Straightedge, Squares: For accuracy.
- Dust Collection System: Crucial for health and safety, especially during sanding and planing. Learn more about dust collection with our guide on the Reliant Dust Collector.
- Personal Protective Equipment (PPE): Safety glasses, ear protection, dust mask.
Step-by-Step Construction Process
1. Bark Removal and Initial Cleaning
Carefully remove any loose bark from the live edge using a chisel, wire brush, or even a pressure washer (allow to dry completely if using water). Some prefer to leave tightly adhered bark, but for a dining table, it’s generally best to remove it to prevent it from flaking off later. Clean the slab thoroughly to remove dirt and debris.
2. Flattening the Slab
Most raw slabs will not be perfectly flat. This is the most critical step for a stable and usable table.
- Router Sled Method: This is the most common DIY method. Build a large router sled (a jig that allows a router to travel across the slab on rails). Set the router depth and make passes across the entire surface, gradually removing material until it’s perfectly flat. Flip the slab and repeat for the other side.
- Hand Planing (for smaller slabs/experienced users): If you have a large, sharp hand plane and skill, this can be done manually.
- Professional Milling: If you sourced from a sawmill, they might offer flattening services using a large industrial planer or CNC router.
3. Squaring and Trimming (Optional)
Decide if you want any straight edges. While the live edges are the star, you might want to square off the ends of the slab using a track saw or circular saw with a straightedge. For precise cuts, ensure your saw setup is stable; exploring resources like Miter Saw Table Height: Importance, Guidelines, and Tips can be helpful for ensuring ergonomic and accurate cuts.
4. Crack and Void Filling (If Necessary)
Many live edge slabs have natural cracks or voids. You can fill these with epoxy resin for a smooth, stable surface.
- Clear Epoxy: For a natural look, use clear epoxy to highlight the wood’s features.
- Tinted Epoxy: Add pigments (black, blue, metallic) to the epoxy for a more dramatic effect.
- Process: Clean the crack thoroughly, tape off the underside, mix and pour the epoxy, allow it to cure, then sand flush.
5. Sanding
This is where the magic happens, revealing the wood’s true beauty. Start with a coarse grit (e.g., 80-100 grit) and progressively move to finer grits (120, 150, 180, 220, and possibly 320 for a very smooth finish).
- Always sand with the grain.
- Ensure all previous grit marks are removed before moving to the next finer grit.
- Pay special attention to the live edge, smoothing any sharp points without losing its natural contour.
For a deeper dive into achieving flawless surfaces, refer to our comprehensive guide on wood finishing techniques.
6. Applying Finish
The finish protects the wood from spills and wear while enhancing its natural color and grain.
- Oil-Based Finishes (e.g., Tung Oil, Linseed Oil): Penetrate the wood, offering a natural, matte look. Easy to repair but require regular reapplication. For insights into selecting finishes, consider linseed oil vs. stain.
- Polyurethane (Water or Oil-Based): Forms a durable, protective layer on the surface. Available in various sheens (matte, satin, gloss). Highly durable for dining tables. For best results with application, check out sprayable water-based polyurethane: a step-by-step guide.
- Hardwax Oils (e.g., Osmo, Rubio Monocoat): A blend of oil and wax, offering a durable, natural-looking finish that is somewhat repairable.
Apply thin coats according to manufacturer instructions, sanding lightly between coats with a very fine grit (e.g., 320-400) for optimal adhesion and smoothness.
7. Selecting and Attaching the Base
The base is crucial for both stability and aesthetic appeal, especially when Building 2026’s Hottest Trend: DIY Live Edge Dining Tables for Modern Homes. Modern homes often favor minimalist or industrial bases.

Popular Base Types:
- Steel Legs: U-shaped, X-shaped, or spider bases are very popular, offering a sleek, industrial look that contrasts beautifully with the organic slab.
- Wooden Bases: Can be crafted from matching or contrasting wood, often in a trestle or pedestal design. Ensure robust joinery.
- Custom Fabricated: Work with a metal fabricator to create a unique base design.
Attachment:
- Z-Clips or Figure-8 Fasteners: These allow for seasonal wood movement while securely attaching the top. Drill recesses in the underside of the slab for these fasteners.
- Slotted Holes: For wooden bases, use elongated slots for bolts to pass through, allowing the tabletop to expand and contract without cracking.
Maintaining Your Live Edge Masterpiece
Congratulations! You’ve successfully completed Building 2026’s Hottest Trend: DIY Live Edge Dining Tables for Modern Homes. Now, ensuring its longevity and beauty requires proper care and maintenance.
Regular Cleaning
- Dusting: Use a soft, dry cloth or a slightly damp cloth for regular dusting.
- Spills: Wipe up spills immediately with a soft cloth. Avoid abrasive cleaners or harsh chemicals, as these can damage the finish.
- Mild Soap: For tougher spots, a diluted solution of mild dish soap and water on a damp cloth can be used, followed by a dry wipe.
Protecting the Surface
- Coasters and Placemats: Always use coasters under drinks and placemats under plates, especially for hot items. Heat and moisture are the biggest enemies of a wood finish.
- Trivets: Use trivets under hot dishes to prevent heat marks.
- Avoid Direct Sunlight: Prolonged exposure to direct sunlight can cause the wood to fade or change color. Consider curtains or blinds during peak sun hours.
- Humidity Control: Wood is a natural material that responds to changes in humidity. Maintain a consistent indoor humidity level (ideally between 40-60%) to prevent excessive expansion and contraction, which can lead to cracks or warping. A humidifier or dehumidifier can help.
Rejuvenating the Finish
Over time, even the most durable finish may show signs of wear.
- Oil Finishes: These are generally easy to touch up. Lightly sand the affected area (if needed) and reapply a fresh coat of the original oil.
- Polyurethane/Varnish: Minor scratches might be buffed out with a furniture polish. Deeper scratches or significant wear might require light sanding and reapplication of a top coat. It’s often best to lightly scuff sand the entire top and apply a fresh coat for an even finish.
- Wax over Polyurethane: For added protection and a subtle sheen, some prefer to apply a coat of wax over a polyurethane finish. Learn more about wax over polyurethane: benefits, application tips, and maintenance.
Dealing with Minor Damage
- Scratches: For light scratches, often a touch-up pen or furniture polish can conceal them. Deeper scratches may require careful sanding and reapplication of finish.
- Water Rings: Often, these can be removed by applying a small amount of mineral oil or mayonnaise to the spot, letting it sit for a few hours, then wiping clean. For persistent rings, very fine steel wool with mineral spirits, followed by re-oiling/finishing, might be necessary.
- Dents: Minor dents in unfinished or oil-finished wood can sometimes be steamed out. Place a damp cloth over the dent and apply a hot iron briefly. The moisture and heat can cause the compressed wood fibers to swell.
By following these maintenance guidelines, your DIY live edge dining table will remain a stunning and functional centerpiece in your modern home for many years to come. This project is not just about building furniture; it’s about creating an heirloom, a piece that tells a story and brings warmth and character to your living space.
Conclusion
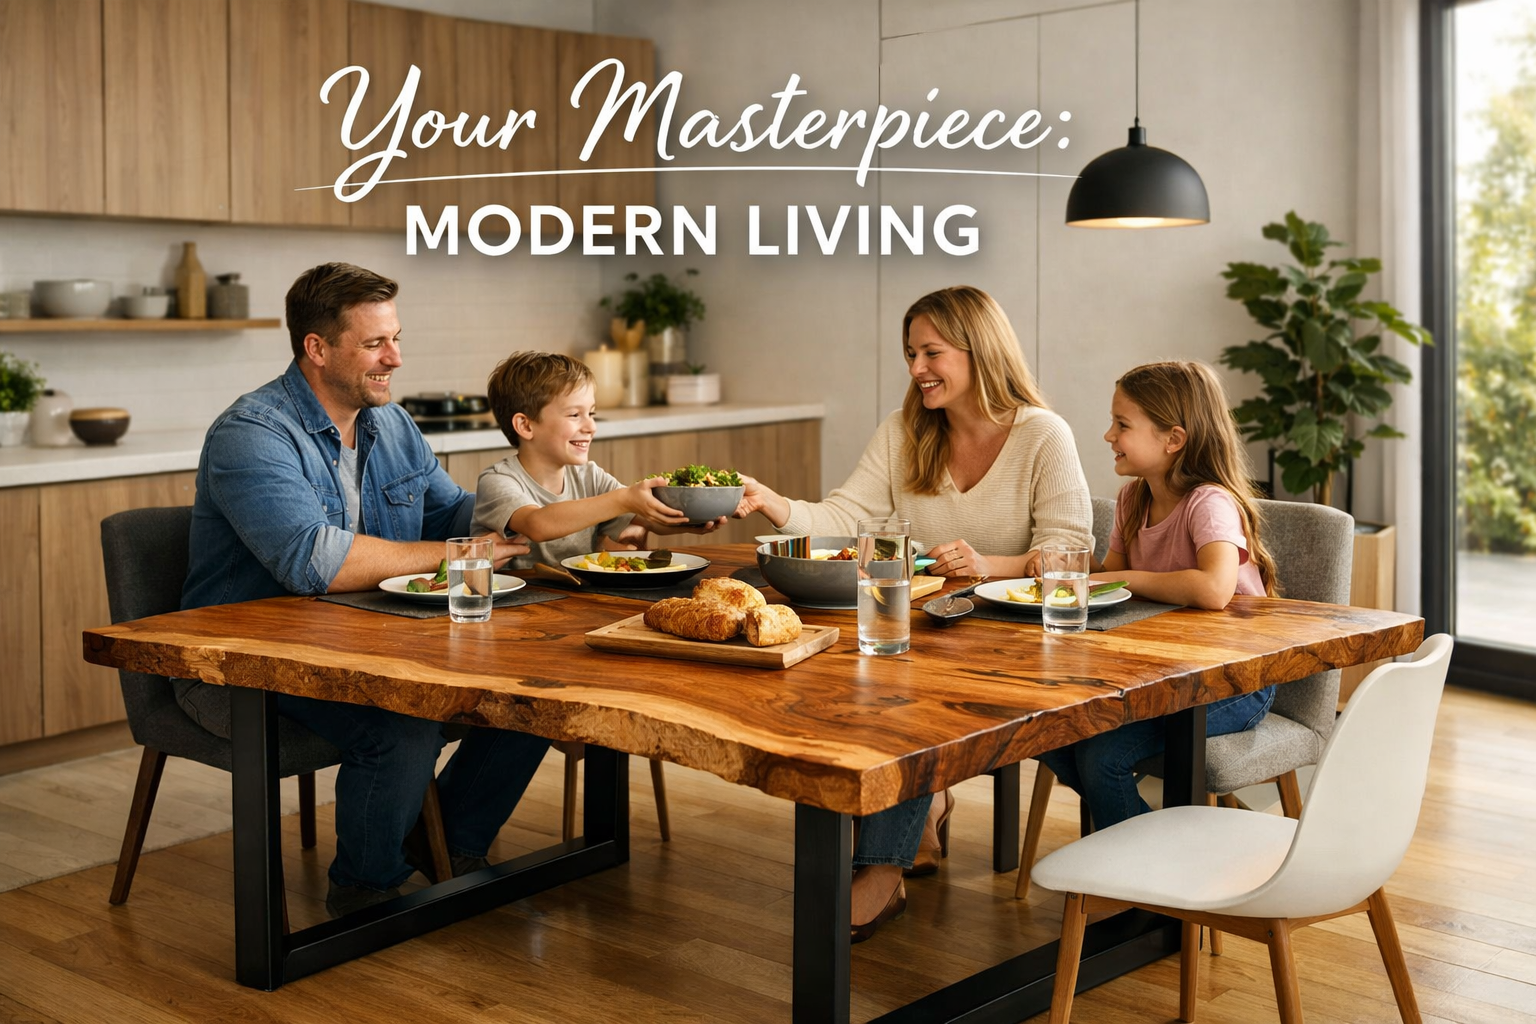
The allure of the live edge dining table as a design staple for modern homes in 2026 is undeniable. Its unique ability to marry the raw beauty of nature with contemporary aesthetics makes it an ideal centerpiece for any space seeking warmth, character, and sophistication. Embarking on Building 2026’s Hottest Trend: DIY Live Edge Dining Tables for Modern Homes is more than just a woodworking project; it’s an opportunity to craft a truly bespoke piece that reflects your personal style and adds immense value to your home.
From the exciting process of sourcing the perfect wood slab – whether a rich walnut, a versatile oak, or a more affordable local timber – to the meticulous steps of milling, flattening, and applying a flawless finish, each stage offers rewarding challenges and learning opportunities. The ability to customize every detail, from the live edge contours to the choice of sleek modern legs, ensures your finished table will be a unique work of art perfectly suited to your living environment.
With patience, the right tools, and a dedication to quality craftsmanship, you can achieve a professional-grade result that rivals high-end custom furniture. This guide has provided you with the foundational knowledge and actionable steps to confidently undertake this project.
Actionable Next Steps:
- Research Wood Species: Determine which wood type best suits your aesthetic, budget, and desired durability.
- Locate Suppliers: Start searching for local sawmills or specialty lumberyards that offer live edge slabs. Consider arborists for sustainable, local options.
- Gather Tools: Assess your current tool collection and identify any necessary purchases, especially for flattening (e.g., router sled components, a moisture meter).
- Plan Your Design: Sketch out your table’s dimensions, consider leg styles, and visualize how it will integrate with your home’s existing decor.
- Prioritize Safety: Always wear appropriate personal protective equipment (PPE) and understand the safe operation of all tools before beginning.
Embrace the journey of creation, and soon you’ll be gathering around your own handcrafted live edge dining table – a testament to your skill and a magnificent focal point that embodies the hottest trend of 2026.
References
- Fine Woodworking. (n.d.). Woodworking Guides and Techniques. Retrieved from https://www.finewoodworking.com/
- The Wood Database. (n.d.). Wood Species Information. Retrieved from https://www.wood-database.com/
- Rubio Monocoat. (n.d.). Oil Finishes. Retrieved from https://www.rubiomonocoatusa.com/
