
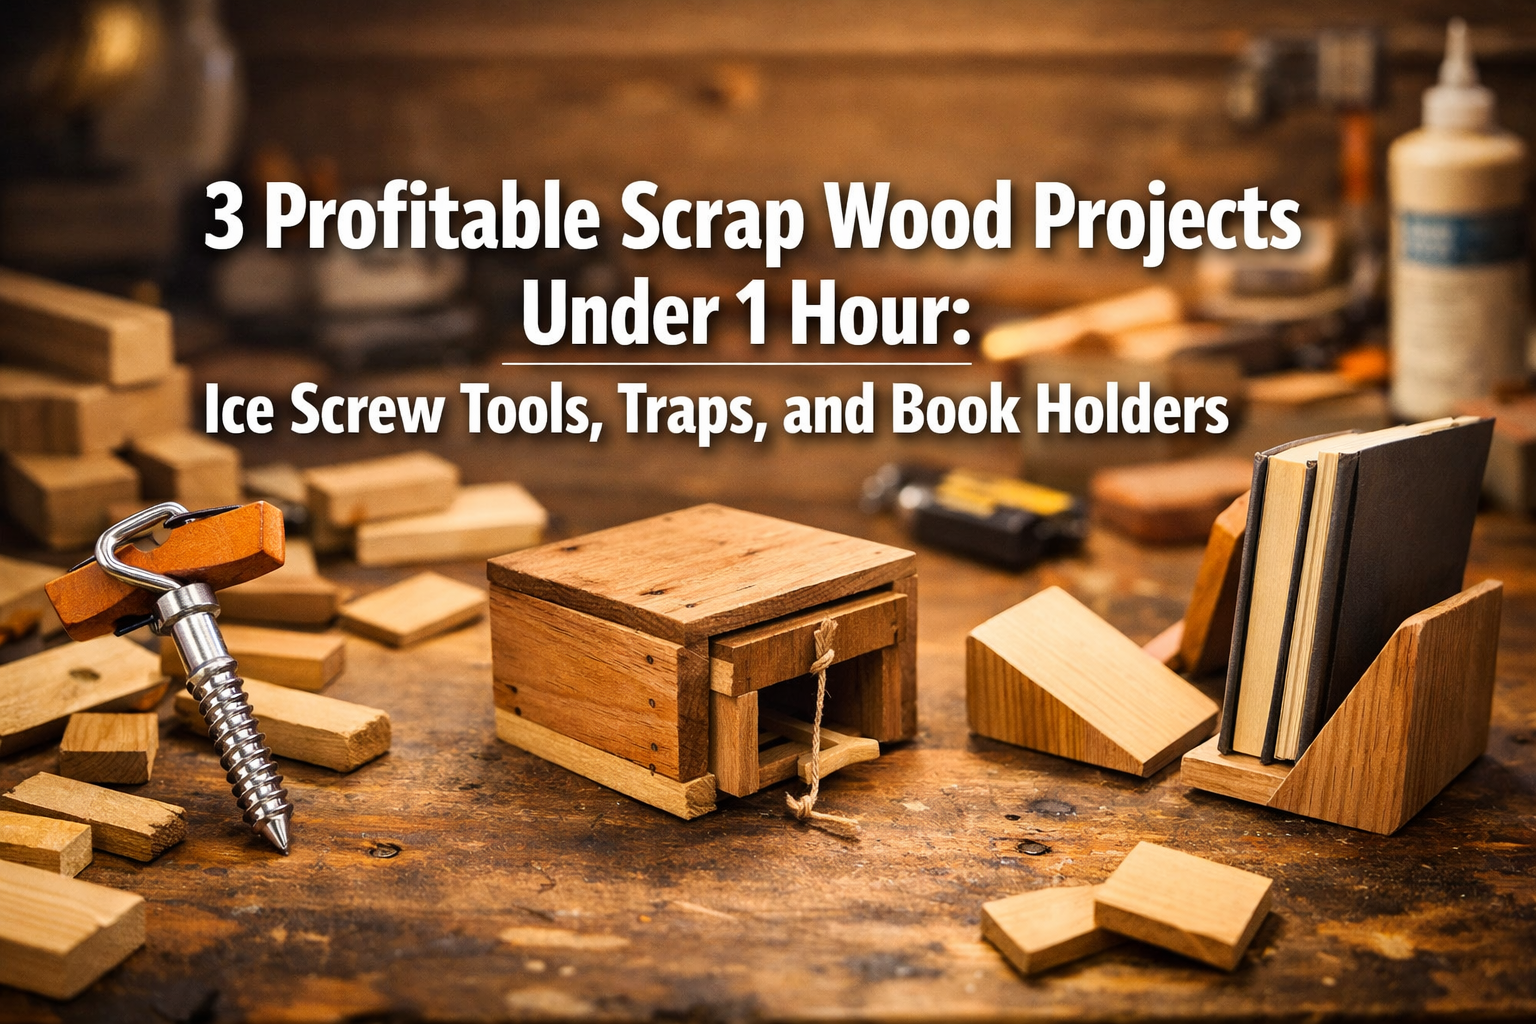

In the bustling world of woodworking, where every piece of lumber holds potential, the concept of maximizing resources has never been more relevant than in 2026. What if you could transform those seemingly unusable offcuts and workshop remnants into marketable, high-demand items in under an hour? This article delves into the exciting realm of 3 Profitable Scrap Wood Projects Under 1 Hour: Ice Screw Tools, Traps, and Book Holders, inspired by the viral YouTube builds that have captured the attention of makers and entrepreneurs alike. We’ll explore detailed tool lists, essential safety tips, and actionable selling strategies, empowering you to monetize your workshop leftovers with efficiency and creativity.
Scrap wood, often relegated to the kindling pile, represents a hidden goldmine for resourceful woodworkers. With a little ingenuity and the right techniques, these small pieces can be transformed into unique, functional, and profitable products. The current market, especially online, rewards quick-to-produce, customizable items that solve specific problems or add aesthetic value. The three projects we’re focusing on—ice screw tools, humane traps, and elegant book holders—offer diverse avenues for profit, appealing to niche markets from outdoor enthusiasts to home decor aficionados. Get ready to turn your scraps into cash! 💰

Key Takeaways
- Transform Waste into Wealth: Learn how to convert common workshop scrap wood into three distinct, profitable products in under 60 minutes each.
- Target Niche Markets: Discover how ice screw tools appeal to climbers, humane traps to environmentally conscious homeowners, and book holders to decor enthusiasts, maximizing sales potential.
- Efficiency is Key: Master the streamlined processes and minimal tool requirements that make these projects genuinely achievable within a one-hour timeframe.
- Safety First: Understand the critical safety precautions and personal protective equipment necessary for woodworking, even on small-scale projects.
- Monetize Your Craft: Gain insights into effective selling strategies, including online marketplaces and customization options, to turn your creations into a consistent income stream in 2026.
Crafting Wooden Ice Screw Tools: A Quick and Profitable Venture
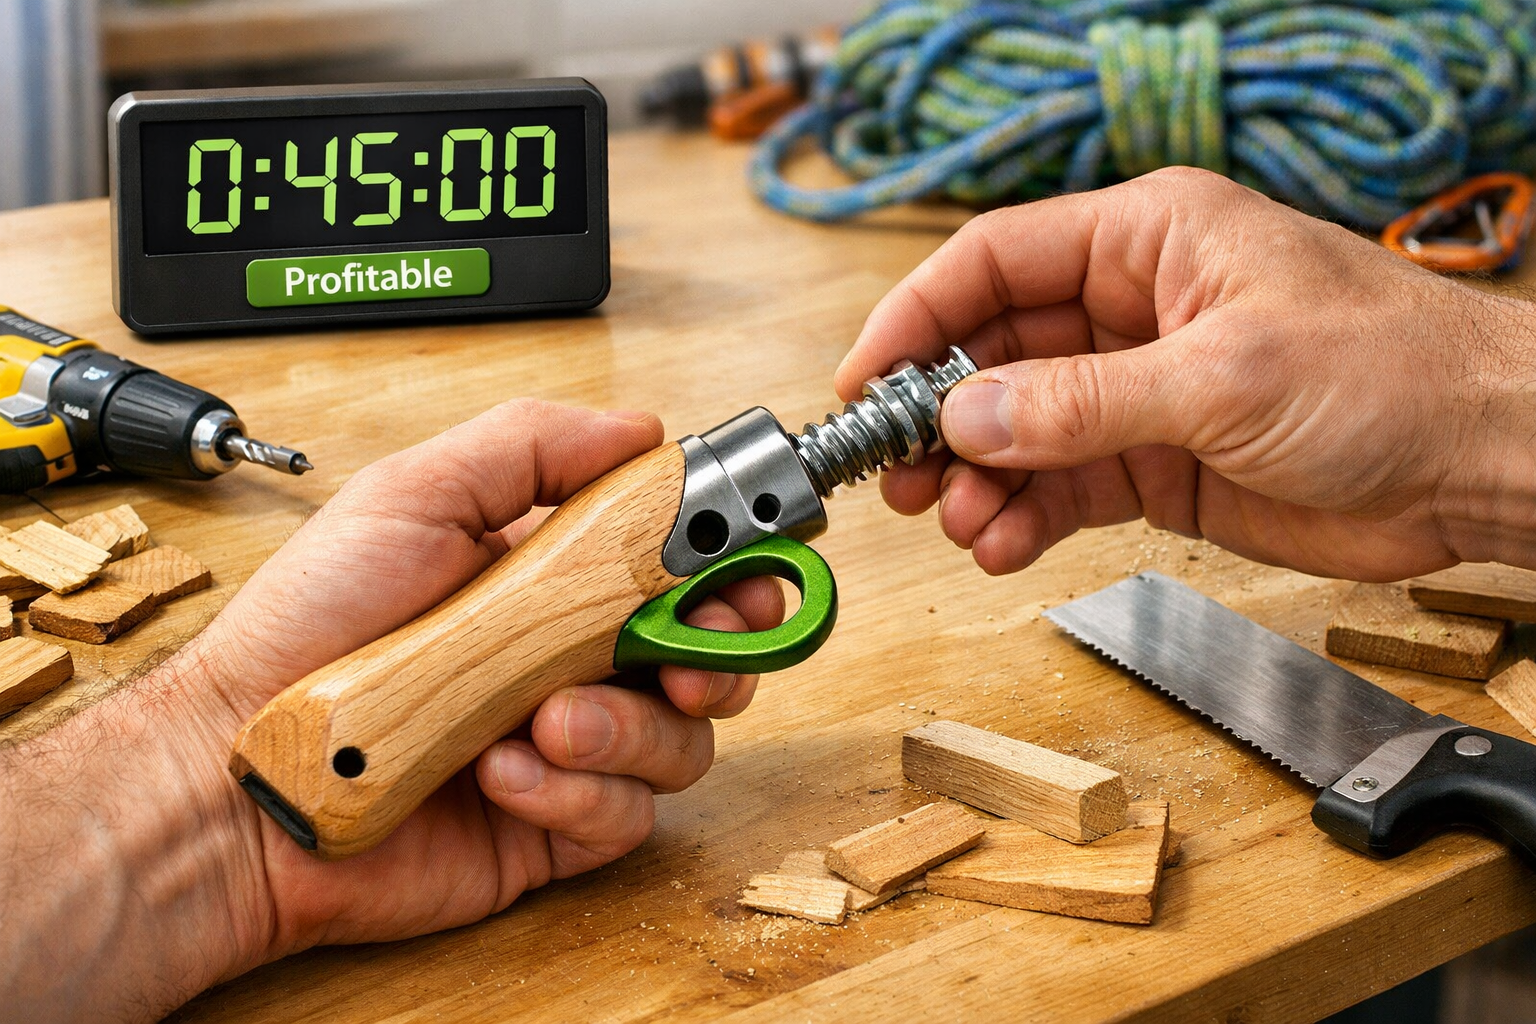
Among the 3 Profitable Scrap Wood Projects Under 1 Hour: Ice Screw Tools, Traps, and Book Holders, the wooden ice screw tool stands out for its niche appeal and utility for outdoor enthusiasts. While not a load-bearing safety device, these wooden tools are incredibly useful for cleaning ice screws, clearing threads, and even acting as a simple handle for easier placement or removal during ice climbing or mountaineering. Their demand comes from the practicality they offer and the personal touch of a handcrafted item.
The Appeal and Functionality
Ice climbing often involves screws getting packed with ice or snow, making them difficult to operate. A simple wooden tool, often designed with a tapered end and perhaps a small pick, can effectively clear these obstructions. Climbers appreciate gear that is lightweight, durable, and functional. By using attractive, dense scrap hardwoods, you can create a tool that is not only effective but also aesthetically pleasing. Think about incorporating unique wood grains or even simple engravings to add value.
Essential Tools and Materials
The beauty of these projects is their minimal requirement for specialized tools, making them accessible even to those with a basic home workshop.
Hand Tools:
- Coping Saw or Japanese Pull Saw: For precise cuts and shaping.
- Rasps and Files: For initial shaping and material removal.
- Sandpaper (various grits): From coarse (80-grit) to fine (220-grit or higher) for smoothing.
- Wood Carving Knives (optional): For finer details and ergonomic shaping.
- Clamps: To secure the workpiece while sawing or carving.
Power Tools (Optional, for efficiency):
- Band Saw or Jigsaw: Significantly speeds up the initial shaping process.
- Spindle Sander or Belt Sander: For rapid shaping and smoothing.
- Drill Press or Hand Drill: For creating the carabiner hole. For tips on choosing the right range for your tasks, check out our guide on Drill Press Spindle Travel: Choosing the Right Range for Your Tasks.
Materials:
- Scrap Hardwood: Dense woods like oak, maple, walnut, or even exotic offcuts are ideal for durability and feel. Dimensions typically around 1″ x 1″ x 6-8″.
- Wood Finish: Linseed oil, Danish oil, or a durable clear coat like polyurethane for protection and enhanced aesthetics. Learn more about finishes with our Danish Oil vs Linseed: The Ultimate Wood Finishing Guide.
- Small Metal Loop/Eyelet (optional): For attaching a cord or lanyard.
Step-by-Step Construction (Under 1 Hour!)
Select and Prepare Wood (5-10 minutes):
- Choose a suitable piece of scrap hardwood. Ensure it’s free of major defects.
- Roughly cut the piece to your desired length (e.g., 6-8 inches) using a coping saw or bandsaw.
Rough Shaping (15-20 minutes):
- Sketch the basic outline of your ice screw tool onto the wood, including the handle, a tapered tip, and any specific cleaning features.
- Use a coping saw or jigsaw to cut out the general shape. Remember to cut slightly outside your lines, as you’ll refine it with sanding.
- Employ a rasp or coarse file to further define the curves and taper the tip.
Refining and Smoothing (15-20 minutes):
- Begin sanding with 80-grit sandpaper to remove tool marks and refine the shape.
- Progress to 120-grit and then 220-grit sandpaper for a smooth finish. Pay attention to ergonomic comfort in the handle area.
- Create a small, subtle point or edge at the tip designed for cleaning ice screw threads.
Drilling and Finishing (5-10 minutes):
- Drill a hole near the end of the handle (away from the working tip) large enough for a carabiner or lanyard. A 1/4″ to 3/8″ diameter is usually sufficient.
- Apply your chosen wood finish. For a quick dry and natural feel, Danish oil or linseed oil works well. Wipe on, let it soak, then wipe off excess. This step can often be done in stages, with initial coats drying as you prepare for the next. For more details on various techniques, see our guide on wood finishing techniques.
Safety First ⚠️
Always wear safety glasses when cutting, drilling, or sanding. Use clamps to secure your workpiece. Work in a well-ventilated area, especially when applying finishes.
Selling Your Wooden Ice Screw Tools
These tools can fetch a good price among the climbing community. Consider selling them on:
- Etsy or similar craft marketplaces: Highlight the handcrafted nature and unique wood grain.
- Local outdoor gear shops: Offer them on consignment.
- Climbing gyms or outdoor events: Direct sales allow for personal interaction and product demonstration.
- Online forums/groups for climbers: Engage directly with your target audience.
Emphasize the unique characteristics of each wood piece and the quality of the finish. Offering customization, such as initial engraving, can also boost appeal.
Building Simple, Humane Scrap Wood Traps
Another incredibly practical and profitable project within the 3 Profitable Scrap Wood Projects Under 1 Hour: Ice Screw Tools, Traps, and Book Holders category is the humane scrap wood trap. These are popular with homeowners, gardeners, and small-scale animal rescuers who prefer catch-and-release methods for dealing with small pests like mice, voles, or chipmunks. The demand for ethical pest control solutions is on the rise in 2026, making these traps a hot commodity.
Why Humane Traps?
Traditional snap traps are often seen as inhumane. Humane traps offer a solution by capturing the animal unharmed, allowing it to be released elsewhere. This aligns with a growing consumer preference for eco-friendly and ethical products. A well-designed, simple wooden trap is not only effective but also aesthetically less intrusive than plastic or metal alternatives.
Essential Tools and Materials
Simplicity is key to keeping this project under an hour.
Hand Tools:
- Measuring Tape or Ruler: For precise cuts.
- Pencil: For marking.
- Hand Saw or Dovetail Saw: For straight, accurate cuts.
- Drill with Various Bits: For pivot points and trigger mechanisms.
- Sandpaper: Medium (120-grit) for smoothing edges.
- Small Hammer: For small nails or pins.
Power Tools (Optional, for speed):
- Miter Saw or Table Saw: For fast, accurate cuts of multiple pieces. Our guide on Miter Saw Table Height: Importance, Guidelines, and Tips can help with setup. For larger projects, a Craftsman 113.299 Table Saw: A Comprehensive Guide for Assembly, Operation, and Maintenance is invaluable.
- Drill Press: For consistent, straight holes.
Materials:
- Thin Scrap Plywood or Solid Wood: 1/4″ to 1/2″ thickness is common. Pieces like 6″x4″ for base, sides, top, and door. Common species like pine, poplar, or even thin reclaimed wood are suitable.
- Small Hinges or Pins: For the trap door mechanism. Toothpicks or small dowels can work in a pinch for very lightweight doors.
- Small Screws or Nails: For assembly.
- String or Fishing Line: For the trigger mechanism.
- Small Spring (optional): For a faster door closure.
Step-by-Step Construction (Under 1 Hour!)
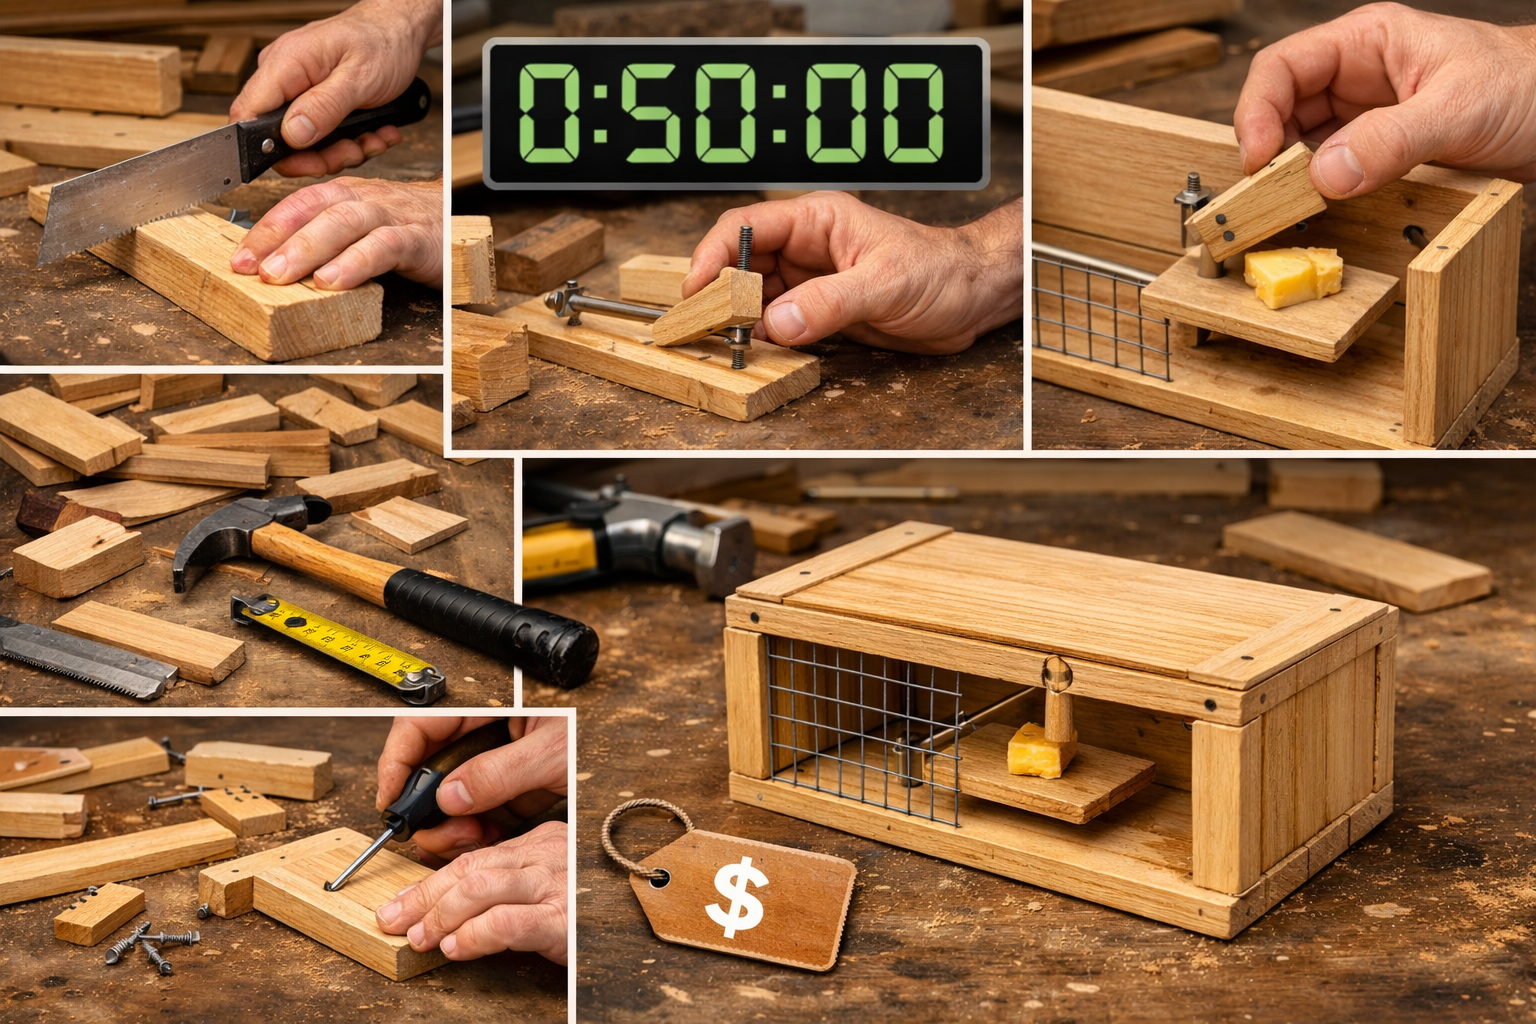
The classic “tipping bucket” or “trip plate” design is often the quickest to build. We’ll outline a simple trip plate design.
Cut Components (15-20 minutes):
- Base: 1 piece (e.g., 6″ x 4″)
- Sides: 2 pieces (e.g., 6″ x 3″)
- Top: 1 piece (e.g., 6″ x 4″)
- Door: 1 piece (e.g., 4″ x 3.5″) – slightly wider than the opening.
- Back: 1 piece (e.g., 4″ x 3″)
- Trip Plate: 1 small piece (e.g., 2″ x 1″)
Assemble the Box (15-20 minutes):
- Attach the back and side pieces to the base using small nails and wood glue. Ensure corners are square.
- Attach the top piece. Leave the front open for the door.
- Lightly sand all edges to prevent splinters and give a finished look.
Construct the Door Mechanism (15-20 minutes):
- Door Pivot: Drill a small hole on each side of the trap at the top front corners. Drill corresponding holes near the top corners of the trap door. Insert small dowels or pins through the door into the side holes, allowing the door to swing freely.
- Trigger Bar: Create a small, thin bar (e.g., 3″ long, 1/4″ wide) that can pivot freely inside the trap. Drill a hole at one end of this bar and attach a string.
- Bait Plate: Attach the string from the trigger bar to the small trip plate inside the trap. The trip plate should rest near the back of the trap.
- Latching Mechanism: When the door is open, the trigger bar holds it up. When the animal steps on the bait plate, it pulls the string, releasing the trigger bar and allowing the door to fall shut. You may need a small L-shaped latch on the outside of the door that can pivot to hold it shut once closed.
A more advanced method involves a simple spring and lever system, which can be pre-made or sourced.
Safety First 🚧
Always wear safety glasses when cutting or drilling. Be careful with sharp tools and ensure all moving parts of the trap are sanded smooth to prevent injury to the animal or user.
Selling Your Humane Scrap Wood Traps
These traps are ideal for direct-to-consumer sales:
- Farmers’ markets or craft fairs: Demonstrate the trap’s operation.
- Local garden centers or hardware stores: Offer a local, handmade option.
- Online marketplaces (Etsy, local classifieds): Highlight the “humane,” “eco-friendly,” and “handmade” aspects.
- Wildlife rehabilitation centers: They might be interested in using or selling them.
Provide clear instructions for use and emphasize the materials used. Consider making different sizes for various small animals.

Designing and Crafting Modern Scrap Wood Book Holders

Finally, among the 3 Profitable Scrap Wood Projects Under 1 Hour: Ice Screw Tools, Traps, and Book Holders, the book holder project offers immense creative freedom and broad market appeal. Book holders, or bookends, are essential for keeping shelves organized and can also serve as decorative elements. Their simplicity and the opportunity to showcase interesting wood grain or finishing techniques make them incredibly profitable.
The Ever-Present Need for Organization and Style
In 2026, home organization and personalized decor remain top trends. Book holders meet both these needs perfectly. They can be minimalist and functional or bold and sculptural, depending on the scrap wood available and your design aesthetic. They are also fantastic gifts, broadening their market potential. For other home decor ideas, consider our guide on The Art of Reflection: Mastering the Woodworking Mirror in 2026.
Essential Tools and Materials
This project is exceptionally forgiving, allowing for a wide range of scrap sizes and types.
Hand Tools:
- Measuring Tape or Ruler: For accurate dimensions.
- Pencil: For marking.
- Hand Saw, Miter Box, or Dovetail Saw: For precise cuts.
- Sandpaper (various grits): For smooth, pleasing finishes.
- Wood Glue: For assembly (if making multi-piece designs).
- Clamps: To hold glued pieces while drying.
Power Tools (Optional, for efficiency and precision):
- Miter Saw: For quick, accurate 45-degree or 90-degree cuts.
- Table Saw: For ripping wider scraps into desired widths.
- Orbital Sander: Speeds up the sanding process significantly.
Materials:
- Scrap Wood: Almost any species or size can work. Hardwoods are preferred for durability and weight. Common dimensions for an “L” shaped book holder might be 6″x4″ for the base and 6″x4″ for the upright piece, both around 3/4″ to 1″ thick. Think about interesting offcuts from larger projects, like pieces left over from Craft Your Dream Farmhouse Dining Table: The Ultimate 2025 DIY Guide.
- Wood Finish: Clear coat, stain, paint, or even rustic wood finishing techniques to enhance the wood’s natural beauty or match decor trends.
- Felt Pads (optional): For the bottom to protect surfaces and prevent slipping.
Step-by-Step Construction (Under 1 Hour!)
We’ll focus on a classic “L-shaped” book holder, which is simple, sturdy, and elegant.
Select and Cut Wood (10-15 minutes):
- Choose two complementary pieces of scrap wood for each book holder. For an “L” shape, you’ll need one piece for the base and one for the upright.
- Example dimensions: Base: 6″ x 4″ x 3/4″, Upright: 6″ x 4″ x 3/4″.
- Cut these pieces precisely, ensuring all edges are square. A miter saw is excellent for this.
Prepare for Joining (10-15 minutes):
- Determine the best way to join your two pieces. For strength and speed, a simple butt joint reinforced with glue is often sufficient for decorative items. For added strength, you might consider a simple dado joint if you have a table saw, but this adds time.
- Lightly sand the surfaces that will be glued to ensure good adhesion.
Assembly (15-20 minutes):
- Apply wood glue to one edge of the base piece and the corresponding edge of the upright piece.
- Carefully align them into an “L” shape.
- Clamp the pieces securely. Allow a few minutes for the glue to set enough so the clamps can be removed for faster workflow, or leave them clamped while you work on other pairs.
- Pro Tip: For even faster assembly, pre-drill small pilot holes and use a couple of countersunk screws in addition to glue. This allows for immediate handling after assembly.
Finishing Touches (10-15 minutes):
- Once the glue has sufficiently dried, remove clamps.
- Sand the entire book holder, starting with 120-grit and moving to 220-grit for a smooth feel. Pay attention to edges to soften them.
- Apply your chosen finish. A quick-drying wipe-on poly or a Danish oil can be applied quickly. Consider cool wood finishing techniques for added flair.
- Attach felt pads to the bottom if desired.
Safety First 🖐️
Always use push sticks when cutting small pieces on a table saw. Wear safety glasses and hearing protection. Ensure your workshop is tidy to avoid trips and falls.
Selling Your Modern Scrap Wood Book Holders
Book holders have a broad appeal:
- Online marketplaces: Etsy, Amazon Handmade, Shopify. Show diverse styles and wood types.
- Local bookstores or gift shops: Offer a unique, locally made product.
- Home decor boutiques: Position them as stylish accents.
- Personalized gifts: Offer laser engraving or custom stain options.
Create sets of two or three for increased value. Showcase various wood types and finishes to appeal to different tastes. Consider bundling them with other small items, like custom bookmarks.
Maximizing Profitability Across All Projects in 2026
To truly make these 3 Profitable Scrap Wood Projects Under 1 Hour: Ice Screw Tools, Traps, and Book Holders a consistent income stream in 2026, consider these overarching strategies:
- Batch Production: Instead of making one item at a time, cut all pieces for 5-10 units of the same product at once. This significantly reduces setup time and increases efficiency.
- Material Sourcing: Maintain a well-organized scrap bin. Visit local lumber yards, cabinet shops, or construction sites (with permission!) for free or low-cost offcuts. Even damaged furniture can yield valuable pieces.
- Branding: Develop a simple, memorable brand name and logo for your woodworking side hustle. This adds a professional touch to your products.
- Photography: High-quality product photos are crucial for online sales. Invest time in learning basic product photography or find a local photographer.
- Customer Service: Provide excellent communication and timely shipping. Positive reviews are your best marketing tool.
- Pricing Strategy: Research similar items online. Factor in your material cost (even if scrap, assign a small value), time, and overhead. Don’t undersell your craft!
- Upcycling and Customization: Highlight how you’re giving new life to discarded wood. Offer custom sizes or finishes. For children’s projects, this can also spark imagination, as seen in Spark Imagination: Unlocking the World of Children’s Woodwork Projects.
Remember, the goal is not just to make items but to create value that others are willing to pay for. Your efficiency, creativity, and attention to detail will set your products apart in the market.
Conclusion
The year 2026 offers incredible opportunities for resourceful woodworkers to turn workshop waste into significant profit. By focusing on 3 Profitable Scrap Wood Projects Under 1 Hour: Ice Screw Tools, Traps, and Book Holders, you can tap into diverse markets with minimal investment in time and materials. These projects—from the rugged utility of ice screw tools for climbers to the ethical functionality of humane traps for homeowners, and the stylish appeal of modern book holders—demonstrate the versatility and value hidden within your scrap bin.
Embrace the challenge of rapid prototyping and efficient batch production. Prioritize safety in your workshop, and never underestimate the power of a well-crafted, thoughtfully finished item. With a clear understanding of your target audience and effective selling strategies, your scrap wood creations can become a consistent and rewarding income stream.
Actionable Next Steps:

- Inventory Your Scraps: Dedicate an hour to sort and categorize your existing scrap wood pieces. Identify what materials you have that could be suitable for these projects.
- Gather Tools: Review the tool lists for each project and ensure you have the necessary equipment or plan to acquire it.
- Choose Your First Project: Select one of the three projects that most excites you or for which you have the most suitable materials.
- Practice and Refine: Start with a few practice pieces. Focus on streamlining your process to meet the under-one-hour goal.
- Develop a Selling Plan: Research online marketplaces or local venues where your chosen product would sell best. Take high-quality photos and write compelling descriptions.
- Continuous Learning: Explore other small, profitable projects. Consider different wood finishing techniques to add variety and appeal to your products.
Start transforming those forgotten offcuts into valuable, coveted items today. Your workshop is not just a place for making; it’s a place for earning!
References
- Fisher, S. (2023). The Woodworker’s Scrap Book: Ideas for Small Projects. Sterling Publishing.
- Mayer, A. (2024). Small Wood Projects for Fun & Profit. Fox Chapel Publishing.
- Climbing Magazine. (2025). Gear Review: Essential Ice Climbing Accessories.
- National Pest Management Association. (2026). Consumer Trends in Humane Wildlife Control.
