
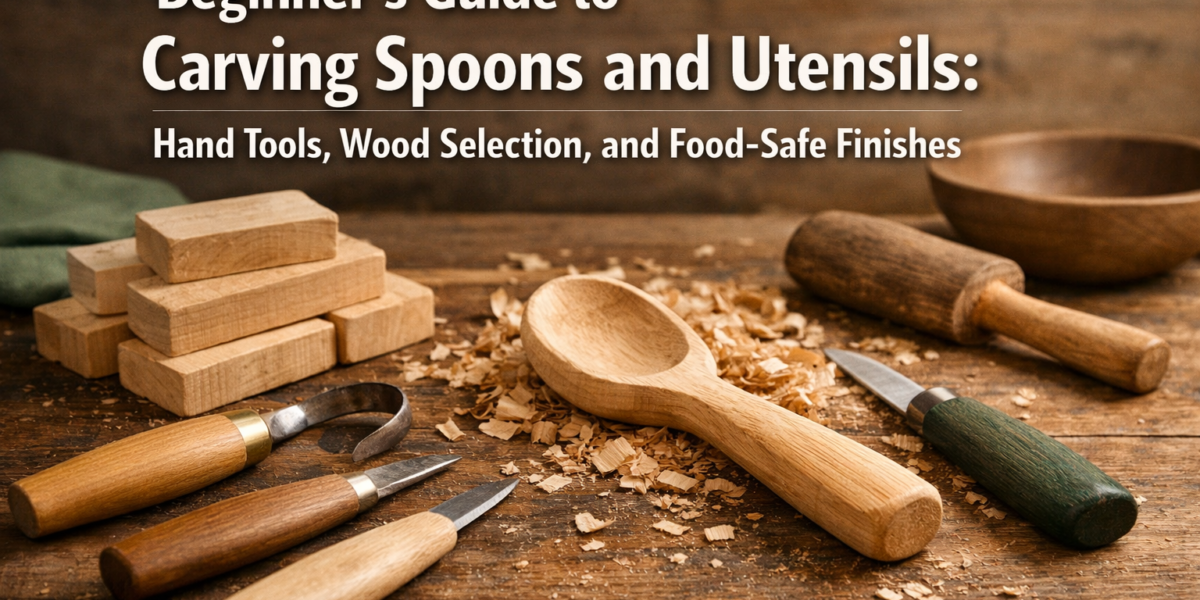

The delicate curl of a wood shaving peels away, revealing the smooth, nascent curve of a spoon. This isn’t just an act of whittling; it’s a meditative journey into craftsmanship, a direct connection to nature, and an accessible entry point into woodworking for anyone. In an age of mass production, the ability to create something functional and beautiful with your own hands holds immense appeal. This comprehensive “Beginner’s Guide to Carving Spoons and Utensils: Hand Tools, Wood Selection, and Food-Safe Finishes” will walk you through every essential step, empowering you to transform raw wood into cherished, usable art by 2026.
Key Takeaways
- Start Simple with Essential Hand Tools: Begin your spoon carving journey with a few basic, sharp hand tools like a carving axe, sloyd knife, and hook knife.
- Choose the Right Wood: Select woods like basswood, cherry, or maple, known for their carver-friendly properties, grain, and food safety.
- Master Basic Carving Techniques: Learn safe and effective cuts, focusing on grain direction, rough shaping, and refining the bowl and handle.
- Apply Food-Safe Finishes: Understand the importance of food-safe oils and waxes to protect your utensils and ensure they are safe for culinary use.
- Prioritize Safety and Sharpening: Always carve safely, using protective gear, and keep your tools razor-sharp for efficient and enjoyable carving.
Essential Hand Tools for Carving Spoons and Utensils
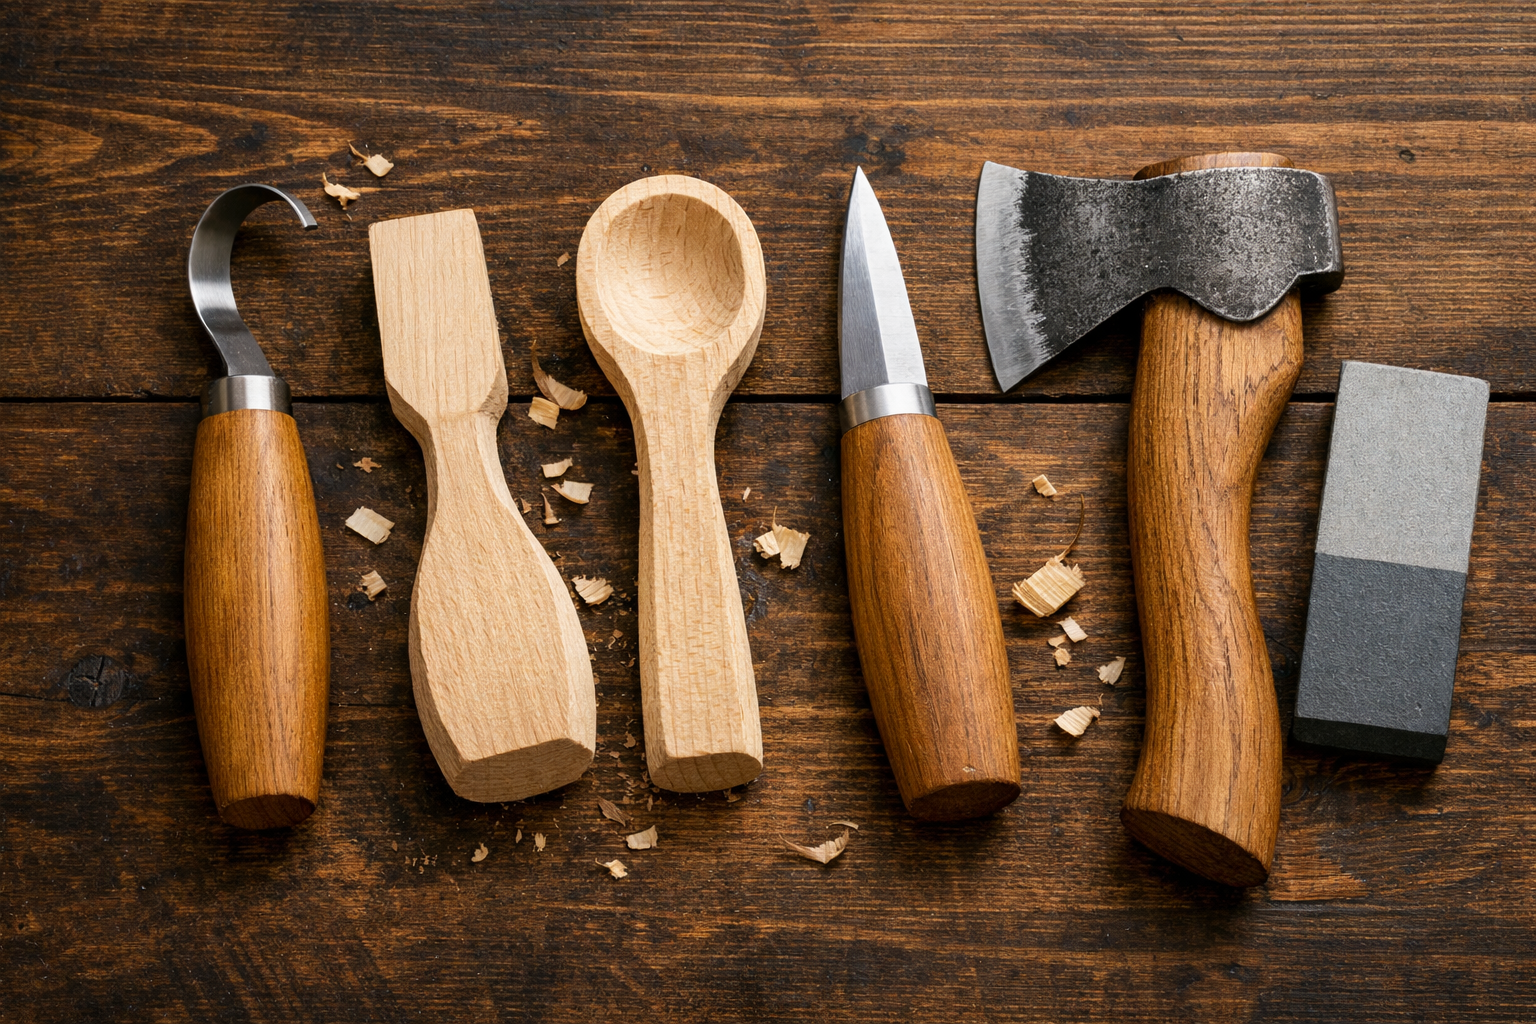
Embarking on the satisfying craft of spoon carving requires only a few fundamental hand tools. Unlike many woodworking disciplines that demand an array of power tools, spoon carving champions simplicity and precision with manual implements. Understanding these tools and how to use them safely is the first step in your “Beginner’s Guide to Carving Spoons and Utensils: Hand Tools, Wood Selection, and Food-Safe Finishes.”

The Core Toolset
Carving Axe (or Hatchet):
- Purpose: Primarily used for the initial rough shaping of your spoon blank. It removes large amounts of wood quickly and efficiently.
- Selection: Look for a small, lightweight axe with a sharp, thin blade and a comfortable handle. The blade should be slightly rounded for easier scooping cuts.
- Safety Tip: Always use a chopping block and keep both hands on the axe, away from the cutting path.
Sloyd Knife (or Straight Carving Knife):
- Purpose: The workhorse for refining the spoon’s exterior shape, handle, and general detailing. Its straight blade allows for controlled, precise cuts.
- Selection: A high-quality sloyd knife will have a durable, sharp blade made from good steel, and an ergonomic handle that fits comfortably in your hand. Blade lengths typically range from 2 to 4 inches.
- Technique: Master push cuts, pull cuts, and paring cuts. Always cut away from your body and use your thumb as a fulcrum for control.
Hook Knife (or Spoon Knife):
- Purpose: Specifically designed to carve the concave bowl of the spoon. Its curved blade allows it to scoop out wood effectively.
- Selection: Hook knives come in various curves (tight, gentle) and orientations (right-handed, left-handed, double-edged). A medium curve is a good starting point for beginners. Ensure it’s exceptionally sharp.
- Technique: Use a rotating motion to scoop out the wood, working from the center of the bowl outwards. Take shallow cuts to avoid splitting.
Sharpening Your Tools: A Crucial Skill
Sharp tools are safe tools. Dull tools require more force, increasing the risk of slips and injury. Learning to sharpen your carving tools is as important as learning to carve itself. For a comprehensive understanding of maintaining a razor edge, explore resources like “The Ultimate Guide to Sharpening Woodworking Chisels and Planes:” (https://woodcraftwiz.com/the-ultimate-guide-to-sharpening-woodworking-chisels-and-planes-achieving-razor-sharp-edges/).
Basic Sharpening Kit:
- Whetstones or Sharpening Stones: A coarse stone for major repairs and a fine stone for honing.
- Strop and Polishing Compound: Essential for achieving a razor-sharp edge and removing burrs.
- Leather Strop: A piece of leather with an abrasive compound applied, used to refine the edge after sharpening.
“A dull knife is more dangerous than a sharp one because it requires excessive force, leading to uncontrolled slips.”
Selecting the Right Wood for Spoons and Utensils
Choosing the appropriate wood is paramount for successful spoon carving, especially when focusing on a “Beginner’s Guide to Carving Spoons and Utensils: Hand Tools, Wood Selection, and Food-Safe Finishes.” The best wood for carving spoons needs to be easy to work with, durable, and above all, food-safe.
Ideal Wood Characteristics for Spoon Carving
- Grain Structure: Look for fine, even grain. This makes carving smoother, reduces tear-out, and results in a stronger, more refined finished product.
- Hardness: Medium-hardwoods are often ideal. They are soft enough to carve by hand without excessive effort but hard enough to hold up to daily use.
- Food Safety: This is non-negotiable for kitchen utensils. Some woods contain natural toxins or sap that can leach into food. Always verify a wood’s food-safe status.
- Availability: Starting with readily available wood makes the hobby more accessible.
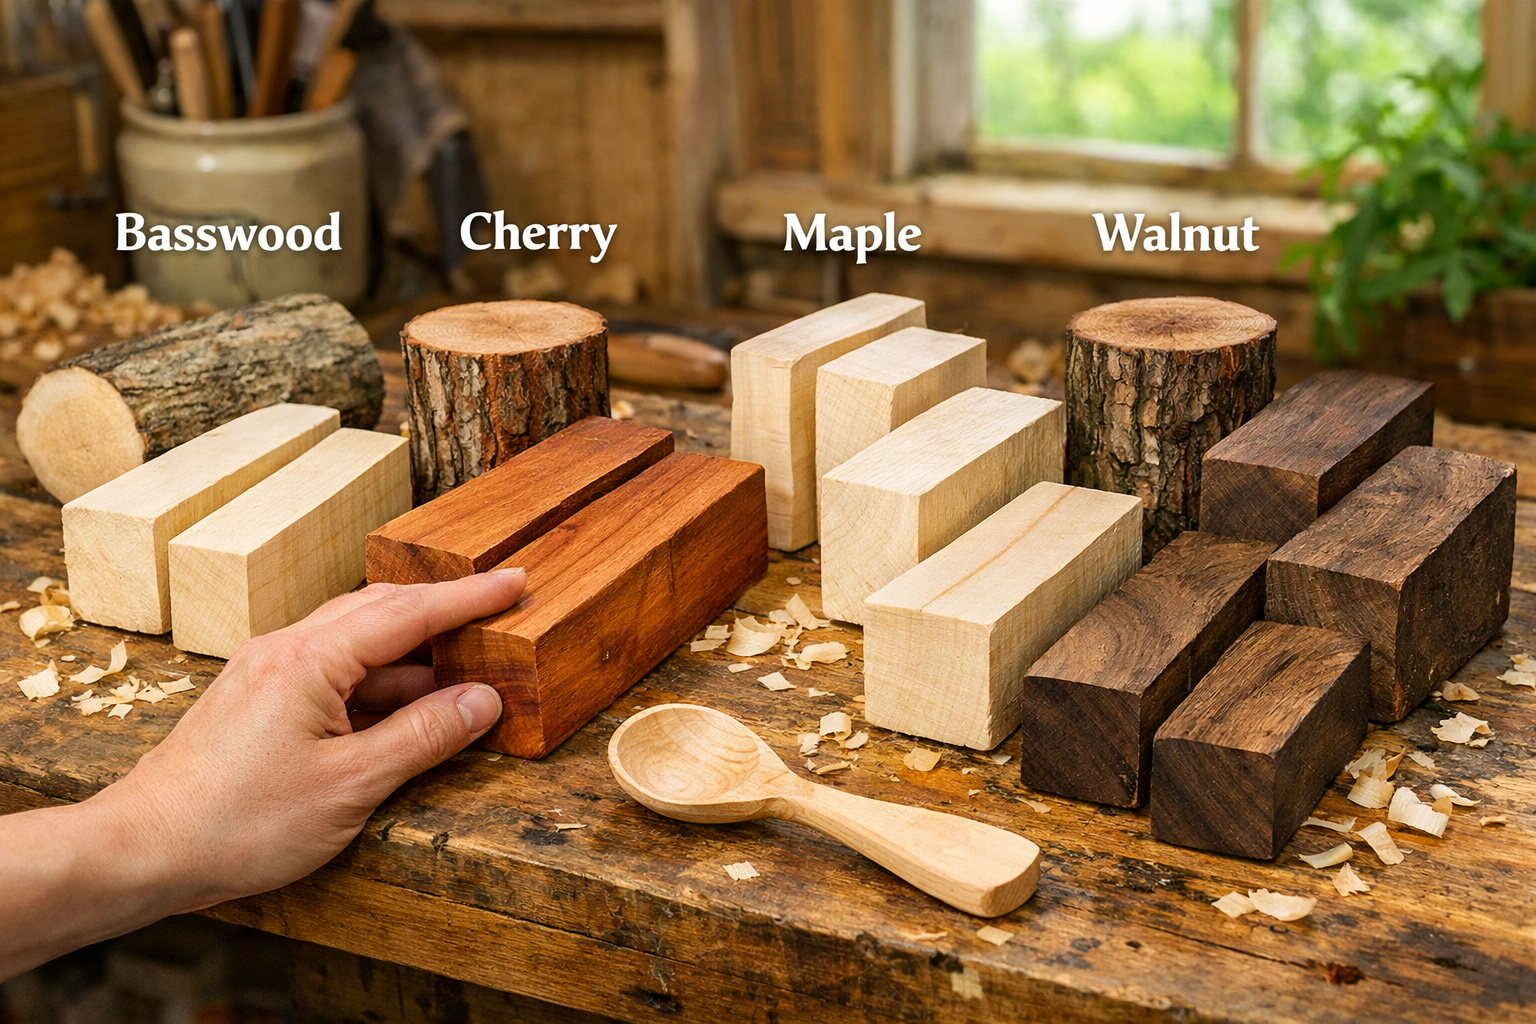
Recommended Wood Species for Beginners
| Wood Species | Characteristics | Best For | Notes |
|---|---|---|---|
| Basswood | Very soft, fine, even grain, pale color, carves easily. | First projects, practice, decorative | Not the most durable for heavy use. |
| Cherry | Medium hardness, beautiful rich color, closes grain, carves well, very food-safe. | Everyday spoons, gifts, beautiful finish | Can be slightly harder than basswood but highly rewarding. |
| Maple | Medium to hard, dense, fine grain, light color, very durable, excellent food-safe. | Utensils requiring high durability | Can be harder to carve, best once some skill is gained. |
| Walnut | Medium hardness, rich dark brown color, good grain, carves well, durable. | Decorative spoons, serving utensils | Offers a stunning contrast; ensure no allergic reactions for users. |
| Birch | Medium hardness, light color, fine grain, carves smoothly, good for everyday use. | All-purpose spoons, kitchen utensils | A reliable and affordable choice. |
Sourcing Your Wood
You can source wood for spoon carving in several ways:
- Local Wood Suppliers/Sawmills: Often have cutoffs or smaller blanks perfect for carving.
- Arborists or Tree Surgeons: When trees are felled, ask for logs or branches. Freshly cut wood (green wood) is often easier to carve than seasoned, dry wood.
- Forestry or Woodland Areas: Always check local regulations before harvesting wood. Look for fallen branches.
- Online Retailers: Many woodworking stores sell pre-cut spoon blanks, which can be convenient for beginners.
Consider exploring “Sourcing Reclaimed and Salvaged Wood: Quality Assessment, Restoration, and Safe Handling” (https://woodcraftwiz.com/sourcing-reclaimed-and-salvaged-wood-quality-assessment-restoration-and-safe-handling/) for sustainable options, though ensure any reclaimed wood is properly identified and suitable for food contact.
Working with Green Wood vs. Dry Wood: Green wood contains more moisture, making it softer and easier to carve. However, it will warp and crack as it dries. Carve the general shape from green wood, then allow it to dry slowly before final shaping and finishing. Dry wood holds its shape but is harder to carve.
Food-Safe Finishes for Carved Spoons and Utensils
After the gratifying process of carving, applying a food-safe finish is the critical final step in your “Beginner’s Guide to Carving Spoons and Utensils: Hand Tools, Wood Selection, and Food-Safe Finishes.” This not only protects the wood from moisture and daily use but also ensures your handcrafted items are perfectly safe for contact with food.
Understanding Food Safety in Finishes
Not all wood finishes are safe for contact with food. Many common finishes contain solvents, heavy metals, or chemicals that can leach into food, posing health risks. For items like spoons, cutting boards, or serving trays, only finishes explicitly labeled as “food-safe” or those derived from natural, edible ingredients should be used.
For more on food-safe finishes, particularly for items like cutting boards, refer to “Ultimate Guide to Wooden Cutting Boards: End-Grain Patterns, Tool Sharpening, and Food-Safe Finishes” (https://woodcraftwiz.com/ultimate-guide-to-wooden-cutting-boards-end-grain-patterns-tool-sharpening-and-food-safe-finishes/).
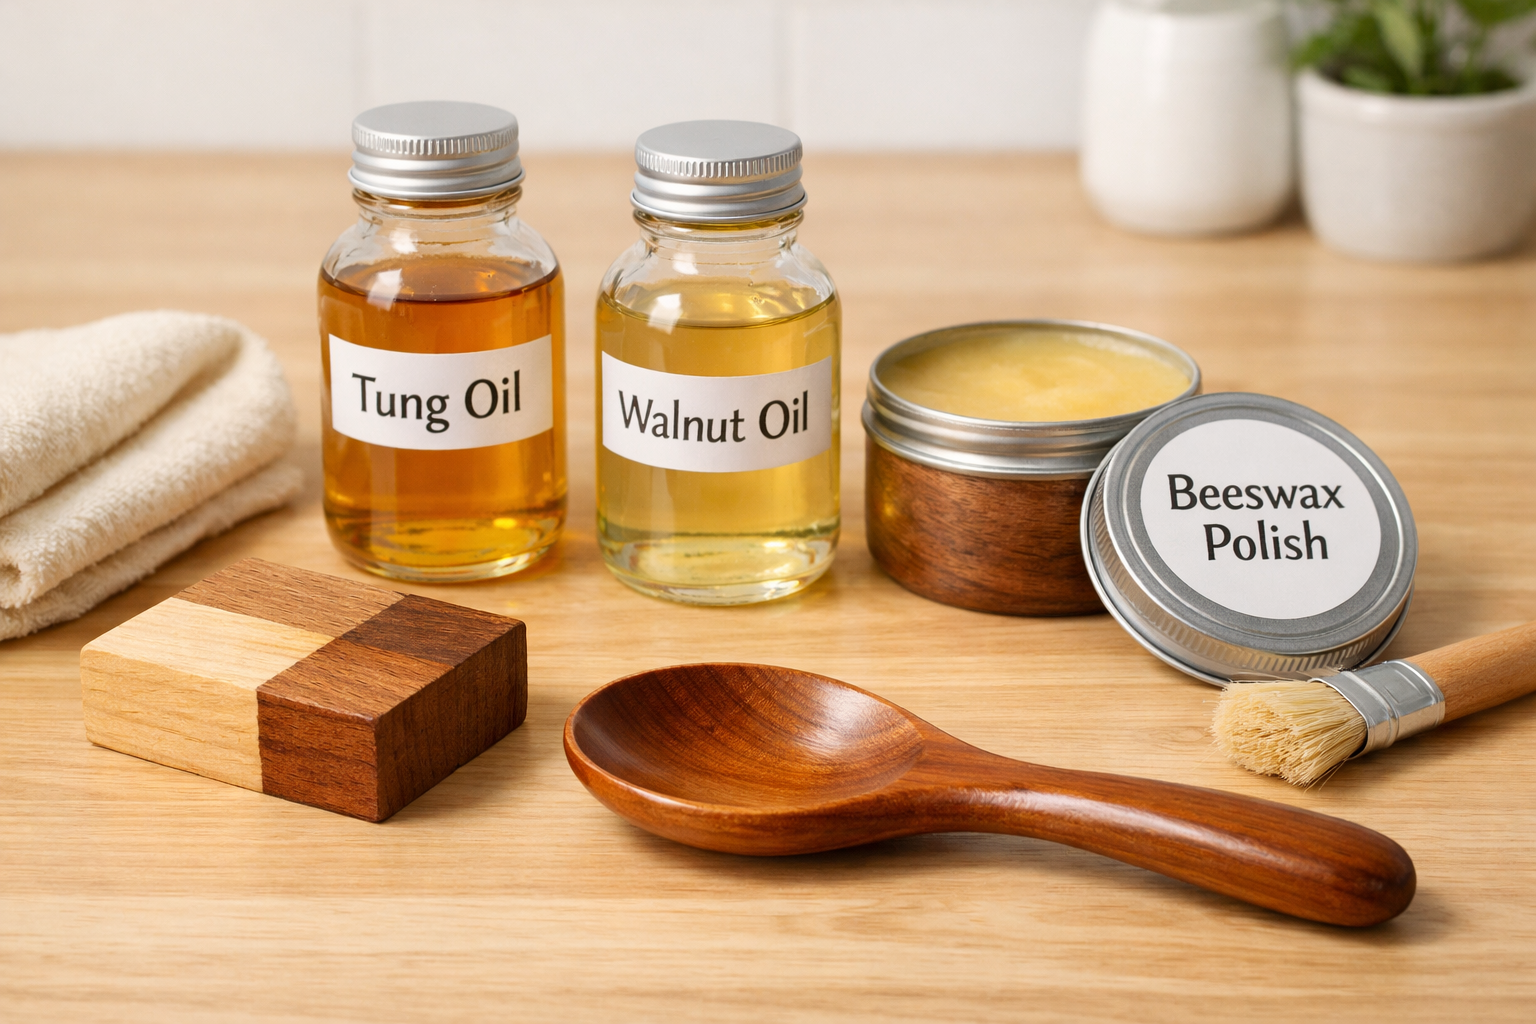
Popular Food-Safe Finish Options
Mineral Oil:
- Pros: Inexpensive, widely available, easy to apply, clear, non-toxic, and penetrates well.
- Cons: Offers minimal protection against moisture and requires frequent reapplication. Can feel greasy if over-applied.
- Application: Apply generously with a clean cloth, let it soak in for several hours, then wipe off any excess. Repeat multiple times for initial saturation.
Walnut Oil:
- Pros: A natural, food-safe drying oil that polymerizes (hardens) within the wood, offering better protection than mineral oil. Enhances wood grain.
- Cons: Can be an allergen for those with nut allergies. Takes longer to cure than mineral oil. More expensive.
- Application: Apply thin coats with a cloth, allowing each coat to dry completely (24-48 hours) before applying the next. Build up several coats.
Tung Oil (Pure):
- Pros: A natural, non-toxic drying oil that provides excellent water resistance and a durable, satin finish. Does not produce a film on the surface.
- Cons: Can be difficult to find pure tung oil (many products are “tung oil finish” which contain additives). Takes a long time to cure.
- Application: Apply very thin coats, rubbing it into the wood. Wipe off excess after 15-20 minutes. Allow 24 hours between coats. Multiple coats are needed.
Beeswax/Carnauba Wax Finishes:
- Pros: Often mixed with mineral or walnut oil, these waxes provide a lovely soft sheen, a pleasant feel, and additional water resistance. Natural and non-toxic.
- Cons: Offer less penetrating protection than oils alone; primarily a surface barrier. Requires more frequent reapplication.
- Application: Apply a small amount to the wood with a cloth, then buff vigorously until a soft sheen appears.
Application Tips for Durable Finishes
- Prepare the Surface: Ensure your spoon is sanded smooth to at least 220-grit for optimal finish penetration and a pleasing texture.
- Warm the Wood: Slightly warming the wood (e.g., in indirect sunlight or with a hairdryer) can help oils penetrate deeper.
- Wipe Off Excess: For all oil finishes, always wipe off any unabsorbed oil after its recommended soak time. This prevents sticky, gummy surfaces.
- Cure Time: Allow adequate cure time, especially for drying oils like walnut and tung oil, before using the utensil. This can take days or even weeks for tung oil.
- Maintenance: Reapply your chosen finish periodically (e.g., every few months or when the wood looks dry) to maintain its protection and luster.
Getting Started with Your First Spoon
Now that you understand the tools, wood, and finishes, it’s time to put it all into practice. Here’s a simplified step-by-step guide to carving your first spoon:
- Design Your Spoon: Sketch your desired spoon shape on paper, then transfer it to your wood blank. Start with a simple, practical design.
- Rough Out with an Axe: Using your carving axe and a chopping block, carefully chop away the excess wood, working towards your drawn outline. Always chop with the grain. Remember to use appropriate safety gear, including cut-resistant gloves.
- Refine the Profile: Switch to your sloyd knife. Using controlled push and pull cuts, refine the overall outline of the spoon, shaping the handle and the rough exterior of the bowl. Pay attention to grain direction to avoid tear-out.
- Carve the Bowl: With your hook knife, carefully carve out the bowl of the spoon. Start shallow, taking small, scooping cuts. Work from the center outwards, gradually deepening and smoothing the bowl.
- Shape and Smooth: Continue using your sloyd knife to refine the handle’s ergonomics and the spoon’s overall curves. Once satisfied with the shape, you can begin to smooth the surfaces with lighter cuts or proceed to sanding.
- Sanding (Optional but Recommended): While many traditional carvers aim for tool-finish, sanding creates a very smooth, comfortable surface. Start with a coarser grit (e.g., 120-grit) and progressively move to finer grits (up to 220 or 320-grit).
- Apply Food-Safe Finish: Once completely smooth and dust-free, apply your chosen food-safe finish as outlined in the previous section.
Remember, practice is key. Your first spoon might not be perfect, but each subsequent spoon will show improvement. Consider creating small, simple items first, such as butter spreaders or spatulas, to build confidence before tackling more complex forms. This methodical approach is central to truly mastering the “Beginner’s Guide to Carving Spoons and Utensils: Hand Tools, Wood Selection, and Food-Safe Finishes.”
Conclusion
The journey of carving spoons and utensils is a deeply rewarding one, bridging the gap between raw natural materials and functional, beautiful objects. This “Beginner’s Guide to Carving Spoons and Utensils: Hand Tools, Wood Selection, and Food-Safe Finishes” has equipped you with the foundational knowledge to begin your own carving adventure in 2026. From selecting the right hand tools and understanding their safe operation to choosing ideal wood species and applying food-safe finishes, every step contributes to creating a piece that is not only personal but also practical for everyday use.

Embrace the learning process, prioritize safety, and most importantly, enjoy the tactile satisfaction of transforming a block of wood into something truly unique. Your hands are now ready to begin this ancient craft, creating heirlooms and gifts that carry the warmth of your effort.
Next Steps:
- Invest in Quality Tools: Purchase a basic set of sharp, well-made carving tools.
- Source Your First Wood Blank: Start with an easy-to-carve wood like basswood or cherry.
- Practice Sharpening: Get comfortable with sharpening before you even start carving.
- Watch Tutorials: Supplement this guide with video tutorials to see techniques in action.
- Start Simple: Don’t try to carve an intricate design for your first project. A simple butter knife or small serving spoon is an excellent starting point.
SEO Meta Title: Beginner’s Guide: Carving Spoons, Tools, Wood & Food-Safe Finishes SEO Meta Description: Learn to carve spoons & utensils with this beginner’s guide. Discover essential hand tools, best wood selection, and food-safe finishes for 2026.
