

For many woodworking enthusiasts, the dream of a sprawling workshop is often hampered by the reality of limited living space, especially in urban apartments. Yet, the passion for crafting with wood doesn’t need to be sidelined. This article will guide you through the process of Building a Compact, Multi-Functional Woodworking Bench for Apartment Dwellers: Maximizing Small Spaces, enabling you to pursue your craft without compromising your living environment. Discover how to design and build a woodworking bench that folds, rolls, and integrates storage, perfect for those with limited space like apartment residents.
Key Takeaways
- Prioritize Mobility and Storage: A truly effective apartment woodworking bench must be easy to move and offer integrated storage to keep tools organized and out of sight.
- Multi-Functionality is Key: Design your bench to serve multiple purposes—not just woodworking—to justify its presence in a small living area.
- Utilize Foldable and Collapsible Elements: Incorporate features like fold-down tops, retractable casters, and nesting components to minimize its footprint when not in use.
- Consider Modular Design: Build the bench in sections or with customizable attachments to adapt it to various tasks and storage needs.
- Material Selection Matters: Choose durable yet lightweight materials for ease of movement and long-term stability in a compact design.
Designing Your Ultimate Compact Woodworking Solution
The foundation of Building a Compact, Multi-Functional Woodworking Bench for Apartment Dwellers: Maximizing Small Spaces lies in meticulous design. This isn’t just about shrinking a traditional workbench; it’s about reimagining its core purpose and form to fit a confined environment. The goal is to create a station that can perform a wide range of tasks while being incredibly efficient with its footprint.

Essential Design Principles for Small Spaces
When designing for an apartment, every inch counts. Consider these principles:
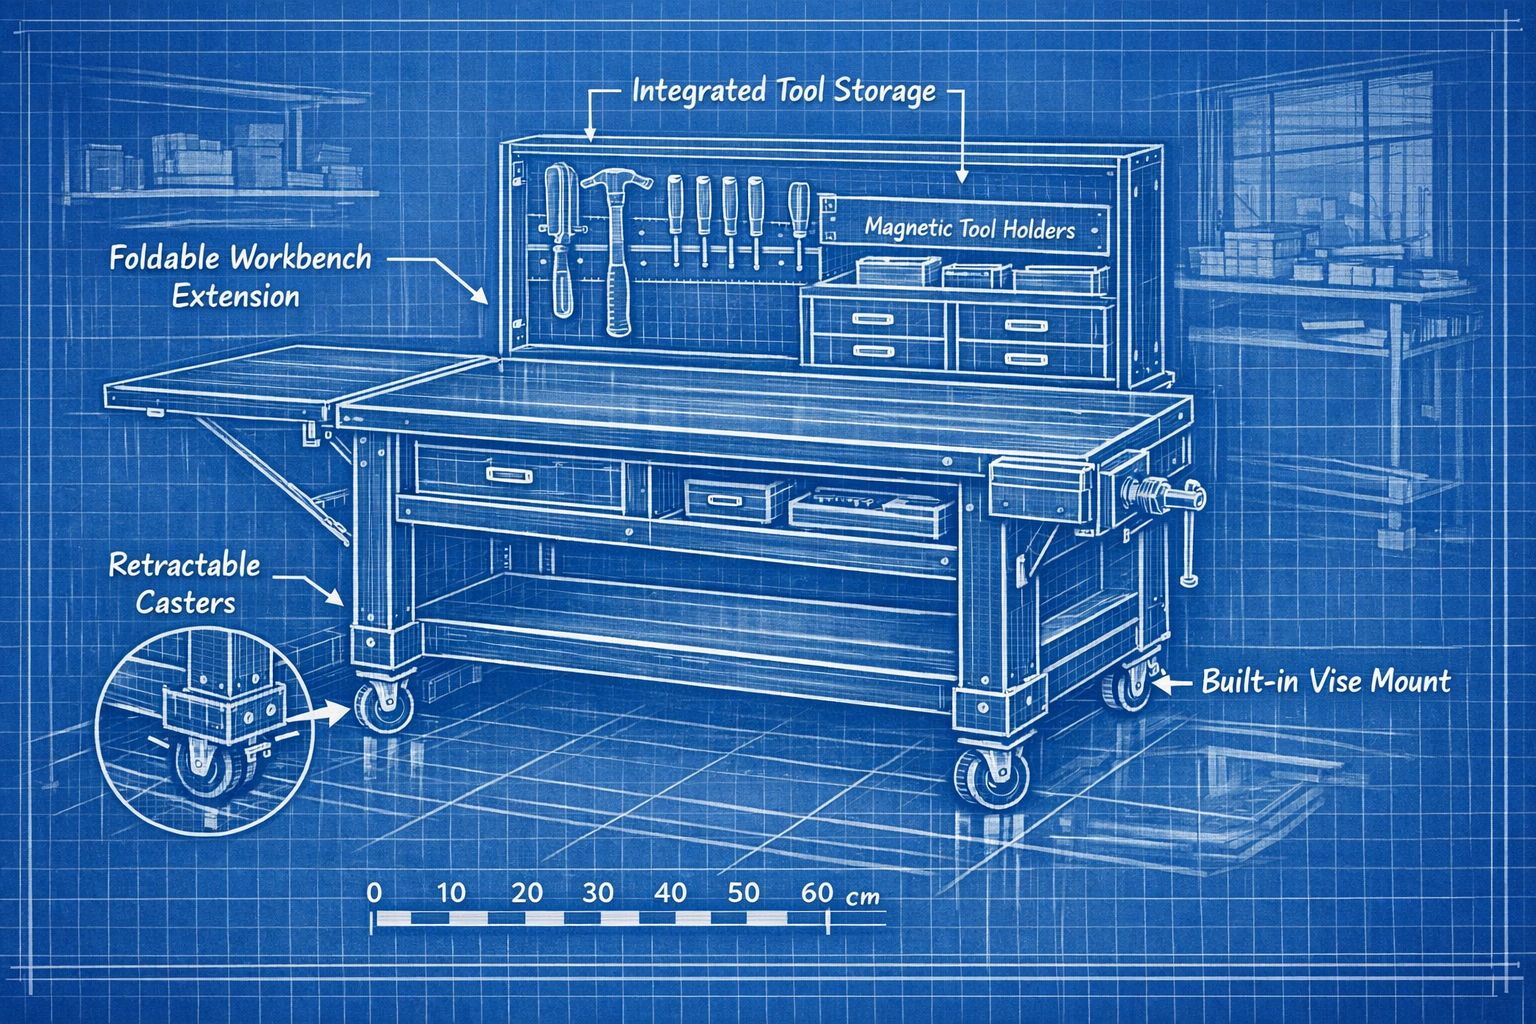
- Foldability and Collapsibility: A bench that can fold down or collapse when not in use is paramount. This could involve a hinged top, fold-out legs, or a design that tucks away into a closet. Think of designs that transform, perhaps even resembling a console table or cabinet when closed.
- Mobility: Incorporate heavy-duty, locking casters. This allows the bench to be rolled out for use and then easily moved back into a corner or storage area. The ability to move it around also means you can work in different areas of your apartment depending on the task and noise level.
- Integrated Storage: This is non-negotiable. Clutter quickly overwhelms small spaces. Your bench should have built-in drawers, shelves, pegboards, or compartments for tools and project materials. Consider vertical storage solutions that don’t take up precious floor space. For inspiration on optimizing storage, check out our guide on building modular wood storage systems for small workshops.
- Multi-Functionality: Can your workbench double as a dining table, a desk, or an assembly station for other hobbies? The more uses it has, the more justifiable its presence in your apartment becomes.
- Stability vs. Portability: While portability is key, the bench must also be stable enough for woodworking tasks. Locking casters and robust joinery are crucial. Some designs incorporate a mechanism to lift the bench slightly off its casters, resting it firmly on the floor for maximum stability during heavy work.
Conceptualizing Your Bench Layout
Start by sketching different configurations. Consider the primary woodworking tasks you’ll perform. Will you mostly be cutting small pieces, sanding, or assembling? This will dictate the required work surface area and the types of clamps or vises you might need.
Common Multi-Functional Elements:
- Integrated Vise: A small, quick-release woodworking vise is invaluable. It can be permanently mounted or designed to be removable and stored when not needed.
- Dog Holes: A grid of dog holes allows for flexible clamping with bench dogs and holdfasts, essential for securing workpieces without a full-sized vise.
- T-Track System: Integrating T-tracks into the benchtop allows for versatile clamping and jig setups. Learn more about T-track vs. dog holes for comparison.
- Fold-Out Extensions: Hinged extensions can significantly increase your work surface when needed, then fold down to save space.
- Tool Storage Drawers/Shelves: Deep drawers beneath the bench are excellent for hand tools, while open shelves can hold power tools.
- Pegboard Backsplash: A vertical pegboard can hold frequently used hand tools, keeping them accessible and organized.
- Dust Collection Port: Consider building in a simple port that can connect to a shop vacuum to minimize sawdust in your apartment.

Materials and Construction: Bringing Your Design to Life
Once you have a solid design, the next step in Building a Compact, Multi-Functional Woodworking Bench for Apartment Dwellers: Maximizing Small Spaces is selecting appropriate materials and executing the build. Durability, weight, and cost are all important factors to consider.
Material Choices for Apartment Benches
- Plywood: High-quality Baltic birch or furniture-grade plywood (¾” or 18mm thick) is an excellent choice for tabletops and structural components. It’s stable, strong, and relatively lightweight compared to solid hardwoods. MDF can also be used for non-load-bearing elements or dust collection components.
- Solid Wood: If budget allows, hardwood like maple or oak can be used for the workbench top for superior durability and resistance to dents, especially for areas that will see heavy use. However, this will add significant weight.
- Hardware:
- Heavy-Duty Locking Casters: Look for casters with a weight rating well beyond your estimated bench weight, and ensure they lock securely to prevent movement during work.
- Folding Brackets/Hinges: If incorporating fold-down elements, choose robust, high-quality hardware that can withstand repeated use.
- Drawer Slides: Full-extension drawer slides are ideal for maximizing storage access.
- Joinery: While screws and glue are sufficient for many components, consider using stronger joinery methods like mortise and tenon or robust pocket hole joinery for critical structural connections to ensure stability.
Step-by-Step Construction Considerations
While a full detailed plan is beyond the scope here, consider these general steps:
- Cut Major Components: Precisely cut all plywood and solid wood pieces according to your design. Remember the adage: measure twice, cut once!
- Assemble the Main Frame: Build the primary structure of your bench, ensuring all joints are square and strong. Use wood glue and appropriate fasteners.
- Install Folding/Retractable Mechanisms: Integrate any folding tabletops, retractable legs, or drop-down storage units at this stage. Test the mechanisms to ensure smooth operation.
- Attach Casters: Secure the heavy-duty locking casters to the base. If using retractable casters, install the lifting mechanism.
- Build and Install Storage: Construct drawers, shelves, and cabinets. Install drawer slides, hang pegboard sections, and create any custom tool holders. Consider our article on DIY modular desk organizers for ideas applicable to bench storage.
- Workbench Top Finishing: If using a plywood top, consider adding a sacrificial hardboard or MDF top layer that can be easily replaced if it gets too damaged. Edge banding can improve durability and aesthetics. For a professional finish, you might explore various natural wood finishing techniques or high-gloss wood finishing techniques.
- Add Accessories: Mount your chosen vise, install bench dog holes, or integrate T-tracks as planned.
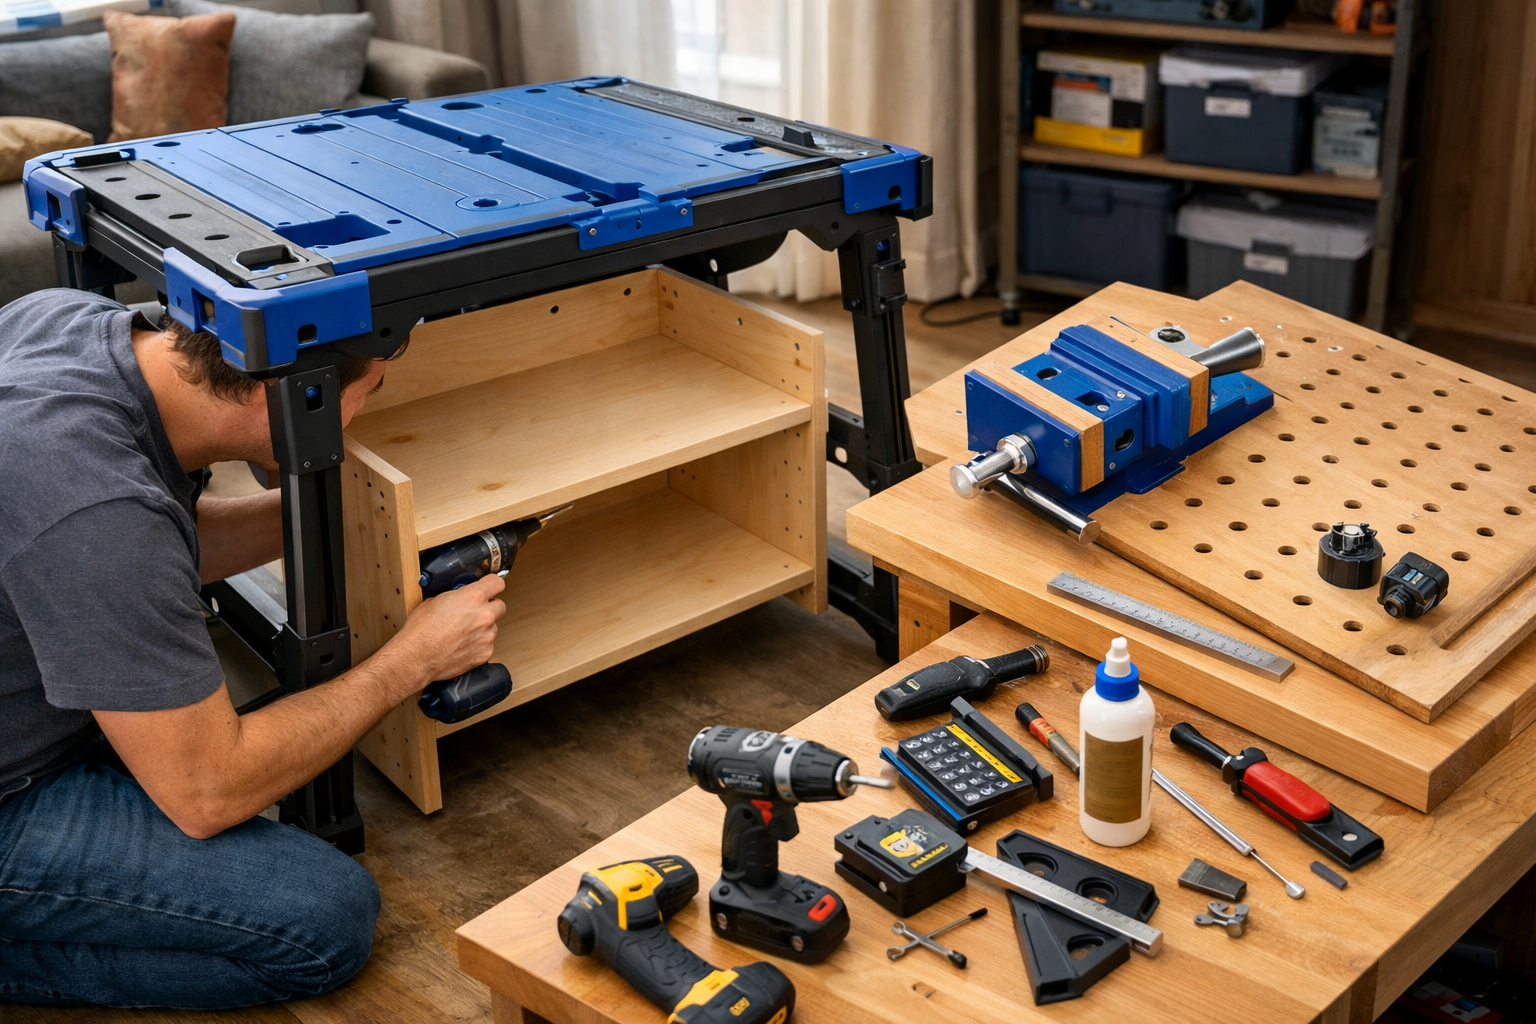
Example: Kreg Mobile Project Center as a Base
For those looking for a quicker, less intensive build, consider using a pre-made base like the Kreg Mobile Project Center. It offers a portable, foldable, and highly functional platform that can be customized. You can then build custom storage cabinets or add more robust tops and vises around it. This provides an excellent starting point for a compact, multi-functional workbench.
Maximizing Functionality and Integration in Your Apartment
The final phase of Building a Compact, Multi-Functional Woodworking Bench for Apartment Dwellers: Maximizing Small Spaces focuses on ensuring your bench genuinely serves its purpose within your unique living situation. This involves thoughtful integration into your apartment’s layout and equipping it for maximum utility.
Smart Integration into Apartment Living
The key here is stealth and adaptability. Your woodworking bench should not dominate your living space.
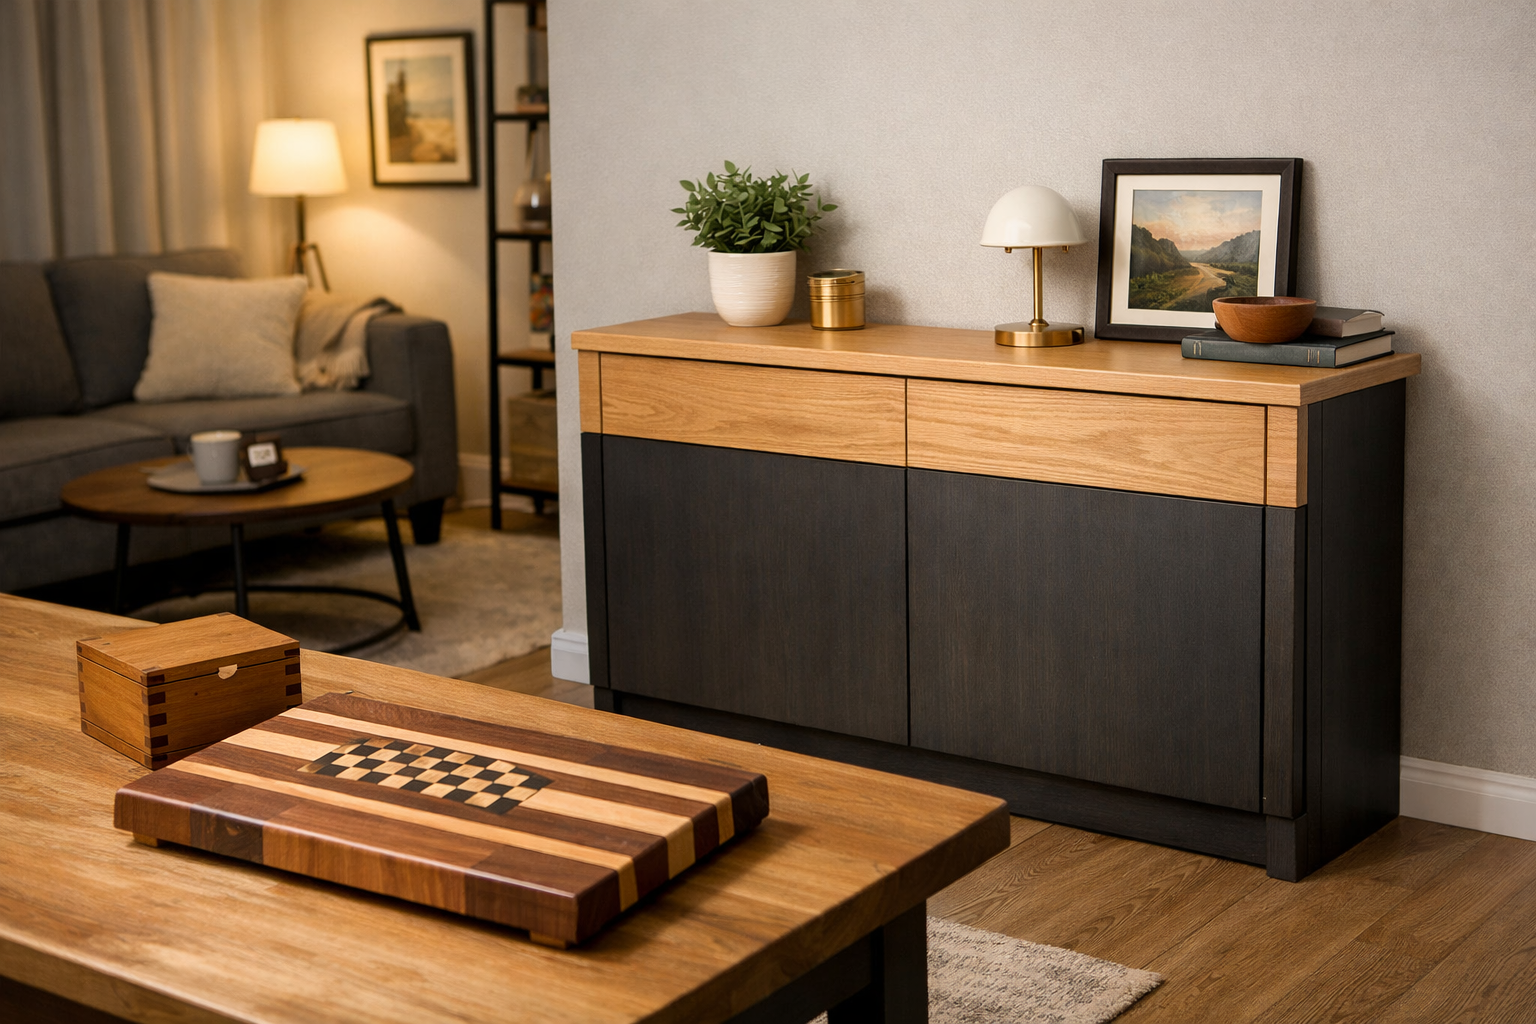
- Design for Disguise: When not in use, can your bench blend in? Perhaps it looks like a narrow console table against a wall, or a compact kitchen island. You could even design it to fit neatly inside a large closet or under a bed if space is extremely tight. For clever space-saving furniture ideas, our article on building a custom Murphy bed with integrated desk offers inspiration on multi-functional design.
- Noise and Dust Mitigation: Woodworking can be noisy and dusty.
- Rubber Matting: Place a heavy rubber mat under the bench to absorb vibrations and protect your floor.
- Shop Vacuum: Invest in a good shop vacuum with dust collection attachments for your tools. This is crucial for keeping your apartment clean.
- Hand Tools: Emphasize the use of hand tools for certain tasks to reduce noise. Explore hand tool mastery for detail work to improve your skills.
- Work During Appropriate Hours: Be mindful of your neighbors and avoid noisy operations during quiet hours.
- Lighting: Ensure you have adequate lighting, either integrated into the bench or a portable task light, to work safely and accurately.
Equipping Your Multi-Functional Bench
Beyond the bench itself, the tools and accessories you choose will define its multi-functionality.
- Compact Power Tools: Opt for smaller, cordless versions of essential power tools where possible. Consider a compact circular saw, a trim router, and a random orbital sander.
- Versatile Hand Tools: A good set of chisels, planes, and saws are indispensable and quiet.
- Clamping Solutions: A variety of clamps (F-style, C-clamps, parallel clamps) are essential. Bench dogs and holdfasts are excellent for flat work on your benchtop.
- Safety Gear: Always have safety glasses, hearing protection, and a dust mask readily available.
- Project Specific Storage: Dedicate specific storage compartments for ongoing projects, keeping all related components together. This can be as simple as a designated drawer or a removable tote.
By thoughtfully designing, building, and equipping your compact, multi-functional woodworking bench, apartment dwellers can fully embrace their woodworking passion. The satisfaction of creating something beautiful, even in a small space, is immense.
Conclusion
Building a Compact, Multi-Functional Woodworking Bench for Apartment Dwellers: Maximizing Small Spaces is not merely a construction project; it’s an exercise in creative problem-solving and an affirmation that passion can thrive in any environment. By prioritizing mobility, integrated storage, multi-functionality, and clever design, apartment dwellers can create a dedicated workspace that supports their woodworking aspirations without sacrificing precious living space.
The journey from design concept to a finished, functional bench requires careful planning and execution, but the reward is a versatile hub for creativity. Whether it’s a fold-away masterpiece or a cleverly disguised console, your compact workbench will empower you to tackle projects, from small decorative items to custom furniture, all within the confines of your home. Remember, the best workshop is the one you actually use.
Actionable Next Steps:

- Assess Your Space: Measure the available footprint in your apartment, considering both active workspace and tucked-away storage.
- Sketch Your Needs: List your primary woodworking tasks and sketch out different bench configurations that could accommodate them.
- Research Designs: Look at examples of portable, folding, or multi-functional workbenches for inspiration.
- Gather Materials & Tools: Select durable, space-saving materials and ensure you have the necessary tools for construction.
- Build and Adapt: Start building, being prepared to make minor adjustments to your design as you go, ensuring it perfectly fits your unique apartment and woodworking style.
