
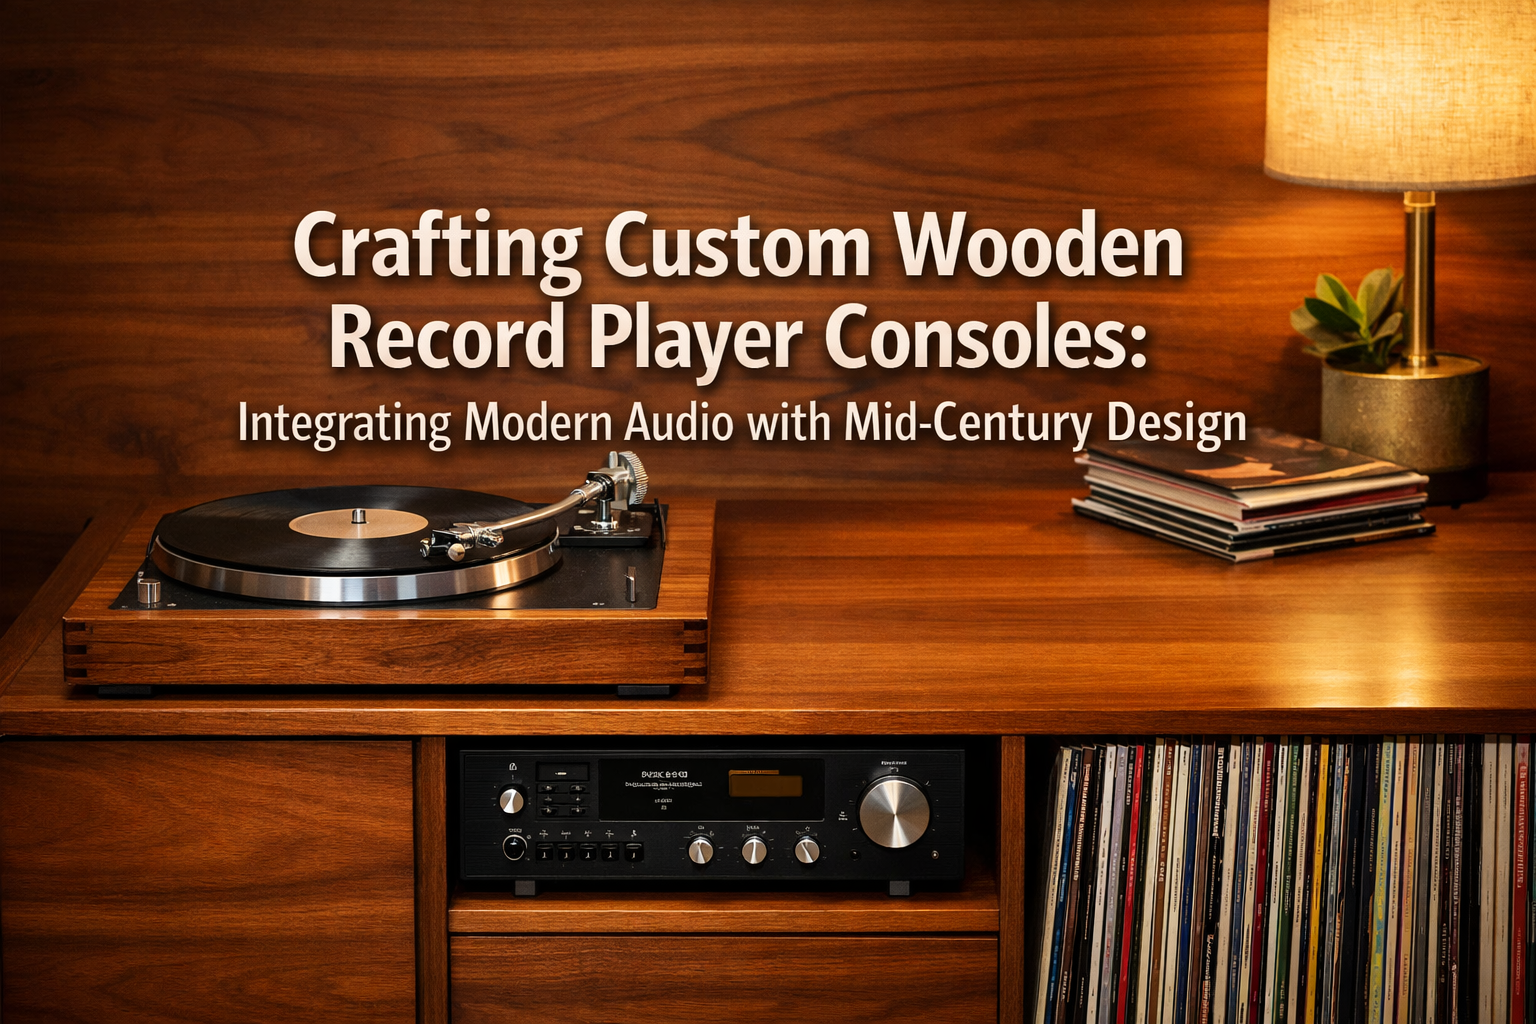

In an era dominated by digital convenience, the tangible allure of vinyl records persists, drawing enthusiasts into a rich, auditory experience. For the audiophile woodworker, this passion extends beyond the music itself, reaching into the very heart of how it’s presented. The year 2026 sees a continued resurgence in bespoke furniture, particularly for specialized needs. This article explores the art of Crafting Custom Wooden Record Player Consoles: Integrating Modern Audio with Mid-Century Design – a fascinating blend of woodworking skill, aesthetic appreciation, and technological integration. This isn’t just about building a box; it’s about creating a functional centerpiece that respects both the heritage of sound and the timeless elegance of mid-century modern design principles.
A custom record player console serves as more than just a piece of furniture; it’s a statement. It houses cherished vinyl collections, protects delicate audio equipment, and elevates the listening experience by presenting it in a manner that is both beautiful and acoustically thoughtful. The challenge lies in harmoniously blending the warm, organic feel of wood with the precise demands of modern audio components, all while capturing the iconic clean lines and sophisticated simplicity of mid-century aesthetics.

Key Takeaways
- Design for Integration: Successfully blending mid-century aesthetics with modern audio requires careful planning for component sizes, ventilation, and cable management from the outset.
- Material Selection Matters: Choosing the right wood (walnut, teak, cherry) and hardware is crucial for achieving an authentic mid-century look and ensuring durability.
- Precision Joinery is Paramount: Employing robust and aesthetically pleasing joinery techniques like dovetails or mortise and tenon joints enhances both the console’s strength and its visual appeal.
- Acoustic Considerations: Incorporating features like isolation platforms, proper ventilation, and vibration damping can significantly improve sound quality.
- Finishing Touches Define Quality: The choice of finish, from natural oils to lacquers, profoundly impacts the console’s appearance and longevity, completing the mid-century modern look.
Conceptualizing Your Mid-Century Audio Haven: Crafting Custom Wooden Record Player Consoles

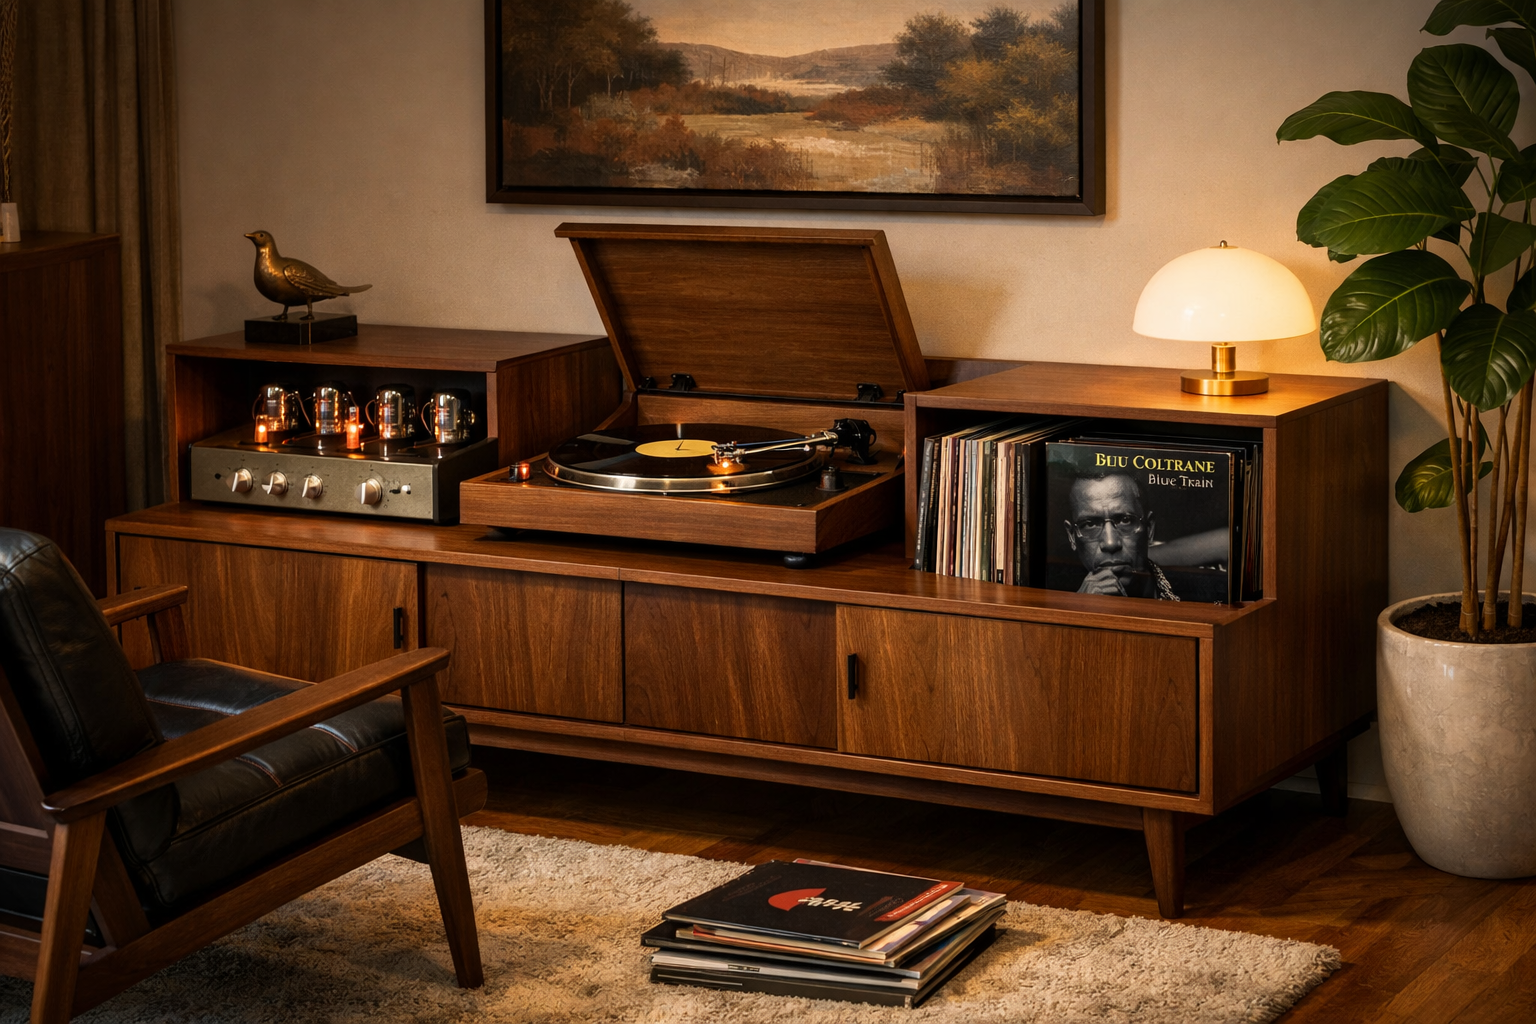
The journey of Crafting Custom Wooden Record Player Consoles: Integrating Modern Audio with Mid-Century Design begins with a clear vision. This initial phase is critical for defining the console’s dimensions, aesthetic, and functional requirements. Mid-century modern design is characterized by its clean lines, organic curves, minimalist forms, and emphasis on functionality. Think Danish modern, Eames, or Saarinen – pieces that are timeless and elegant.
Understanding Mid-Century Modern Aesthetics
Before sketching designs, immerse yourself in the hallmarks of mid-century modern. Key elements include:
- Tapered Legs: Often angled and slender, giving a “floating” appearance.
- Clean Lines: Uncluttered, geometric forms without excessive ornamentation.
- Rich Woods: Walnut, teak, cherry, and rosewood are popular choices, celebrated for their grain and warm tones.
- Minimalist Hardware: Integrated pulls or subtle brass/chrome accents.
- Functionality: Every element serves a purpose; form follows function.
Consider how these elements will translate into your record player console. Will it be a low-slung credenza, a taller cabinet, or a compact side table? The scale should complement the room it will inhabit.
Designing for Modern Audio Integration
Modern audio equipment, while often sleek, has specific requirements. Your design must accommodate:
- Dimensions: Turntables, amplifiers, receivers, and sometimes even speakers need precise compartments. Measure all components meticulously.
- Ventilation: Amplifiers generate heat. Adequate airflow is essential to prevent overheating and prolong equipment life. Design open backs, ventilation cutouts, or discreet fan systems.
- Cable Management: Nothing detracts from a clean mid-century aesthetic like a tangle of wires. Plan for discrete cable routing channels, grommets, and hidden compartments.
- Vibration Isolation: Turntables are sensitive to vibrations. Incorporate isolation platforms (e.g., rubber feet, Sorbothane pads) or design shelves with built-in damping.
A good design integrates these technical needs seamlessly, making them part of the overall aesthetic rather than an afterthought. Sketch multiple ideas, experiment with different configurations, and consider using 3D modeling software for detailed visualization.
“A truly custom console isn’t just built around your equipment; it’s built for it, ensuring optimal performance and a visually cohesive experience.”
Material Selection: The Foundation of Your Console
The choice of wood profoundly impacts both the console’s appearance and its durability.
- Walnut: A quintessential mid-century wood, known for its rich, dark brown color and beautiful grain. It’s strong and works well for fine furniture.
- Teak: Another popular choice, particularly for its distinctive grain and golden-brown hue. It’s naturally oily and durable.
- Cherry: Offers a warm, reddish-brown tone that deepens over time. It’s easy to work with and takes finishes beautifully.
- Maple or Birch: Lighter woods that can be stained to mimic other species or used for a contrasting, lighter aesthetic.
Consider solid wood for structural elements and veneered plywood for larger panels to ensure stability and reduce costs. For specific ideas on crafting other wooden pieces, explore articles like “Console Tables That Wow: Build Sleek Entryway and TV Stand A” for inspiration on furniture construction. Console Tables That Wow: Build Sleek Entryway and TV Stand A

Construction Techniques for Crafting Custom Wooden Record Player Consoles

With your design finalized and materials selected, the real work of Crafting Custom Wooden Record Player Consoles: Integrating Modern Audio with Mid-Century Design begins. This phase focuses on precise cuts, strong joinery, and careful assembly.
Essential Tools and Workspace Setup
A well-organized workspace and the right tools are paramount.
- Table Saw: For accurate rip and crosscuts.
- Miter Saw: For precise angled cuts, especially for tapered legs.
- Router: For dados, rabbets, decorative edges, and creating cable channels.
- Joinery Tools: Chisels, hand planes, clamps, and potentially a domino or biscuit joiner. For mastering hand tools, see “Hand Tool Mastery for Detail Work: Chisels, Hand Planes, and”. Hand Tool Mastery for Detail Work: Chisels, Hand Planes, and
- Sanding Equipment: Orbital sander, sanding blocks, various grits of sandpaper.
- Safety Gear: Eye protection, hearing protection, dust mask.
Mastering Joinery for Strength and Aesthetics
Mid-century modern furniture often features exposed joinery as a design element.
- Dovetail Joints: Excellent for drawers and cabinet corners, offering incredible strength and a classic look.
- Mortise and Tenon Joints: Ideal for frames, legs, and rails, providing robust structural integrity.
- Dados and Rabbets: Perfect for shelving, back panels, and creating clean recesses for components.
- Mitered Joints: Used for seamless corners, often reinforced with splines or biscuits.
When constructing the frame and panels, pay meticulous attention to squareness and flatness. Any deviation will compound as you assemble, leading to an imperfect piece. For example, when building a console that includes doors or drawers, the fit and finish of these elements are critical. Precision in cutting and assembly ensures smooth operation and a professional appearance. You might find inspiration for other functional storage solutions in articles like “Building Wooden Spice Racks: Wall-Mounted and Rotating Desig”. Building Wooden Spice Racks: Wall-Mounted and Rotating Desig
Crafting Iconic Tapered Legs
Tapered legs are a hallmark of mid-century design. They can be created using a tapering jig on a table saw or with a band saw and then refined with a hand plane. Ensure all legs are identical in length and taper for stability and visual consistency. Attaching them securely, often with mortise and tenon or sturdy metal plates, is crucial.
Integrating Functional Features
- Adjustable Shelving: Allows for flexibility as audio equipment changes or as your vinyl collection grows.
- Drawer Construction: If your design includes drawers, focus on smooth-gliding drawer slides and robust box construction.
- Hidden Cable Channels: Route cables neatly within the console’s structure, emerging discreetly where needed. Consider a removable back panel for easy access.
- Ventilation Grilles: Incorporate stylish grilles or carefully placed cutouts to allow heat to escape.
- Isolation Platforms: Design specific areas for your turntable and amplifier, potentially with recessed platforms or built-in dampening materials.

Finishing Your Console: The Final Touch for Integrating Modern Audio with Mid-Century Design
The finishing stage is where your custom wooden record player console truly comes to life, cementing its mid-century modern identity. This process not only protects the wood but also enhances its natural beauty and ensures the console blends seamlessly with your audio setup and home decor.

Sanding: The Foundation of a Flawless Finish
A perfect finish begins with thorough sanding. Start with a coarser grit (e.g., 100-120) to remove tool marks and progressively move to finer grits (e.g., 180, 220, 320).
- Even Pressure: Apply consistent pressure across all surfaces.
- Grain Direction: Always sand with the grain to avoid visible scratches.
- Dust Removal: After each grit, meticulously remove all dust using a tack cloth or compressed air before moving to the next finer grit. Any remaining dust will be trapped under the finish.
Choosing and Applying the Right Finish
The choice of finish significantly impacts the final aesthetic and durability. Mid-century modern pieces often feature finishes that highlight the natural beauty of the wood rather than obscuring it.
| Finish Type | Characteristics | Pros | Cons | Mid-Century Suitability |
|---|---|---|---|---|
| Oil Finish | Penetrates wood, natural feel, satin sheen | Enhances grain, easy to repair, natural look | Less protective, requires reapplication | Excellent |
| Lacquer | Dries quickly, durable, various sheens | Smooth finish, good protection, professional look | Fumes, requires spray equipment, less DIY-friendly | Very Good |
| Varnish/Polyurethane | Forms a hard, protective film, high durability | Highly protective, water-resistant, durable | Can look plastic-y, difficult to repair | Good (satin/matte) |
| Shellac | Natural, non-toxic, warm amber tone, traditional feel | Fast-drying, easy to apply, reversible | Less durable against water/alcohol, scratches easily | Good |
For a classic mid-century look, an oil finish (like Danish oil or teak oil) is often preferred as it brings out the wood’s natural color and grain with a soft, inviting luster. For a slightly more protective but still authentic look, a satin lacquer or a low-sheen varnish can work well. If you are using reclaimed wood, ensure you understand how to best finish it. More details can be found here: Sustainable Finishes for Reclaimed Wood: Low-VOC Recipes and.
Apply your chosen finish according to the manufacturer’s instructions, typically in multiple thin coats, allowing adequate drying time between each. Lightly sand with a very fine grit (e.g., 400-600) between coats for maximum smoothness, then thoroughly clean off dust.
Hardware and Final Assembly
Once the finish is fully cured, it’s time for the final assembly of your custom wooden record player console.
- Install Hardware: Attach hinges, drawer slides, door pulls, and any adjustable shelf pins. Choose hardware that complements the mid-century aesthetic – brushed brass, polished chrome, or minimalist integrated pulls.
- Component Installation: Carefully place your turntable, amplifier, and other audio components into their designated compartments.
- Cable Management: Route all cables through the planned channels and grommets, securing them neatly with cable ties or clips. This step is crucial for both aesthetics and functionality.
- Test Everything: Power on your audio system, test all connections, and ensure everything is functioning correctly and acoustically pleasing.
By meticulously attending to these details, your project of Crafting Custom Wooden Record Player Consoles: Integrating Modern Audio with Mid-Century Design will culminate in a stunning, functional, and enduring piece of furniture that enhances your listening experience and home decor for years to come. For ideas on crafting other unique home pieces, consider “Handcrafted Wooden Wall Clocks: Designs That Blend Narrative”. Handcrafted Wooden Wall Clocks: Designs That Blend Narrative

Conclusion
Crafting Custom Wooden Record Player Consoles: Integrating Modern Audio with Mid-Century Design is a deeply rewarding endeavor that marries the passion for woodworking with the love of music. It demands careful planning, skilled execution, and an eye for detail, resulting in a piece that is as much a work of art as it is a functional hub for your audio enjoyment. By embracing the timeless principles of mid-century modern design – clean lines, quality materials, and a focus on functionality – and meticulously integrating the specific requirements of modern audio equipment, woodworkers can create heirloom-quality consoles that elevate any living space.
The process, from initial conceptualization to the final polished finish, allows for immense creativity and personalization. It’s an opportunity to select woods that speak to you, incorporate joinery that showcases your skill, and design a piece that perfectly accommodates your unique audio setup and vinyl collection. The year 2026 is an excellent time to embark on such a project, with abundant resources and a thriving community of woodworkers and audiophiles.
Actionable Next Steps:
- Gather Inspiration: Explore mid-century modern furniture archives, design blogs, and real-world examples to refine your aesthetic vision.
- Measure Your Gear: Accurately measure all audio components (turntable, amplifier, speakers, etc.) and your vinyl collection to ensure precise fit.
- Sketch and Plan: Develop detailed drawings, considering internal dimensions, cable routing, and ventilation. Don’t be afraid to create multiple iterations.
- Source Quality Materials: Select high-quality hardwoods and hardware that align with the mid-century aesthetic and your budget.
- Practice Joinery: If new to certain joinery techniques, practice on scrap wood before applying them to your console.
- Build and Refine: Construct your console methodically, taking time for careful sanding and applying a finish that enhances the wood’s natural beauty.
Embark on this journey, and you’ll not only gain a magnificent piece of furniture but also deepen your appreciation for the craft of woodworking and the art of sound.
