
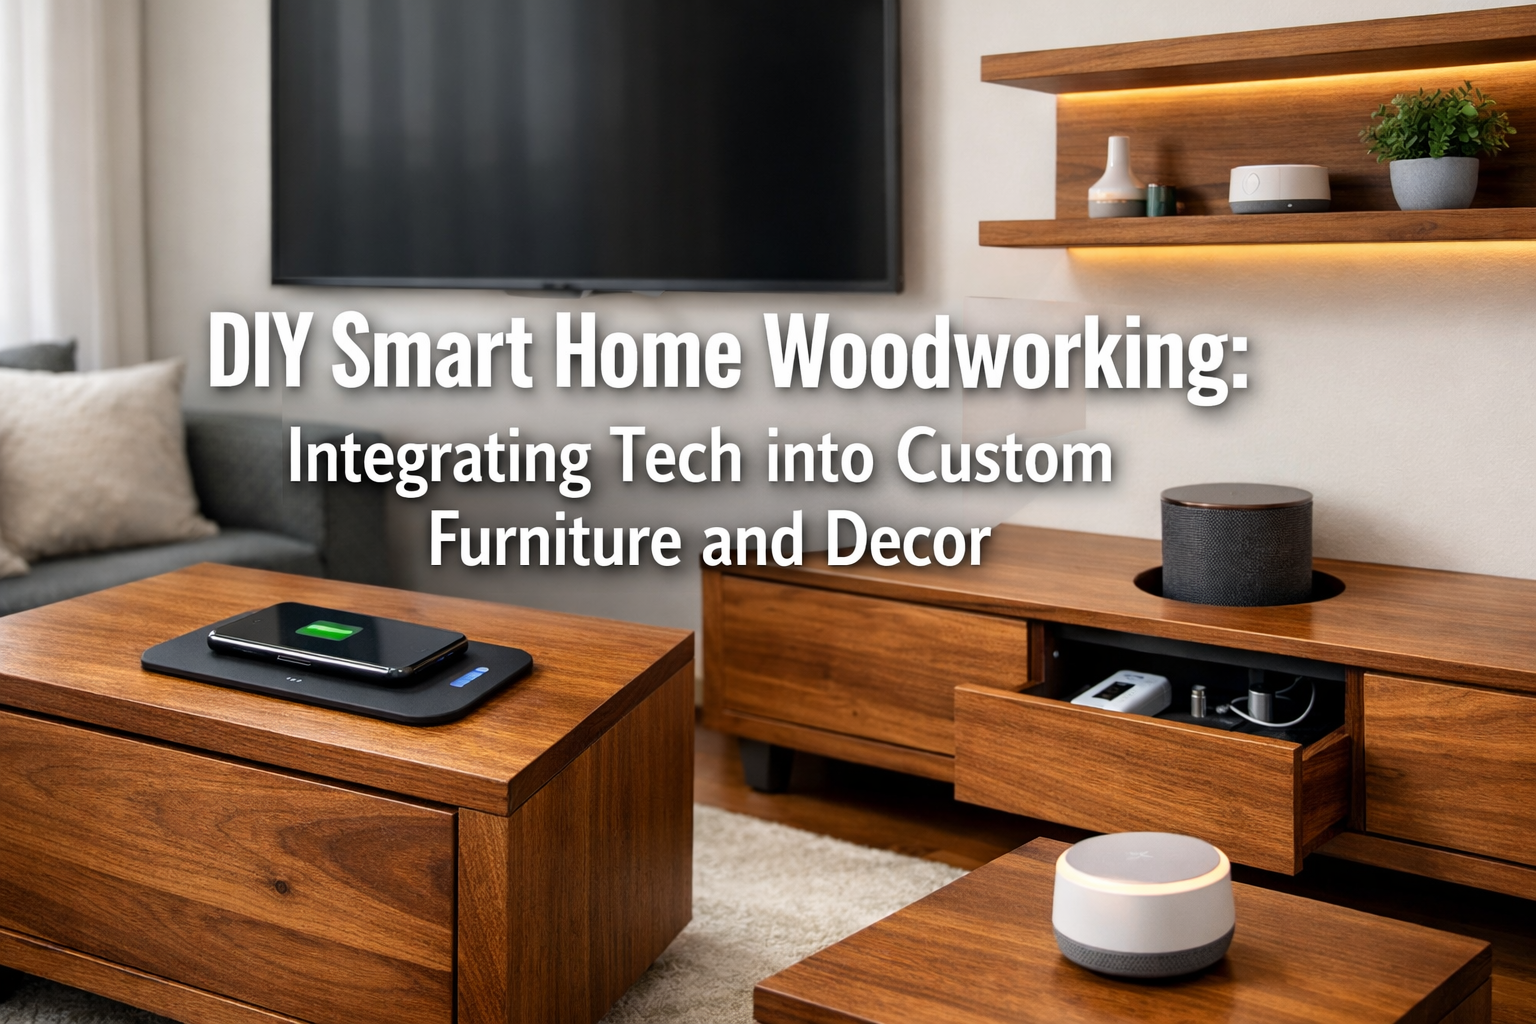

The modern home of 2026 is increasingly smart, yet the aesthetics of visible technology often clash with the warmth and character of traditional decor. This creates a unique opportunity for enthusiasts of DIY Smart Home Woodworking: Integrating Tech into Custom Furniture and Decor. By blending the timeless craft of woodworking with cutting-edge smart home technology, homeowners can create functional, beautiful, and highly integrated living spaces. This guide explores how to build custom wooden enclosures and mounts for smart home devices, seamlessly integrating technology into home decor with elegant woodworking, from hidden charging stations to smart speaker stands and integrated lighting solutions.
Woodworking offers unparalleled customization, allowing you to design pieces that perfectly fit your space and specific technological needs. This article will delve into the methods and considerations for crafting bespoke furniture and decor that not only houses but also enhances your smart devices, ensuring a harmonious and efficient environment.

Key Takeaways
- Seamless Integration: Learn how to embed smart home devices like charging pads, speakers, and lighting into custom wooden furniture and decor, reducing clutter and enhancing aesthetics.
- Design & Functionality: Discover techniques for planning projects that prioritize both the visual appeal of woodworking and the practical functionality of integrated technology, including cable management and ventilation.
- Material & Tool Selection: Understand the essential tools and materials needed for successful DIY smart home woodworking, from various wood types to specialized routing bits and fastening systems.
- Advanced Techniques: Explore methods for creating hidden compartments, capacitive touch controls, and automated features, elevating your projects beyond simple enclosures.
- Safety & Best Practices: Gain insights into critical safety considerations and best practices for working with both wood and electronics to ensure durable and safe creations.
Crafting Smart Solutions: Designing for Technology Integration
Integrating smart technology into woodworking projects begins long before the first cut. It requires thoughtful planning, understanding both the capabilities of your woodworking skills and the requirements of the technology you intend to embed. The goal is to create pieces where technology enhances the furniture, rather than dominates it, resulting in a cohesive design that champions DIY Smart Home Woodworking: Integrating Tech into Custom Furniture and Decor.
Planning Your Smart Woodworking Project
Before you start, consider the “what” and “where.” What smart devices do you want to integrate, and where in your home will these custom pieces reside?
- Device Selection: Identify the specific smart devices. Common choices include:
- Wireless charging pads (Qi chargers)
- Smart speakers (e.g., Amazon Echo, Google Nest)
- LED strip lighting (for ambiance or task lighting)
- Small smart hubs or controllers
- Tablets or display screens
- Location & Function: Decide the piece of furniture or decor. A nightstand might host a hidden charging pad and a small speaker, while a media console could house a soundbar and cable management for a TV. A custom floating shelf could feature integrated LED lighting.
- Aesthetic Harmony: Consider the existing decor. Will your new piece blend in, or will it be a statement piece? Wood choice, finish, and design style are crucial. For a minimalist look, explore Warm Minimalism in Woodworking.
Essential Design Considerations
Successful integration means more than just cutting a hole.
- Cable Management: This is paramount. Design channels, hidden compartments, or access points for wires to keep them tidy and out of sight. Remember power adapters, too – they can be bulky.
- Ventilation: Electronic devices generate heat. Ensure adequate airflow, especially for devices enclosed within wood. Consider discrete vents, gaps, or even small, quiet fans if needed.
- Power Access: Plan for easily accessible power outlets or cleverly concealed power strips within your furniture.
- Wireless Signal: For Wi-Fi or Bluetooth devices, ensure that the wood enclosure does not significantly impede signal strength. Thin wood generally isn’t an issue, but thick, dense hardwoods might require testing.
- Device Access & Maintenance: Can you easily access the device for updates, reboots, or replacement? Hidden panels, magnetic latches, or sliding mechanisms can be excellent solutions.
“The true art of DIY Smart Home Woodworking lies in making the technology disappear, leaving only the beauty and functionality of the wood.”
Tools and Materials for Tech Integration
Beyond standard woodworking tools, some specialized items become essential for these projects.
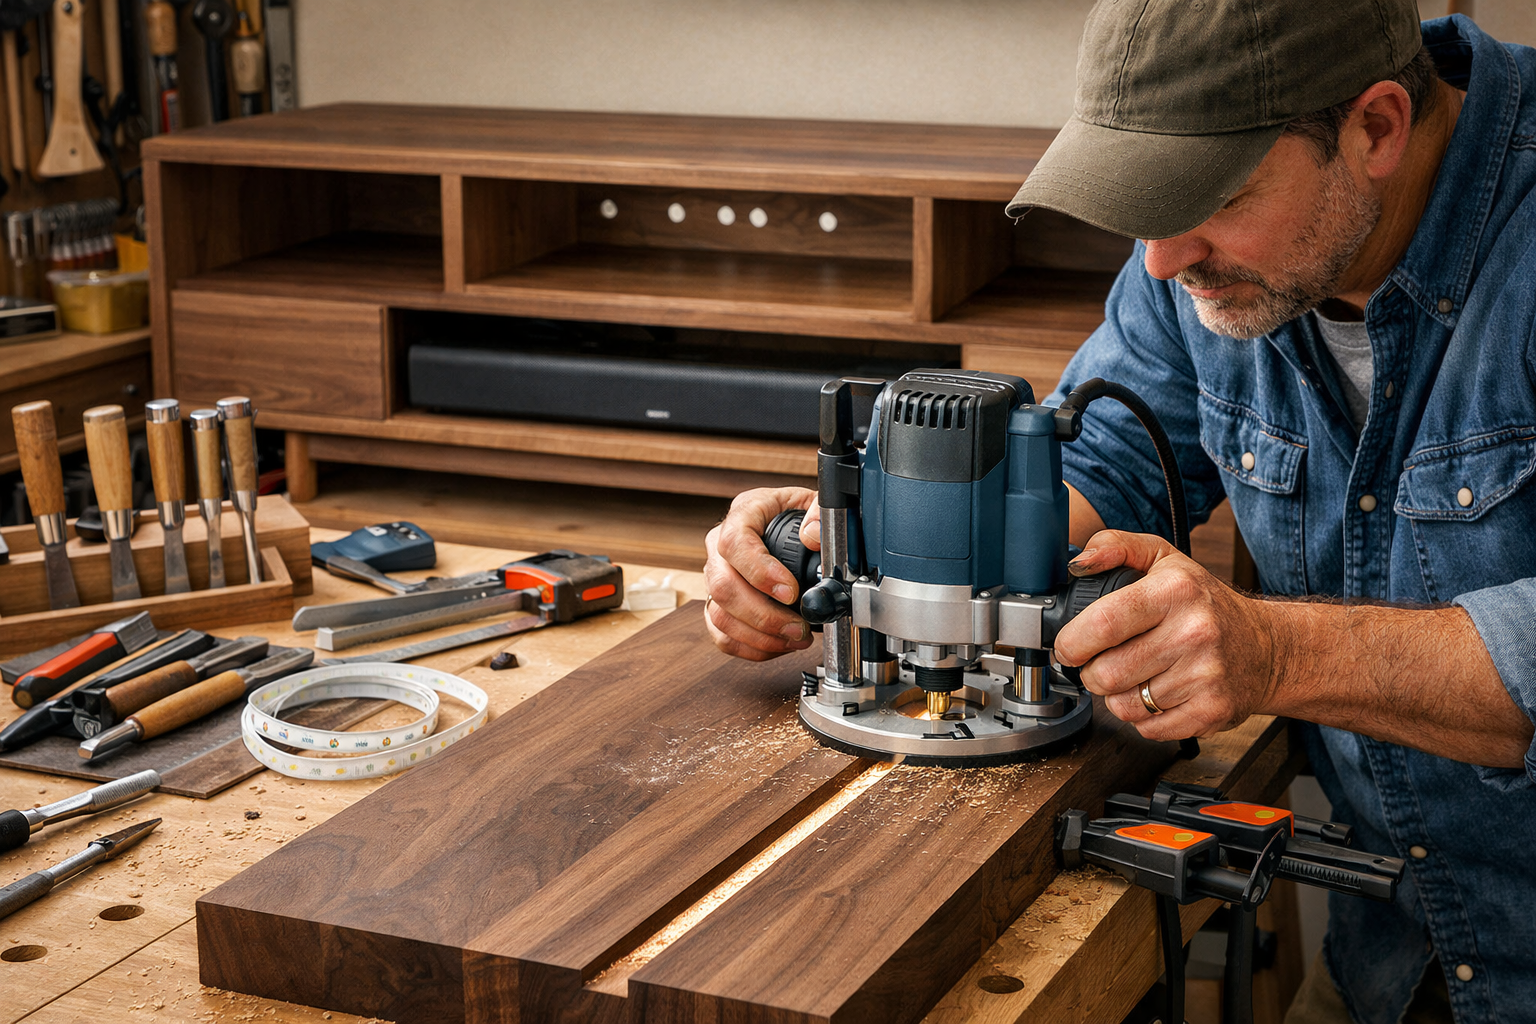
- Routing Tools: A router table or a handheld router with a variety of bits is crucial for creating precise dados, rebates, and pockets for devices and wiring channels.
- Drilling: Forstner bits are excellent for creating flat-bottomed holes for recessed components like wireless charging coils. Step bits can create clean holes for cables.
- Wood Selection: Choose woods suitable for fine joinery and finishing. Hardwoods like walnut, maple, cherry, or oak are popular for their durability and aesthetic appeal. Consider sourcing reclaimed and salvaged wood for unique character.
- Fasteners & Adhesives: Wood glue is fundamental. Magnetic catches, specialized hinges, and hidden fasteners help create sleek, access-friendly designs.
- Tech Components: Purchase your smart devices and their respective power supplies before you start building to ensure accurate measurements.
Building Integrated Furniture: Techniques and Projects
With a solid plan in place, the next step is execution. This involves applying specific woodworking techniques to accommodate smart technology, turning your designs into tangible, functional pieces.
Common Integration Techniques
Here are several methods for embedding technology into your custom furniture:
- Recessed Pockets: For wireless chargers or small smart displays, use a router and template to create a perfectly sized, shallow pocket on the surface or underside of a piece of wood. The device can then be flush-mounted or mounted just below the surface for a hidden effect.
- Cable Channels & Conduits: Router dados or grooves on the back or underside of shelves and tabletops to hide wiring. For more complex runs, create small conduits by laminating thin strips of wood.
- Hidden Compartments: Create secret drawers or hinged panels using precise joinery and hardware. These are ideal for housing smart hubs, power strips, or even valuable items. Mastering the woodworking box lid can provide valuable insights for creating secure access points.
- Integrated Grilles: For smart speakers, design a discreet wooden grille to allow sound to pass through while keeping the speaker hidden. This often involves thin dowels, laser-cut patterns, or fabric-backed panels.
- Touch Controls: Integrate capacitive touch sensors directly into the wood surface to control lights or other smart features. These sensors detect touch through a thin layer of wood, providing a minimalist control interface.
Project Ideas & Step-by-Step Approaches
Let’s look at some popular projects that exemplify DIY Smart Home Woodworking: Integrating Tech into Custom Furniture and Decor.
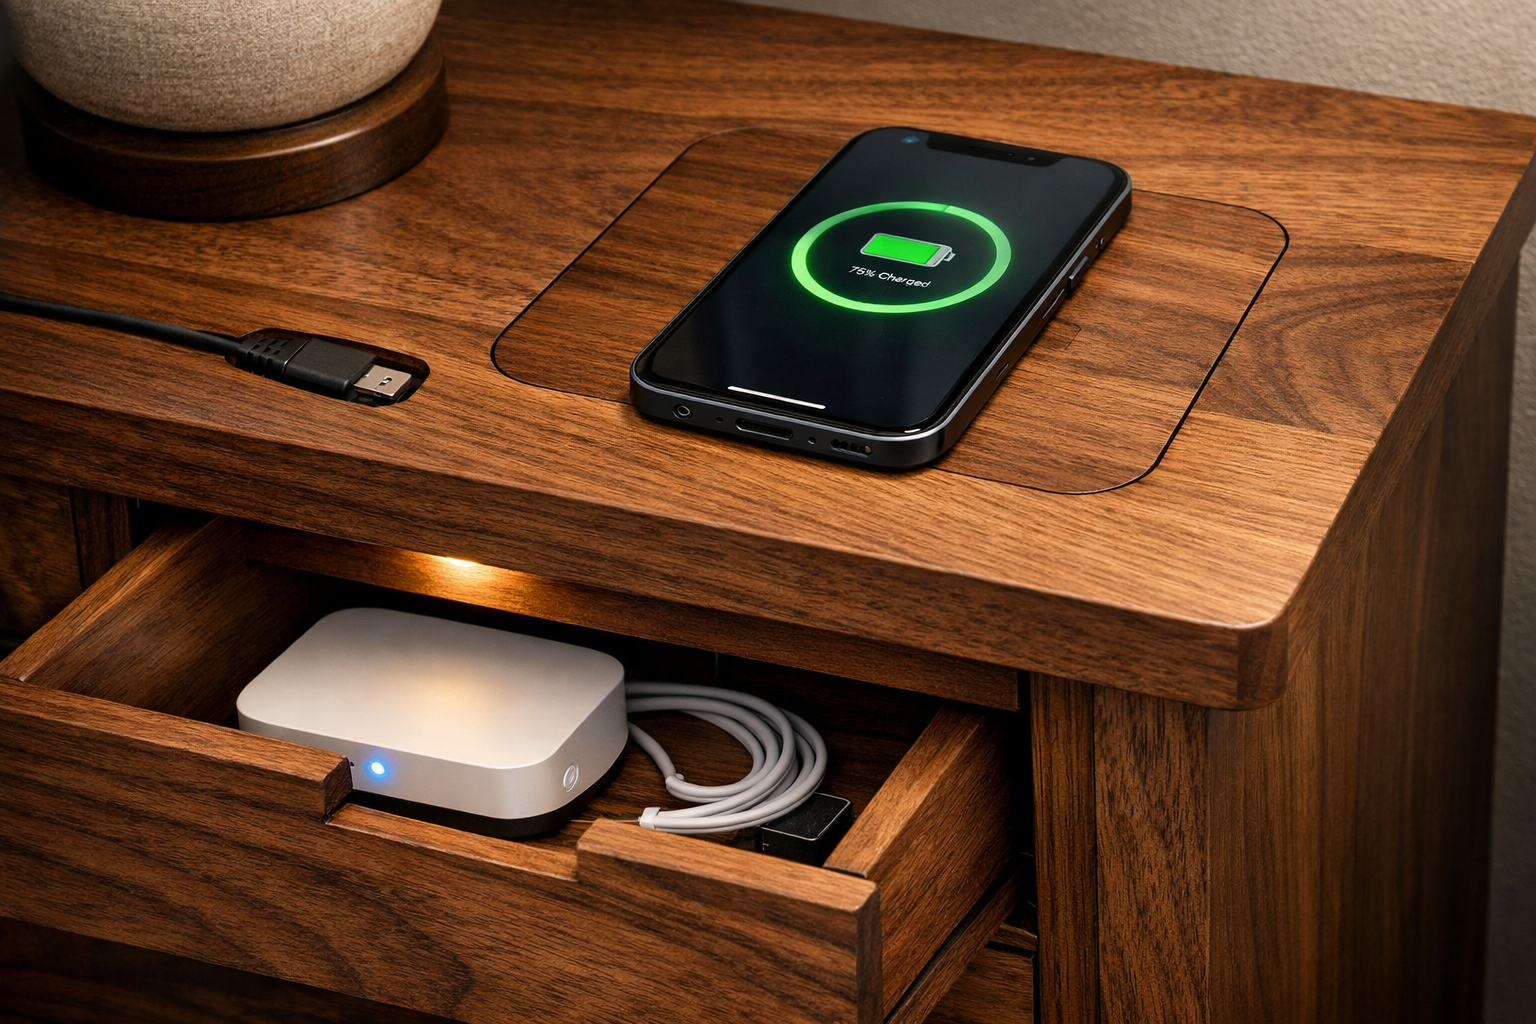
Project 1: Smart Charging Nightstand
- Concept: A custom nightstand with a built-in wireless charging pad and discrete cable management.
- Steps:
- Design: Plan a nightstand. Decide on drawer configuration, leg style, and the exact placement of the charging pad.
- Cut & Join: Cut your wood pieces to size. Use strong joinery like dovetails for drawers and mortise-and-tenon for the frame.
- Router for Charger: Using a template or a jig, route a shallow, flat-bottomed pocket on the nightstand’s top surface or directly beneath it (for invisible charging) that perfectly fits your wireless charging coil.
- Cable Routing: From the charging pocket, route a small channel to an internal compartment or the back of the nightstand for the charging pad’s USB cable. Create a small hole for the cable to exit.
- Hidden Power: Design a small, accessible compartment (perhaps a false back on a drawer or a hinged panel) to house a compact USB power adapter, keeping the cabling tidy.
- Assembly & Finish: Assemble the nightstand. Apply your chosen finish, ensuring it doesn’t interfere with the wireless charging signal (most finishes are fine).
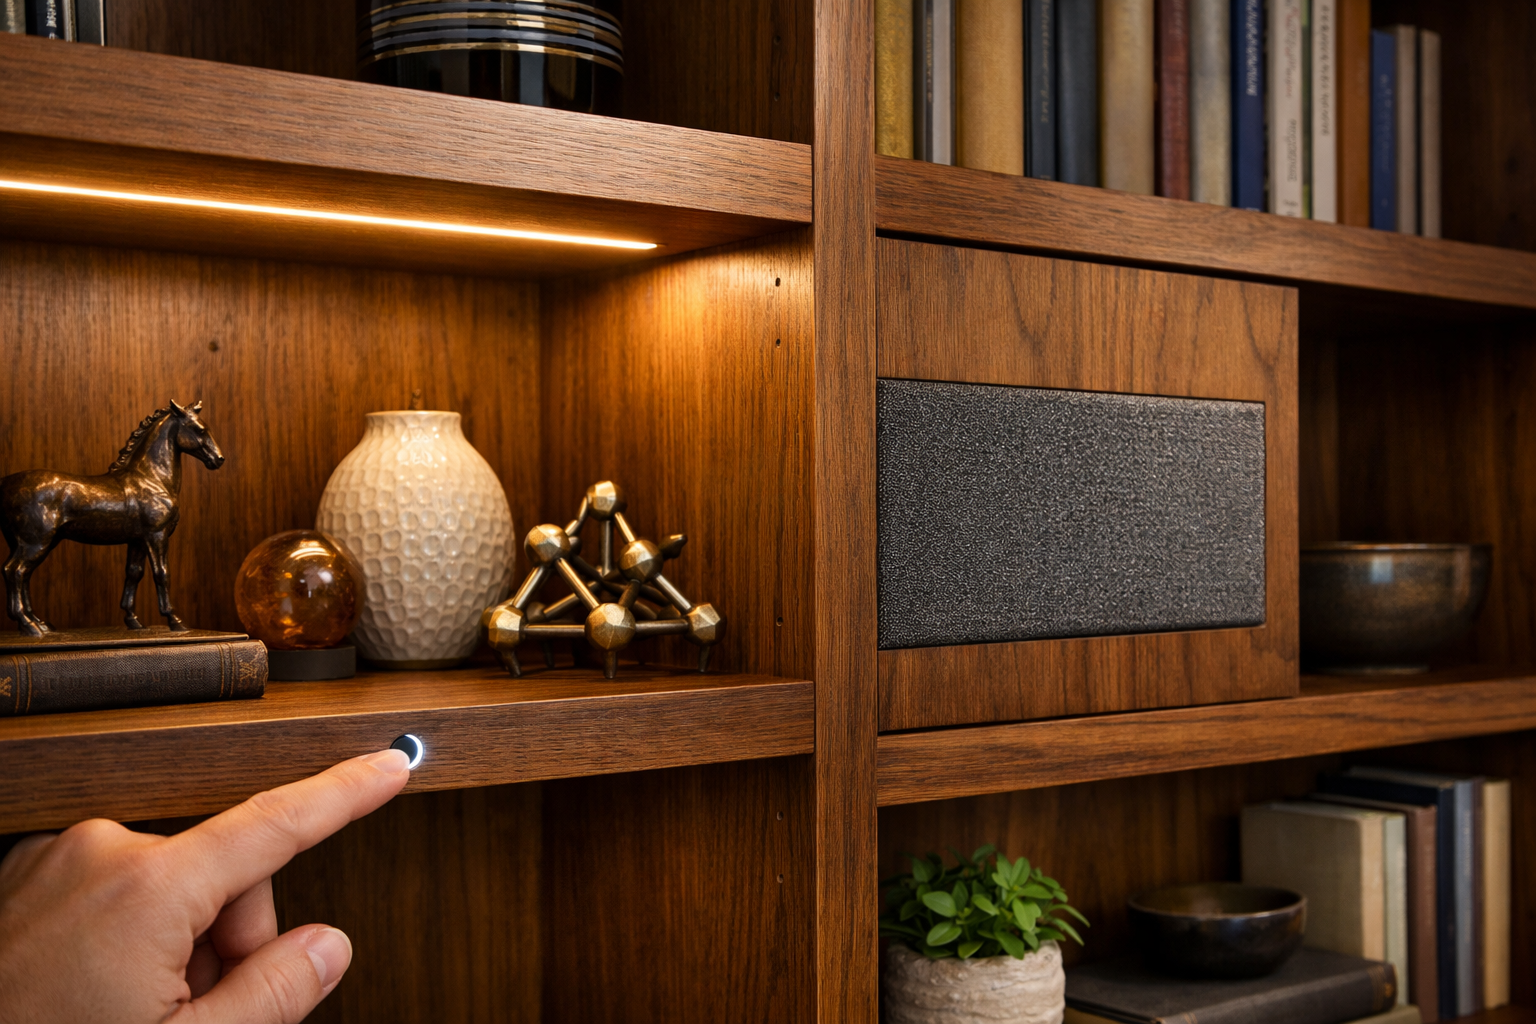
Project 2: Integrated Smart Speaker Shelf
- Concept: A floating shelf or bookcase section that seamlessly houses a smart speaker and includes LED accent lighting.
- Steps:
- Design: Determine the size and style of your robust floating shelves. Plan a cavity for the smart speaker and a channel for LED strips.
- Construct Shelf Body: Build the basic shelf box or frame. For a floating shelf, ensure strong internal bracing for advanced fastening systems.
- Speaker Cavity: Create a precisely sized enclosure for the smart speaker within the shelf. This can be a separate internal box or a routed-out section.
- Acoustic Grille: Design and create a wooden grille for the front of the speaker cavity. This could be a series of thin, parallel dowels or a panel with decorative perforations. Line the inside of the cavity with acoustic fabric to enhance sound quality and conceal the speaker.
- LED Channels: Route shallow grooves along the desired edges or underside of the shelf to embed LED light strips. Ensure the channels are deep enough to recess the strips.
- Wiring: Route small channels for the speaker’s power cable and the LED power cable, leading them to a discrete exit point at the back or underside of the shelf.
- Finishing & Installation: Install the smart speaker and LED strips. Apply a suitable finish. Mount the shelf securely.
Advanced Integrations and Future Possibilities
As smart home technology continues to evolve, so too will the possibilities for DIY Smart Home Woodworking: Integrating Tech into Custom Furniture and Decor. Thinking beyond simple enclosures opens up a world of sophisticated, custom creations.
Smart Lighting Integration
One of the most impactful integrations is smart lighting.
- Hidden LED Strips: Recess LED strips into shelves, under cabinets, or behind headboards for ambient or task lighting. These can be controlled by smart home assistants, apps, or even integrated touch sensors.
- Accent Lighting: Build custom wooden lamp bases or candle holders with hidden LED integration to complement your decor while offering smart control.
- Motion-Activated Lights: Integrate motion sensors into furniture pieces, such as under-bed lighting that activates when your feet touch the floor at night.
Automated Features and Interaction
Consider how your wooden creations can interact with their environment.
- Motorized Components: Imagine a hidden TV lift within a custom wooden cabinet or a motorized charging drawer that opens with a voice command. Small stepper motors and microcontrollers can bring these ideas to life.
- Sensor Integration: Embed temperature, humidity, or air quality sensors into furniture to monitor your home’s environment, feeding data to your smart home system.
- Capacitive Touch: As mentioned, capacitive touch sensors allow for invisible controls on your wooden surfaces. A gentle touch on a specific spot could turn on lights, adjust blinds, or activate a smart scene.
Materials and Finishes for Smart Projects
The choice of wood and finish can significantly impact both aesthetics and functionality.
- Wood Type: Experiment with different wood species for varied aesthetics. For instance, live edge wood slabs can create stunning, natural pieces, while lighter woods like maple allow for custom staining or painting.
- Finishes: Ensure your chosen finish is durable and complements the wood. For projects involving embedded electronics, verify that the finish won’t interfere with touch sensors or wireless signals. Polyurethane is a common choice for durability.
- Sustainable Sourcing: For eco-conscious projects, explore sustainable wood sourcing or upcycling old pallets for unique, reclaimed materials.
Safety and Maintenance
Working with both wood and electronics requires careful attention to safety.
- Electrical Safety: Always ensure proper insulation, use appropriate wiring gauges, and secure all electrical connections. If you’re unsure, consult a qualified electrician.
- Heat Dissipation: Double-check that all enclosed electronic devices have sufficient ventilation to prevent overheating, which can shorten device lifespan and pose a fire hazard.
- Tool Safety: Follow all standard woodworking safety practices, including wearing appropriate PPE (eye protection, hearing protection) and safely operating power tools. For guidance on workshop setup, see Creating Ergonomic Workshop Furniture.
- Maintenance: Design projects so that devices can be easily accessed for cleaning, software updates, or replacement without damaging the wooden structure.
By embracing these advanced techniques and prioritizing safety, DIY woodworkers can create truly innovative and personalized smart home solutions that are both beautiful and highly functional in 2026.

Conclusion
DIY Smart Home Woodworking: Integrating Tech into Custom Furniture and Decor represents the exciting intersection of traditional craftsmanship and modern innovation. In 2026, the demand for aesthetically pleasing and seamlessly integrated technology is higher than ever, and woodworking offers the perfect medium to achieve this. From creating discrete charging stations to embedding smart lighting and speakers, the possibilities are vast and limited only by imagination and skill.
By carefully planning your projects, understanding the requirements of both wood and electronics, and employing precise woodworking techniques, you can transform your living space into a truly smart and elegant home. These custom pieces not only reduce clutter and enhance functionality but also add unique character and value that off-the-shelf solutions simply cannot match. Embrace the challenge, learn new skills, and create bespoke smart furniture that stands the test of time, both in style and technology.
Actionable Next Steps:
- Identify a Small Project: Start with a simple project like a charging tray or a speaker stand to get familiar with the integration process.
- Gather Your Tools: Ensure you have the necessary routing and drilling tools, along with your chosen smart devices.
- Sketch and Plan: Before making any cuts, thoroughly sketch your design, considering cable management, ventilation, and access.
- Prioritize Safety: Always keep electrical and woodworking safety at the forefront of your work.
- Experiment with Finishes: Test finishes on scrap wood to see how they interact with touch sensors or wireless signals, if applicable.
