
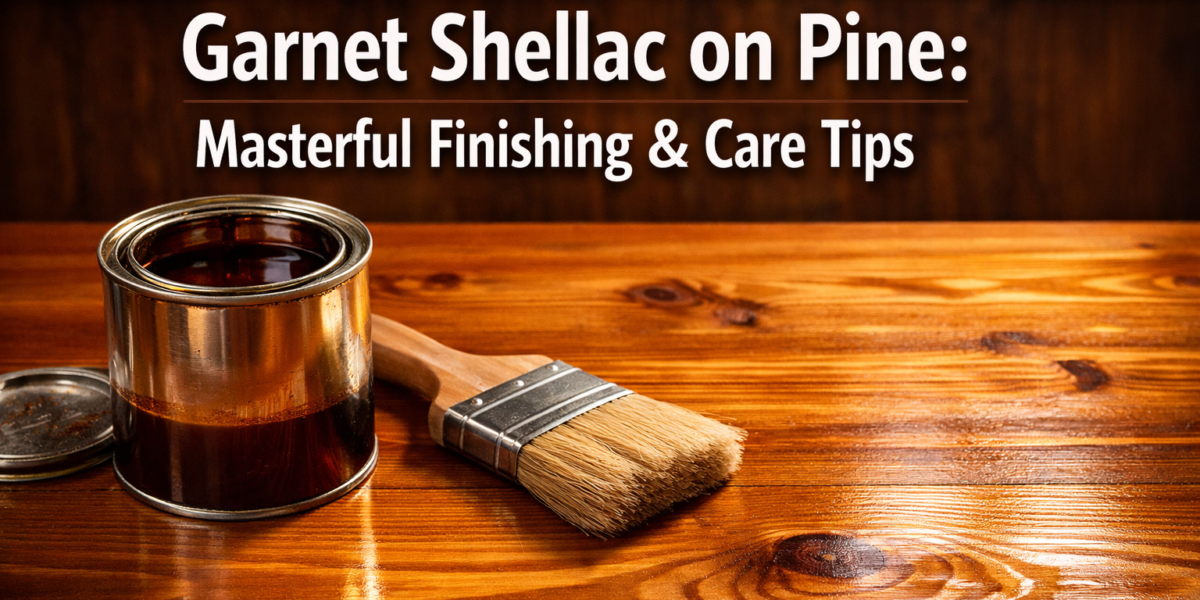

Discover the timeless beauty of garnet shellac on pine, a captivating combination that brings warmth and elegance to any space with its golden finish, lacquer, varnish, and natural wax. This classic finishing technique has a rich history dating back centuries, originating from the traditional craft of shellac application. Garnet shellac on pine showcases the natural beauty of the wood grain while adding depth and character to furniture, flooring, and other wooden surfaces. Whether you’re restoring an antique piece or looking to add a touch of sophistication to your home decor, garnet shellac on pine is a versatile choice that never goes out of style.
Key Takeaways
- Garnet shellac is a versatile and durable finish option for pine wood, providing a warm and rich color.
- Before applying garnet shellac on pine, it is important to understand the basics of garnet shellac and the characteristics of pine wood.
- Properly preparing the pine surface by sanding and removing any imperfections will ensure a smooth and flawless finish.
- Mixing garnet shellac correctly, following the recommended ratio of shellac flakes to alcohol, is crucial for achieving the desired color and consistency.
- Applying garnet shellac using the appropriate techniques, such as using a brush or pad, will result in an even and professional-looking finish.
- To achieve a smooth finish, it is important to apply multiple thin coats of garnet shellac, allowing each coat to dry completely before applying the next.
- Regular maintenance, such as cleaning with a gentle solution and protecting the surface from heat and moisture, will help preserve the beauty of the garnet shellac finish.
- Avoid common mistakes, like applying too thick of a coat or rushing the drying process, as they can lead to uneven or blotchy results.
Garnet Shellac Basics
Definition
Garnet shellac on pine is a type of wood finish that is commonly used to enhance the natural beauty of pine wood. It is made from a combination of shellac resin and garnet flakes, which gives it a rich reddish-brown color. Garnet shellac, thanks to its excellent adhesion properties, is known for being an ideal choice for pine surfaces.

Benefits
One of the main benefits of using garnet shellac on pine is its durability. The shellac forms a protective layer on the wood surface, shielding it from scratches and wear over time. Garnet shellac lacquer brings out the natural grain and depth of the pine wood, giving it a warm and inviting appearance.
Another advantage of garnet shellac is its ability to protect against moisture and heat. The shellac acts as a barrier, preventing water from penetrating the wood and causing damage. It also provides some resistance to heat, making it suitable for use in areas where temperature fluctuations are common.
Application Tools
To apply garnet shellac on pine, you will need a few essential tools. These include:
- Brush: A high-quality bristle brush is recommended for applying the shellac evenly onto the wood surface.
- Sandpaper: Sandpaper with different grits will be needed to prepare the surface by smoothing out any imperfections.
- Tack cloth: This cloth is used to remove any dust or debris from the surface before applying the shellac.
- Container: A container or tray will be needed to hold and mix the garnet shellac before application.
- Safety equipment: It’s important to use gloves and eye protection when working with shellac to ensure personal safety.
When choosing application tools, opt for high-quality ones that can provide smooth and even coverage. This will help achieve professional-looking results with your garnet shellac finish.
Pine Wood Characteristics
Natural Beauty
Garnet shellac is a fantastic choice for enhancing the natural beauty of pine wood. When applied to pine furniture or other pine wood surfaces, garnet shellac brings out the unique characteristics of the wood, creating a stunning visual appeal. The warm and rich tones achieved with garnet shellac add depth and dimension to the natural grain patterns of pine. This combination results in a beautiful and inviting finish that showcases the inherent beauty of the wood.
Texture Variations
One of the advantages of using garnet shellac on pine is the ability to achieve different texture variations. Whether you prefer a smooth and glossy finish or a more subdued matte or satin texture, garnet shellac can deliver it all. With proper application techniques, garnet shellac can create a lustrous and reflective surface that highlights the natural features of the wood. Alternatively, if you desire a more understated look, garnet shellac can be buffed to produce a softer sheen with a slight satin or matte appearance.
Common Imperfections
While garnet shellac can enhance the beauty of pine wood, there are some common imperfections that may occur during application. These imperfections include brush marks, uneven coverage, or streaks in the finish. However, these issues can be addressed and prevented with proper preparation and technique. Before applying garnet shellac, it is crucial to ensure that the surface is clean and free from any dust or debris. Using high-quality brushes or applicators designed specifically for shellac can help minimize brush marks and achieve more even coverage. Taking your time during application and applying thin coats will also contribute to a smoother finish.
Preparing Pine Surface
Sanding Techniques
Proper sanding techniques are crucial for achieving a smooth and flawless surface before applying garnet shellac on pine wood. Sanding not only helps to remove any existing finish or imperfections but also creates a clean and receptive surface for the shellac to adhere to.
To sand pine wood for garnet shellac application, follow these step-by-step instructions:
- Start with a coarse-grit sandpaper, such as 80 or 100 grit, to remove any roughness or unevenness on the surface.
- Sand in the direction of the wood grain, applying even pressure across the entire surface.
- Gradually move to finer-grit sandpapers, such as 120 and 180 grit, to smooth out the wood further.
- Use a sanding block or sponge for more control and even pressure distribution.
- Pay extra attention to areas with knots or resin pockets, as they may require additional sanding to ensure a consistent appearance.
Achieving a smooth surface through effective sanding techniques requires some tips and tricks:
- Regularly check the progress by running your hand over the sanded surface to feel for any rough spots.
- Clean the surface between each sanding stage to remove dust and debris that can interfere with the next step.
- Consider using a tack cloth or vacuum cleaner with a brush attachment to thoroughly remove all particles.
- Avoid oversanding by being mindful of how much material you’re removing at each stage.
Cleaning Process
Before applying garnet shellac on pine, it is essential to thoroughly clean the wood surface. Cleaning removes dust, dirt, oils, and other contaminants that could affect the adhesion and appearance of the shellac.
Follow these recommendations for cleaning products suitable for preparing pine wood:
- Use a mild detergent mixed with water to gently scrub away dirt and grime from the surface.
- Rinse the wood with clean water to remove any residue from the cleaning solution.
- Allow the wood to dry completely before proceeding with the shellac application.
Removing dust and debris is crucial for a successful finish. Dust particles can become trapped in the shellac, resulting in an uneven surface or blemishes on the final coating. Ensure a clean surface by using a lint-free cloth or tack cloth to wipe away any remaining dust before applying the garnet shellac.

Filling Imperfections
To achieve a seamless and professional-looking finish, it’s important to address any imperfections in the pine wood before applying garnet shellac. Imperfections such as knots, cracks, or holes can affect the final appearance of the coating.
Consider these methods for filling imperfections in pine wood:
- Wood putty or filler: Choose a suitable wood filler that matches the color of your pine wood. Apply it to fill cracks, holes, or gaps in the surface. 2
Mixing Garnet Shellac
Proportions
Maintaining proper proportions when mixing garnet shellac is crucial for achieving the desired finish on pine surfaces. The ideal ratios of shellac flakes to denatured alcohol vary depending on the project requirements and the desired level of sheen. As a general guideline, a 1-pound cut of garnet shellac is achieved by dissolving one pound of shellac flakes in one gallon of denatured alcohol. This mixture provides a medium level of sheen and is suitable for most applications.
However, it’s important to note that these proportions can be adjusted based on personal preference or specific project needs. For a higher sheen, more shellac flakes can be added to the mixture, while reducing the amount of denatured alcohol. On the other hand, if a lighter sheen is desired, less shellac flakes can be used.
Stirring Method
To ensure a uniform consistency when mixing garnet shellac, it is recommended to stir the mixture thoroughly. Proper stirring helps distribute the shellac flakes evenly throughout the solution and prevents any clumping or separation. It’s best to use a stirring stick or paddle and make sure to scrape the sides and bottom of the container to incorporate all the flakes into the alcohol.
During the stirring process, it’s important to avoid introducing air bubbles into the mixture, as they can affect the final finish. To minimize air bubbles, stir gently and avoid vigorous agitation. Taking your time during this step will help achieve a smooth and consistent mixture without any unwanted bubbles.
Storage Tips
For effective preservation of garnet shellac, proper storage is essential. It is recommended to store garnet shellac in an airtight container to prevent moisture absorption and maintain its quality over time. Glass jars with tight-fitting lids are ideal for this purpose.
It’s important to store garnet shellac in a cool, dry place away from direct sunlight. Exposure to heat and light can degrade the shellac and reduce its effectiveness. By storing garnet shellac in optimal conditions, you can ensure its longevity and prevent spoilage.
Application Techniques
Brushing Method
When it comes to applying garnet shellac on pine, the brushing method is a popular choice. This technique involves using a brush to evenly apply the shellac onto the surface of the wood. To achieve an even coverage, it is important to use long, smooth strokes with the brush. By applying consistent pressure and maintaining a steady hand, you can minimize brush marks and ensure a smooth finish.
To get started with the brushing method, dip your brush into the garnet shellac and remove any excess by gently tapping it against the side of the container. Begin applying the shellac in one corner of the wood and work your way across, overlapping each stroke slightly for even distribution. Remember to follow the grain of the wood for a seamless finish.
To minimize brush marks during application, try using a high-quality brush with fine bristles. This will help ensure that the shellac is applied smoothly without leaving behind visible streaks or lines. Working in smaller sections at a time can also help prevent drying before you have a chance to even out the application.
Spraying Option
Another option for applying garnet shellac on pine is through spraying. Using a spray gun allows for efficient and uniform coverage, especially when working on larger surfaces or intricate details. The spray gun atomizes the shellac into fine particles, which results in a smooth and professional-looking finish.

When spraying garnet shellac, it is important to adjust the spray gun settings accordingly for optimal results. Start by setting the air pressure and fan width based on your specific spray gun model and manufacturer’s instructions. Then, hold the spray gun approximately 6-8 inches away from the wood surface and apply an even coat of shellac using sweeping motions.
One of the benefits of using a spray gun is that it allows for quick application and faster drying time compared to brushing. However, it’s important to practice proper technique and control the amount of shellac being sprayed to avoid over-application or runs in the finish. It may be helpful to try practicing on a scrap piece of wood before applying the shellac to your project.
Drying Time
The drying time for garnet shellac on pine can vary depending on several factors, including temperature, humidity, and the number of coats applied. Generally, garnet shellac dries relatively quickly compared to other finishes. It typically takes about 30 minutes to an hour for the shellac to dry to the touch.
To ensure proper drying between coats, it is recommended to wait at least two hours before applying another layer of shellac. This allows sufficient time for the solvent in the shellac to evaporate and for the finish to harden. However, keep in mind that drying times can be affected by environmental conditions. Higher temperatures and lower humidity levels tend to accelerate drying, while cooler temperatures and higher
Achieving Smooth Finish
Sanding Between Coats
Sanding between coats is a crucial step in achieving a smooth and flawless golden finish when applying garnet shellac on pine. This process helps to remove imperfections, such as brush strokes or dust particles, and creates a surface that is ready for the next coat of shellac.
To sand between coats, start by allowing each coat of shellac to dry completely. Once dry, use a fine-grit sandpaper, such as 220 or 320 grit, to gently sand the surface. Sanding in a circular motion or following the grain of the wood can help ensure an even finish.
One important tip when sanding between coats is to be gentle and avoid applying too much pressure. The goal is to lightly smooth the surface without removing too much of the previous coat. After sanding, use a clean cloth or brush to remove any dust before applying the next coat of shellac.
Tack Cloth Use
Tack cloth plays a vital role in the garnet shellac application process by helping to remove dust particles from the wood surface. Dust can easily settle on the surface while working, and if not properly removed, it can mar the final finish.
To effectively use tack cloth, unfold it and lightly drag it across the wood surface in long sweeping motions. The sticky nature of tack cloth will pick up any dust or debris present on the wood. It is important to avoid pressing too hard or rubbing vigorously with tack cloth, as this may damage the delicate layers of shellac.
Using tack cloth before each coat of shellac ensures that you have a clean and dust-free surface for optimal adhesion and a smooth finish. Remember to discard used tack cloths after each use and always use a fresh one for subsequent coats.
Maintenance Tips
Cleaning Shellac Finish
To maintain a garnet shellac finish on pine, it is important to clean and care for the surface properly. One of the best methods for cleaning shellac finishes is to use a soft, lint-free cloth dampened with water or a mild soap solution. Gently wipe the surface in a circular motion to remove any dirt or grime. Avoid using abrasive cleaners or harsh chemicals, as they can damage the finish.
In addition to regular cleaning, it is recommended to periodically apply a thin coat of wax or polish to protect and enhance the shine of the garnet shellac finish. This will help preserve its durability and bring out its natural beauty. Be sure to follow the manufacturer’s instructions when applying any wax or polish product.
Repairing Scratches
If scratches occur on a garnet shellac finish, they can be repaired effectively with some simple techniques. Start by cleaning the scratched area with a soft cloth and mild soap solution to remove any dirt or debris. Then, assess the depth of the scratch. For shallow scratches, applying a small amount of paste wax or furniture touch-up marker that matches the color of the finish can help conceal and blend them seamlessly.
For deeper scratches, using fine-grit sandpaper may be necessary. Gently sand the scratched area in line with the wood grain until the scratch becomes less visible. After sanding, apply a layer of shellac using a brush or cloth to restore the protective coating and ensure a consistent appearance.
Reapplication Process
Over time, it may be necessary to refresh the garnet shellac finish on pine by reapplying another coat of shellac. Before starting this process, make sure to thoroughly clean and remove any old wax or polish from the surface. Sanding lightly with fine-grit sandpaper can help create adhesion for better results.
To reapply garnet shellac, mix the shellac flakes with denatured alcohol according to the manufacturer’s instructions. Apply the mixture using a brush or cloth, working in thin and even strokes. Allow each coat to dry completely before applying additional coats. Sand lightly between coats for a smooth finish.
Common Mistakes to Avoid
Over-Sanding
When it comes to over-sanding pine wood before applying garnet shellac, there are several risks that you need to be aware of. Over-sanding can actually remove too much of the wood’s natural texture, leaving you with a surface that lacks character and depth.
Not only does over-sanding affect the visual appeal of the final finish, but it can also impact the overall durability of the coating. When too much wood is sanded away, the shellac may not adhere properly, leading to issues such as peeling or flaking over time.
To avoid over-sanding and preserve the natural texture of pine wood, it’s important to take a measured approach when sanding. Start with a medium-grit sandpaper and gradually work your way up to finer grits. This will help you achieve a smooth surface without going too far and removing too much wood.
Using a sanding block or sanding sponge can help distribute pressure evenly and prevent excessive sanding in certain areas. Take your time and regularly check the surface for any signs of over-sanding. Remember, it’s better to err on the side of caution and leave some texture intact rather than risk compromising the final finish.
Insufficient Drying Time
One common mistake that DIY enthusiasts make when working with garnet shellac on pine is not allowing sufficient drying time between coats. Insufficient drying time can have detrimental effects on the overall finish quality.
If you rush the process and apply another coat before the previous one has fully dried, you may end up with a tacky or sticky surface. This not only affects the appearance but also compromises the durability of the finish.
To ensure adequate drying time, follow the manufacturer’s instructions regarding drying times between coats. These guidelines are typically provided on the product label or packaging. Consider factors such as temperature and humidity, as they can affect drying times.
Allow the shellac to dry undisturbed in a well-ventilated area. It’s better to wait a little longer and ensure that each coat is fully dried before proceeding with the next one. This will help you achieve a durable and smooth finish that enhances the natural beauty of the pine wood.
Inconsistent Layers
Achieving consistent layers of garnet shellac on pine can be challenging but crucial for a professional-looking result. Inconsistent application can lead to visual imperfections and an uneven finish.
When applying the shellac, it’s important to maintain a steady hand and use even strokes. This helps ensure that each layer is applied uniformly across the surface of the wood. Take your time and pay attention to areas where more or less shellac may be required for an even coating.
Using a high-quality brush or applicator pad can also contribute to achieving consistent layers. These tools allow for better control over the amount
Final Remarks
Congratulations! You now have a solid understanding of how to apply garnet shellac on pine wood. By following the steps outlined in this article, you can achieve a smooth and durable finish that enhances the natural beauty of your pine furniture or woodworking projects.
Remember, preparation is key. Take the time to properly prepare the pine surface by sanding it and removing any dirt or dust. This will ensure that the shellac adheres well and creates a flawless finish. Be mindful of your application technique and apply multiple thin coats for optimal results.
Now it’s time to put your newfound knowledge into practice. Grab your garnet shellac and start transforming your pine pieces into stunning works of art. Don’t be afraid to experiment and refine your skills along the way. With practice, you’ll become more confident in achieving professional-looking finishes.
o ahead, unleash your creativity, and enjoy the process of working with garnet shellac on pine wood!
Frequently Asked Questions
Can I use garnet shellac on pine wood?
Yes, garnet shellac is suitable for use on pine wood. It enhances the natural beauty of pine and provides a durable protective finish.
How do I prepare the pine surface before applying garnet shellac?
To prepare the pine surface, sand it thoroughly to remove any roughness or imperfections. Make sure to clean off any dust or debris before applying the garnet shellac.
How do I mix garnet shellac?
Mixing garnet shellac is simple. Just add the desired amount of shellac flakes to denatured alcohol and let them dissolve completely. Stir well before use.
What are some application techniques for garnet shellac?
You can apply garnet shellac using a brush, pad, or spray gun. Ensure even coverage by working in thin coats and following the grain of the wood.
How can I achieve a smooth finish with garnet shellac?
To achieve a smooth finish, lightly sand between coats with fine-grit sandpaper. Build up multiple thin coats of shellac, allowing each coat to dry completely before sanding and applying the next one.
Any maintenance tips for garnet shellac on pine?
To maintain the beauty of your pine wood finished with garnet shellac, periodically clean it with a soft cloth or mild soap and water. Avoid using harsh chemicals or abrasive cleaners that could damage the finish.
What are common mistakes to avoid when using garnet shellac on pine?
Avoid applying too thick of a coat as it may result in uneven drying and an unsightly finish. Also, be mindful of dust particles settling on wet surfaces as they can become trapped in the finish.
