


Craft beer has exploded in popularity, transforming from a niche hobby into a vibrant cultural phenomenon. For many enthusiasts, the experience extends beyond the taste of a finely brewed ale to the presentation and portability of their cherished bottles and cans. This growing appreciation has fueled a demand for handcrafted accessories, and among the most sought-after items is the wooden beer caddy. More than just a simple carrier, a well-built wooden beer caddy is a statement piece, a functional work of art that enhances the enjoyment of craft brews. This article dives deep into Mastering Wooden Beer Caddy Builds: Portable Designs for Craft Brew Lovers, offering a comprehensive guide for both aspiring and experienced woodworkers to create stunning, durable, and truly portable beer carriers.
Whether you’re heading to a backyard BBQ, a friend’s gathering, or simply want an elegant way to store your favorite six-pack, a custom-built wooden beer caddy adds a touch of class and personal flair. In 2026, the DIY woodworking community continues to embrace projects that combine utility with aesthetic appeal, and the beer caddy is a prime example. This guide will explore everything from design considerations and material selection to construction techniques and finishing touches, ensuring your finished product is both beautiful and functional.

Key Takeaways
- Design for Portability and Durability: Focus on lightweight yet strong wood choices, comfortable handles, and secure bottle compartments.
- Material Selection is Crucial: Different wood species offer varying aesthetics, workability, and cost. Consider both appearance and structural integrity.
- Essential Tools and Techniques: Basic woodworking tools combined with accurate measurements and joinery methods are key to a professional finish.
- Personalization Enhances Value: Incorporate features like bottle openers, custom engravings, or unique finishes to make your caddy truly one-of-a-kind.
- Proper Finishing for Longevity: Protect your wooden beer caddy from spills and wear with appropriate sealants and finishes that highlight the wood’s natural beauty.
The Art of Crafting a Portable Beer Caddy: Design and Materials
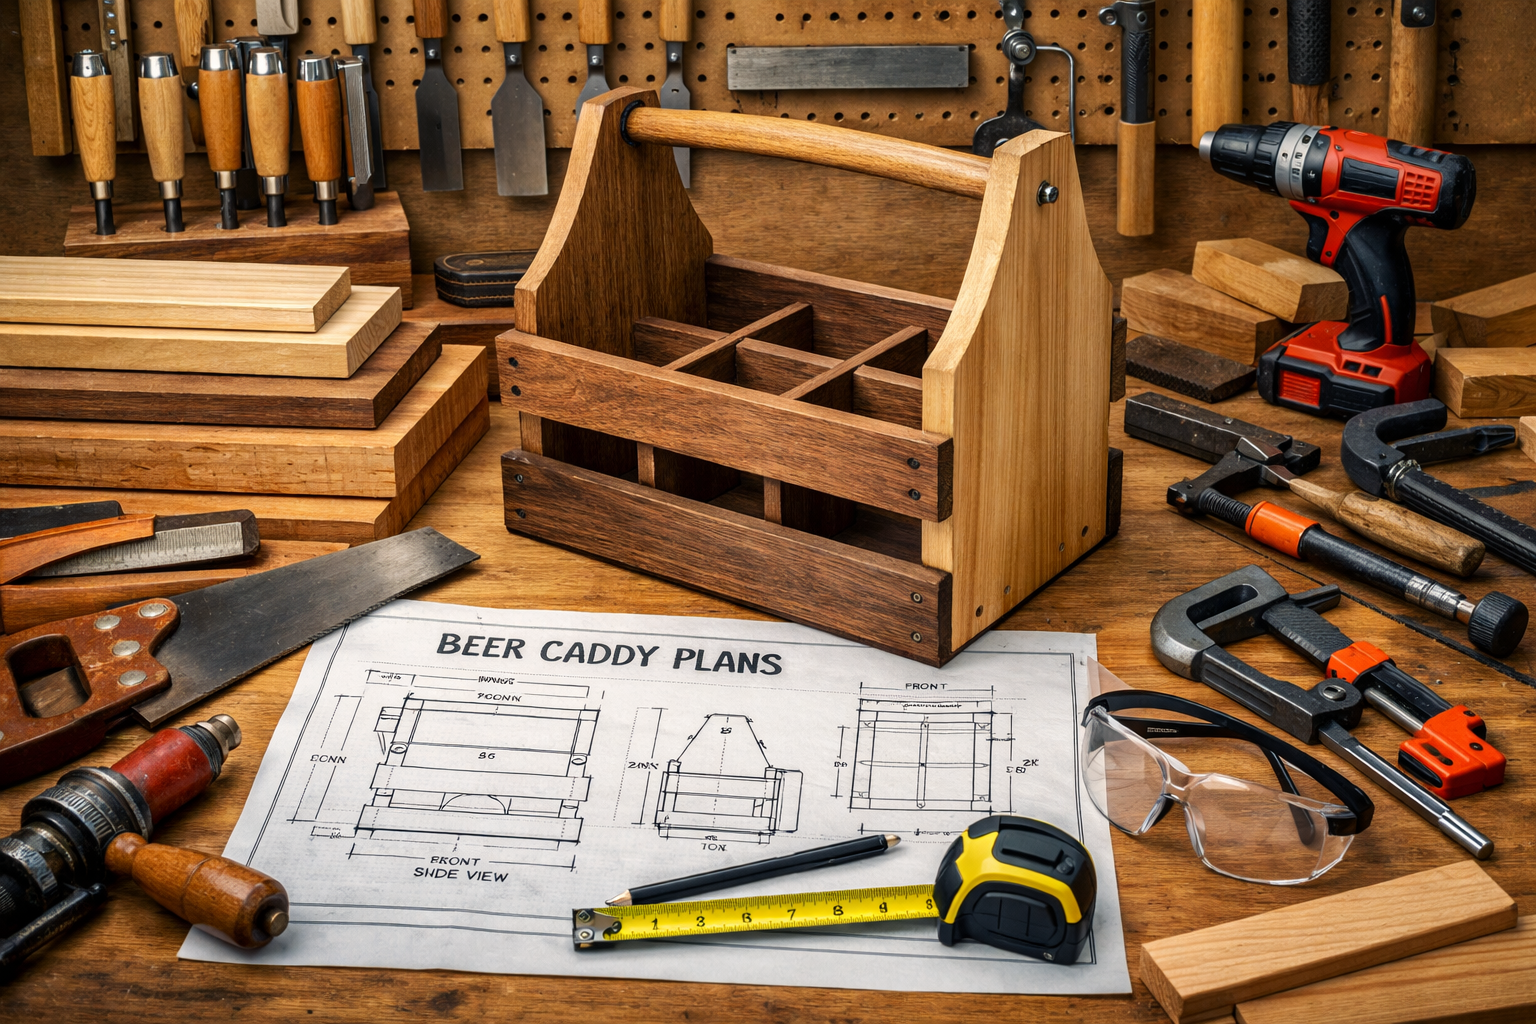
Building a wooden beer caddy is an accessible project for most woodworking enthusiasts, yet it offers ample opportunity for creativity and refinement. The core challenge lies in balancing aesthetics with practical functionality, especially when designing for portability. When you embark on Mastering Wooden Beer Caddy Builds: Portable Designs for Craft Brew Lovers, the initial planning stages are critical.
Understanding Design Principles for Portable Beer Caddies
A portable beer caddy needs to be comfortable to carry, sturdy enough to protect its contents, and visually appealing. Here are some key design considerations:
- Capacity: Most caddies are designed for six bottles or cans, but you might consider variations for four, eight, or even twelve. Adjust dimensions accordingly.
- Dimensions: Standard bottle sizes (e.g., 12 oz long-neck bottles, 16 oz cans) will dictate compartment sizes. Ensure enough clearance for easy insertion and removal, but not so much that bottles rattle excessively.
- Handle Design: The handle is paramount for portability.
- Fixed Top Handle: A sturdy dowel or shaped piece of wood running across the top is a classic and reliable choice.
- Side Cut-Outs: For smaller caddies, integrated handholds cut into the sides can work, but may be less comfortable for heavier loads.
- Rope/Leather Handles: These add a rustic or modern touch but require secure attachment points.
- Compartmentalization: Dividers are essential for keeping bottles from clinking and breaking. These can be fixed or removable, offering flexibility for different beverage sizes.
- Base Stability: A solid, flat base prevents tipping and provides a stable foundation for the contents.
- Added Features:
- Bottle Opener: Integrated into the side or end for convenience.
- Chalkboard Panel: For labeling contents or adding personalized messages.
- Ice Compartment: A removable, waterproof liner for keeping drinks chilled, though this adds complexity and weight.
Selecting the Right Wood Species
The choice of wood greatly influences the caddy’s appearance, weight, durability, and cost. When Mastering Wooden Beer Caddy Builds: Portable Designs for Craft Brew Lovers, consider these popular options:
| Wood Species | Characteristics | Pros | Cons | Ideal Use |
|---|---|---|---|---|
| Pine | Softwood, light color, prominent grain | Inexpensive, easy to work, lightweight | Prone to dents/scratches, absorbs stain unevenly | Budget-friendly, rustic look |
| Poplar | Hardwood, greenish tint, even texture | Inexpensive for a hardwood, smooth finish, good for painting | Can have streaks of green/purple, less visually striking grain | Painted caddies, good base for stain if pre-conditioned |
| Oak | Hardwood, strong, distinct open grain | Very durable, beautiful grain patterns, good stain absorption | Heavier, harder to work, more expensive | Premium, long-lasting caddies, classic look |
| Maple | Hardwood, dense, fine, even grain | Very durable, smooth finish, light color | Can be difficult to stain evenly, moderately expensive | Modern, clean aesthetic, excellent for engraving |
| Cherry | Hardwood, reddish-brown, beautiful aging | Ages beautifully, smooth finish, good workability | More expensive, darkens with age | High-end, heirloom quality caddies |
| Walnut | Hardwood, dark brown, rich grain | Extremely durable, stunning dark color, luxurious | Most expensive, heavier | Luxury, showcase pieces |
For a comprehensive look at how different wood species showcase hand-cut joints, which could be applied to caddy construction, consider exploring Wood Species Selection for Visible Joinery: Choosing Materials that Showcase Hand-Cut Joints in Contemporary Designs.
You might also consider using reclaimed wood to add character and a unique story to your caddy. Explore options like Sourcing and Restoring Urban-Harvested and Reclaimed Wood: Quality, Character, and Sustainability for more information.
💡 Pro Tip: When choosing wood, think about where the caddy will be used. Will it be exposed to moisture or rough handling? This will help you decide between a softer, more affordable wood and a harder, more durable option.
Essential Tools, Construction Techniques, and Personalization
Once the design is finalized and the wood selected, the next step in Mastering Wooden Beer Caddy Builds: Portable Designs for Craft Brew Lovers involves the actual construction. This requires a combination of basic woodworking tools and precise techniques to ensure a sturdy and attractive finished product.
Necessary Tools and Equipment
While intricate joinery can be used, a simple beer caddy can be built with relatively few tools. Here’s a list of essentials:
- Measuring & Marking:
- Tape measure, ruler, square
- Pencil
- Cutting:
- Miter saw or circular saw (for straight, accurate cuts)
- Jigsaw (for curves, handle cut-outs)
- Hand saw (for smaller adjustments or traditional joinery)
- Drilling:
- Cordless drill/driver
- Drill bits (for pilot holes, handle attachment)
- Forstner bits (for larger, clean holes, e.g., for bottle openers) – learn more about 3/16 Forstner Bit Basics: Usage Tips and Safety Techniques
- Assembly:
- Wood glue (waterproof if caddy will encounter moisture)
- Clamps (bar clamps, pipe clamps)
- Screws or nails (finish nails are often sufficient)
- Hammer or brad nailer
- Finishing:
- Sandpaper (various grits from 80 to 220)
- Random orbital sander (optional, but highly recommended)
- Rags or brushes for applying finish
For those looking to optimize their workspace for such projects, consider exploring resources like “Master Your Craft: Building the Ultimate Woodworking Storage Bench in 2026 – Wood Craft Wiz” (https://woodcraftwiz.com/master-your-craft-building-the-ultimate-woodworking-storage-bench-in-2026/).
Step-by-Step Construction Guide (Simplified)
This generalized guide provides a framework; specific plans will vary.
- Cut Your Lumber:
- Measure and cut all side panels, end panels, and the bottom piece according to your design.
- Cut pieces for dividers and the handle. Ensure all cuts are square and precise. Accuracy here prevents gaps later.
- Prepare Panels:
- If adding a bottle opener, drill the necessary holes or rout the recess into the designated panel.
- If creating handle cut-outs, mark and cut them now. For a dowel handle, drill through-holes in the end panels.
- Assemble the Box:
- Apply wood glue to the edges of the side and end panels.
- Join the panels to form the basic box structure. Use clamps to hold them firmly while the glue dries.
- Reinforce joints with finish nails or screws. Predrilling pilot holes is crucial to prevent splitting, especially in hardwoods.
- Attach the Bottom:
- Apply glue to the bottom edges of the assembled box.
- Place the bottom panel onto the box, aligning it precisely.
- Secure with screws or nails, again using pilot holes.
- Install Dividers:
- Measure and cut slots or dadoes in the side panels if you’re using fixed, interlocking dividers.
- For simpler, glue-in dividers, measure and mark their positions on the inside of the box. Apply glue and secure them with small brad nails.
- Attach the Handle:
- For a dowel handle, slide it through the pre-drilled holes in the end panels. Secure it with a small amount of glue or a screw from the outside.
- For other handle types, attach them firmly using appropriate hardware.
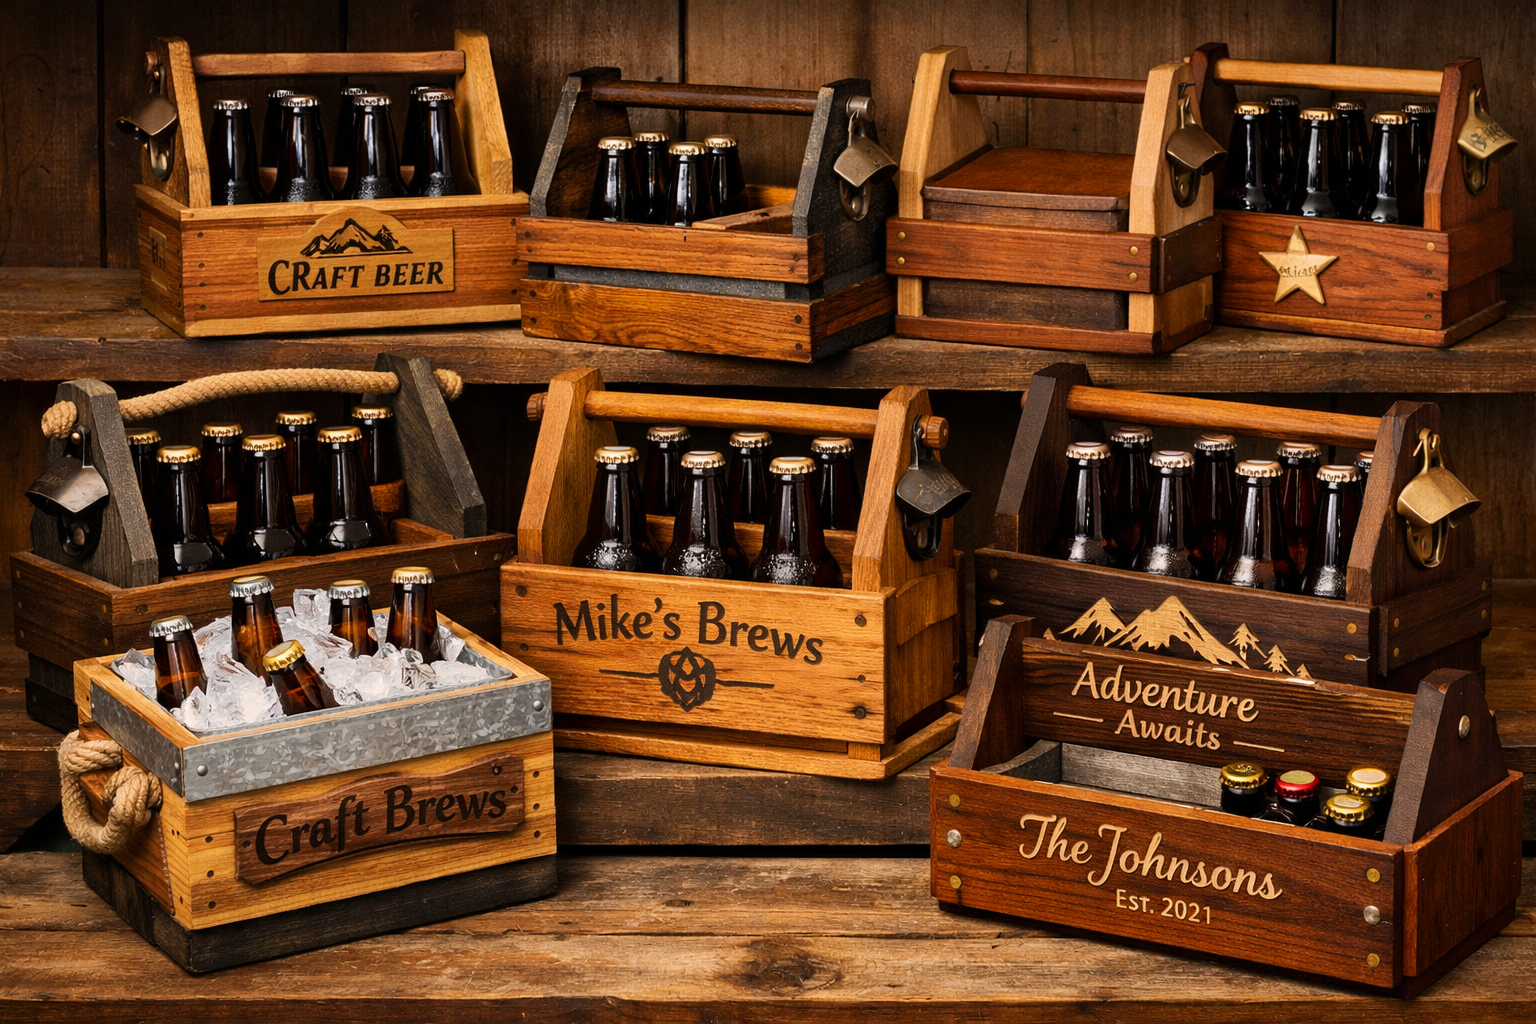
Personalization: Making Your Caddy Unique
Personalization is where your caddy truly comes to life. It’s an integral part of Mastering Wooden Beer Caddy Builds: Portable Designs for Craft Brew Lovers.
- Engraving/Woodburning: Add initials, a favorite brewery logo, or a clever quote using a laser engraver or woodburning tool.
- Different Wood Combinations: Utilize contrasting wood species for different components (e.g., an oak body with a walnut handle) for a distinctive look. See Turning Shop Scraps into Design Features: Mixed-Wood Techniques and Offcut Utilization for Zero-Waste Woodworking for inspiration on mixed-wood techniques.
- Hardware Choices: Select antique brass, brushed nickel, or black iron hardware for bottle openers, corner protectors, or feet to match your aesthetic.
- Staining and Painting:
- Stain: Enhances the natural grain of the wood. Experiment with different shades to achieve the desired look.
- Paint: Offers endless color possibilities and a more modern or whimsical feel. Consider distressing techniques for a vintage look; learn more at distressed wood finishing techniques – Wood Craft Wiz.
- Liners: For caddies intended for cold drinks, a removable waterproof liner can be custom-made or purchased to fit.
Finishing Touches and Maintenance for Longevity
The final steps in Mastering Wooden Beer Caddy Builds: Portable Designs for Craft Brew Lovers involve sanding and applying a protective finish. This not only enhances the caddy’s appearance but also protects it from spills, moisture, and general wear and tear, ensuring it lasts for years to come.
The Importance of Sanding
Sanding is often overlooked but is crucial for a professional-looking finish.
- Progressive Grits: Start with a coarser grit (e.g., 80 or 100) to remove saw marks and imperfections. Gradually work your way up to finer grits (150, 180, 220). Do not skip grits, as this will leave deeper scratches from the previous grit visible in the final finish.
- Dust Removal: After each sanding step, thoroughly remove all dust with a tack cloth or compressed air. Residual dust can create imperfections when finish is applied.
- Edge Softening: Lightly sand all sharp edges to make the caddy more comfortable to handle and less prone to chipping.
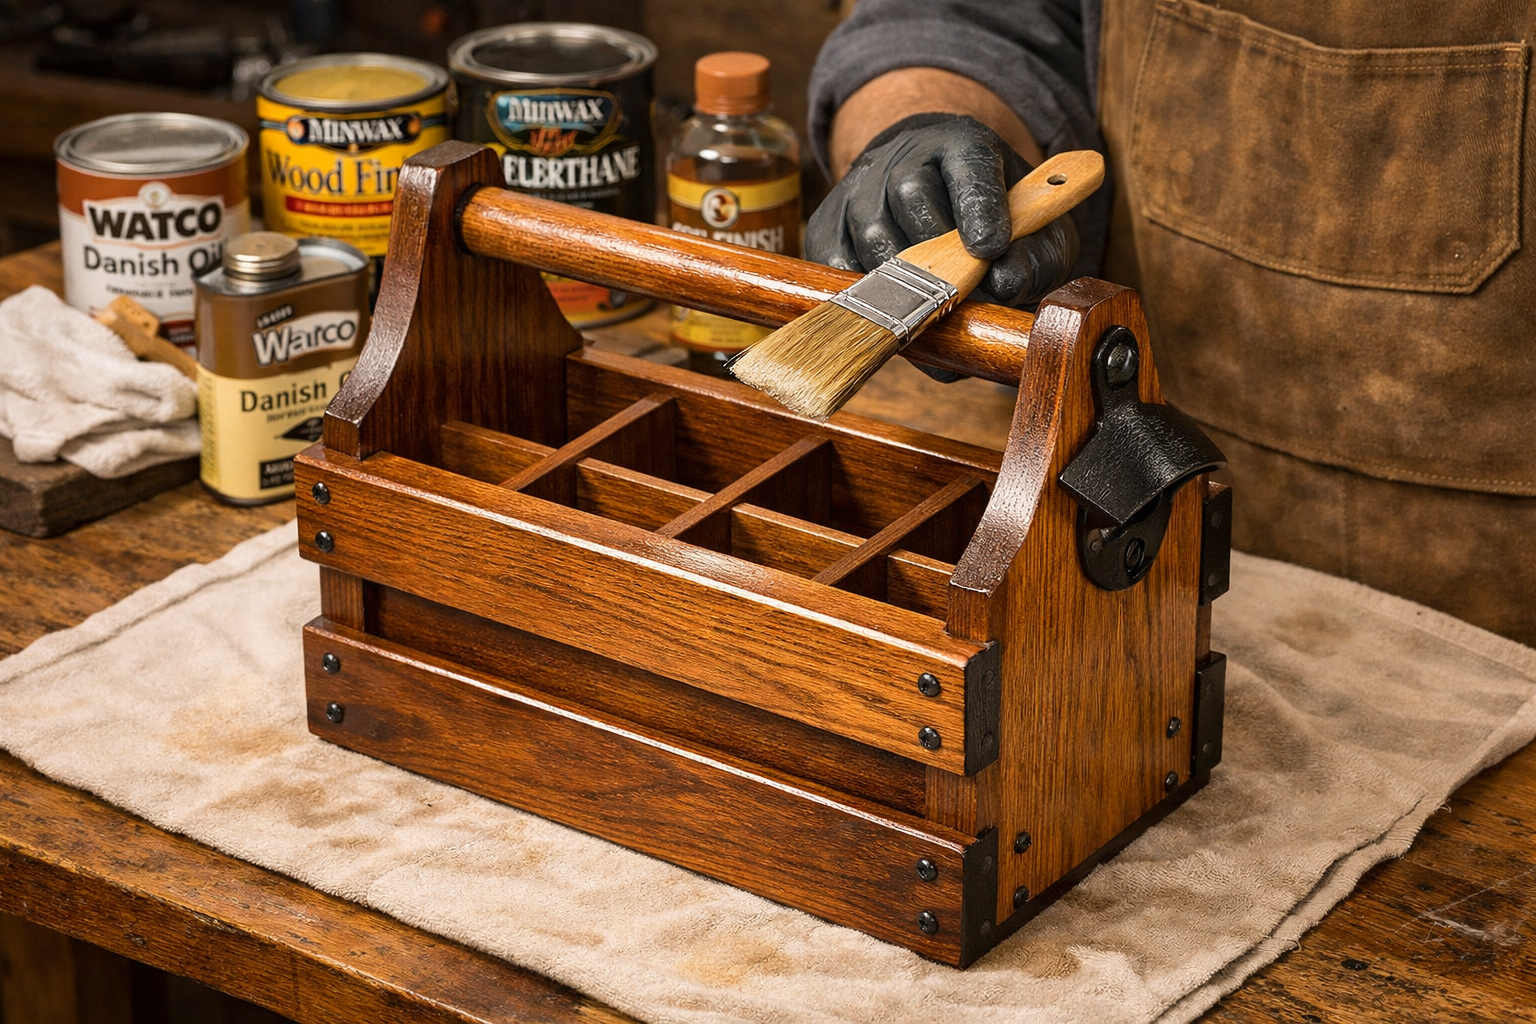
Choosing the Right Wood Finish
The finish protects the wood and dictates the final look. Given the potential for spills, a durable, water-resistant finish is recommended.

- Polyurethane: Highly durable and water-resistant. Available in oil-based (more ambering, strong odor) and water-based (dries faster, less odor, clearer finish) versions. Applied with a brush or spray. For tips on spray application, see sprayable water based polyurethane – a step-by-step guide.
- Varnish: Similar to polyurethane but often provides a harder, more scratch-resistant surface. Excellent for marine applications, making it suitable for beer caddies.
- Shellac: A natural finish that provides a beautiful, amber glow. Less water-resistant than polyurethane or varnish, but good for an antique look.
- Oil Finishes (e.g., Tung Oil, Linseed Oil): Penetrate the wood, enhancing its natural color and grain. They offer a more natural, tactile feel but provide less surface protection against heavy spills. Multiple coats are needed. If considering staining over linseed oil, refer to Can You Stain Over Linseed Oil? Our Ultimate Guide to Achieving Desired Finish.
- Wax Finishes: Offer a soft luster but minimal protection. Often used over other finishes for added depth.
For a broader understanding of various wood finishing techniques, explore cool wood finishing techniques – Wood Craft Wiz or wood finishing techniques – Wood Craft Wiz. Specific wood types also have tailored finishing guides, such as mahogany wood finishing techniques – Wood Craft Wiz or oak wood finishing techniques – Wood Craft Wiz.
Application Tips for a Flawless Finish
- Cleanliness is Key: Work in a dust-free environment.
- Thin Coats: Apply several thin coats rather than one thick coat. This prevents drips, bubbles, and ensures better adhesion.
- Sanding Between Coats: Lightly sand with a fine grit (e.g., 220 or 320) between coats to ensure good adhesion and a smooth finish. Remove dust thoroughly.
- Follow Manufacturer’s Instructions: Adhere to drying times and application recommendations specific to your chosen finish.
- Curing Time: Allow the finish to fully cure before putting the caddy into heavy use. This can take several days or even weeks, depending on the product.
Maintenance and Care for Your Wooden Beer Caddy
Proper care will extend the life and beauty of your handcrafted caddy.
- Clean Spills Immediately: Wipe up any beer or condensation spills with a soft, damp cloth.
- Avoid Submerging: Do not soak the caddy in water.
- Periodic Re-application: Depending on the finish and usage, you may need to re-apply a coat of finish every few years to maintain protection. Oil finishes, in particular, benefit from regular re-oiling.
- Storage: Store the caddy in a dry place, away from extreme temperature fluctuations or direct sunlight, which can cause warping or cracking.
By diligently following these steps, your journey in Mastering Wooden Beer Caddy Builds: Portable Designs for Craft Brew Lovers will culminate in a durable, attractive, and highly functional accessory that will be admired for its craftsmanship and utility.
Conclusion
Mastering Wooden Beer Caddy Builds: Portable Designs for Craft Brew Lovers is a rewarding endeavor that blends practical woodworking skills with the joy of craft beer culture. From the initial spark of an idea to the final protective coat, each step offers an opportunity to create something truly unique and personal. We’ve covered the crucial aspects of design, emphasizing portability and durability, and explored how different wood choices, like the classic oak or the striking walnut, can define your caddy’s character.
We’ve also delved into the essential tools and construction techniques that bring these designs to life, from accurate cutting and assembly to the vital role of personalization. Whether you choose to engrave a special message, integrate a bottle opener, or experiment with various wood types and finishes, each decision contributes to a caddy that reflects your individual style and craftsmanship. Finally, understanding the importance of proper sanding and selecting the right finish ensures your creation is not only beautiful but also robust enough to withstand spills and transport, protecting your precious brews for years to come.
As you continue your woodworking journey in 2026, let the wooden beer caddy be a testament to your skill and passion. It’s more than just a carrier; it’s a conversation starter, a personalized gift, and a functional piece of art that enhances every craft beer experience. So grab your tools, select your wood, and start crafting a portable companion for your favorite brews today.
Actionable Next Steps:
- Sketch Your Design: Begin by drawing out your ideal beer caddy, considering capacity, handle style, and any special features.
- Source Your Materials: Visit your local lumberyard or reclaim yard. Don’t be afraid to experiment with different wood species.
- Gather Your Tools: Ensure you have the necessary tools for cutting, drilling, and assembly. If you’re missing something, consider investing or borrowing.
- Practice on Scraps: Before making final cuts, practice any new joinery or cutting techniques on scrap pieces of wood.
- Plan Your Finish: Research different wood finishes and decide which best suits your chosen wood and the caddy’s intended use.
Happy crafting, and cheers to your next woodworking masterpiece! 🍻
References
- Fine Woodworking Magazine. (2024). Essential Joinery Techniques. Taunton Press.
- The Wood Whisperer. (2023). Wood Finishing 101. The Wood Whisperer, LLC.
- Craft Beer & Brewing Magazine. (2024). The Culture of Craft. Craft Beer & Brewing.
