
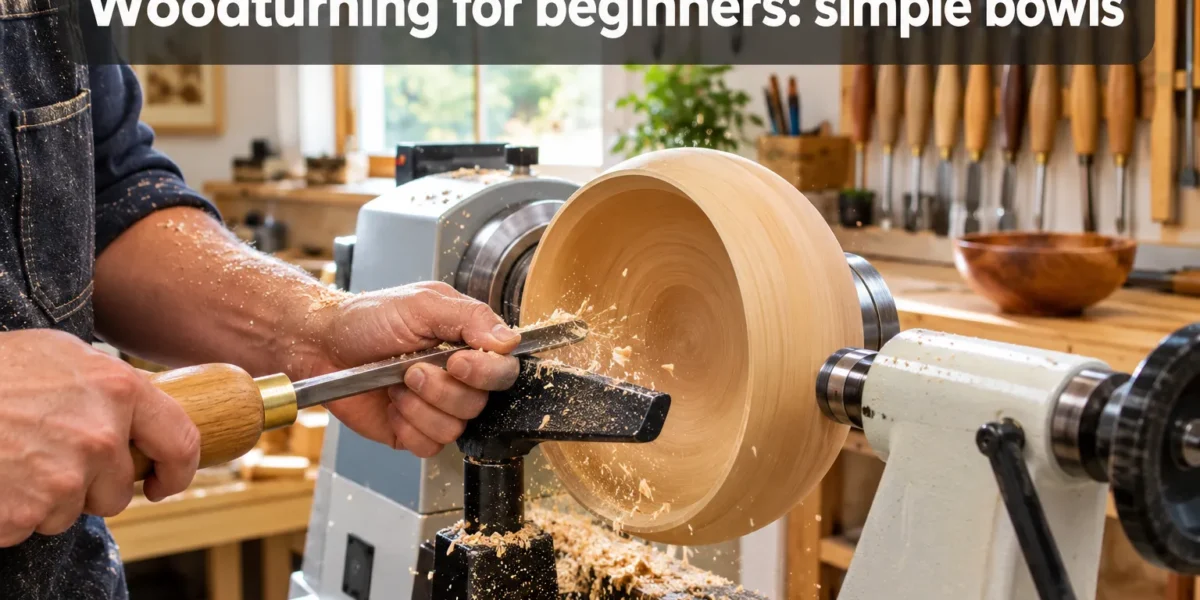
Short-form video platforms are increasingly showcasing the mesmerising craft of woodturning, drawing a new generation of makers to the lathe. This surge in interest highlights that creating beautiful, functional wooden items is more accessible than ever, even for complete novices. For those looking to delve into a rewarding hobby, “Woodturning for beginners: simple bowls and decor” offers a practical entry point into transforming raw timber into stunning pieces. This guide provides foundational knowledge, essential tools, and step-by-step instructions to help you start crafting your own unique wooden creations in 2026.
Key Takeaways
- Woodturning is an accessible craft for beginners, focusing on safety and basic techniques.
- Essential tools include a wood lathe, chisels/gouges, safety gear, and wood blanks.
- Starting with simple projects like small bowls, platters, and decorative items builds fundamental skills.
- Proper tool sharpening, controlled cutting, and effective finishing are crucial for quality results.
- Consistent practice and adherence to safety protocols lead to rewarding progress in woodturning.
The Allure of Woodturning for Beginners: Simple Bowls and Decor
Woodturning, the process of shaping wood on a lathe as it spins, is a timeless craft that combines artistry with precision. It offers immense satisfaction as you witness a rough block of wood transform into a graceful bowl, a delicate vase, or an elegant decorative piece. For beginners, the initial steps might seem daunting, but by focusing on straightforward projects and mastering core techniques, anyone can achieve impressive results. The tactile experience of working with wood, feeling its texture, and bringing out its natural beauty is profoundly rewarding.
Choosing the right introductory projects is key to success in “Woodturning for beginners: simple bowls and decor”. Simple bowls, small platters, and decorative spindles are ideal starting points. These projects allow you to practice fundamental cuts, understand wood grain, and develop a consistent rhythm without the complexity of more intricate designs. The beauty of these items lies in their simplicity and the unique character of the wood itself.
Essential Tools and Equipment for Your First Woodturning Projects
Before you can begin shaping wood, you’ll need the right equipment. Investing in quality tools from the outset will enhance your learning experience and ensure safety.
The Wood Lathe
The lathe is the central piece of equipment. For beginners, a midi or mini lathe is often sufficient. These are smaller, more affordable, and take up less space than full-sized models. Key features to consider include:
- Motor Horsepower: A 1/2 HP to 1 HP motor is suitable for turning small to medium-sized projects.
- Speed Control: Variable speed control is highly desirable, allowing you to adjust the RPM for different wood types and turning stages.
- Swing Over Bed: This measurement dictates the maximum diameter of the wood blank you can turn. For bowls, a larger swing is beneficial.
- Distance Between Centers: This determines the maximum length of spindle work you can perform.
Woodturning Chisels and Gouges
A basic set of turning tools is essential. Look for high-speed steel (HSS) tools, which hold an edge longer than carbon steel. A good starter set typically includes:
- Roughing Gouge: Used to quickly shape square blanks into cylindrical or round forms.
- Spindle Gouge: Ideal for detailed work on spindles, creating coves and beads.
- Bowl Gouge: Specifically designed with a deep flute to clear shavings when hollowing out bowls. This is indispensable for turning bowls.
- Parting Tool: Used to cut off completed pieces from the lathe or to create grooves.
- Skew Chisel: A versatile tool for planing cuts and creating crisp lines, though it has a steeper learning curve for beginners.
Safety Gear
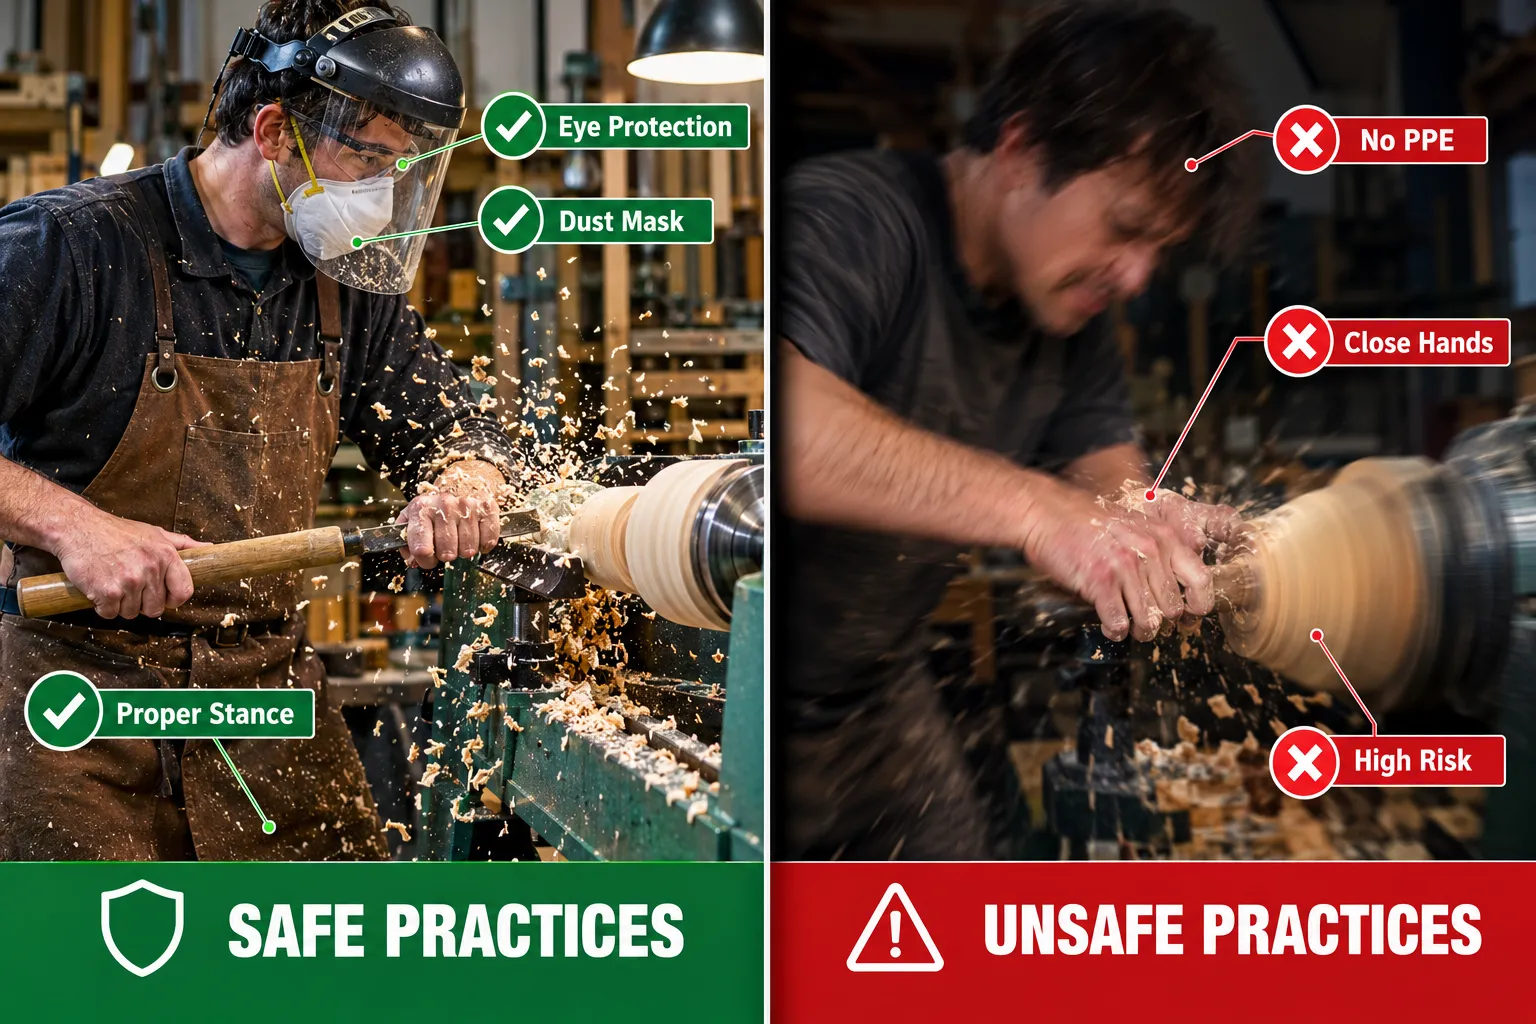
Safety is paramount in woodturning. Always wear appropriate personal protective equipment (PPE):
- Full Face Shield: Protects your entire face from flying debris and wood chips.
- Safety Glasses: Worn under the face shield for an extra layer of protection.
- Dust Mask or Respirator: Fine wood dust can be a respiratory hazard.
- Hearing Protection: Lathes can be noisy, especially with larger pieces of wood.
- Appropriate Clothing: Avoid loose clothing or jewelry that could get caught in the spinning lathe.
Other Essential Accessories
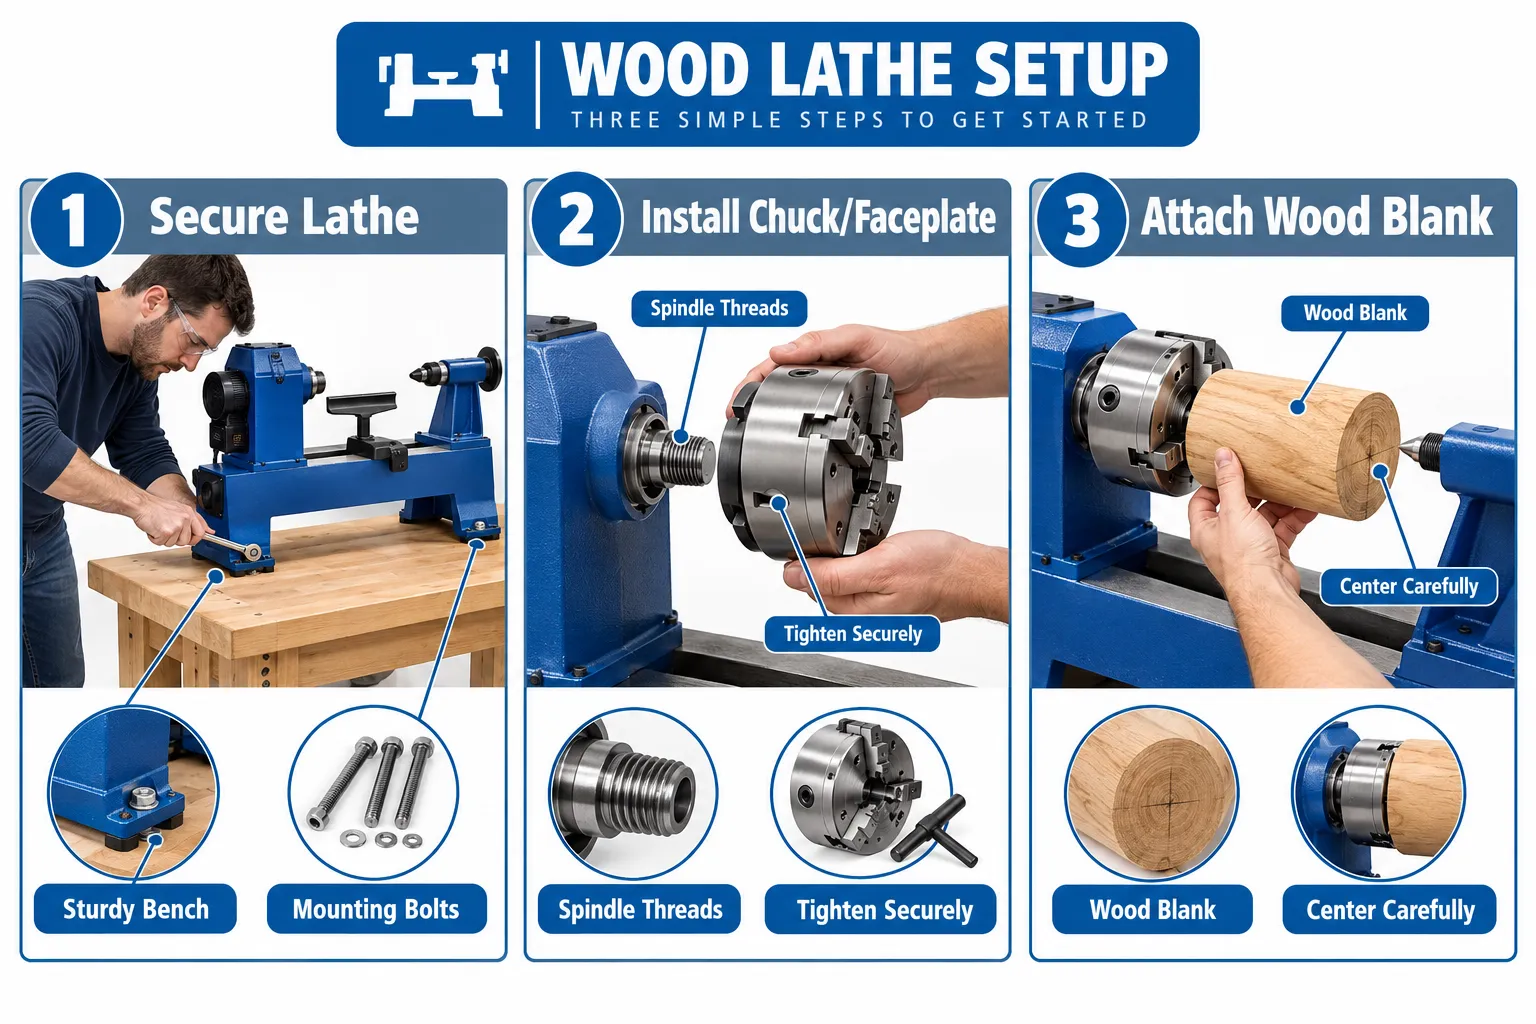
- Lathe Chuck or Faceplate: Used to hold the wood blank securely on the headstock. A chuck is versatile for various projects, while a faceplate is often used for larger bowl turning.
- Live Center: Supports the tailstock end of the wood blank, allowing it to spin freely.
- Dead Center: A fixed point that supports the tailstock end, less common now due to friction.
- Tool Rest: Provides a stable platform for bracing your turning tools against the spinning wood.
- Sharpening System: Keeping your tools razor-sharp is critical for clean cuts and reducing tear-out. This could be a grinding wheel or a specialized sharpening jig.
- Wood Blanks: Start with softwoods or easily workable hardwoods like maple, cherry, or poplar. You can learn more about sustainable wood sourcing to find suitable materials.
Mastering Basic Techniques for Simple Bowls and Decor
Once you have your equipment set up and safety gear on, it’s time to learn the fundamental techniques for woodturning for beginners: simple bowls and decor. Patience and practice are your best tools.
Mounting the Wood Blank
Properly mounting the wood is the first critical step.
- Select Your Wood: For a simple bowl, choose a square or round blank slightly larger than your desired finished piece. Ensure the wood is free of cracks or large knots.
- Rough Shape (Optional): If starting with a square blank, you might consider cutting off the corners with a band saw to make it more balanced before mounting, reducing vibration.
- Attach to Faceplate/Chuck:
- Faceplate: Screw the faceplate securely to the center of one side of your wood blank. This method is common for bowl turning where the blank is mounted only on the headstock.
- Four-Jaw Chuck: If using a chuck, ensure your blank has a tenon or recess turned onto it (often done on the lathe itself after mounting between centers, or by securing it to a screw chuck first).
Basic Turning Cuts
Learning to control your tools is paramount. The goal is to make smooth, controlled cuts, removing wood chips rather than scraping or tearing.
- Roughing Cut: Using a roughing gouge, begin with light passes, gently presenting the tool to the spinning wood. Support the tool firmly on the tool rest and pivot it slightly to take off small amounts of material. Gradually increase pressure as you gain confidence, always moving from larger diameter to smaller.
- Shearing Cut (for Bowls): With a bowl gouge, this is a staple for hollowing. Start with the flute of the gouge pointing in the direction of the cut. Gently bring the cutting edge into contact with the spinning wood, rolling the tool slightly to engage the bevel and create a clean shaving. Always cut downhill or from a larger diameter towards a smaller one when possible.
- Scraping Cut: While shearing cuts are preferred for cleaner results, scraping can be useful for refining shapes or reaching difficult areas, especially for beginners. Be aware that scraping can leave a rougher surface.
Shaping Your First Bowl
Let’s walk through the general process for a simple beginner bowl:
- Mount the Blank: Secure a round or square blank to a faceplate or chuck. Ensure it’s centered and tight.
- True Up the Outside: With your roughing or bowl gouge, carefully shape the outside of the blank. Start by making the rim perfectly round, then gradually shape the curve of the bowl’s exterior. Keep the tool rest close to the wood and adjust it as you remove material.
- Create a Tenon or Recess (if needed): If you mounted the blank on a faceplate, you’ll want to turn a tenon on the bottom of the bowl that can be gripped by a chuck. This allows you to remove the faceplate later and turn the bottom of the bowl. Alternatively, you can create a small foot for the bowl, leaving the faceplate screws in place until the very end.
- Hollow the Interior: This is where the bowl gouge shines. Begin by drilling a shallow pilot hole in the center with a drill chuck in the tailstock. Then, using your bowl gouge, start at the rim and work your way towards the center, gradually hollowing out the interior. Always keep the bevel rubbing the wood and maintain a gentle, continuous cut.
- Refine the Shape: Once the basic shape is achieved, use light shearing cuts to smooth out any bumps or ridges on both the interior and exterior. Aim for an even wall thickness.
Finishing and Decorating Your Woodturned Creations
Completing your simple bowls and decor involves sanding, applying a finish, and potentially adding decorative elements. These steps elevate your piece from a functional item to a work of art.
Sanding on the Lathe
Sanding on the lathe can be much faster than hand sanding.
- Reduce Speed: Always reduce the lathe speed significantly for sanding.
- Start Coarse: Begin with a coarser grit sandpaper (e.g., 100-120 grit) to remove tool marks. Work your way through progressively finer grits (e.g., 150, 180, 220, 320, 400), ensuring all previous grit scratches are removed before moving to the next.
- Reverse Rotation (Optional): If your lathe has a reverse function, sanding in reverse for some grits can help eliminate unidirectional scratches.
- Hand Sanding: For final touches or hard-to-reach areas, remove the piece from the lathe and hand sand.
Applying Finishes
Choosing the right finish enhances the wood’s beauty and protects it. For beginners, simple, easy-to-apply finishes are best. You can explore various wood finishing techniques as you advance.
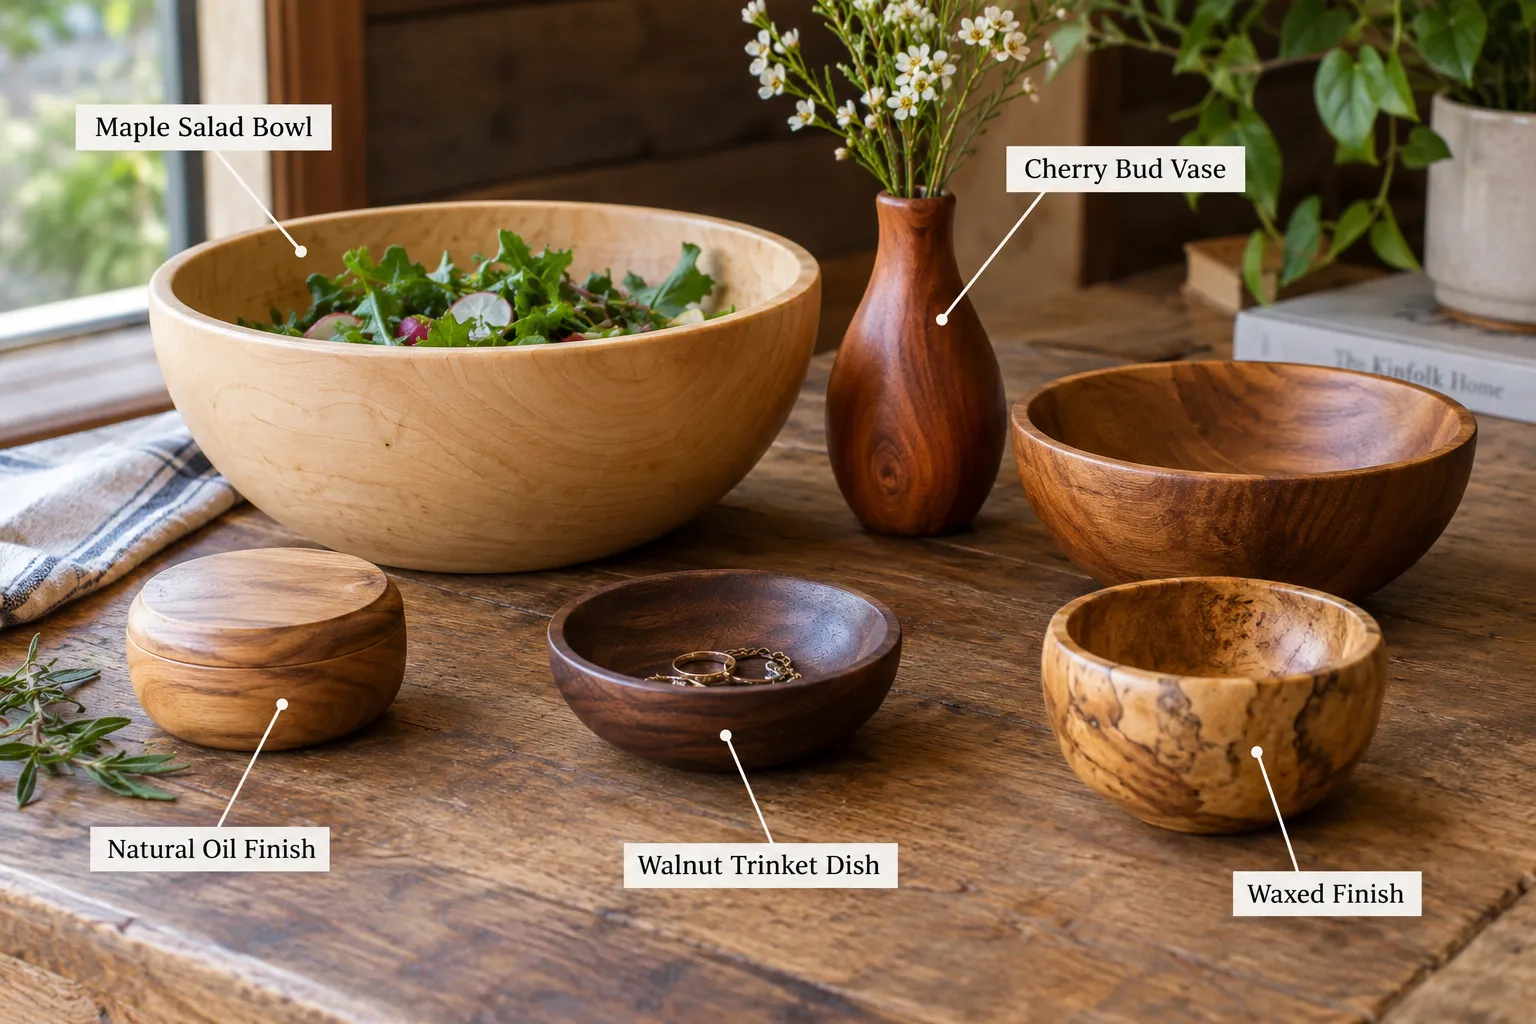
- Food-Safe Finishes: For bowls intended for food contact (like salad bowls), use food-safe mineral oil, tung oil, or walnut oil. Apply generously, let it soak in, then wipe off the excess. Repeat coats for more protection.
- Oil Finishes (Non-Food Safe): Danish oil, linseed oil, or teak oil penetrate the wood, offering a natural look and feel. They are easy to apply by wiping on and wiping off.
- Waxes: Carnauba wax or beeswax polishes can provide a soft luster and some protection, often applied over an oil finish.
- Lacquer/Polyurethane: These offer more durable, protective coatings but can be more challenging to apply smoothly without drips or brush marks. They are less common for beginner projects like simple bowls due to their more involved application process.
Adding Decorative Elements
While “Woodturning for beginners: simple bowls and decor” often emphasizes the natural beauty of the wood, you can also add subtle decorative touches:
- Burn Lines: Using a thin wire or string held against the spinning wood can create dark, elegant burn lines.
- Carving: After turning, parts of the bowl or decor piece can be hand-carved to add texture or patterns.
- Coloring: Dyes or stains can dramatically alter the appearance of your turned pieces, though this is often reserved for non-food contact items.
- Embellishments: Small inlays of contrasting wood or other materials can be added, though this is a more advanced technique.
Conclusion
Embarking on the journey of “Woodturning for beginners: simple bowls and decor” opens up a world of creative possibilities. With a modest investment in basic equipment, a commitment to safety, and a willingness to learn fundamental techniques, you can soon transform raw timber into beautiful, handmade objects. Remember that mastery comes with practice. Your first bowls might not be perfect, but each turn of the lathe builds skill and confidence. So, gather your tools, select a piece of wood, and begin experiencing the immense satisfaction of creating something truly unique with your own hands. The vibrant community of woodturners offers endless inspiration and support as you continue to explore this captivating craft.