

Imagine your garden transformed into a vibrant sanctuary, bustling with the cheerful melodies and graceful flights of native birds. While simple birdhouses offer a welcome haven, discerning garden enthusiasts in 2026 are elevating their outdoor spaces with “DIY Wooden Birdhouses: Advanced Designs with Precision Joinery for Garden Enthusiasts.” This isn’t just about providing shelter; it’s about crafting architectural feats that showcase woodworking skill, enhance aesthetic appeal, and stand the test of time. By incorporating sophisticated techniques like dovetail and mortise-and-tenon joints, you can build truly exceptional, wildlife-friendly habitats that are not only durable but also beautiful additions to any landscape. This guide will walk you through the essential knowledge, techniques, and considerations to turn your birdhouse projects into profitable, long-lasting investments.
Key Takeaways
- Elevate Craftsmanship: Move beyond basic construction by incorporating precision joinery like dovetail and mortise-and-tenon joints for superior strength and aesthetics in your birdhouses.
- Species-Specific Design: Tailor birdhouse dimensions, entrance hole size, and interior features to attract desired bird species, ensuring optimal habitat suitability.
- Optimal Wood Selection: Choose naturally durable and weather-resistant woods such as cedar, redwood, cypress, or white oak for longevity and minimal maintenance.
- Durable Finishing: Apply eco-friendly, non-toxic, weather-resistant finishes to protect your birdhouses from the elements while remaining safe for avian inhabitants.
- Profitable Outdoor Projects: Advanced birdhouse designs with precision joinery offer a niche for woodworkers seeking to create high-value, marketable garden accents.
Mastering Precision Joinery for DIY Wooden Birdhouses: Advanced Designs with Precision Joinery for Garden Enthusiasts
For the dedicated woodworker, the allure of “DIY Wooden Birdhouses: Advanced Designs with Precision Joinery for Garden Enthusiasts” lies in the opportunity to combine functional artistry with robust construction. Moving beyond nails and screws, precision joinery techniques offer unparalleled strength, durability, and a level of craftsmanship that instantly elevates a birdhouse from a simple structure to a miniature architectural marvel. In 2026, the demand for well-built, aesthetically pleasing garden accessories continues to rise, making these advanced birdhouses an ideal project for those looking to hone their skills and potentially create profitable outdoor products.

The Superiority of Precision Joinery
Why opt for precision joinery over simpler fastening methods? The answer lies in several key advantages:
- Exceptional Strength: Joints like dovetails and mortise-and-tenons create mechanical locking mechanisms, resisting forces that would easily compromise screwed or nailed joints. This is crucial for outdoor structures exposed to wind, rain, and temperature fluctuations.
- Enhanced Durability: These joints distribute stress more effectively across the wood fibers, preventing warping, twisting, and joint failure over time. A birdhouse built with precision joinery will last for decades.
- Aesthetic Appeal: Exposed joinery, particularly dovetails, adds a touch of classic craftsmanship and visual interest that mass-produced items simply cannot replicate. It signals quality and attention to detail.
- Reduced Reliance on Adhesives: While wood glue is often used to reinforce these joints, the mechanical interlocking provides inherent strength, meaning the structure is robust even before the glue cures.
- Structural Integrity: Precision joints create a solid, monolithic feel, making the birdhouse more stable and less prone to racking or loosening.
Essential Advanced Joinery Techniques for Birdhouses
To truly create “DIY Wooden Birdhouses: Advanced Designs with Precision Joinery for Garden Enthusiasts,” mastering a few key joints is essential.
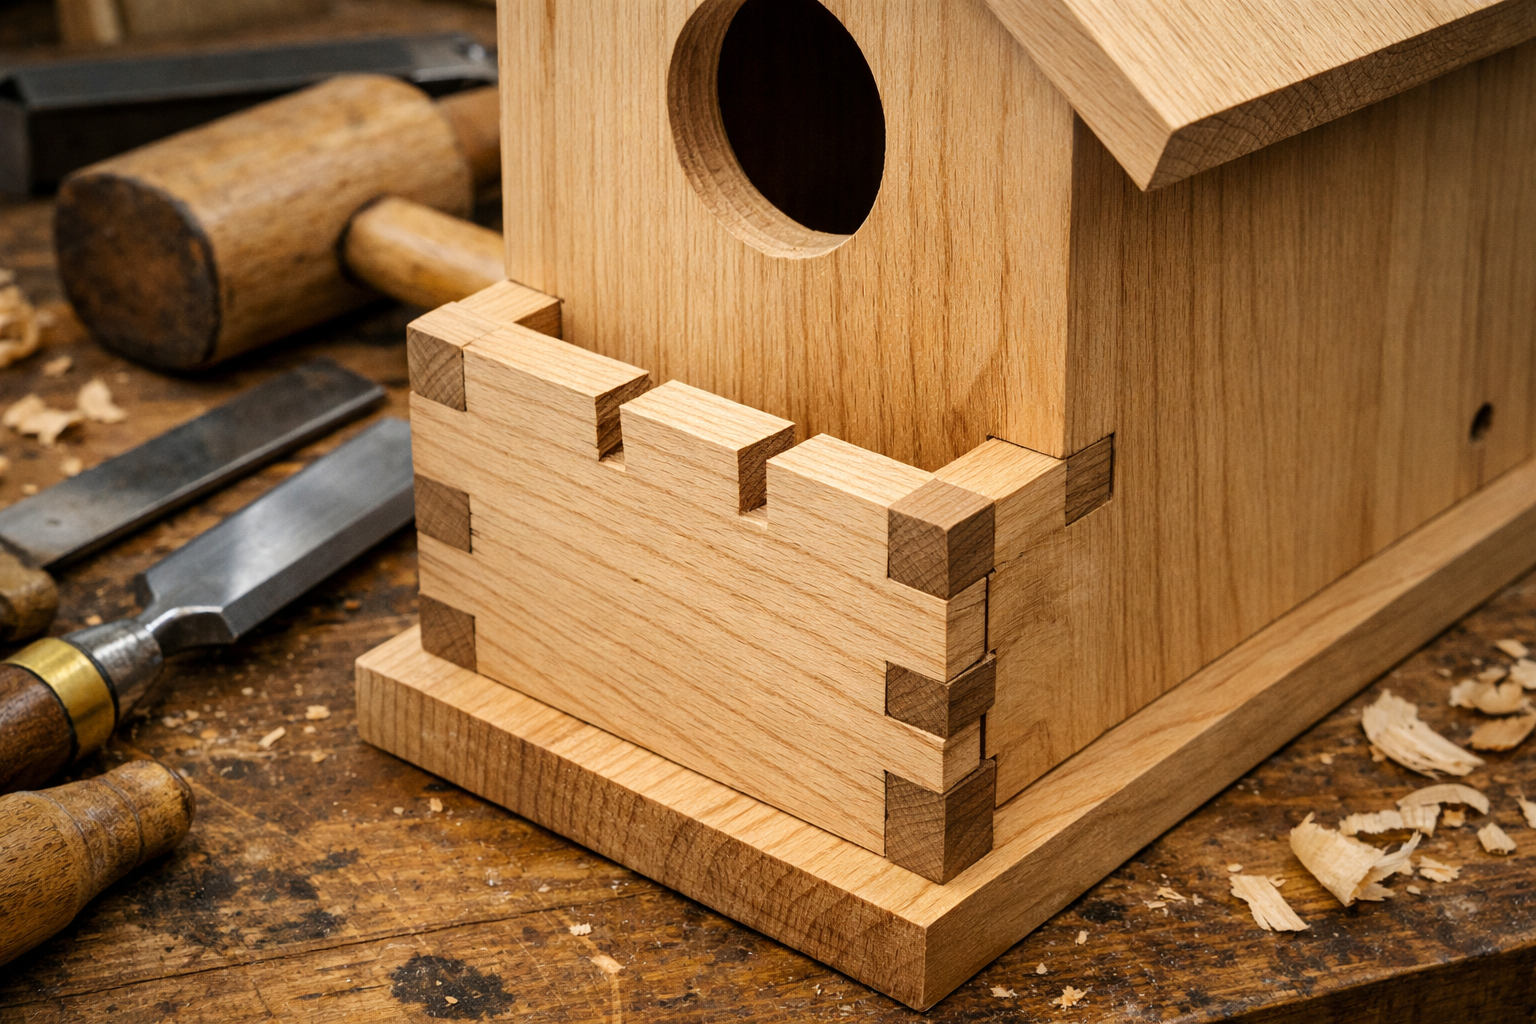
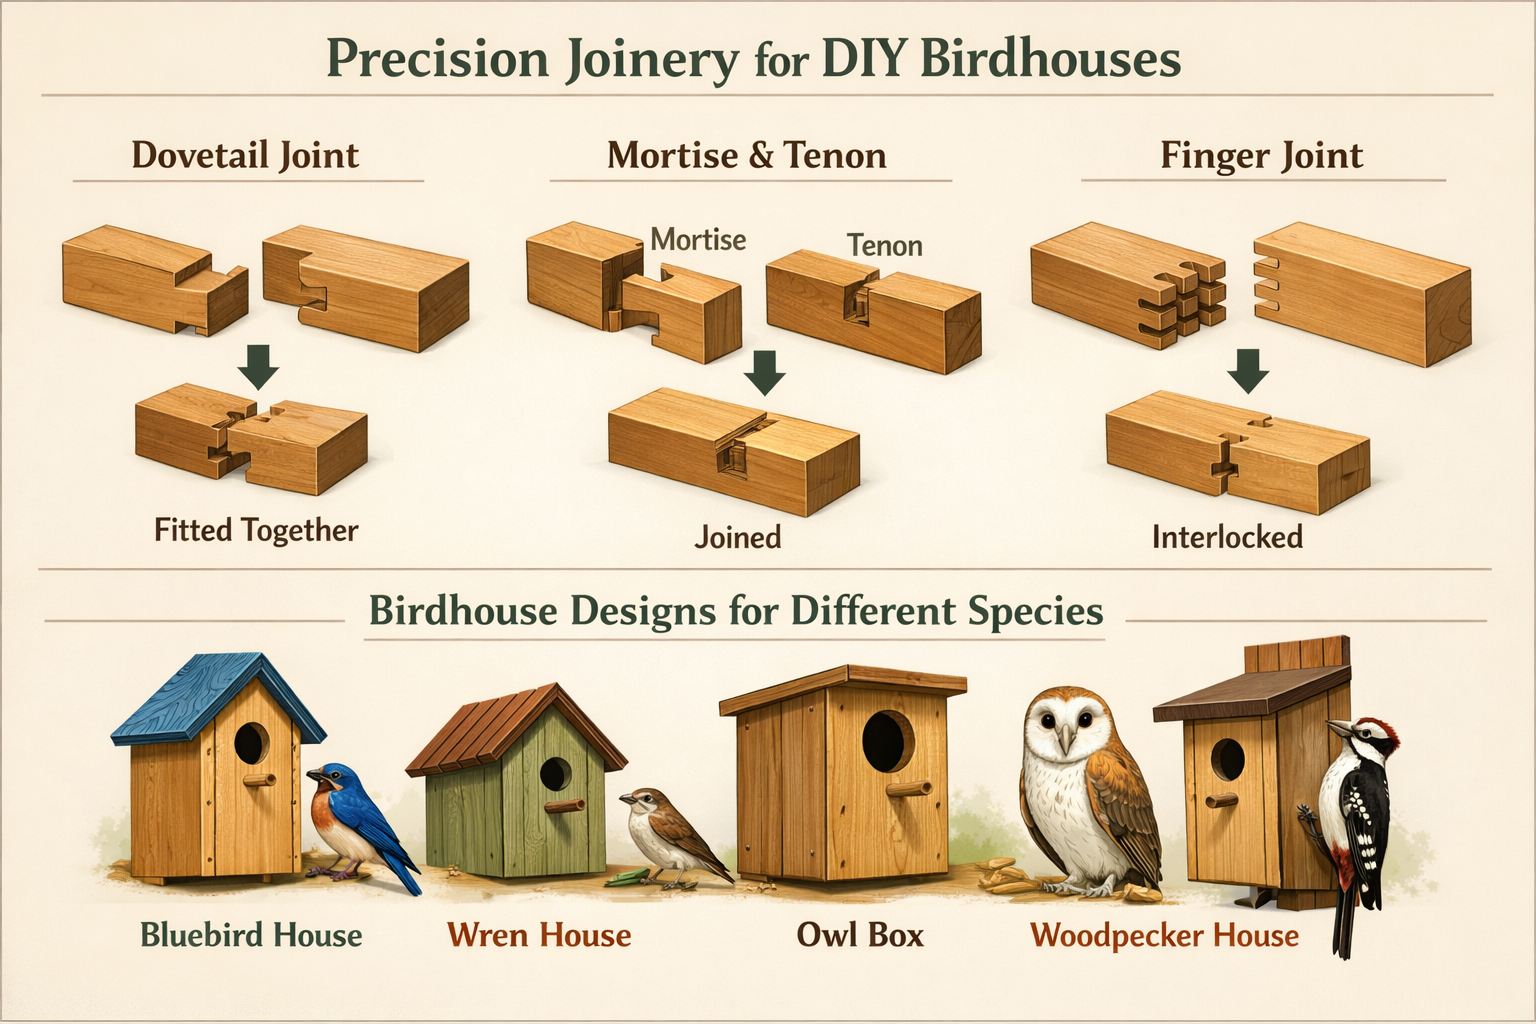
1. Dovetail Joints
The dovetail joint is renowned for its strength and beauty. It’s particularly effective for connecting perpendicular pieces, such as the sides of a birdhouse. The flared shape of the ‘dovetails’ (pins) and the corresponding ‘tails’ locks the pieces together, making them incredibly resistant to being pulled apart.
- Types: Through dovetails (pins and tails visible on both faces), half-blind dovetails (visible on one face), and secret mitered dovetails (hidden). For birdhouses, through or half-blind dovetails are most common due to their strength and visible appeal.
- Tools: Dovetail saw, chisels, marking gauge, dovetail marker, mallet, and a steady hand. A router with a dovetail jig can also be used for efficiency, but hand-cut dovetails are a mark of true skill.
- Application: Ideal for the corners of the main birdhouse body, connecting the front, back, and side panels.
2. Mortise-and-Tenon Joints
The mortise-and-tenon joint is one of the oldest and strongest joints in woodworking, perfect for connecting pieces at right angles. It involves cutting a slot (mortise) into one piece of wood and a projecting tongue (tenon) on the end of another piece, which then fits snugly into the mortise.
- Types: Through mortise-and-tenon (tenon passes completely through the mortise), blind mortise-and-tenon (tenon does not pass through), haunched mortise-and-tenon (reduces width of tenon).
- Tools: Mortising chisel, mortising machine, router, drill press, tenon saw, marking gauge.
- Application: Excellent for attaching perches, roof supports, or even the base to the main body if designing a more complex, multi-component structure. For example, a sturdy, decorative perch would greatly benefit from a strong mortise-and-tenon connection to the front panel.
3. Finger Joints (Box Joints)
While not as aesthetically celebrated as dovetails, finger joints provide excellent mechanical strength and are simpler to cut. They consist of interlocking rectangular fingers that fit together snugly, ideal for square or rectangular boxes.
- Tools: Table saw with a dado stack or a router with a finger joint jig.
- Application: Can be used for the corners of the birdhouse body, especially if a simpler, more modern aesthetic is desired or if production efficiency is a concern.
Precision Joinery Workflow
Regardless of the specific joint chosen, a meticulous workflow is key to success:
- Accurate Measurement and Marking: Precision begins with precise measurements. Use a sharp pencil, marking knife, and a reliable marking gauge. “Measure twice, cut once” is not just a cliché; it’s a golden rule.
- Careful Cutting: Use sharp, appropriate saws and chisels. For dovetails and tenons, aim to cut to the waste side of your line, allowing for fine-tuning.
- Test Fitting: Always dry-fit your joints before applying glue. They should fit snugly but not require excessive force to assemble. If a joint is too tight, pare away small amounts of wood with a sharp chisel. If too loose, consider shims or recutting.
- Gluing and Clamping: Use a high-quality exterior wood glue. Apply glue sparingly but thoroughly to both mating surfaces. Clamp the joint firmly, ensuring it’s square, and allow ample drying time. Remove any excess glue squeeze-out immediately with a damp cloth or after it has dried, using a chisel. For more on advanced fastening, explore our guide on woodworking fasteners.
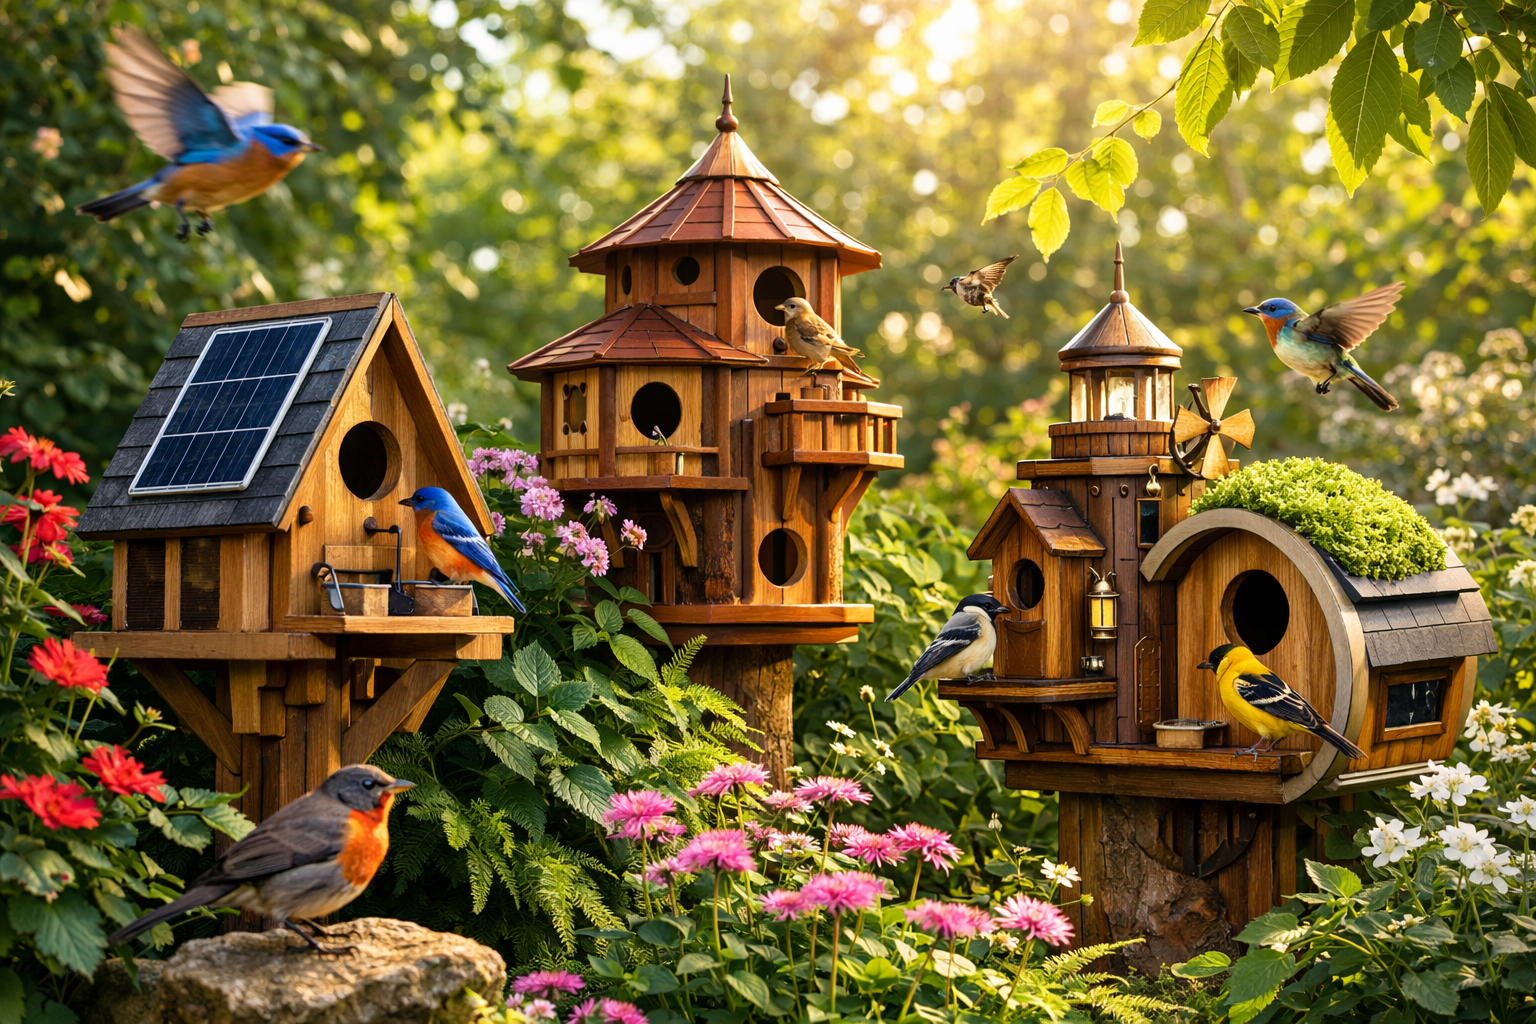
Designing Species-Specific & Weather-Resistant Birdhouses
Creating “DIY Wooden Birdhouses: Advanced Designs with Precision Joinery for Garden Enthusiasts” extends beyond impeccable craftsmanship; it involves thoughtful design that caters to specific avian residents and withstands the rigors of the outdoors. In 2026, environmentally conscious garden enthusiasts prioritize structures that are both functional for wildlife and durable against the elements.
Birdhouse Design for Specific Species
Understanding the needs of different bird species is paramount for designing a truly functional birdhouse. A one-size-fits-all approach rarely works.
- Entrance Hole Size: This is the most critical dimension. A too-large hole invites predators or undesirable species, while a too-small one excludes the target bird.
- Wrens: 1 to 1.5 inches
- Bluebirds: 1.5 inches (often a horizontal oval for Western Bluebirds)
- Chickadees: 1.125 inches
- House Sparrows/Starlings: Larger holes (avoid attracting these invasive species by careful sizing).
- Cavity Size (Floor Dimensions): The internal space needs to be adequate for nesting and fledglings.
- Wrens/Chickadees: 4×4 inches
- Bluebirds: 5×5 inches
- Woodpeckers: 6×6 inches (and often require wood shavings inside)
- Cavity Depth: Distance from the bottom of the entrance hole to the floor. This protects young birds from predators reaching in.
- Wrens/Chickadees: 6-8 inches
- Bluebirds: 8-10 inches
- Ventilation: Essential to prevent overheating, especially in warmer climates. Drill small holes near the top of the side panels, just below the roofline, or create small gaps in the roof structure.
- Drainage: Drill 1/4-inch to 1/2-inch holes in each corner of the birdhouse floor to allow water to escape.
- Perches: Contrary to popular belief, external perches are often unnecessary and can even be detrimental, providing a foothold for predators. Most cavity-nesting birds can cling to the entrance hole. If a perch is desired for aesthetic reasons, ensure it is very short and directly below the hole. Consider attaching it with a strong mortise-and-tenon joint for durability.
- Cleanout Panels: Crucial for annual cleaning, which prevents disease and parasite buildup. Design one side or the bottom panel to open or pivot easily. This can be secured with a simple hook-and-eye latch or a pivoting wooden block.
Optimal Wood Selection for Longevity
The choice of wood significantly impacts the birdhouse’s lifespan and its safety for birds. Avoid treated lumber as chemicals can be toxic.
| Wood Type | Characteristics | Best For |
|---|---|---|
| Cedar | Naturally rot-resistant, insect-resistant, attractive reddish hue, aromatic. | All-around excellent choice, durable, widely available. |
| Redwood | Highly rot-resistant, durable, beautiful color. More expensive and less readily available in some regions. | Premium, long-lasting birdhouses. |
| Cypress | Excellent decay resistance, especially in wet conditions. Pale color that weathers to gray. | Ideal for very damp climates or ground-level birdhouses. |
| White Oak | Very durable, strong, and resistant to rot when properly dried and finished. | High-end, sturdy designs, often used for more formal architectural styles. |
| Pine | Economical, easy to work with. Less naturally resistant to rot than other options, requiring good finish. | Good for beginner projects or where cost is a primary concern, but ensure robust finishing. |
| Poplar | Smooth, easy to paint, inexpensive. Similar to pine in durability. | Better for painted birdhouses where natural wood aesthetics aren’t the priority. See our comparison of Aspen vs. Poplar. |
Thickness: Aim for wood that is 3/4 inch thick for good insulation and structural integrity. Thinner wood (1/2 inch) can work for smaller birdhouses but offers less protection from temperature extremes.
Weather-Resistant Finishing Techniques
Even with durable wood, an appropriate finish is vital for protection. The key is to use non-toxic, eco-friendly products.
- Exterior Oil Finishes: Linseed oil, tung oil (pure, not oil blends), or specialized exterior penetrating oils are excellent choices. They soak into the wood, protecting it from moisture while allowing it to breathe. They are safe for birds once cured. For other great options, check out our guide on cool wood finishing techniques.
- Water-Based Paints/Stains: If painting, use exterior-grade, low-VOC (Volatile Organic Compound) water-based paints. Lighter colors are preferable as they reflect heat, keeping the interior cooler. Avoid dark colors that absorb heat. Stains should also be water-based and non-toxic. Ensure all painted surfaces are fully dry and cured before installation.
- Natural Weathering: For cedar, redwood, or cypress, some prefer to leave the wood unfinished to weather naturally to a silver-gray patina. While this is aesthetically pleasing and perfectly safe for birds, it offers less protection against fungal growth and can shorten the lifespan compared to a well-maintained oiled finish.
- Avoid: Varnishes, lacquers, and oil-based polyurethane finishes are generally not recommended inside the birdhouse due to fumes and potential toxicity. However, for exterior surfaces, some exterior-grade polyurethanes can be used if they are fully cured and chosen carefully for low VOCs. For more on finishes, see our guide on high gloss wood finishing techniques.
Application Tips:
- Preparation: Sand all surfaces smooth (120-220 grit) to ensure good adhesion and a pleasant feel.
- Even Coats: Apply finishes in thin, even coats to avoid drips and ensure thorough drying.
- Curing Time: Allow ample time for the finish to fully cure and off-gas before placing the birdhouse outdoors. This can take several days to weeks, depending on the product and environmental conditions.
By combining precision joinery with species-specific design and appropriate weather-resistant finishes, your “DIY Wooden Birdhouses: Advanced Designs with Precision Joinery for Garden Enthusiasts” will not only serve as a testament to your woodworking skill but also as a cherished haven for your garden’s avian residents for many years to come.
Bringing Your Advanced Birdhouse to Life: Tools, Techniques, and Marketing in 2026
Successfully executing “DIY Wooden Birdhouses: Advanced Designs with Precision Joinery for Garden Enthusiasts” requires a blend of the right tools, refined techniques, and, if you’re looking to turn your passion into profit, a strategic approach to marketing. In 2026, the market for unique, handcrafted outdoor decor and wildlife habitats is robust, offering a compelling opportunity for skilled woodworkers.

Essential Tools for Advanced Birdhouse Construction
Moving beyond basic construction demands a more refined toolkit.
- Precision Marking Tools:
- Marking Knife: For razor-sharp lines that guide cuts, superior to pencil lines for joinery.
- Marking Gauge: Essential for consistently marking lines parallel to an edge, critical for dovetails and tenons.
- Combination Square/Engineer’s Square: For accurate 90-degree and 45-degree angles.
- Hand Tools for Joinery:
- Dovetail Saw/Backsaw: Fine-toothed saws with a stiffened back for precise, straight cuts.
- Chisels: A set of sharp, high-quality chisels (bench chisels, mortise chisels) is indispensable for paring waste and cleaning joints.
- Mallet: For driving chisels.
- Power Tools (Optional, but highly recommended for efficiency):
- Table Saw: For ripping and crosscutting wood to precise dimensions. For safety and precision, ensure your miter saw height is correctly set.
- Router: With a dovetail bit and jig, or straight bits for mortises, can speed up joinery.
- Drill Press: For accurately drilling entrance holes, drainage holes, and pilot holes. A Ryobi DP100 drill press could be a great asset.
- Band Saw: Useful for cutting curves for more elaborate roof designs or decorative elements. The Delta 28-190 Bandsaw is a popular choice.
- Orbital Sander: For smooth finishes, especially before applying protective coatings.
- Clamping: A variety of clamps (bar clamps, F-clamps, pipe clamps) are necessary to hold pieces securely during assembly and glue-up.
Step-by-Step Construction Overview
While each design will have unique steps, a general sequence for building an advanced birdhouse with precision joinery includes:
- Design and Planning: Sketch your design, determine dimensions for the target bird species, and select your joinery. Create a cut list.
- Wood Preparation: Mill your lumber to the correct thickness, width, and length. Ensure all faces are square and true.
- Marking Joinery: Accurately mark all dovetails, mortises, and tenons on your prepared lumber.
- Cutting Joinery: Carefully cut out the pins, tails, mortises, and tenons using your chosen hand or power tools. Test fit frequently.
- Cutting Birdhouse Components: Cut the entrance hole (using a hole saw on a drill press), drainage holes, and any other decorative elements.
- Dry Assembly: Assemble the entire birdhouse without glue to ensure all joints fit perfectly and the structure is square. Make any necessary adjustments.
- Sanding: Sand all internal and external surfaces to your desired grit, paying attention to edges.
- Glue-Up and Clamping: Apply exterior-grade wood glue to the joints, assemble, and clamp securely. Ensure the assembly remains square. Wipe off excess glue squeeze-out immediately.
- Finishing: Apply your chosen non-toxic, weather-resistant finish, following manufacturer instructions for coats and curing time.
- Installation Hardware: Attach any necessary hanging hardware (e.g., galvanized eye hooks or a sturdy mounting bracket).
Marketing Your Advanced Birdhouses in 2026
If your goal is to sell your handcrafted birdhouses, a thoughtful marketing strategy is crucial.
- Highlight Craftsmanship: Emphasize the precision joinery (dovetails, mortise-and-tenons) as a key differentiator. Share photos and videos of the construction process. This elevates your product from a generic birdhouse to a piece of functional art.
- Showcase Durability: Stress the longevity and weather resistance achieved through superior materials and construction. This appeals to customers seeking lasting value.
- Species-Specific Benefits: Market birdhouses tailored for specific local bird species. This adds a practical, educational, and conservation-minded appeal.
- High-Quality Photography: Invest in excellent product photography. Show birdhouses in natural garden settings, highlighting their aesthetic appeal and functionality.
- Online Presence:
- Etsy/Shopify: Create an online store to reach a broader audience.
- Social Media (Instagram, Pinterest): Visually driven platforms are perfect for showcasing your work. Use relevant hashtags like #handcraftedbirdhouse, #woodworkingart, #gardendecor, #precisionjoinery, and #wildlifehabitat.
- Local Marketplaces/Craft Fairs: Participate in local events to connect with customers directly and build a local following.
- Storytelling: Share the story behind your craftsmanship. What inspired you? What’s your process? Customers connect with makers who share their passion.
- Eco-Friendly Angle: Highlight the use of sustainable wood and non-toxic finishes, appealing to environmentally conscious consumers in 2026.
- Upsell Opportunities: Offer complementary products like mounting poles, cleaning brushes, or even custom engraving. Consider exploring other related projects like DIY box beams to diversify your offerings.
By focusing on superior craftsmanship, thoughtful design, and effective marketing, your “DIY Wooden Birdhouses: Advanced Designs with Precision Joinery for Garden Enthusiasts” can become not just a rewarding hobby, but a thriving venture in 2026.
Conclusion
The journey of crafting “DIY Wooden Birdhouses: Advanced Designs with Precision Joinery for Garden Enthusiasts” is a deeply rewarding one, blending the tactile satisfaction of woodworking with the profound pleasure of supporting local wildlife. By embracing the principles of precision joinery, species-specific design, and durable finishing, woodworkers can elevate simple bird shelters into enduring works of art that enrich both gardens and the lives of their feathered inhabitants. In 2026, the demand for such thoughtful, high-quality handcrafted items continues to grow, offering a significant opportunity for artisans to showcase their skills and even develop a profitable niche.
The commitment to techniques like dovetail and mortise-and-tenon joints not only ensures exceptional strength and longevity but also imbues each birdhouse with a unique character that mass-produced alternatives simply cannot replicate. Furthermore, understanding the specific needs of various bird species allows for the creation of truly effective and safe habitats, making your contributions genuinely impactful. As you select naturally resistant woods and apply eco-friendly finishes, you are not just building a structure; you are creating a legacy of craftsmanship and environmental stewardship.
Actionable Next Steps:
- Refine Your Skills: Practice precision joinery techniques on scrap wood. Start with simpler joints like finger joints, then progress to half-blind dovetails and mortise-and-tenons. There are many online tutorials and woodworking classes available.
- Research Local Birds: Identify common cavity-nesting birds in your area. Learn their specific requirements for house dimensions, entrance hole size, and preferred nesting environments.
- Source Quality Materials: Invest in good quality, sustainably sourced wood like cedar or redwood. Look for non-toxic, exterior-grade finishes that are safe for wildlife.
- Design Your Masterpiece: Sketch out an advanced birdhouse design incorporating your chosen joinery and species-specific dimensions. Don’t be afraid to experiment with unique architectural elements.
- Build and Evaluate: Construct your first advanced birdhouse, paying close attention to every detail. After installation, observe how birds interact with it and note any potential improvements for future designs.
- Consider the Market: If you’re interested in selling, begin building a portfolio of your work. High-quality photography and an engaging story behind your creations will be invaluable. Explore platforms like Etsy or local craft markets.
By taking these steps, you will not only create beautiful, long-lasting birdhouses but also contribute to the biodiversity and charm of your garden, demonstrating the true spirit of a dedicated garden enthusiast and skilled woodworker.
