
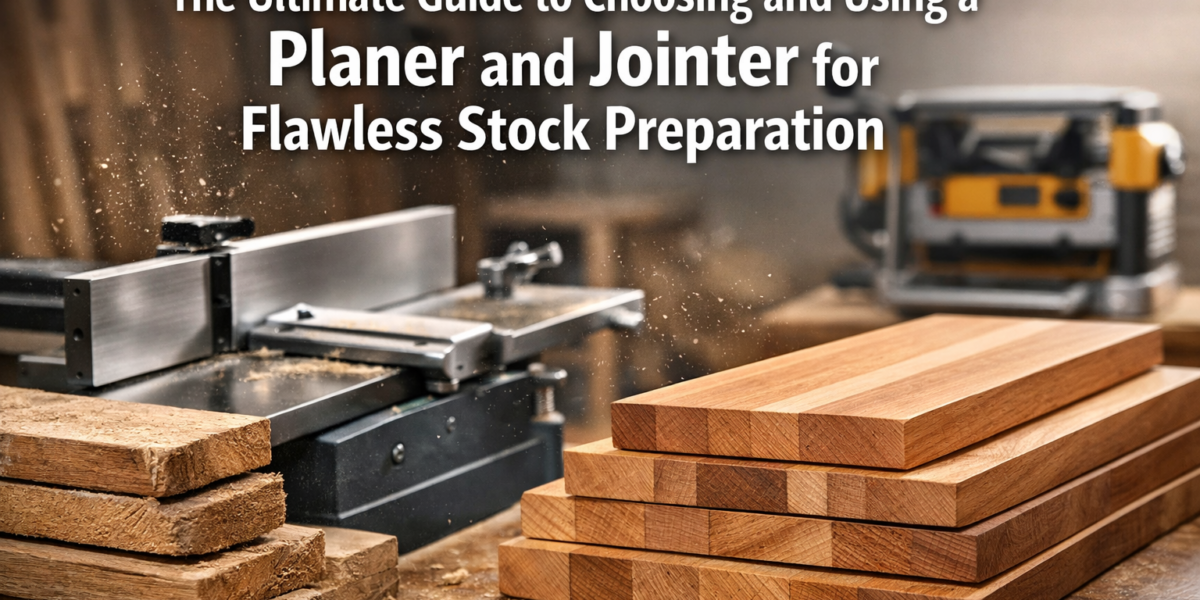

The journey of transforming rough, raw lumber into precise, workable stock is often perceived as a complex undertaking, yet it is the bedrock of professional-grade woodworking. Without perfectly flat faces and square edges, joinery fails, projects warp, and craftsmanship suffers. This critical first step, known as stock preparation, hinges entirely on the mastery of two fundamental machines: the jointer and the planer. Many woodworkers, particularly those new to the craft, struggle to differentiate their roles or understand how to effectively use them in tandem. This comprehensive guide, The Ultimate Guide to Choosing and Using a Planer and Jointer for Flawless Stock Preparation, aims to demystify these essential tools, providing a roadmap for selecting the right equipment, setting it up precisely, and mastering the techniques required to achieve truly flawless results in 2026.
Key Takeaways

- Distinct Roles: A jointer creates one flat face and one square edge; a planer brings the opposite face to a consistent, parallel thickness.
- Sequential Use: Always use the jointer before the planer for optimal results, starting with the widest face.
- Crucial Calibration: Accurate setup, including knife height and table parallelism, is vital for precision and safety.
- Safety First: Always wear appropriate personal protective equipment (PPE) and understand feed techniques.
- Machine Choice: Selecting the right size and type (benchtop vs. floor model, helical vs. straight knives) impacts efficiency and finish.
Understanding the Essential Duo: Planer vs. Jointer
Achieving perfectly flat and dimensioned lumber is impossible with just one of these machines. They are a team, each performing a unique, indispensable function. Think of them as the foundation layers for any woodworking project, from elegant furniture to intricate cabinetry.
The Jointer: Creating Flatness and Square Edges

The jointer’s primary role is to create a perfectly flat reference face on a piece of rough lumber. It does this by shaving off material from one side until it is uniformly flat, removing any cups, bows, or twists. Once one face is flat, the jointer is then used to create an edge that is precisely 90 degrees (square) to that newly flattened face.
Key Components of a Jointer:
- Infeed Table: The adjustable table that supports the wood before it passes over the cutterhead. Its height determines the depth of cut.
- Outfeed Table: The stationary table that supports the wood after it passes over the cutterhead. It must be perfectly level with the highest point of the cutterhead knives.
- Cutterhead: The rotating assembly containing the knives (blades) that remove material.
- Fence: A movable guide, typically adjustable to 90 and 45 degrees, that helps keep the work square to the cutterhead.
For a deeper dive into jointer specifics, particularly on setup and maintenance, you might find our guide on the Delta 37-196 Jointer insightful.
The Planer: Achieving Consistent Thickness
Once you have one flat face and one square edge from the jointer, the planer takes over. Its job is to create a second, parallel flat face, bringing the entire board to a consistent, desired thickness. It does not flatten a board on its own; it simply makes one face parallel to the other, already flat face. Feeding a twisted or bowed board directly into a planer will result in a thinner, but still twisted or bowed, board.
Key Components of a Planer:
- Infeed/Outfeed Rollers: These power the lumber through the machine.
- Cutterhead: Similar to the jointer, this rotating head holds the knives that shave off material.
- Tables/Bed: Supports the lumber as it passes through.
- Thickness Adjustment Wheel: Controls the height of the cutterhead, determining the final thickness of the board.
For those looking into specific planer models, our article on the Hitachi P13F Planer offers valuable insights.
Choosing the Right Planer and Jointer for Your Workshop
Selecting the ideal planer and jointer involves considering several factors, including your budget, available space, the type and size of projects you undertake, and the specific features you prioritize. This section of The Ultimate Guide to Choosing and Using a Planer and Jointer for Flawless Stock Preparation will help you make informed decisions.
Jointer Selection Considerations
Bed Length: This is perhaps the most critical factor. Longer beds (60 inches or more) provide more support for longer boards, making it easier to achieve true flatness. A 6-inch jointer might have a 45-inch bed, while an 8-inch jointer often boasts a 60-inch bed. For serious furniture making, a longer bed is invaluable.
Width Capacity: Common widths are 6-inch, 8-inch, and 12-inch. If you frequently work with wide boards, an 8-inch or 12-inch jointer will save you time and effort. However, wider jointers are significantly more expensive and require more space.
Cutterhead Type:
- Straight Knife (HSS): Most common and affordable. Knives are long, high-speed steel blades. Can leave slight knife marks and require frequent sharpening/changing.
- Helical/Spiral (Carbide Inserts): More expensive upfront but offer numerous benefits:
- Quieter operation.
- Superior finish, especially on figured or difficult grain (reduces tear-out).
- Longer lasting carbide inserts, which can be rotated to a fresh edge when dull, rather than requiring full replacement or sharpening of a long blade.
- Easier and less frequent maintenance.
Power: Look for a motor that can handle the type of wood you’ll be working with. For hardwoods, 1 HP for a 6-inch jointer and 1.5-2 HP for an 8-inch or larger is a good baseline.
Benchtop vs. Floor Model:
- Benchtop Jointers: Compact, more affordable, but generally have shorter beds and less power. Best for small shops and processing shorter, narrower stock.
- Floor Model Jointers: Larger, heavier, more powerful, with longer beds. Essential for serious woodworking and handling larger, longer pieces of lumber.
Planer Selection Considerations
- Width Capacity: Most popular planers are 12-inch or 13-inch, suitable for a wide range of projects. Larger industrial planers go up to 20 inches or more.
- Cutterhead Type: Similar to jointers, planers come with straight knives or helical/spiral cutterheads, with the same advantages for helical.
- Motor Power: For a 12-13 inch planer, a 1.5-2 HP motor is recommended, especially for hardwoods. More power means less bogging down and cleaner cuts.
- Feed Rate: Often measured in FPM (feet per minute). A slower feed rate can result in a smoother finish but takes longer. Some planers offer variable feed rates.
- Depth of Cut: Most portable planers can take a maximum cut of 1/8 inch, but it’s often best to take shallower cuts (1/32 to 1/16 inch) to reduce stress on the machine and prevent tear-out.
- Snipe Reduction: Snipe is a common issue where the ends of the board are slightly thinner than the middle. Look for features like cutterhead locks or infeed/outfeed table extensions to minimize snipe.
- Portability vs. Stationary:
- Portable Thickness Planers: Compact, benchtop units, typically 12-13 inches wide. Excellent for small shops, on-site work, and budget-conscious woodworkers.
- Stationary Planers: Larger, heavier, floor-standing machines, often 15-20 inches wide. Offer greater power, stability, and capacity for production work.
For maintaining sharp cutting tools, including planer and jointer knives, our resource on sharpening woodworking chisels and planes provides foundational knowledge that applies to knife care.
Mastering Setup and Techniques for Flawless Stock Preparation
Even the best machines won’t deliver flawless results if they aren’t properly set up and operated. This section of The Ultimate Guide to Choosing and Using a Planer and Jointer for Flawless Stock Preparation details the essential steps for calibration and effective use.
Jointer Setup and Usage
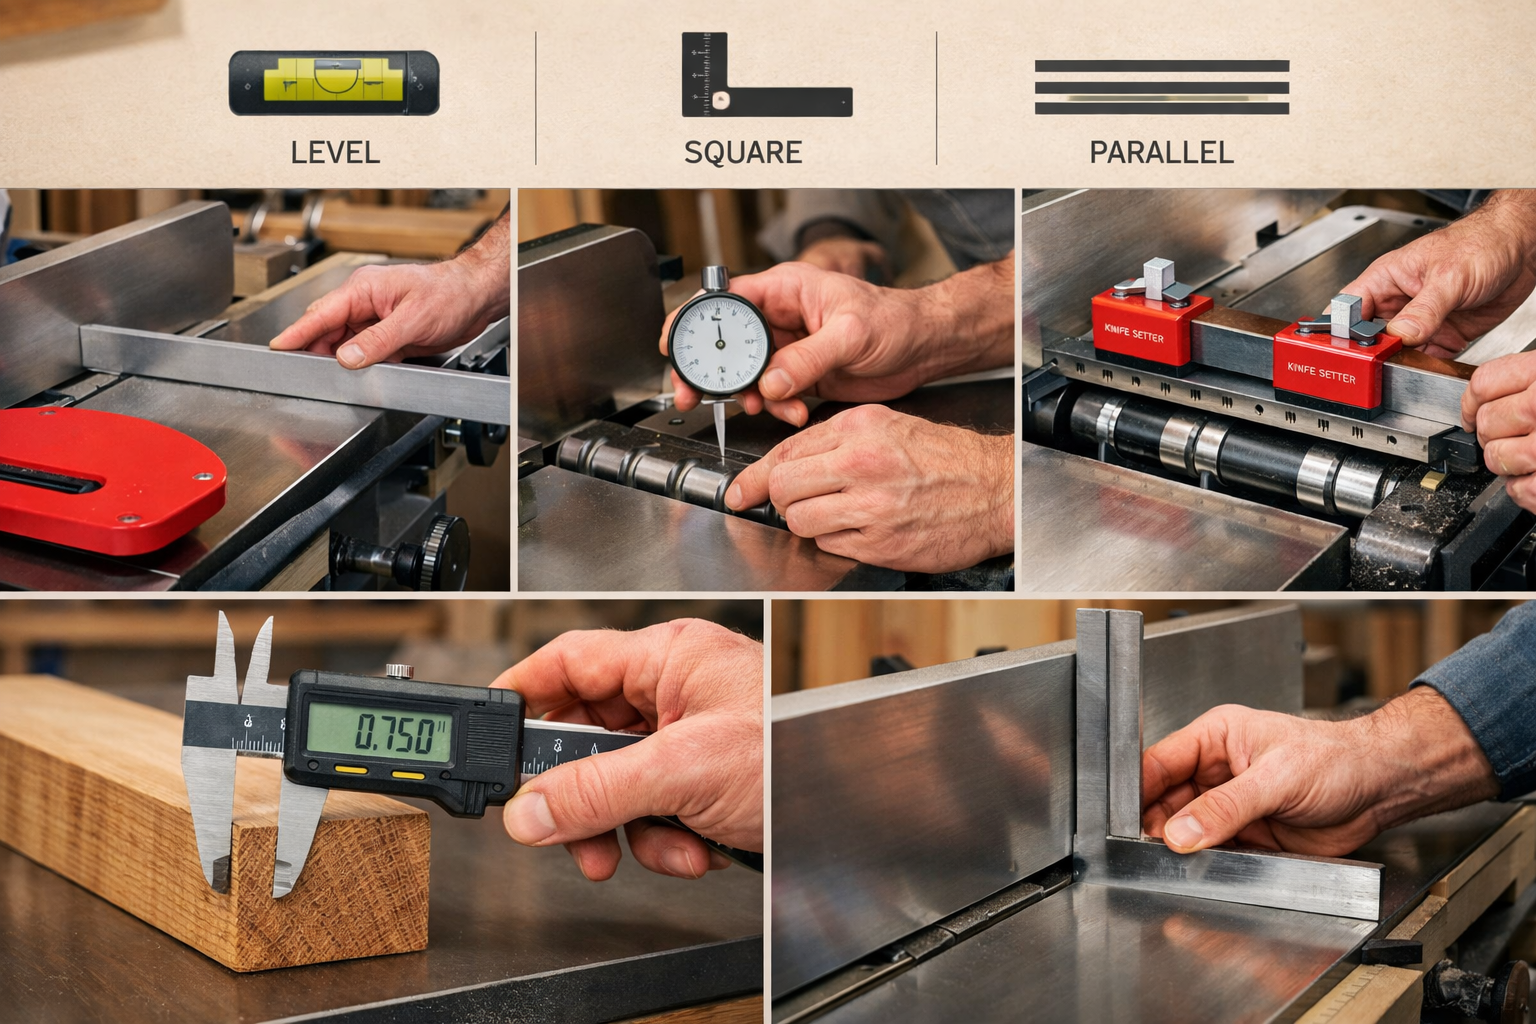
- Knife Alignment: The most critical step. The outfeed table must be perfectly flush with the highest point of the cutterhead knives. If the outfeed table is too low, the board will dive at the end of the cut. If it’s too high, the board will lift, preventing a consistent cut. Use a straightedge to check this carefully.
- Fence Squareness: Ensure your fence is perfectly 90 degrees to the tables using an accurate square. This is crucial for creating truly square edges.
- Depth of Cut: Start with shallow cuts, typically 1/32 to 1/16 inch. Deeper cuts stress the machine and increase the risk of tear-out.
- Flattening a Face:
- Identify the worst face (most cupped, bowed, or twisted).
- Place the board with the hollow side down (if cupped) or convex side down (if bowed).
- Apply even pressure over the infeed table and feed the board smoothly across the cutterhead. Use push blocks for safety.
- Continue making passes, rotating the board if necessary to balance material removal, until one face is completely flat.
- Squaring an Edge:
- Place the newly flattened face against the jointer fence.
- Feed the board through until the edge is perfectly square to the face. Make sure to use push sticks or blocks.
Planer Setup and Usage
- Knife Condition: Dull knives lead to tear-out and a poor finish. Ensure your planer knives are sharp and properly installed.
- Dust Collection: Planers generate a tremendous amount of chips. A robust dust collection system is essential for safety, machine performance, and a clean shop. Consider a mobile dust collection cart for convenience.
- Minimizing Snipe:
- Support long boards with roller stands on both the infeed and outfeed sides.
- For portable planers, engage the cutterhead lock (if available).
- Consider making a sacrificial sled for very short pieces or to minimize snipe further.
- Feeding Stock:
- Always feed the board with the jointer-flattened face down on the planer bed. This ensures the top face becomes parallel to the already flat bottom face.
- Take shallow passes (1/32 to 1/16 inch).
- Flip the board end-for-end between passes, especially on wide boards, to help equalize pressure and prevent uneven stock removal.
- Avoid feeding boards wider than the machine’s capacity.
Advanced Techniques and Troubleshooting

- Jointing Warped Stock: For severely warped boards, sometimes it’s better to rip them into narrower strips on a table saw first, then joint each strip individually. This reduces the amount of material to remove and the strain on the jointer. For stable rip cuts, proper table saw setup is key, which you can learn more about in guides like the one for the Pro-Tech 10 Table Saw.
- Dealing with Tear-out:
- Take shallower cuts.
- Feed with the grain whenever possible.
- For figured grain, a helical cutterhead significantly reduces tear-out.
- Jointing boards at a slight angle to the fence (skewing) can sometimes help.
- Preventing Jointer “Dip”: This occurs when the board dips slightly at the very beginning or end of the cut. Maintain consistent downward pressure throughout the pass, especially on the outfeed table as the board clears the cutterhead.
- When to Stop: For both machines, stop when you have removed just enough material to achieve the desired flatness, squareness, and thickness. Over-processing wastes valuable lumber.
- Safety First: Always use push blocks or push sticks, wear eye and ear protection, and keep hands away from the cutterhead. Never stand directly in line with the work piece as it passes through the planer, in case of kickback.
Conclusion
Mastering the use of a jointer and planer is not merely about operating machinery; it’s about elevating your woodworking to a level of precision that distinguishes hobbyists from true craftsmen. The Ultimate Guide to Choosing and Using a Planer and Jointer for Flawless Stock Preparation has laid out the essential knowledge for understanding their distinct roles, selecting the right tools for your specific needs, and implementing the precise setup and techniques for achieving perfectly flat and square stock.
In 2026, with the right combination of knowledge, practice, and quality equipment, you can confidently tackle any project knowing your foundational stock preparation is impeccable. Invest the time in understanding these machines, practice diligently with scrap wood, and always prioritize safety. The reward will be woodworking projects that fit together seamlessly, look professional, and stand the test of time.
Next Steps:

- Assess Your Needs: Review your current projects and shop space to determine the ideal jointer and planer specifications.
- Research Specific Models: Based on your needs, delve into reviews and specifications of machines within your budget.
- Practice on Scrap: Before committing valuable project lumber, practice setup and feed techniques on cheaper, rough lumber.
- Prioritize Safety: Always read your machine manuals and adhere to all safety guidelines.
SEO Meta Title: The Ultimate Guide to Planer & Jointer for Flawless Wood Prep SEO Meta Description: Master stock preparation in 2026 with this ultimate guide to choosing, setting up, and using jointers & planers for perfectly flat and square lumber.
