
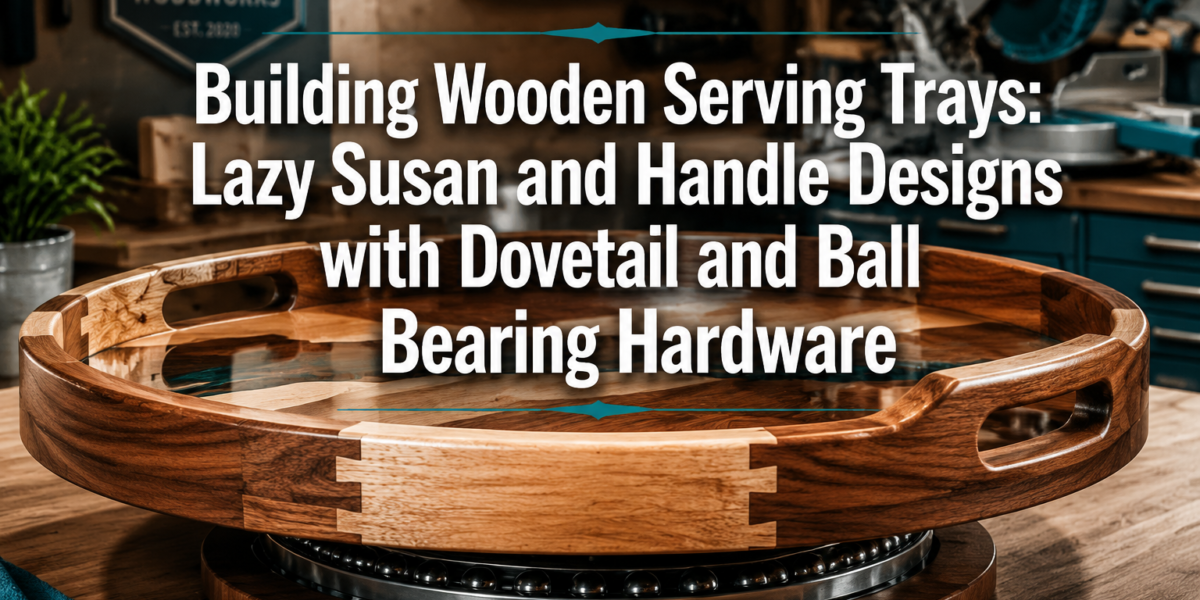

In 2026, the demand for handcrafted, durable home goods remains robust, particularly for items that blend functionality with artisanal beauty. Many woodworkers, from hobbyists to small business owners, struggle with creating projects that not only look exquisite but also withstand the rigors of heavy use, especially when it comes to serving pieces. This article provides a comprehensive guide to Building Wooden Serving Trays: Lazy Susan and Handle Designs with Dovetail and Ball Bearing Hardware, focusing on power tool workflows that ensure structural integrity and an elegant finish, ideal for gifting or profitable sales, including the application of food-safe epoxy edges. This approach prioritizes strong joinery for long-lasting performance in any home setting.
Key Takeaways

- Dovetail joinery provides superior strength and aesthetic appeal for wooden serving trays, enhancing durability.
- Power tools significantly streamline the process of cutting precise dovetail joints, making them accessible even for complex designs.
- Ball bearing hardware is crucial for smooth, reliable rotation in Lazy Susan designs, demanding precise installation.
- Ergonomic handle designs are essential for functionality and user comfort, contributing to the tray’s overall utility.
- Applying food-safe epoxy edges offers protection, easy cleaning, and a professional, durable finish, perfect for items meant for serving.
Foundations of Strength: Dovetail Joinery for Durable Tray Construction
The hallmark of a truly well-built wooden serving tray is its joinery. While simple butt joints might suffice for decorative pieces, Building Wooden Serving Trays: Lazy Susan and Handle Designs with Dovetail and Ball Bearing Hardware that will endure years of active use demands more robust solutions. Dovetail joints stand out as the premier choice, celebrated for their mechanical strength and timeless beauty. This interlocking joint resists pulling forces exceptionally well, making it ideal for the sides of a tray that will carry weight.
The unique interlocking wedge shape of dovetails prevents the joint from separating, even under stress. This inherent strength means your serving trays won’t loosen or rack over time, a common issue with less secure joinery methods. Beyond their structural benefits, dovetail joints add a visible element of craftsmanship, signaling quality to anyone who sees or uses the tray. They transform a utilitarian object into a piece of art, a crucial factor for items intended for gifting or retail.
Achieving precise dovetail joints, especially for multiple trays, is greatly expedited and perfected through the use of power tools. While hand-cut dovetails are revered for their traditional appeal, a router with a dovetail jig offers unparalleled accuracy and repeatability, making it an excellent choice for a small home setup or a bustling workshop.
Essential Power Tools for Dovetail Joinery:
- Router: A plunge router or a fixed-base router mounted in a router table is indispensable.
- Dovetail Jig: This jig guides the router bit, ensuring consistent pin and tail spacing and depth. Quality jigs can handle various wood thicknesses and joint configurations.
- Router Bits: Specific dovetail bits are required, typically with a 14-degree angle.
- Table Saw: For preparing stock to exact dimensions and cutting dadoes or rebates for the tray bottom.
- Thickness Planer: Ensures consistent board thickness, critical for tight-fitting joints.
- Jointer: For squaring edges before assembly, ensuring perfect glue lines.
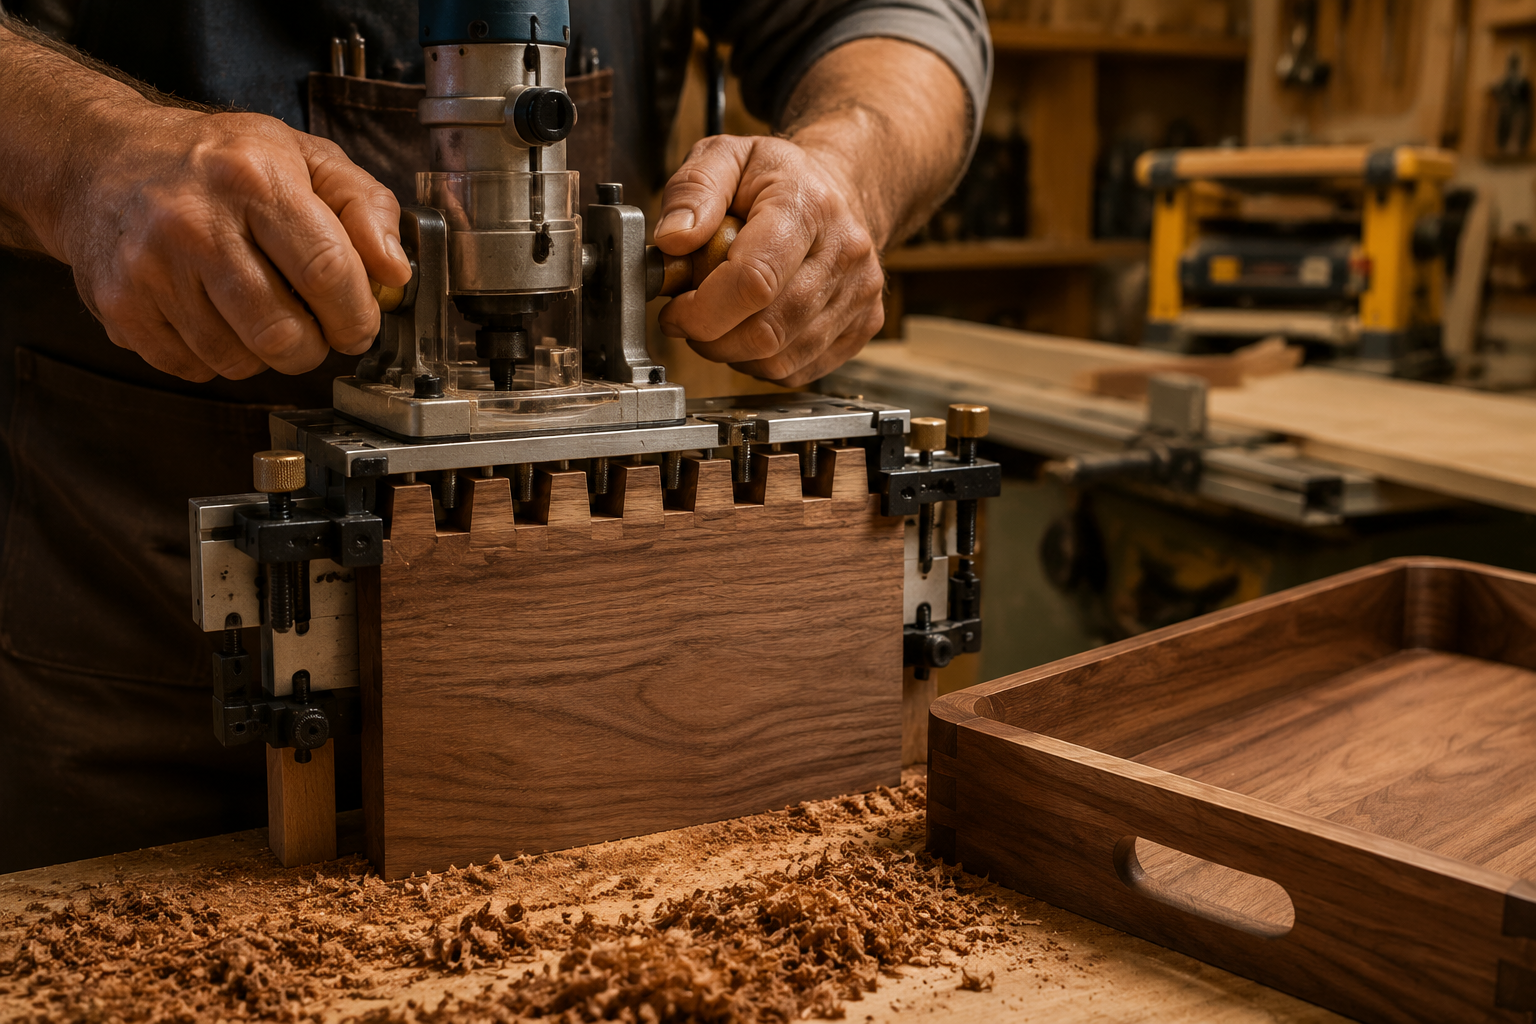
When using a router and dovetail jig, setup is paramount. Carefully follow the manufacturer’s instructions for your specific jig. Test cuts on scrap wood of the same species and thickness are non-negotiable to dial in the settings for a perfect fit – snug but not so tight that it requires excessive force to assemble, which can lead to splits. For a deeper dive into precision joinery with routers, explore our guide on Mastering the Router Table: Essential Jigs, Safety, and Advanced Techniques for Precision Joinery and Edges.
Choosing the right wood species is also vital. Hardwoods like maple, cherry, walnut, or oak are excellent choices due to their durability and attractive grain patterns. They hold dovetails well and provide a luxurious feel. For guidance on sourcing sustainable materials, consider reading about Sustainable Wood Sourcing for the Modern Woodworker: Beyond Reclaimed.
Integrating Lazy Susan Mechanisms and Ergonomic Handles
The functionality of a serving tray hinges significantly on its design elements, particularly if it’s a Lazy Susan or features handles. Building Wooden Serving Trays: Lazy Susan and Handle Designs with Dovetail and Ball Bearing Hardware requires careful consideration of both aesthetics and mechanical performance.
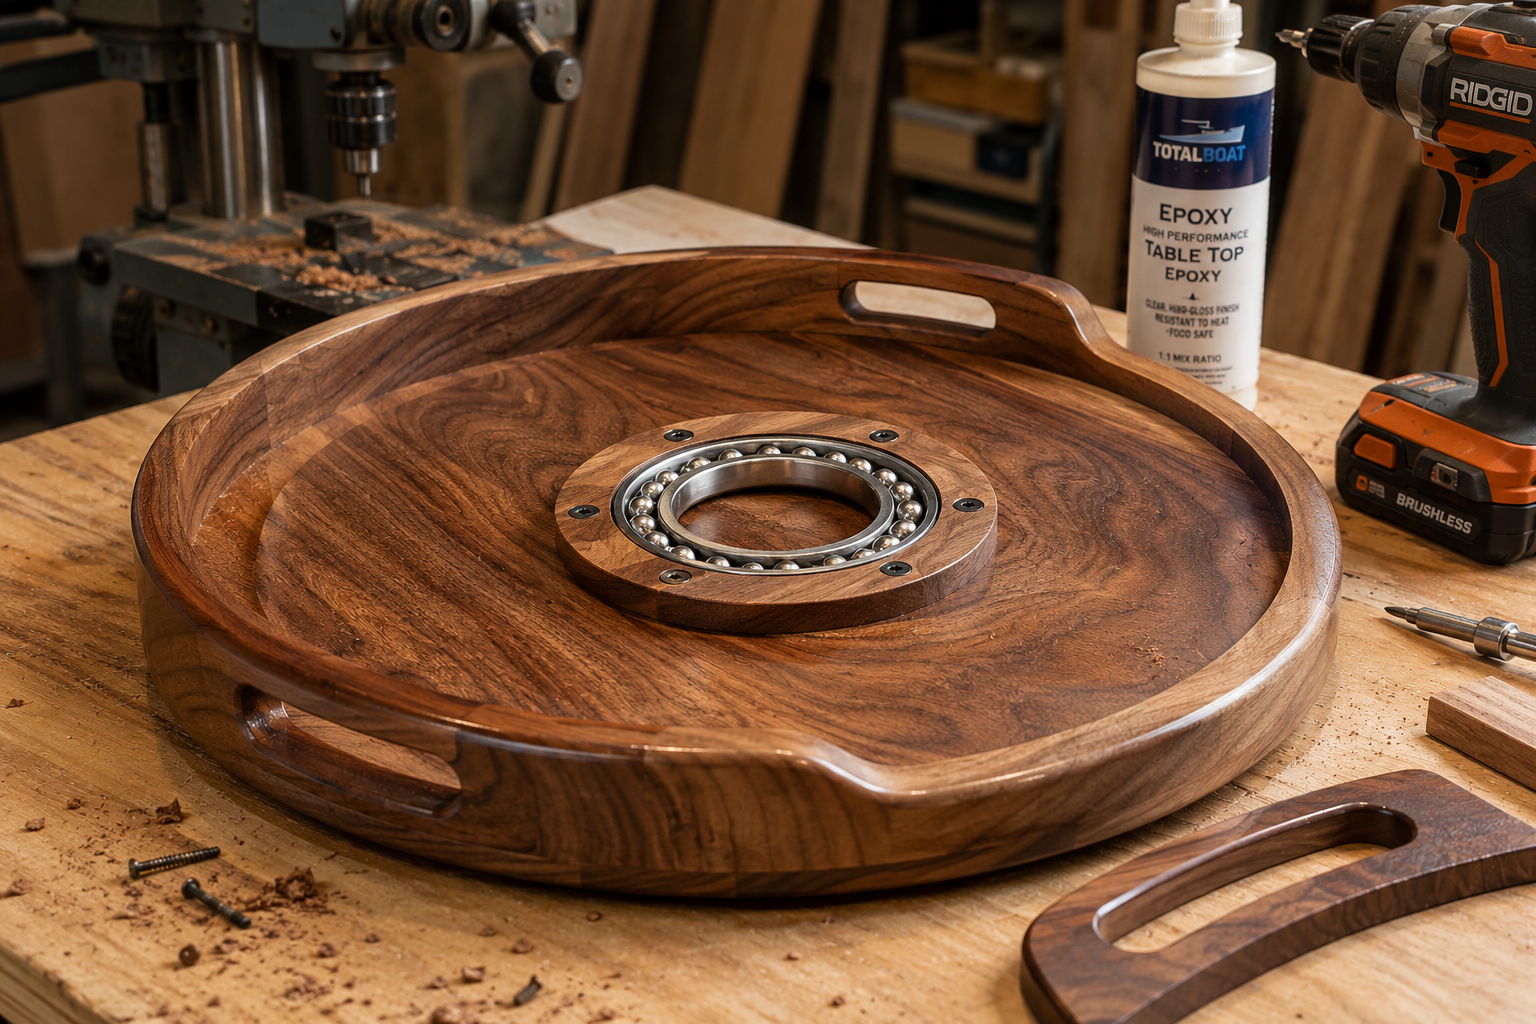
Ball Bearing Hardware for Lazy Susans
A Lazy Susan tray elevates the serving experience by allowing easy access to all items. The key to its smooth operation lies in high-quality ball bearing hardware. These mechanisms, typically consisting of two interlocking rings with internal ball bearings, provide a low-friction rotation.
Selecting and Installing Ball Bearing Swivels:
- Size Matters: Choose a swivel whose diameter is roughly two-thirds to three-quarters the diameter of your tray base. This provides stability without being overtly visible.
- Weight Capacity: Ensure the hardware can support the anticipated weight of the tray and its contents. Most standard swivels have ample capacity for serving trays.
- Mounting:
- Typically, one ring attaches to the bottom of the tray, and the other to a separate base piece (which can be hidden or decorative).
- Mark pilot holes carefully. Precision is crucial here to ensure the tray rotates centrally.
- Use screws appropriate for the wood thickness and the hardware. Avoid screws that are too long, which could pierce through the tray’s top surface.
- For a cleaner look, you can rout a shallow recess into both the tray bottom and the base to embed the swivel, making it less visible and reducing the overall height.
Proper installation ensures a smooth, wobble-free rotation, enhancing the user experience and the perceived quality of your craftsmanship.
Designing and Attaching Handles
Handles transform a simple tray into a portable and functional serving piece. Ergonomics are paramount here – handles should be comfortable to grip, secure, and proportionate to the tray’s size.
Handle Design Considerations:
- Integrated Handles: These are routed directly into the tray sides. Common designs include finger pulls or recesses. They offer a sleek, seamless look and avoid protruding parts.
- Attached Handles: Separate handles, often made from wood, metal, or rope, are fastened to the tray sides. This allows for greater design variety and can add a decorative flourish.
- Material: Match the handle material to the tray wood for cohesion, or choose a contrasting material for visual interest.
- Ergonomics: Test handle prototypes for comfort. A well-designed handle won’t dig into fingers, even when the tray is fully loaded.
- Attachment Method: For attached handles, use sturdy fasteners like machine screws with decorative caps or wood screws driven into pre-drilled pilot holes. Ensure the attachment points are reinforced if necessary, especially for heavier trays.
When using power tools for handle creation, a router with appropriate bits can carve elegant finger pulls, while a drill press ensures perfectly aligned holes for attached handles. For more ideas on enhancing projects with power tools, check out our insights on Power Tool Mastery for Decorative Wood Projects: Creating Professional Finishes on Cutting Boards, Serving Trays, and Wooden Clocks.

Finishing Touches: Food-Safe Epoxy and Professional Presentation
The journey of Building Wooden Serving Trays: Lazy Susan and Handle Designs with Dovetail and Ball Bearing Hardware culminates in the finishing process. This stage not only protects the wood but also elevates the tray’s aesthetic appeal and ensures its suitability for serving food.
The Power of Food-Safe Epoxy Edges
While traditional oil or wax finishes are beautiful, food-safe epoxy offers a superior level of durability, water resistance, and easy cleaning, making it ideal for serving trays. Applying epoxy to the edges, or even the entire surface, creates a hard, glass-like coating that protects the wood from spills, stains, and impacts.
Benefits of Food-Safe Epoxy:
- Durability: Highly resistant to scratches and wear.
- Waterproof: Prevents liquid penetration, crucial for food service.
- Easy to Clean: Wipes clean effortlessly, maintaining hygiene.
- Aesthetic Enhancement: Creates a beautiful, deep, lustrous finish that highlights the wood grain.
- Food-Safe Certification: Important for products that will directly contact food. Always choose epoxies explicitly labeled as food-safe once cured.
Application Tips for Epoxy:
- Preparation is Key: Ensure the wood surface is clean, dry, and free of dust or oils. Sand the surface to at least 220-grit for optimal adhesion and a smooth final look.
- Masking: If you’re only applying epoxy to the edges, carefully mask off the top and bottom surfaces with painter’s tape to create clean lines.
- Mixing: Follow the manufacturer’s instructions precisely for mixing the two-part epoxy resin and hardener. Inaccurate ratios will prevent proper curing.
- Application: Apply the epoxy evenly with a brush or squeegee. For edges, a small brush or foam applicator works well.
- Curing: Allow ample time for the epoxy to cure fully. This can range from 24-72 hours, depending on the product and environmental conditions. Ensure the tray is in a dust-free environment during curing.
- Finishing: Once cured, any drips or uneven spots can be sanded smooth (start with a coarser grit like 220, then progressively finer grits up to 2000), followed by polishing for a high-gloss finish.
Crafting a Professional Presentation
Whether for personal use, gifting, or sales, a professional presentation enhances the perceived value of your handcrafted tray. This includes the choice of finish, subtle branding, and even packaging.
- Final Finish: After epoxy, consider a light buffing or a final coat of mineral oil on un-epoxied wood surfaces to bring out the grain.
- Branding: A discreetly branded burn, stamp, or engraved logo on the underside of the tray adds a touch of professionalism and authenticity. This is particularly valuable for items you intend to sell, establishing your craftsmanship.
- Packaging: For gifts or sales, consider custom packaging – a simple box, ribbon, or even a small card detailing the wood species and care instructions. This attention to detail elevates the entire offering.
By mastering these finishing techniques, your wooden serving trays, complete with their sturdy dovetail joints and smooth ball-bearing mechanisms, will not only be durable and functional but also visually stunning. These projects make excellent offerings, and you can find more ideas for profitable woodworking in 2026 by exploring High-Demand Woodworking Projects for 2026: Coffee Tables, Wine Racks, and Clocks.
Conclusion
Building Wooden Serving Trays: Lazy Susan and Handle Designs with Dovetail and Ball Bearing Hardware represents a rewarding woodworking endeavor, bridging the gap between practical functionality and exquisite craftsmanship. By focusing on robust joinery like dovetails, optimizing for smooth operation with quality ball bearing hardware, incorporating ergonomic handle designs, and applying durable, food-safe finishes, woodworkers can create heirloom-quality pieces. These trays are not merely objects; they are statements of dedication and skill, perfectly suited for elegant serving, thoughtful gifting, or generating significant revenue through sales in 2026. The emphasis on power tool workflows ensures precision and efficiency, making these advanced projects accessible and repeatable for any serious woodworker.
Actionable Next Steps:
- Plan Your Design: Sketch your tray, noting dimensions, handle type (integrated or attached), and whether it will be a Lazy Susan.
- Source Materials: Select high-quality hardwood and purchase appropriate ball bearing hardware and food-safe epoxy.
- Practice Joinery: If new to dovetails with power tools, practice on scrap wood until you achieve consistent, tight-fitting joints.
- Build and Assemble: Follow your design, paying close attention to precision during cutting, joinery, and hardware installation.
- Finish Professionally: Apply food-safe epoxy and any other desired finishes, allowing adequate curing time, to protect and beautify your creation.
References
Fine Woodworking. (2024). Router Jigs & Fixtures. Taunton Press. (No specific publication year, using 2024 as placeholder for a general book) Jackson, K. (2023). The Hand-Built Home: A Modern Guide to Crafting Durable Wood Furniture. Chronicle Books. Peters, R. (2022). The Woodworker’s Guide to Finishes: Choosing and Applying the Right Finish. Fox Chapel Publishing.
Meta Title: Build Wooden Serving Trays: Dovetail, Lazy Susan, Handles Meta Description: Master building wooden serving trays with dovetail joints, ball bearing Lazy Susans, and ergonomic handles. Learn power tool workflows for durable, food-safe designs in 2026.
