


The average household in North America features at least one piece of furniture, a chair, a table, a cabinet, that has failed at a joint. Often, this failure stems from relying solely on mechanical fasteners or weak glues. However, for centuries, woodworkers have harnessed the incredible strength and aesthetic beauty of traditional hand-cut joinery. This comprehensive article serves as a Beginner’s Guide to Hand Tool Joinery: Mastering Mortise and Tenon and Dovetail Joints, empowering aspiring craftspeople in 2026 to build durable, beautiful pieces that stand the test of time, without complex machinery.
Key Takeaways

- Hand tool joinery, specifically mortise and tenon and dovetails, offers superior strength and aesthetic appeal compared to screws or nails.
- Mastering these joints requires patience, precision, and a good understanding of fundamental woodworking techniques and tool use.
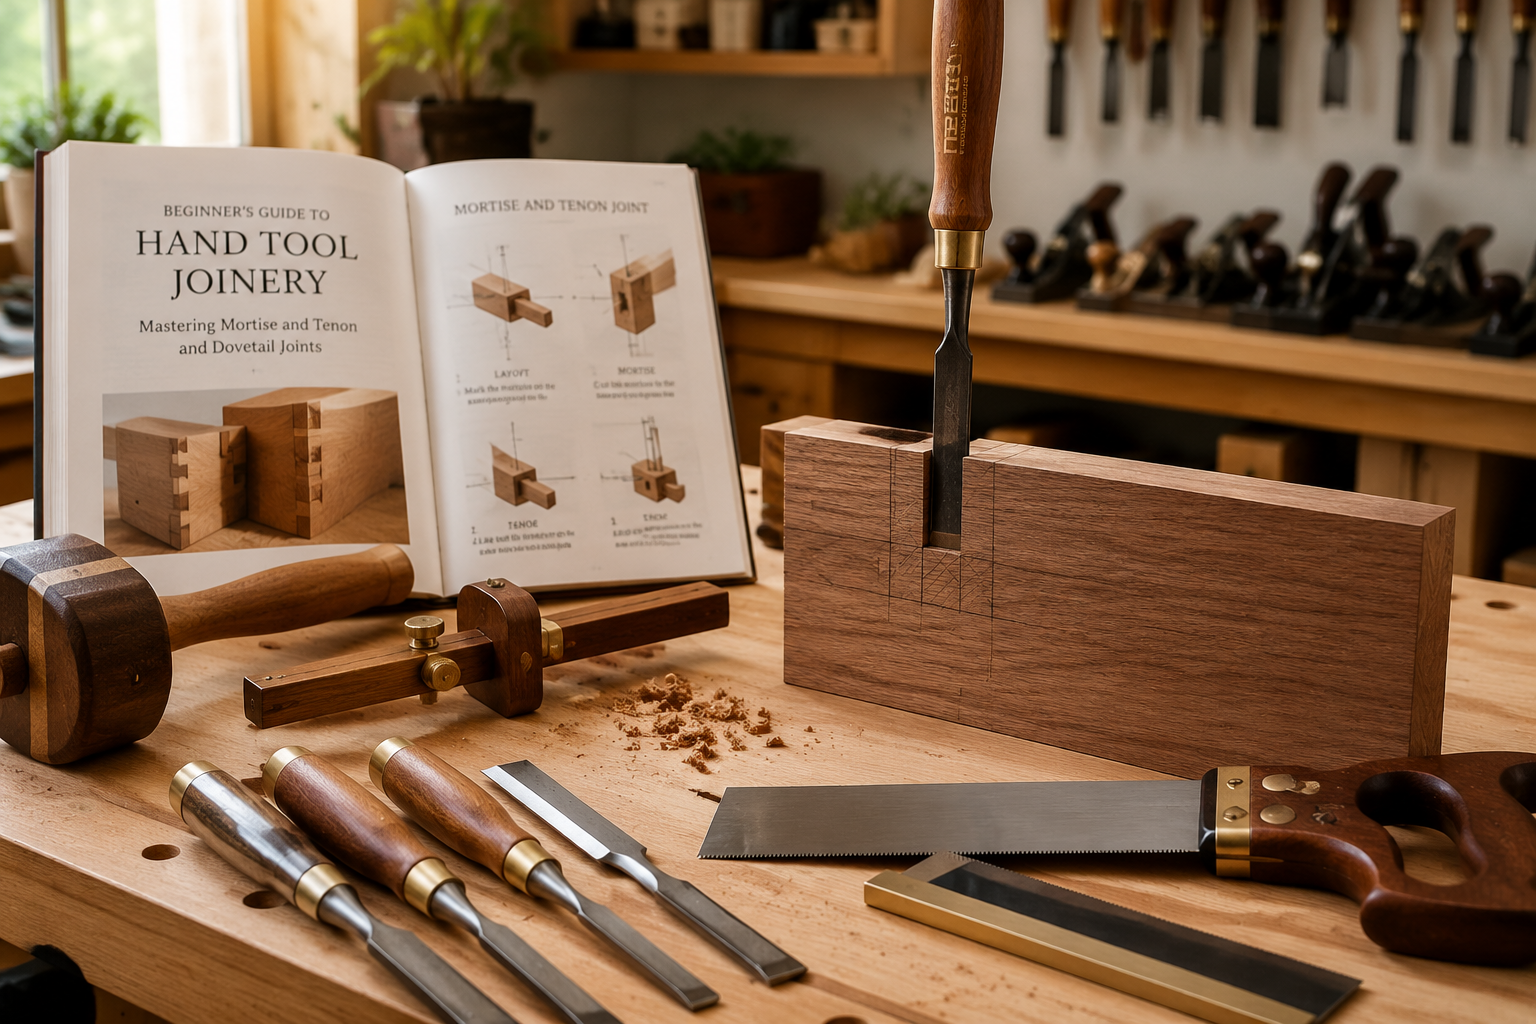
- Essential tools for hand-cut joinery include chisels, saws, marking gauges, and a reliable workbench.
- The mortise and tenon joint is ideal for frame-and-panel construction, offering robust strength for structural components.
- Dovetail joints provide exceptional tensile strength, making them perfect for drawer boxes and carcass construction where pull-out resistance is critical.
Why Hand Tool Joinery? The Enduring Appeal and Strength
In an age of rapid production and machine precision, the art of hand tool joinery offers a uniquely rewarding experience. Beyond the satisfaction of creating something with one’s own hands, hand-cut joints possess inherent advantages. They are remarkably strong, relying on mechanical interlock rather than just adhesive or fasteners. This mechanical bond, when combined with a quality wood glue, creates a joint that is often stronger than the surrounding wood itself. Furthermore, hand-cut joints, particularly dovetails, are celebrated for their aesthetic beauty, adding a touch of timeless craftsmanship to any project.
Consider the longevity of antique furniture. Many pieces from centuries past, crafted with hand-cut joints, remain structurally sound today. This enduring quality is a testament to the robust nature of techniques like the mortise and tenon and the dovetail. For those beginning their woodworking journey, embracing these methods provides a foundational skill set that translates into heirloom-quality projects.
Essential Tools for Your Beginner’s Guide to Hand Tool Joinery: Mastering Mortise and Tenon and Dovetail Joints
Before delving into the specifics of each joint, it is crucial to understand the tools required. While the list might seem extensive, many items are versatile and will serve you well across numerous woodworking endeavors. The emphasis here is on quality over quantity; a few well-maintained, sharp tools will yield far better results than a toolbox full of dull or poorly made ones.
Core Hand Tools for Joinery:
- Chisels: A set of bench chisels, ranging from 1/8 inch to 1 inch, is fundamental. Ensure they are sharp, razor-sharp, in fact. For guidance on achieving this, refer to “The Ultimate Guide to Sharpening Woodworking Chisels and Planes: Achieving Razor-Sharp Edges” (https://woodcraftwiz.com/the-ultimate-guide-to-sharpening-woodworking-chisels-and-planes-achieving-razor-sharp-edges/).
- Saws:
- Dovetail Saw: A fine-toothed back saw specifically designed for precise joinery cuts.
- Tenon Saw: A slightly larger back saw for cutting the shoulders and cheeks of a tenon.
- Coping Saw: Essential for clearing waste from dovetail pins and tails.
- Marking and Measuring Tools:
- Marking Gauge: Crucial for accurately scribing parallel lines, especially for tenons and mortises.
- Dovetail Marker/Template: Helps lay out dovetail angles consistently.
- Engineer’s Square/Combination Square: For checking squareness and transferring measurements.
- Pencil/Knife: A sharp pencil or marking knife for clear, precise layout lines.
- Mallet: For driving chisels with control.
- Workbench with Vise: A sturdy workbench with a reliable vise is non-negotiable for holding workpieces securely. Consider “Building a Portable Workbench: Designs for Small Spaces and On-the-Go Woodworking” (https://woodcraftwiz.com/building-a-portable-workbench-designs-for-small-spaces-and-on-the-go-woodworking/) for ideas.
- Clamps: A variety of clamps are needed to hold pieces during assembly and glue-up.
- Router Plane (Optional but Recommended): Excellent for precisely leveling tenon cheeks or mortise bottoms.
Preparing Your Wood and Tools
Before making any cuts, ensure your lumber is square, flat, and dimensioned accurately. This initial preparation is paramount for successful joinery. Similarly, all your cutting tools, especially chisels, must be exceptionally sharp. A dull chisel tears wood; a sharp one slices cleanly, allowing for the precise fit required for strong joints.
Mastering the Mortise and Tenon Joint
The mortise and tenon joint is a cornerstone of woodworking, renowned for its strength in joining rails and stiles in frame construction, think table legs into aprons, or door frames. It consists of two parts: the mortise (a rectangular hole) and the tenon (a projecting tongue shaped to fit snugly into the mortise).
Step-by-Step Guide to Cutting a Mortise and Tenon
Preparation and Layout:
- Ensure both workpieces are dimensioned accurately, square, and flat.
- Determine the size and location of your mortise. A good rule of thumb is for the tenon’s thickness to be one-third the thickness of the rail it’s joining.
- Use a marking gauge to scribe the shoulder lines and the cheek lines on the tenon workpiece. Mark the depth of the mortise on the mortise workpiece.
- Tip: Use a marking knife for exceptionally crisp lines, which will guide your chisels and saws.
Cutting the Mortise:
- Secure the mortise workpiece firmly in a vise.
- Use a drill press to remove most of the waste. Select a drill bit slightly smaller than the mortise width. Drill a series of overlapping holes within your marked lines, ensuring not to drill past the intended depth.
- Alternatively, for a fully hand-tool approach, use a mortise chisel. Start by chopping along the center of the mortise, then work towards the lines, paring away waste. Chop from both sides to prevent blow-out.
- Clean up the sides and ends of the mortise with a sharp bench chisel, paring precisely to your layout lines. Keep checking for squareness and depth.
Cutting the Tenon:
- Secure the tenon workpiece horizontally in your vise.
- Use a tenon saw to cut the shoulders of the tenon. Saw precisely on the waste side of your layout lines, ensuring the shoulders are perfectly square to the face.
- Next, cut the cheeks of the tenon. You can do this with a tenon saw or by carefully chopping with a chisel. Saw or chop on the waste side of your lines, leaving a hair of material.
- Pare the tenon cheeks with a sharp bench chisel, slowly and carefully removing material until the tenon fits snugly into the mortise. It should require light tapping with a mallet, not forcing. The goal is a perfect friction fit.
Test Fit and Assembly:
- Carefully test fit the tenon into the mortise. It should slide in without excessive force but also without wobble. If too tight, pare a tiny amount from the tenon cheeks. If too loose, you may need to shim or start over.
- Once satisfied with the fit, apply a quality wood glue, such as those discussed in “The Ultimate Guide to Wood Glue: Choosing the Right Adhesive for Every Project, Joint, and Environmental Condition” (https://woodcraftwiz.com/the-ultimate-guide-to-wood-glue-choosing-the-right-adhesive-for-every-project-joint-and-environmental-condition/), to both surfaces.
- Assemble the joint, using clamps to hold it until the glue cures. Ensure the joint is square during clamping.
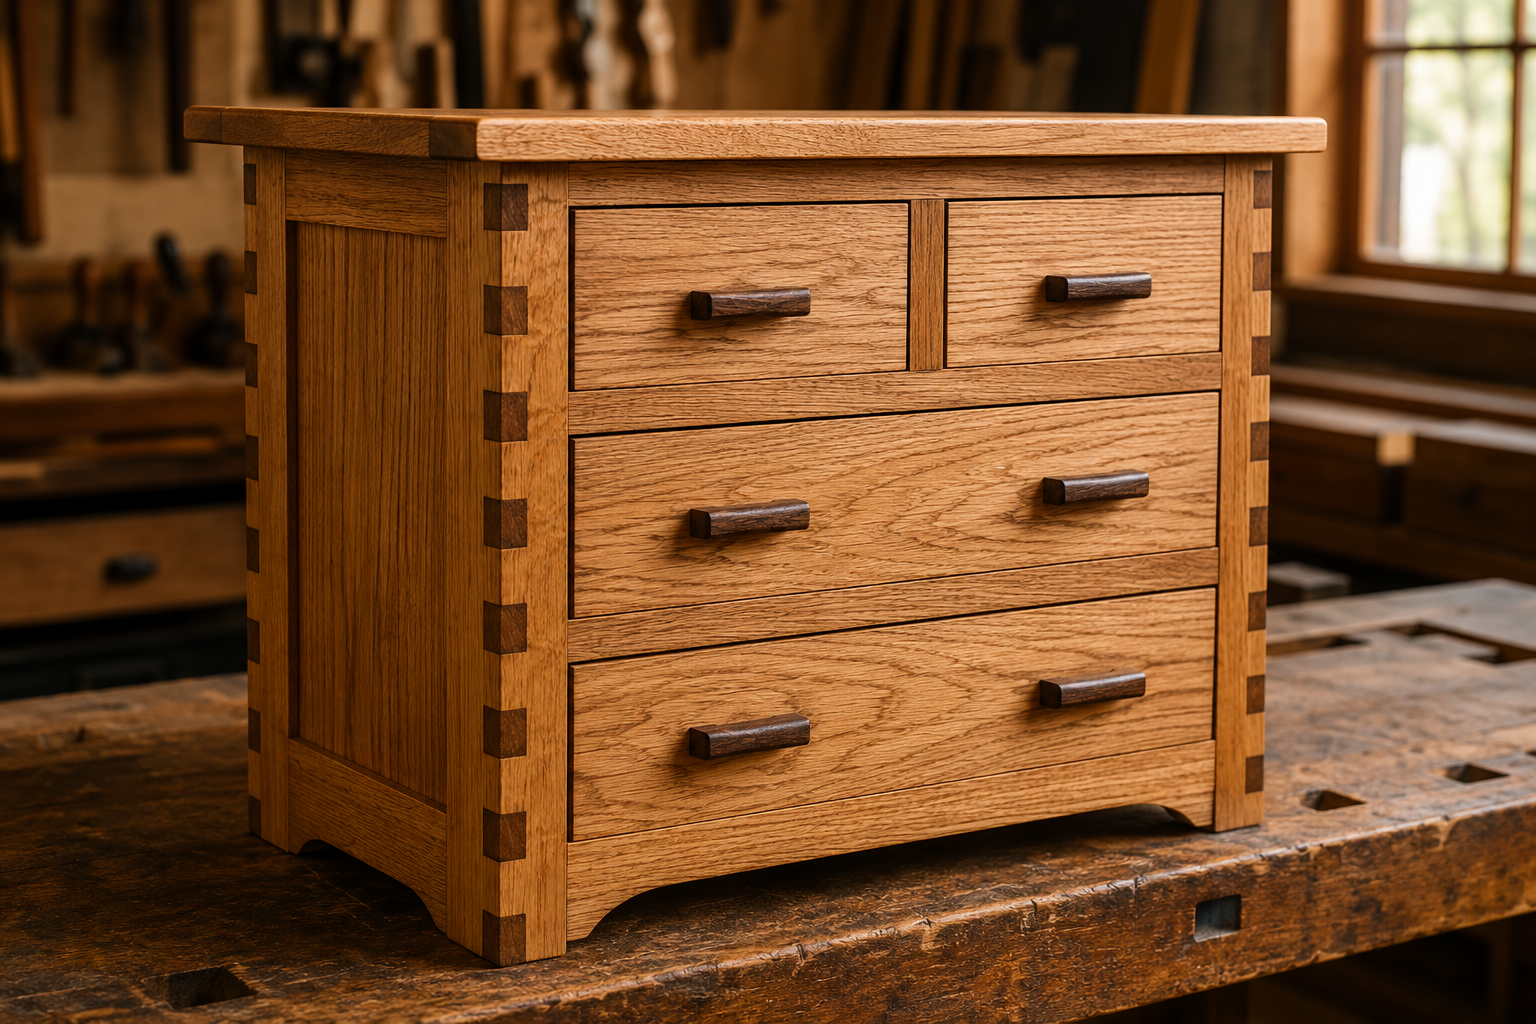
Mastering the Dovetail Joint
The dovetail joint is perhaps the most iconic and visually appealing of all hand-cut joints. Its interlocking “pins” and “tails” provide exceptional mechanical strength, particularly against racking and pulling forces, making it ideal for drawer construction, boxes, and carcass work. Learning this joint is a crucial part of any Beginner’s Guide to Hand Tool Joinery: Mastering Mortise and Tenon and Dovetail Joints.
There are several variations, including through dovetails (where the joint is visible on both faces), half-blind dovetails (visible on one face), and secret dovetails (hidden completely). We will focus on the through dovetail as the foundational technique.
Step-by-Step Guide to Cutting a Through Dovetail
Preparation and Layout:
- Prepare your two workpieces (e.g., the front and side of a drawer). Ensure they are perfectly square and to dimension.
- Mark the “shoulders” or “baselines” on both pieces, typically matching the thickness of the mating piece. Use a marking gauge for accuracy.
- Decide which piece will have the tails and which will have the pins. Traditionally, the tails are cut first.
- Lay out your tails on the end grain of the tail board. Use a dovetail marker or a sliding bevel set to your desired angle (1:6 for hardwoods, 1:8 for softwoods). Evenly space the tails, ensuring half-tails are at the edges for strength.
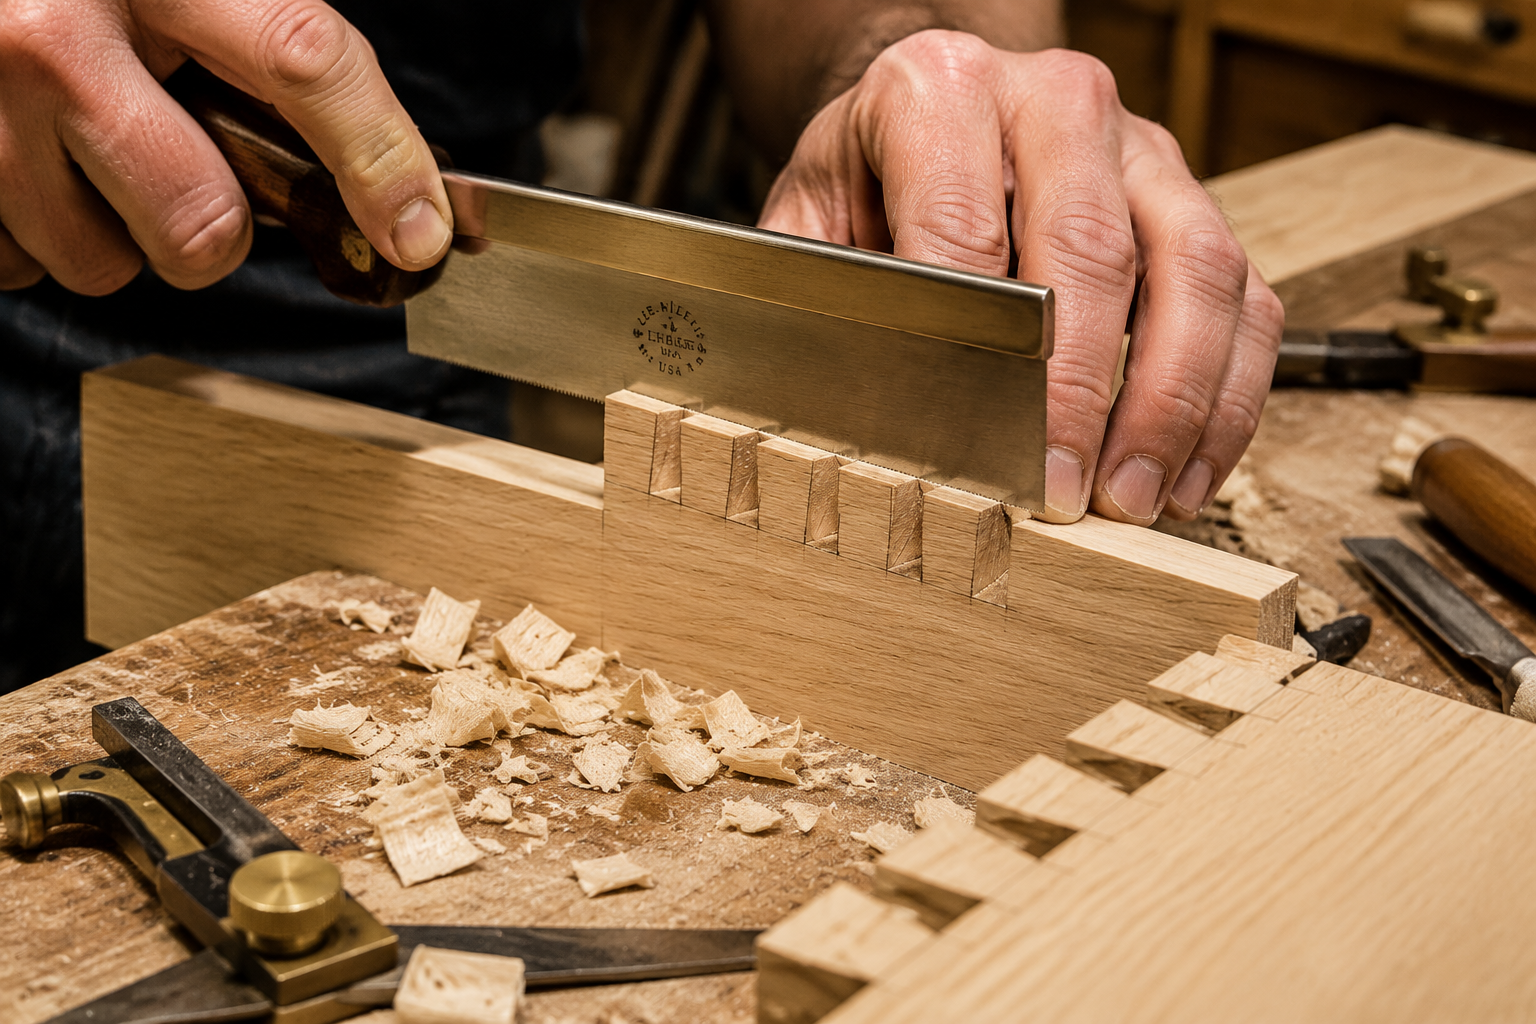
Cutting the Tails:
- Secure the tail board vertically in your vise.
- Using a dovetail saw, cut along your marked tail lines, angling the saw precisely. Cut on the waste side of the lines.
- After the angled cuts, carefully saw along the baseline to remove the waste between the tails. Be careful not to undercut the tails.
- Use a coping saw or a sharp chisel to remove the bulk of the waste between the tails.
- Pare precisely to the baseline with a sharp chisel, creating crisp, clean tail sockets.
Transferring the Tails to the Pin Board:
- This is a critical step for a tight-fitting joint. Place the tail board squarely on the end of the pin board, aligning the shoulder lines perfectly.
- Carefully trace around the tails onto the end grain of the pin board using a marking knife or a very sharp pencil. This transfers the exact shape of your tails to form the pins. Mark the waste areas clearly.
Cutting the Pins:
- Secure the pin board vertically in your vise.
- Using your dovetail saw, carefully cut along the transferred pin lines, again cutting on the waste side.
- Saw along the baseline to remove the waste, similar to how you cut the tails.
- Use a coping saw or chisel to remove the bulk of the waste between the pins.
- Pare precisely to the baseline with a sharp chisel, ensuring the pins are perfectly shaped to receive the tails.
Test Fit and Assembly:
- Carefully test fit the pin board into the tail board. It should be a snug fit, perhaps requiring a few gentle taps with a mallet.
- If too tight, identify the high spots (often marked by shiny areas where wood has been compressed) and carefully pare them down. Patience is key here.
- Once a perfect dry fit is achieved, apply a thin, even coat of wood glue to the mating surfaces.
- Assemble the joint, tapping with a mallet if necessary, and clamp until the glue is fully cured. Ensure the joint remains square.
This technique is fundamental to projects like wooden storage chests with hinged lids (https://woodcraftwiz.com/wooden-storage-chests-with-hinged-lids-techniques-for-dovetail-joints-and-rustic-finishes/) and ultimate DIY end tables (https://woodcraftwiz.com/ultimate-diy-end-tables-versatile-designs-from-nightstands-to-side-tables-with-dovetail-drawers/).
Practice and Patience: The Keys to Joinery Mastery
Becoming proficient in hand tool joinery, especially with joints like the mortise and tenon and dovetails, is not an overnight process. It requires consistent practice, attention to detail, and a healthy dose of patience. Do not be discouraged by initial imperfections. Every cut, every pare, every joint you attempt, no matter how flawed, builds muscle memory and sharpens your eye.
Start with inexpensive, softer woods like pine or poplar for practice pieces. Cut multiple joints. Experiment with different marking techniques. Learn to identify and correct your mistakes. The more you practice, the more intuitive the process will become. Over time, you will develop a “feel” for the wood and the tools, allowing you to achieve increasingly precise and beautiful results.
Consider maintaining a sharp edge on your tools. Dull tools make accurate cuts nearly impossible and can lead to frustration or even injury. Regular sharpening sessions, perhaps once every project or even more frequently, will dramatically improve your success rate.
Finally, remember that hand tool joinery is a journey, not a destination. There are always new techniques to learn, new variations to master, and new projects to tackle. Embrace the process, enjoy the craft, and take pride in the strong, beautiful connections you create.

Conclusion
Embarking on the Beginner’s Guide to Hand Tool Joinery: Mastering Mortise and Tenon and Dovetail Joints opens a world of traditional craftsmanship. By understanding the essential tools, meticulously preparing your materials, and following the step-by-step guides for cutting mortise and tenon and dovetail joints, you gain the foundational skills to construct robust and aesthetically pleasing wooden furniture. In 2026, the value of handcrafted items built with integrity continues to grow, and mastering these joints is your gateway to creating heirloom-quality pieces. Practice diligently, sharpen your tools, and embrace the precision required. The satisfaction of a perfectly fitted, hand-cut joint is a reward in itself, promising projects that endure for generations.
Actionable Next Steps:
- Gather Your Tools: Invest in a quality set of chisels, a dovetail saw, a tenon saw, and essential marking tools.
- Master Sharpening: Prioritize learning how to sharpen your chisels and plane irons to a razor edge.
- Practice on Scraps: Dedicate time to repeatedly cutting mortise and tenon and dovetail joints on inexpensive scrap wood.
- Start a Simple Project: Apply your new skills to a small, manageable project like a simple box or a small stool.
SEO Meta Title: Beginner’s Guide to Hand Tool Joinery: Mortise, Tenon & Dovetails SEO Meta Description: Master hand tool joinery in 2026! This beginner’s guide covers essential tools, step-by-step techniques for mortise and tenon, and dovetail joints.
