
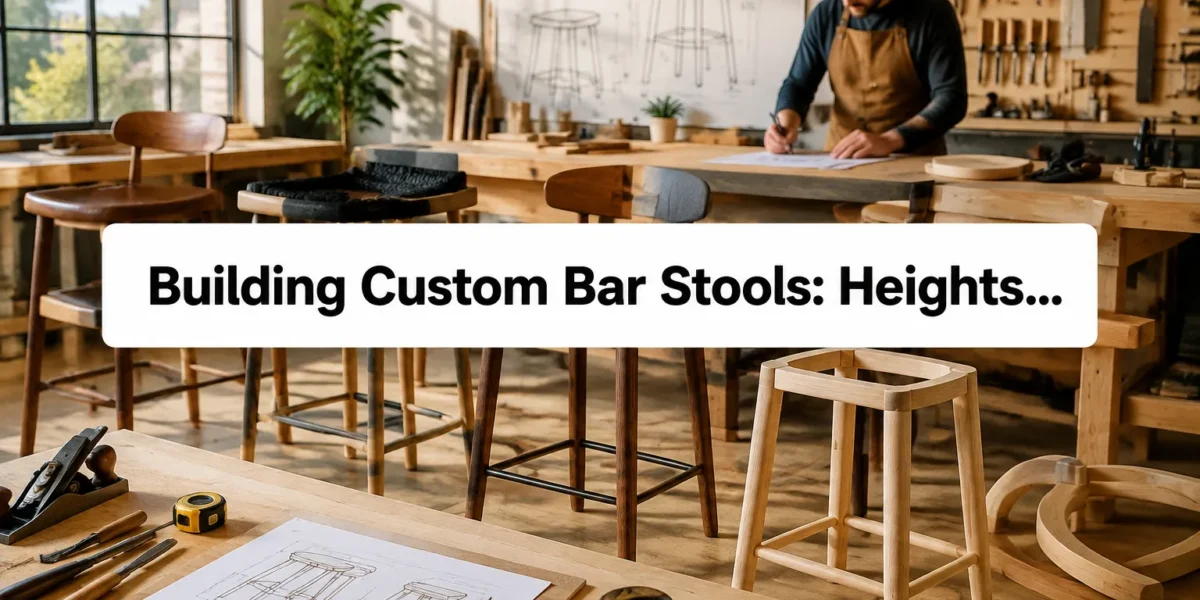
The perception that custom furniture is solely for one-off, artisanal pieces often deters woodworkers from exploring its full potential, especially for items like bar stools. However, mastering the nuances of “Building Custom Bar Stools: Heights, Spacing, Upholstery Integration, and Batch Production” opens up significant opportunities for both hobbyists seeking perfect home integration and professionals aiming for scalable, profitable projects. This guide delves into transforming individual design aspirations into repeatable, high-quality production, ensuring comfort, aesthetics, and efficiency.
Key Takeaways
- Height and Spacing are Crucial: Precise measurements based on counter/bar height and ergonomic legroom are fundamental for user comfort and safety.
- Design for Upholstery Early: Integrating upholstery considerations from the initial design phase streamlines the build process and ensures a professional finish.
- Jigs Enable Batch Production: Developing specialized jigs and templates is essential for consistent quality and efficiency when building multiple identical stools.
- Material Selection Impacts Durability: Choosing appropriate wood species and upholstery fabrics significantly affects the longevity and aesthetic appeal of custom bar stools.
- Refine Your Workflow: A methodical approach to design, fabrication, and finishing allows for both bespoke quality and the scalability of batch work.
Understanding Ergonomics and Aesthetics: Heights and Spacing for Custom Bar Stools
When embarking on “Building Custom Bar Stools: Heights, Spacing, Upholstery Integration, and Batch Production,” the first critical step is to define the stool’s primary dimensions: height and spacing. These aren’t arbitrary figures but are governed by ergonomic principles and the dimensions of the counter or bar they will serve. Incorrect measurements can lead to uncomfortable seating, awkward aesthetics, or even safety concerns.
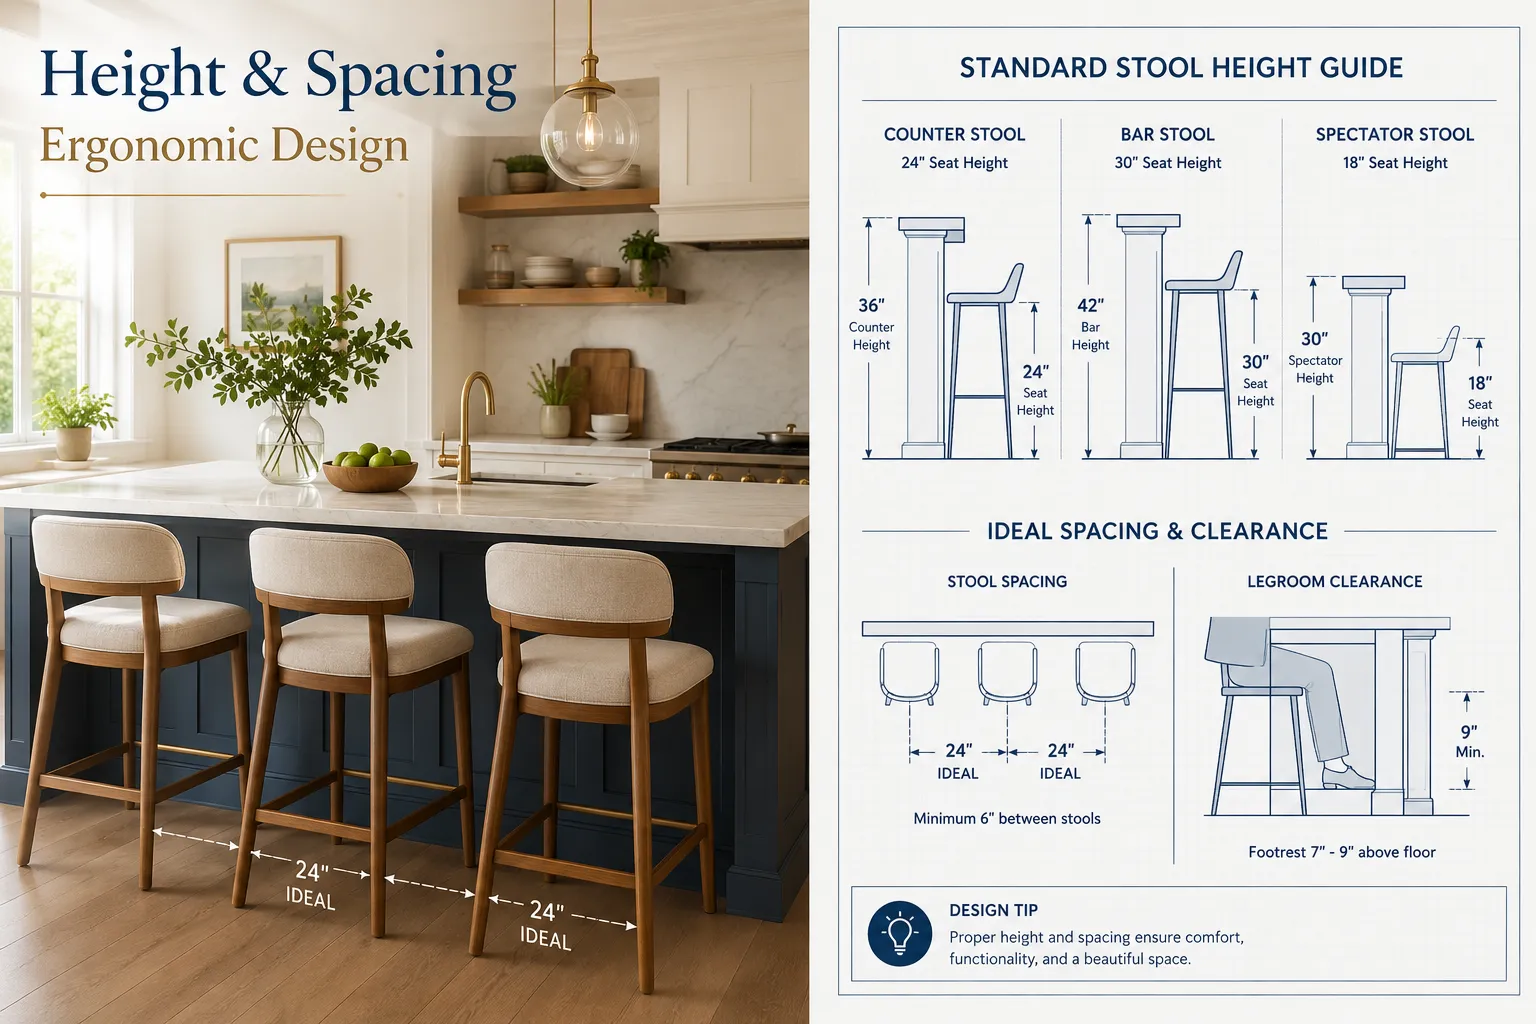
Standard Height Guidelines
Bar stools come in three primary height categories, each corresponding to a different surface height:
- Counter Height Stools: Designed for standard kitchen counters, which are typically 36 inches (91 cm) high. Counter stools usually have a seat height of 24-26 inches (61-66 cm). This allows for an ideal 10-12 inches (25-30 cm) of clearance between the top of the seat and the underside of the counter.
- Bar Height Stools: Suited for traditional bar counters, which often stand at 40-42 inches (102-107 cm). Bar stools typically feature a seat height of 28-30 inches (71-76 cm), maintaining that crucial 10-12 inch clearance.
- Spectator/Extra-Tall Stools: Less common but necessary for surfaces 44-48 inches (112-122 cm) high, such as high-top tables or pub tables. These stools can have seat heights ranging from 32-36 inches (81-91 cm).
It is important to always measure the specific counter or bar you are designing for, as variations exist. The 10-12 inch clearance rule is paramount for comfortable seating, allowing ample room for legs without being too low. For a deeper dive into joinery and comfort standards, you can explore resources like https://woodcraftwiz.com/building-custom-bar-stools-from-scratch-joinery-comfort-and-height-standards-explained/.
Spacing for Comfort and Access
Beyond height, the spacing between stools and the required aisle clearance are vital for a functional and inviting setup.
Individual Stool Width and Clearance: Consider the average width of a person and the stool itself. A good rule of thumb is to allow at least 6 inches (15 cm) between the seats of adjacent stools. This prevents people from bumping elbows and provides a sense of personal space. For example, if your stool seat is 18 inches wide, you would typically need 24 inches (61 cm) per person along the counter.
Aisle Clearance: Crucially, there needs to be enough space behind the stools for people to easily get in and out, and for others to walk past comfortably.
- Minimum Clearance: 36 inches (91 cm) from the back of the stool to any wall or obstruction. This allows for basic maneuverability.
- Ideal Clearance: 42-48 inches (107-122 cm) provides ample space for people to walk behind seated individuals without disturbing them, especially in high-traffic areas or commercial settings.
Footrests: Don’t overlook the footrest height. For optimal comfort, footrests should be positioned approximately 18-20 inches (46-51 cm) below the seat of the stool. This provides a stable and comfortable place for feet, reducing pressure on the back of the thighs.
Ensuring these dimensions are meticulously planned at the outset will prevent costly redesigns and guarantee a superior end product, whether you’re building a single custom piece or engaging in batch production.
Integrating Upholstery for Enhanced Comfort and Aesthetics
Upholstery isn’t just an afterthought for custom bar stools; it’s an integral design element that dictates comfort, durability, and overall aesthetic appeal. Planning for upholstery from the initial design phase of “Building Custom Bar Stools: Heights, Spacing, Upholstery Integration, and Batch Production” ensures a seamless, professional finish and optimizes the construction process.
Designing for Upholstery
When designing a wooden bar stool that will be upholstered, several factors need to be considered:
- Seat Base Construction: The seat base must be designed to securely hold the foam and fabric. A common approach involves creating a solid wood or plywood substrate with a slight dish or contour for added comfort. The edges of this substrate should be smooth and slightly rounded to prevent wear on the fabric.
- Attachment Points: Plan how the upholstered seat will attach to the stool frame. Common methods include screws driven up from the stretcher into the seat base, or mounting plates. Ensure these attachment points are sturdy and easily accessible for assembly or future re-upholstering.
- Fabric Choice: The fabric selected should be durable, stain-resistant, and aesthetically pleasing. For high-traffic areas, consider performance fabrics, vinyl, or leather. The pattern and texture of the fabric will significantly impact the stool’s final look.
- Foam Density and Thickness: The foam provides the primary comfort. High-density foam (typically 1.8-2.5 lbs per cubic foot) is recommended for seating to ensure longevity and prevent sagging. The thickness will depend on the desired comfort level, usually ranging from 2-4 inches (5-10 cm).
The Upholstery Process
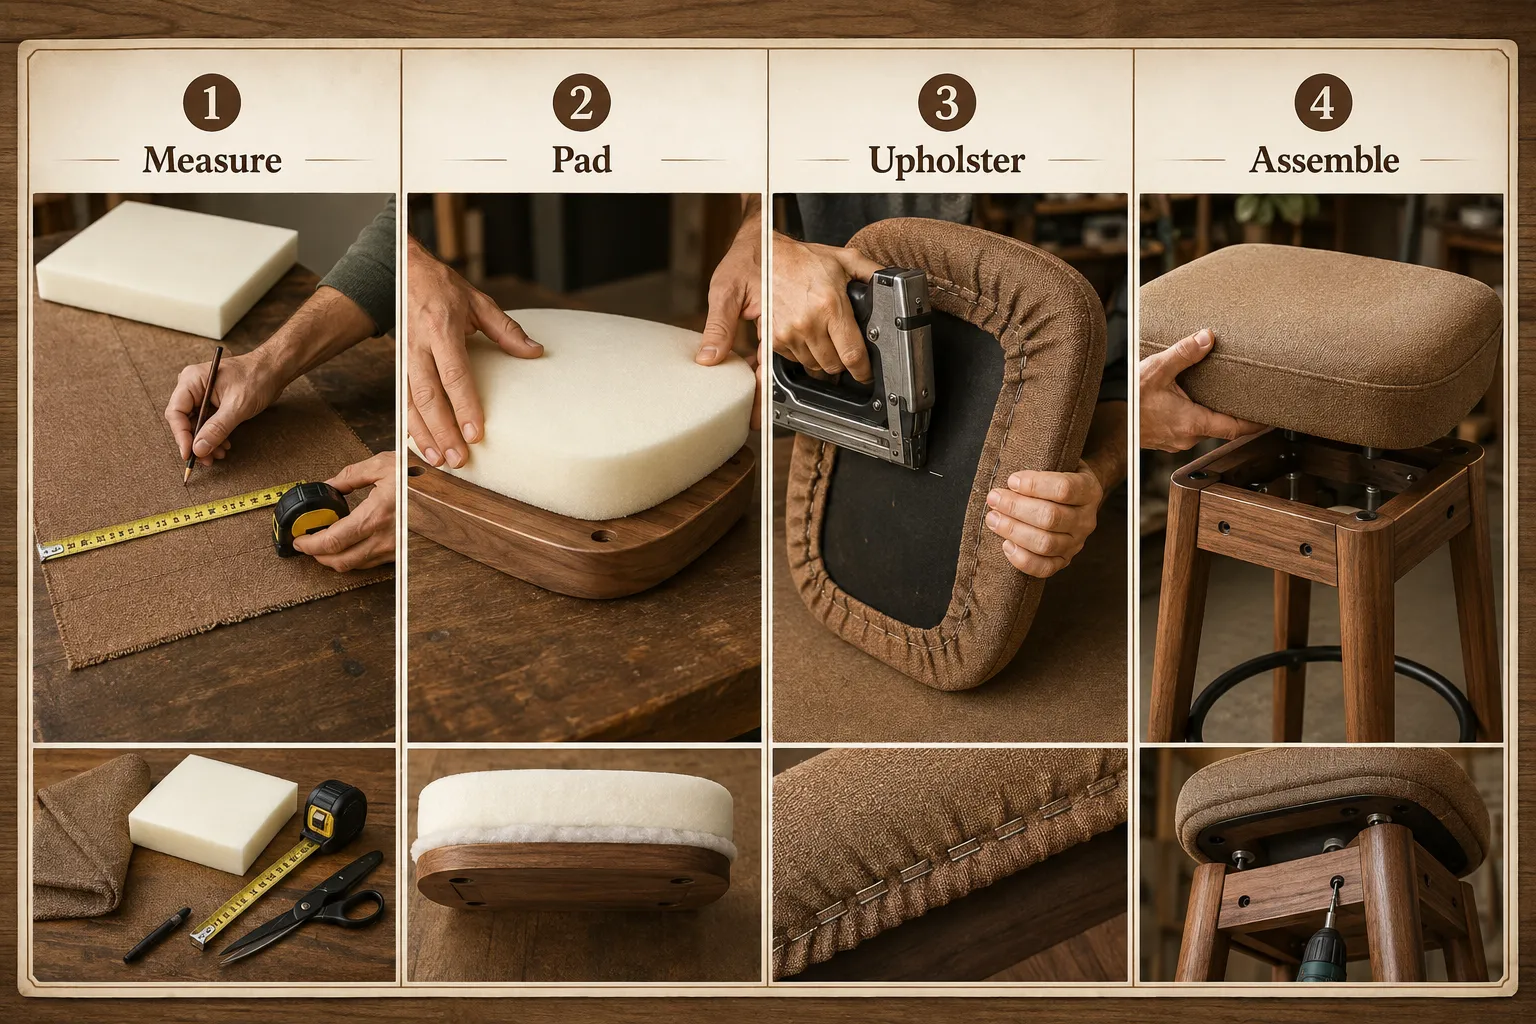
Once the stool frame is built and the seat base prepared, the upholstery process can begin. This typically involves several steps:
- Cut Foam: Cut the high-density foam to the exact shape of your seat base. If the seat has a slight contour, you may need to shape the foam accordingly.
- Attach Foam to Base: Use spray adhesive to secure the foam to the seat base. This prevents the foam from shifting during the next steps.
- Cut Fabric: Cut the chosen fabric with ample overhang, usually 4-6 inches (10-15 cm) beyond the edge of the seat base on all sides. This excess allows for proper tensioning and stapling.
- Upholster the Seat:
- Center the seat base (foam side down) onto the wrong side of the fabric.
- Start by stapling the fabric to the underside of the seat base at the center of each side, pulling taut but not distorting the foam. Use a pneumatic or electric staple gun for efficiency, especially in batch production.
- Work your way around the seat, continuously pulling the fabric taut and stapling every 1-2 inches (2.5-5 cm).
- Carefully fold and pleat the fabric at the corners, ensuring a neat, wrinkle-free appearance. Trim excess fabric.
- Attach Upholstered Seat to Frame: Once upholstered, the seat can be securely fastened to the stool frame using your pre-planned attachment method. Ensure all fasteners are concealed or aesthetically integrated.
Material Considerations
- Fabric Durability: For bar stools, especially those intended for commercial use or busy homes, selecting fabrics with a high double-rub count (a measure of abrasion resistance) is crucial. Fabrics with a count of 15,000-30,000 double rubs are suitable for residential use, while commercial applications may require 30,000+ [Source: FabricLink.com, 2026].
- Wood Species: The underlying wood for the stool frame should be strong and stable. Hardwoods like oak, maple, walnut, or cherry are excellent choices for their durability and beauty. For more on wood choices, explore “Beginner’s Guide to Wood Species: Hardwoods vs. Softwoods,” which covers workability and best uses for DIY projects.
- Finishing: Apply a durable finish to the wooden components before attaching the upholstered seat. This protects the wood and makes it easier to clean.
By carefully integrating upholstery into the design and construction process, you can create custom bar stools that are not only visually appealing but also offer superior comfort and long-lasting durability.
Batch Production Strategies: Efficiency and Consistency for Custom Bar Stools
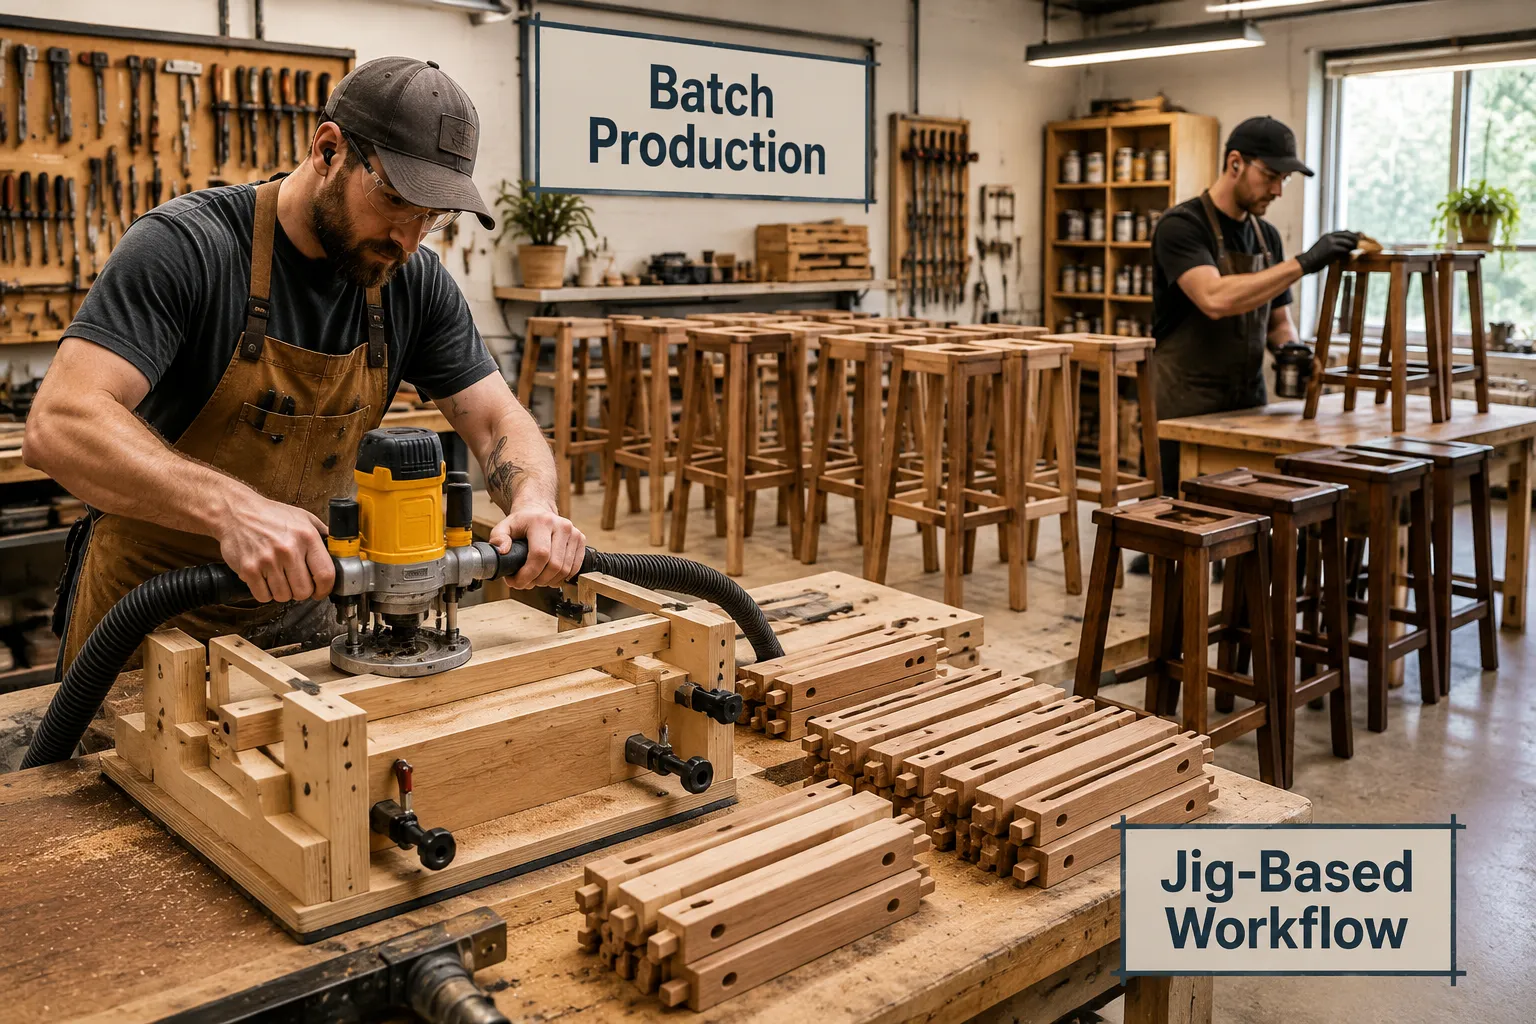
The real magic in “Building Custom Bar Stools: Heights, Spacing, Upholstery Integration, and Batch Production” lies in transforming a singular design into a repeatable, efficient production process. This is particularly valuable for woodworkers looking to sell their creations or furnish multiple spaces with matching pieces. Batch production relies heavily on precision, standardization, and the smart use of jigs and templates.
Designing for Reproducibility
Before cutting any wood for batch production, spend time refining your design with reproducibility in mind.
- Standardized Components: Can leg lengths, stretcher dimensions, or seat bases be standardized? The more identical components you have, the easier batch cutting becomes.
- Simplify Joinery: While strong joinery is paramount (as discussed in https://woodcraftwiz.com/mastering-wood-joinery-techniques-essential-methods-for-strong-and-beautiful-furniture/), consider joints that are efficient to cut repeatedly. Mortise and tenon joints, for instance, can be cut quickly with a router table and jigs once set up.
- Material Optimization: Plan your cut list to maximize material yield and minimize waste. This is crucial for cost-effectiveness in batch production.
The Power of Jigs and Templates
Jigs and templates are the backbone of efficient batch production, ensuring every component is identical and precise.
- Cutting Jigs:
- Crosscut Sleds: For cutting multiple leg and stretcher pieces to exact lengths on a table saw.
- Router Templates: Create templates for curved stool components, such as seat backs or decorative elements. Use a router with a pattern bit to quickly replicate these shapes.
- Tapering Jigs: If your stool legs have a taper, a tapering jig for your table saw will ensure consistent angles on all four sides of multiple legs.
- Assembly Jigs:
- Frame Assembly Jigs: Create a simple jig on your workbench that holds the legs and stretchers in perfect alignment while you glue and clamp the frame. This ensures squareness and consistent dimensions across all stools. For ideas on optimizing your workspace, consider resources like “Building Your First DIY Heavy-Duty Workbench: A Step-by-Step Guide to” or “DIY Modular Desk Organizers: Custom Solutions for a Clutter-Free Woodworking Workspace”.
- Drilling Guides: If you’re drilling holes for fasteners or dowels, a drilling guide or jig ensures consistent hole placement and depth.
“The true measure of a batch production system isn’t just speed, but the unwavering consistency of quality across every single piece. Jigs are your silent partners in achieving that precision.”
Streamlining the Workflow
A methodical, assembly-line approach is key to efficient batch production:
- Component Cutting: Cut all identical components for all stools at once. For example, cut all leg blanks, then all stretchers, then all seat bases. This minimizes tool changes and setup time.
- Joinery Preparation: Perform all identical joinery cuts (e.g., mortises, tenons, dadoes) for all components in one go.
- Sanding and Finishing (Pre-Assembly): For many projects, it’s more efficient to sand and apply initial coats of finish to individual components before assembly, especially if they have intricate areas that become hard to reach later.
- Sub-Assembly: Assemble smaller sections first (e.g., two legs and a stretcher form a side assembly).
- Final Assembly: Bring the sub-assemblies together to form the complete stool frame. Use your assembly jigs to maintain consistency.
- Upholstery (Batch): Once all frames are ready, set up an upholstery station. Cut all foam, then all fabric, and then upholster all seats in a sequential manner.
- Final Finishing and Quality Control: Apply final finishes, then conduct a thorough quality check on each stool, ensuring all details meet your standards.
By implementing these batch production strategies, woodworkers can efficiently produce high-quality, consistent custom bar stools, transforming a labor-intensive craft into a scalable venture. This systematic approach not only saves time and reduces material waste but also elevates the perceived value and professionalism of your work.
Conclusion
Building custom bar stools transcends mere craftsmanship; it’s an intricate dance of design, ergonomics, and production efficiency. From meticulously calculating the ideal heights and spacing to seamlessly integrating upholstery and mastering batch production techniques, every step contributes to creating pieces that are both beautiful and highly functional. For the hobbyist, these methods ensure bespoke furniture that perfectly fits their home. For the professional, they lay the groundwork for a scalable, profitable woodworking enterprise, transforming individual projects into a stream of consistent, high-quality products.
The insights provided in this guide, particularly around standardized measurements, the power of jigs, and a streamlined workflow, serve as a robust framework. As you embark on your next project, remember that precision in planning saves time in execution, and thoughtful design extends far beyond initial aesthetics to encompass the user’s long-term comfort and the builder’s efficiency. Embrace these strategies, and your custom bar stools will stand as a testament to skillful design and masterful production.
Actionable Next Steps:
- Measure Your Space: Accurately measure your counter or bar height, and determine your desired aisle clearance to establish precise stool dimensions.
- Design for Comfort: Sketch out your stool design, incorporating ergonomic footrest height and a seat base that facilitates upholstery integration.
- Plan Your Jigs: Identify which components can benefit from cutting and assembly jigs to ensure consistency for future projects.
- Source Materials: Select durable wood species and appropriate upholstery fabrics suitable for the intended use and expected wear.
- Refine Your Workflow: Map out the steps from cutting to finishing, looking for opportunities to batch similar tasks to improve efficiency.