

The average artisan’s workshop in 2026, often cramped and under-resourced, faces a persistent challenge: how to create high-value, desirable items that stand out in a crowded market without requiring extensive infrastructure. The answer, surprisingly, often lies in blending traditional woodworking with modern materials. Specifically, the fusion of wood with epoxy resin through inlay techniques offers an unparalleled avenue for crafting exquisite pieces. This method elevates simple wooden objects into works of art, transforming them into sought-after items such as magnetic knife holders, decorative coasters, and unique accent furniture pieces. Mastering “Epoxy Resin Inlay Woodworking: Magnetic Knife Holders, Coasters, and Accent Furniture Pieces” unlocks both creative freedom and significant market potential for woodworkers at any skill level.
Key Takeaways
- Epoxy resin inlay seamlessly blends natural wood aesthetics with modern design, creating visually striking and durable pieces.
- Projects like magnetic knife holders, coasters, and accent furniture are ideal for showcasing resin inlay techniques due to their manageable size and broad appeal.
- Proper material selection, precise routing, and careful resin pouring are crucial steps for achieving professional-grade results.
- These handcrafted items offer high market value, making them excellent choices for both personal enjoyment and profitable sales in 2026.
- Safety precautions, including ventilation and personal protective equipment, are essential when working with epoxy resin.
The Allure of Epoxy Resin Inlay Woodworking: Magnetic Knife Holders, Coasters, and Accent Furniture Pieces
Epoxy resin has emerged as a transformative material in woodworking, offering both structural integrity and limitless aesthetic possibilities. When incorporated as an inlay, it allows woodworkers to introduce vibrant colors, striking patterns, and even encapsulate objects within wood. This technique breathes new life into raw timber, creating pieces that are not just functional but also captivating works of art. The appeal of “Epoxy Resin Inlay Woodworking: Magnetic Knife Holders, Coasters, and Accent Furniture Pieces” lies in its ability to combine the warmth and natural beauty of wood with the sleek, often translucent, qualities of resin.
Why Epoxy Inlay?
- Aesthetic Versatility: Epoxy can be tinted with various pigments, mica powders, or dyes to achieve an endless spectrum of colors, from opaque solids to translucent swirls and deep, shimmering effects.
- Durability and Protection: Once cured, epoxy resin provides a hard, water-resistant, and durable surface that protects the inlaid area from wear and tear, making it ideal for items like coasters and kitchen accessories.
- Unique Designs: The ability to create “river” designs, encapsulate glitter, stones, or even phosphorescent powders allows for truly one-of-a-kind creations.
- Enhanced Value: The visual complexity and unique nature of epoxy resin inlaid pieces significantly increase their perceived and actual value, making them excellent candidates for profitable small-scale woodworking.
Consider a magnetic knife holder, for instance. A simple wooden block, while functional, can be elevated into a statement piece with a vibrant epoxy resin “river” running through it, perhaps matching kitchen decor or offering a stark, artistic contrast. Coasters, often mundane items, become conversation starters when adorned with swirling resin patterns or embedded natural elements. Accent furniture, like a small side table or a decorative shelf, can feature bold geometric resin inlays that transform an ordinary piece into a focal point.
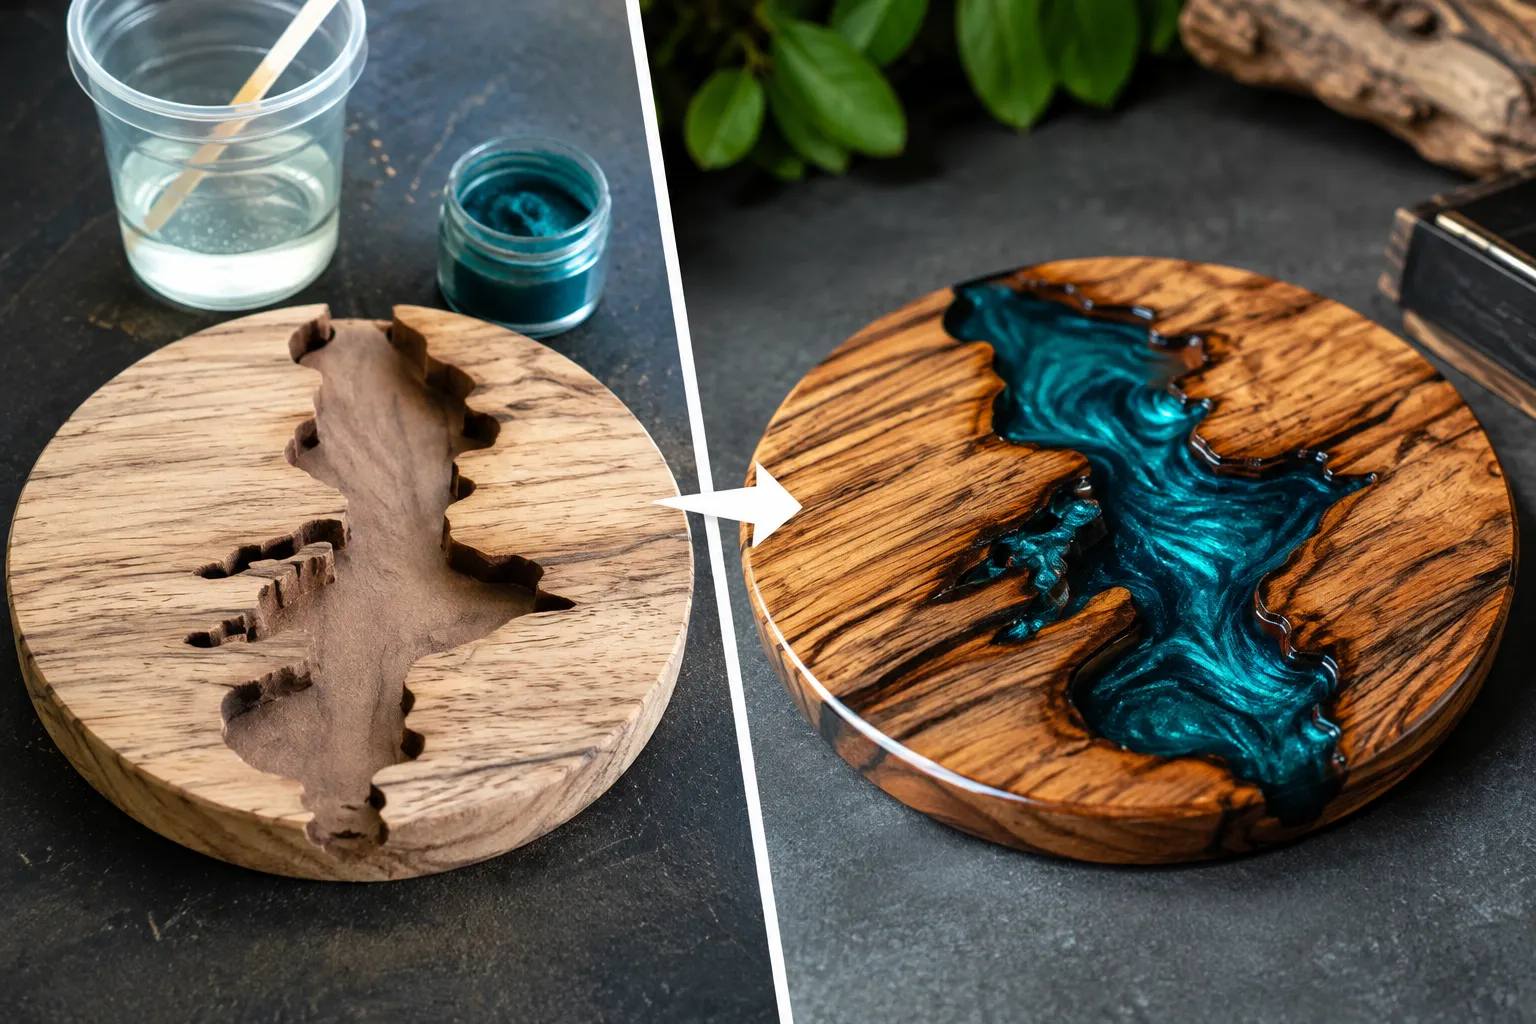
The process involves routing out a channel or cavity in the wood and then carefully pouring liquid epoxy resin into that void. After curing, the piece is sanded and finished, revealing a seamless blend of wood and resin. This technique allows for creativity that goes beyond traditional wood inlay methods, offering a modern twist to an age-old craft.
Crafting Magnetic Knife Holders with Epoxy Resin Inlay
Magnetic knife holders are both practical kitchen tools and opportunities for artistic expression. Integrating epoxy resin inlay elevates them from mere storage solutions to elegant display pieces. The process requires careful planning and execution, but the result is a durable, visually stunning, and highly functional item.
Design and Wood Selection
The first step is design. Decide on the dimensions of your knife holder and the pattern of your epoxy inlay. Common inlay patterns include:
- River Designs: A meandering or straight channel running through the wood, filled with a contrasting color resin.
- Geometric Shapes: Squares, circles, or abstract forms routed into the wood.
- Live Edge: Incorporating a natural wood edge with a resin fill to highlight its organic beauty.
For wood selection, hardwoods like walnut, maple, cherry, or oak are excellent choices due to their durability and attractive grain patterns. The contrast between a dark wood like walnut and a lighter, vibrant epoxy, or a pale maple with a deep, rich resin color, can be particularly striking.
Essential Tools and Materials
To embark on this project, you will need:
- Wood: Your chosen hardwood piece.
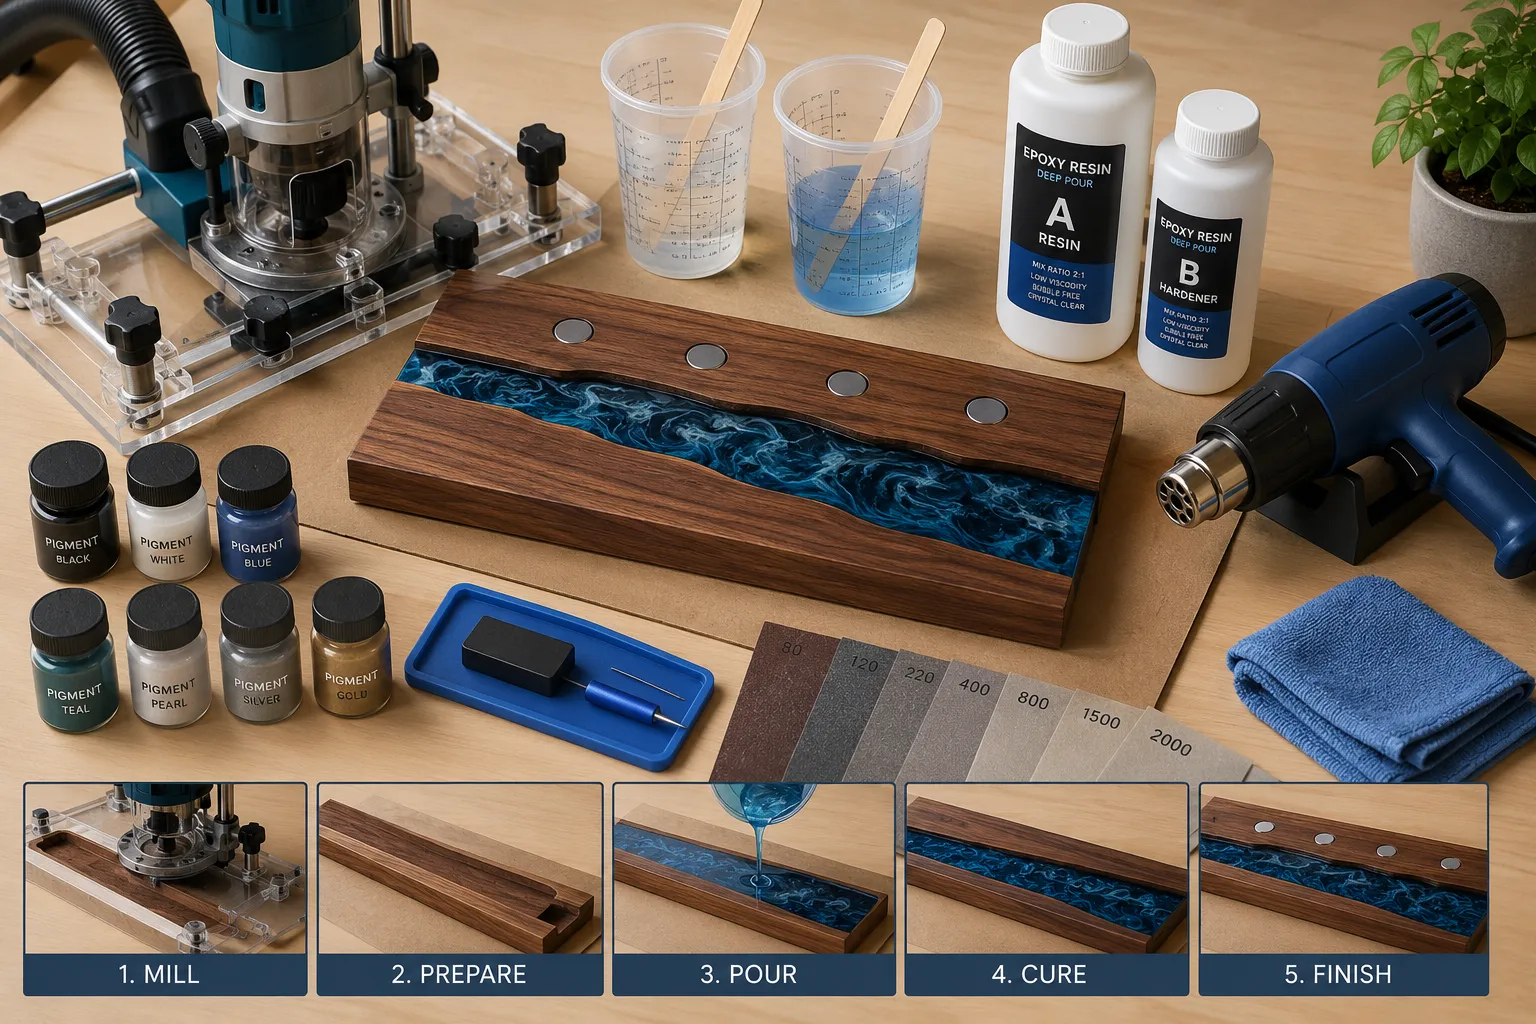
- Epoxy Resin Kit: Typically includes resin and hardener, often a 1:1 or 2:1 mix ratio. Ensure it’s a casting or deep pour epoxy for thicker applications.
- Pigments/Dyes: For coloring the epoxy. Mica powders offer shimmer, while liquid dyes provide opaque or translucent color.
- Router: With various bits for creating channels and cavities. A plunge router is particularly useful.
- Clamps: To secure the workpiece.
- Sanding Supplies: From coarse to fine grits (e.g., 80, 120, 220, 320, 400, 600+).
- Finishing Oil/Varnish: To protect the wood and resin.
- Neodymium Magnets: Strong magnets, typically 1/2″ to 3/4″ in diameter, for holding knives.
- Measuring and Mixing Tools: Graduated cups, stir sticks, digital scale for precise resin mixing.
- Safety Gear: Respirator, gloves, eye protection.
- Tape/Sealant: To create a dam for the epoxy pour, if necessary.
For creating precise channels, consider using beginner’s guide to essential woodworking jigs to ensure straight lines and consistent depths.
Step-by-Step Process for a Magnetic Knife Holder
- Prepare the Wood: Cut your wood piece to the desired size. Plane and sand it smooth.
- Route the Inlay Channels: Mark your desired inlay pattern. Using a router, carefully cut the channels for the epoxy. The depth will depend on your design, typically 1/8″ to 1/2″. Ensure the channels are clean and free of sawdust. For magnetic knife holders, you’ll also need to route recesses on the back of the wood to embed the magnets. These should be deep enough so the magnets are flush or slightly below the surface, allowing them to attract through the wood.
- Prepare for Epoxy Pour: Clean the routed channels thoroughly with compressed air. If creating an open-ended “river” design or filling gaps on a live edge, use painter’s tape or a mold-release sealant to create a temporary dam to contain the liquid epoxy.
- Mix and Pour Epoxy: Following the manufacturer’s instructions, accurately measure and mix your epoxy resin and hardener. Add your chosen pigments or dyes. Stir slowly to minimize air bubbles. Pour the mixed epoxy carefully into the routed channels, slightly overfilling to allow for sanding. Use a heat gun or torch (briefly and from a distance) to pop any surface bubbles.
- Cure: Allow the epoxy to cure fully, typically 24-72 hours, depending on the product and ambient temperature.
- Embed Magnets: Once the epoxy is cured, flip the piece over. Use epoxy glue or strong adhesive to secure the neodymium magnets into their routed recesses on the back. Ensure they are correctly oriented for magnetic attraction. Some woodworkers prefer to embed magnets before the main epoxy pour, but doing it after allows for a cleaner front face finish. Consider building robust knife blocks for more detailed insights on magnet placement.
- Sand and Finish: Once the epoxy and magnet adhesive are fully cured, begin sanding. Start with a coarse grit (e.g., 80 or 120) to level the epoxy with the wood surface, then progressively move to finer grits (up to 400, 600, or even 1000+ for a glass-smooth finish). This is where the magic happens, revealing the clarity and depth of the resin.
- Apply Finish: Clean the piece thoroughly. Apply a food-safe finishing oil or varnish to protect both the wood and the resin, bringing out their natural beauty.
| Component | Key Consideration |
|---|---|
| Wood Choice | Hardwoods (walnut, maple, cherry) for durability and contrast |
| Epoxy Type | Casting/Deep Pour for thickness; UV-resistant for longevity |
| Pigment | Mica powders for shimmer, liquid dyes for opaque/translucent color |
| Magnet Placement | Precise routing on back, sufficient depth for strong hold |
| Sanding Grit | Progressive, from coarse (80) to very fine (600+) for smooth finish |
Epoxy Resin Inlay Woodworking: Coasters and Accent Furniture Pieces
Beyond magnetic knife holders, “Epoxy Resin Inlay Woodworking: Magnetic Knife Holders, Coasters, and Accent Furniture Pieces” extends to creating stunning coasters and unique accent furniture. These smaller projects are excellent for refining your skills and experimenting with different resin techniques.
Crafting Coasters with Epoxy Resin Inlay
Coasters are perfect entry-level projects for epoxy resin inlay. Their small size makes them quick to produce and ideal for batch production, especially useful for workshop organization for high volume small project production.
Design Ideas for Coasters:
- Geometric Inlays: Simple square, circle, or triangular cutouts filled with contrasting resin.
- Ocean Waves: Layers of blue and white resin swirled to mimic ocean waves.
- Petri Dish Art: Creating cellular patterns by dropping small amounts of colored resin and white resin into a clear base.
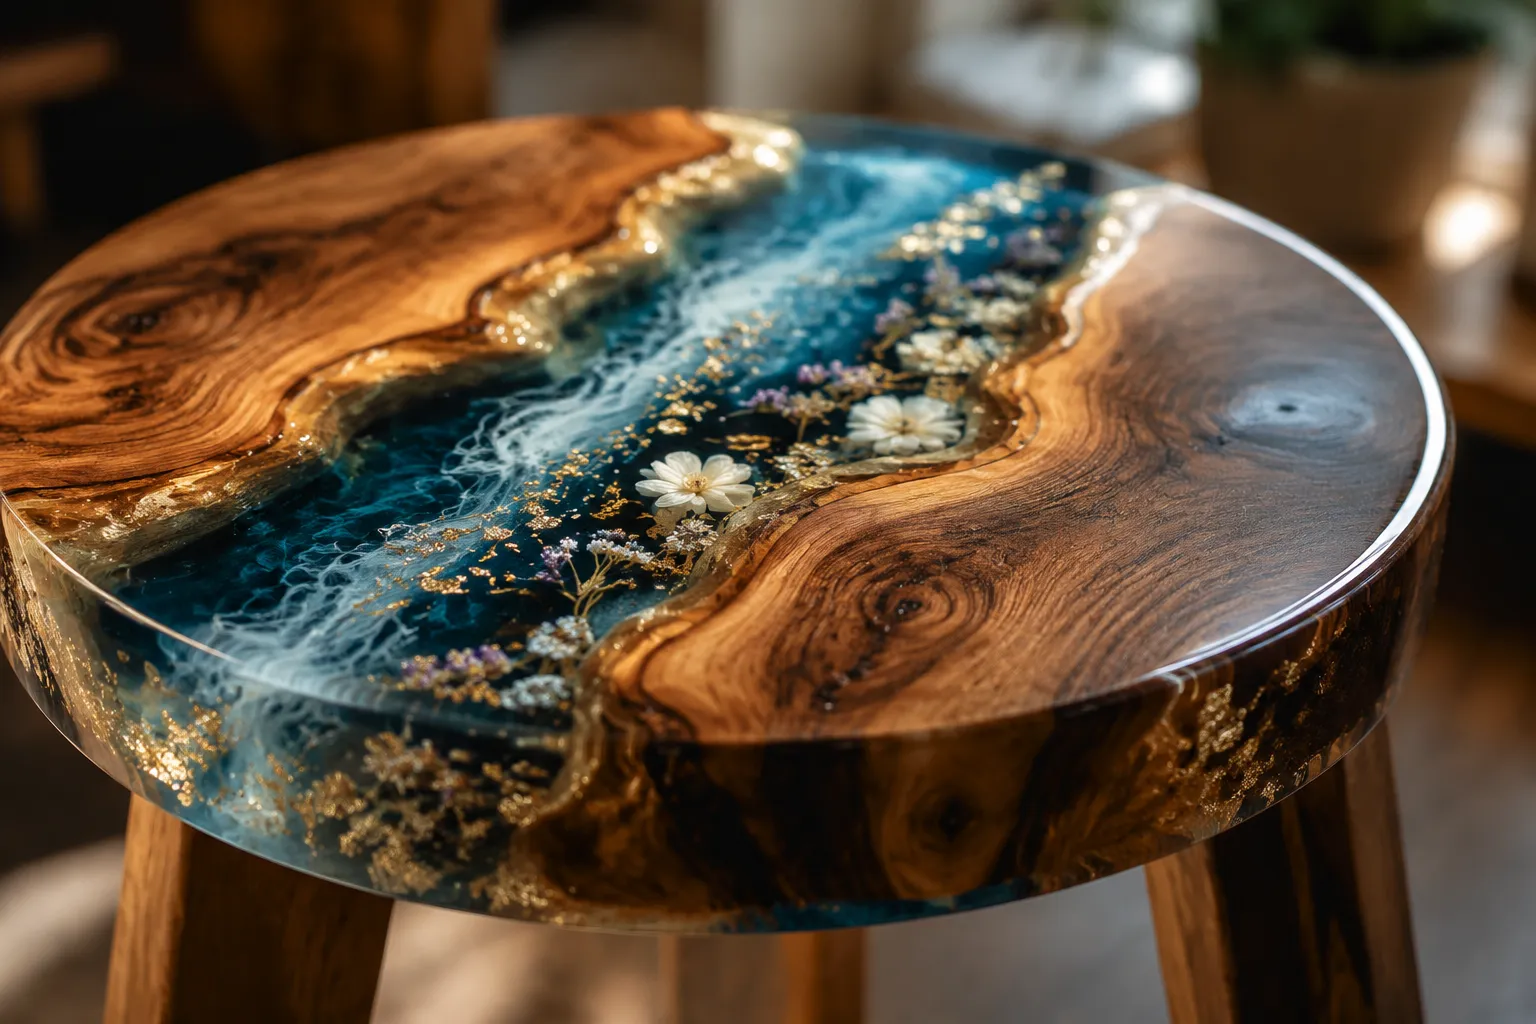
- Encapsulated Elements: Embedding dried flowers, small pebbles, coffee beans, or glitter within clear or tinted resin. This can also be applied to larger pieces like inlay cutting boards.
The process is similar to the knife holder, but on a smaller scale. Start with small wood blanks (e.g., 4″x4″ squares or circles). Route shallow channels, typically 1/8″ to 1/4″ deep. Mix and pour your colored epoxy, ensuring to pop any bubbles. Once cured, sand through progressive grits to a high polish, then apply a food-safe finish. For intricate designs, consider using beginners guide to laser engraving and cutting to create precise, complex patterns for your resin fill.
Accent Furniture Pieces with Epoxy Inlay
Accent furniture offers a larger canvas for epoxy resin inlay, allowing for more ambitious and visually impactful designs. These can range from small side tables and coffee tables to decorative wall art panels or cabinet door inserts.
Project Ideas:
- River Tables: While full river tables are extensive projects, small accent tables can feature scaled-down river designs running through their tops or even down their legs.
- Geometric Tabletops: Inlaying large geometric patterns in contrasting woods and resins across a tabletop.
- Cracked Wood Inlay: Filling natural cracks or voids in reclaimed wood with clear or colored epoxy, highlighting the imperfections as features.
- Book-Matched Resin Panels: Using two mirror-image wood slabs with a resin pour down the middle.
Considerations for Accent Furniture:
- Wood Movement: For larger pieces, always account for wood movement. Ensure your inlay design and resin choice can accommodate seasonal expansion and contraction of the wood, or design the inlay to be flexible.
- Structural Integrity: If routing deep channels, ensure you do not compromise the structural integrity of the furniture piece.
- Leveling: For large pours, a perfectly level surface is paramount to prevent uneven epoxy thickness.
- Volume of Resin: Larger projects require more epoxy, which can be a significant cost factor. Plan your resin volume carefully.
- Cure Time: Deep or large pours of epoxy can generate heat. Ensure you use an epoxy formulated for deep pours to prevent excessive heat buildup, which can cause cracking or yellowing. Also, larger volumes typically mean longer cure times.
Regardless of the project size, the finishing process is critical. A beautifully sanded and polished epoxy inlay, complemented by a rich wood finish, transforms a piece from handmade to artisan quality. The demand for unique, handcrafted home decor in 2026 makes these projects particularly appealing for selling.
Advanced Techniques and Finishing for Epoxy Resin Inlay Woodworking: Magnetic Knife Holders, Coasters, and Accent Furniture Pieces
Mastering “Epoxy Resin Inlay Woodworking: Magnetic Knife Holders, Coasters, and Accent Furniture Pieces” involves not just the basic pouring technique, but also understanding advanced methods and achieving a flawless finish. The quality of the final surface dictates the perceived value and durability of your piece.
Advanced Inlay Techniques
- Multi-Layered Pours: For designs with depth and dimension, pour thin layers of different colored or clear epoxy, allowing each to partially cure before adding the next. This creates stunning optical effects, especially when encapsulating objects.
- Swirling and Marbling: Achieve intricate patterns by lightly swirling different colored epoxies together just after pouring, using a stick or even a blowing technique. Be careful not to over-mix, which can muddy the colors.
- Glow-in-the-Dark: Incorporate phosphorescent powders into clear epoxy to create elements that glow after being exposed to light, adding a magical touch to coasters or accent pieces.
- Metallic Effects: Use metallic pigments or flakes to create a molten metal look within your inlay, offering a striking contrast to natural wood.
Achieving a Flawless Finish
The finishing process is where your epoxy resin inlay truly shines. It transforms a rough, sanded surface into a glossy, professional-grade masterpiece.
- Sanding Progression: This cannot be overstressed. After the initial leveling with coarse grit, move systematically through finer grits.
- Rough Sanding (80-120 grit): Level the epoxy with the wood.
- Medium Sanding (180-220 grit): Remove deeper scratches.
- Fine Sanding (320-400 grit): Prepare for higher grits.
- Very Fine Sanding (600-1000 grit): Begin to achieve a smooth, matte surface.
- Ultra-Fine Sanding (1500-3000 grit): For a glass-like finish, especially on the epoxy. Wet sanding at these stages can be highly effective.
- Polishing: For the epoxy, consider using a plastic polish or a specialized resin polishing compound with a buffing pad. This step removes micro-scratches and brings out the maximum shine and clarity of the resin.
- Wood Finish Application: Once the epoxy is polished, apply your chosen wood finish.
- Oils (e.g., Tung oil, Linseed oil, Rubio Monocoat): Penetrate the wood, enhancing its natural color and providing a matte to satin finish. They are generally easy to reapply and repair.
- Varnishes/Polyurethanes: Create a hard, durable, protective layer on the surface. They offer high resistance to moisture and wear, often resulting in a glossy finish. For kitchen items like magnetic knife holders and coasters, ensure the finish is food-safe.
- Waxes: Provide a softer, more natural feel and a low sheen. Less durable but easy to apply.
- Care and Maintenance: Educate yourself and your customers on how to care for epoxy resin and wood products. Avoid harsh chemicals, extreme temperatures, and direct sunlight, which can yellow or damage the resin over time.
Safety Best Practices
Working with epoxy resin involves chemicals that require respect. Always prioritize safety:
- Ventilation: Work in a well-ventilated area or use an exhaust fan to draw fumes away.
- Personal Protective Equipment (PPE):
- Respirator: A good quality respirator with organic vapor cartridges is essential to protect your lungs from fumes.
- Gloves: Nitrile gloves are recommended to prevent skin contact. Latex gloves may react with some resins.
- Eye Protection: Safety glasses or goggles are crucial to protect against splashes.
- Skin Protection: Wear long sleeves and pants to minimize skin exposure.
- Clean-up: Have isopropyl alcohol or acetone on hand for immediate clean-up of spills.
- Disposal: Dispose of epoxy waste (mixed or unmixed) according to local regulations.
By adhering to these advanced techniques and safety protocols, you can consistently produce high-quality “Epoxy Resin Inlay Woodworking: Magnetic Knife Holders, Coasters, and Accent Furniture Pieces” that are not only beautiful but also durable and safe. This level of craftsmanship ensures your creations stand out, whether for personal use, gifting, or commercial sale.
Conclusion
Epoxy resin inlay woodworking offers a captivating intersection of traditional craft and modern materials, opening up a world of creative possibilities for woodworkers in 2026. From the functional artistry of magnetic knife holders to the intricate beauty of coasters and the statement-making presence of accent furniture, this technique elevates ordinary wood into extraordinary pieces. The ability to infuse vibrant colors, unique patterns, and even encapsulated elements into wood allows for the creation of truly one-of-a-kind items that possess significant aesthetic and market value.
The journey of mastering “Epoxy Resin Inlay Woodworking: Magnetic Knife Holders, Coasters, and Accent Furniture Pieces” involves careful planning, precise execution with tools like routers, and meticulous attention to the finishing process. Safety remains paramount throughout, ensuring a healthy working environment. For those looking to expand their woodworking repertoire, produce unique gifts, or create profitable inventory for sale, embracing epoxy resin inlay is a rewarding endeavor. Start with simpler projects like coasters to build confidence, then progressively tackle more complex items like magnetic knife holders and bespoke accent furniture. The demand for bespoke, handcrafted items continues to grow, making this a skill set that will serve any artisan well.