
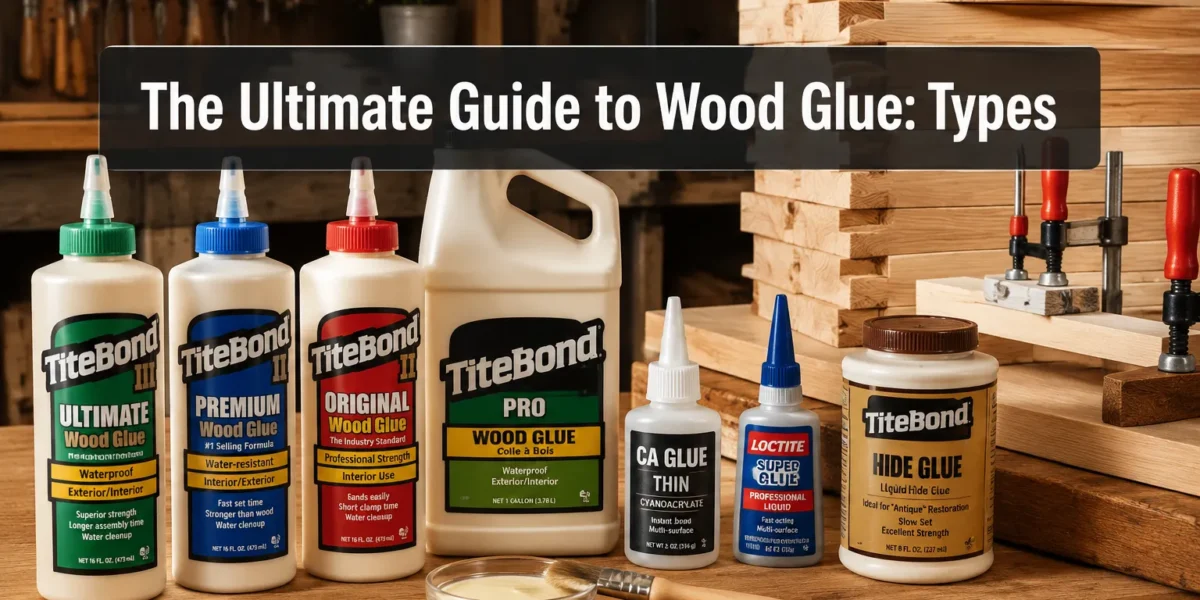
The structural integrity of a wooden masterpiece hinges not on the grand design alone, but on the microscopic bonds formed by its adhesive. In fact, a properly glued wood joint can be stronger than the wood itself, often failing in the wood fibers adjacent to the joint rather than at the glue line (USDA Forest Products Laboratory, 2010). This critical detail underscores the importance of mastering wood glue. This article, “The Ultimate Guide to Wood Glue: Types, Application, and Achieving Stronger Joints in Woodworking,” delves into the essential knowledge every woodworker, from novice to seasoned artisan, needs to create durable, long-lasting projects.
Key Takeaways
- Diverse Glue Types: Different woodworking projects demand specific glues; understanding the properties of PVA, polyurethane, epoxy, and hide glues is crucial for optimal results.
- Proper Surface Preparation: Achieving a strong joint begins with meticulously prepared, clean, and flat surfaces that allow the glue to penetrate and bond effectively.
- Optimal Application: Applying the correct amount of glue and ensuring even coverage prevents weak spots and ensures maximum bonding strength.
- Effective Clamping: Consistent and appropriate clamping pressure is vital during the curing process, holding pieces together while the glue forms its permanent bond.
- Adequate Curing Time: Rushing the curing process compromises joint strength; always adhere to the manufacturer’s recommended drying and cure times.
Understanding the Types of Wood Glue: A Comprehensive Overview
Choosing the right adhesive is the first, and arguably most important, step in creating robust woodworking joints. Each type of wood glue offers unique properties, making it suitable for different applications, environmental conditions, and desired aesthetics. Understanding these distinctions is fundamental to achieving stronger joints in woodworking.
Polyvinyl Acetate (PVA) Glues
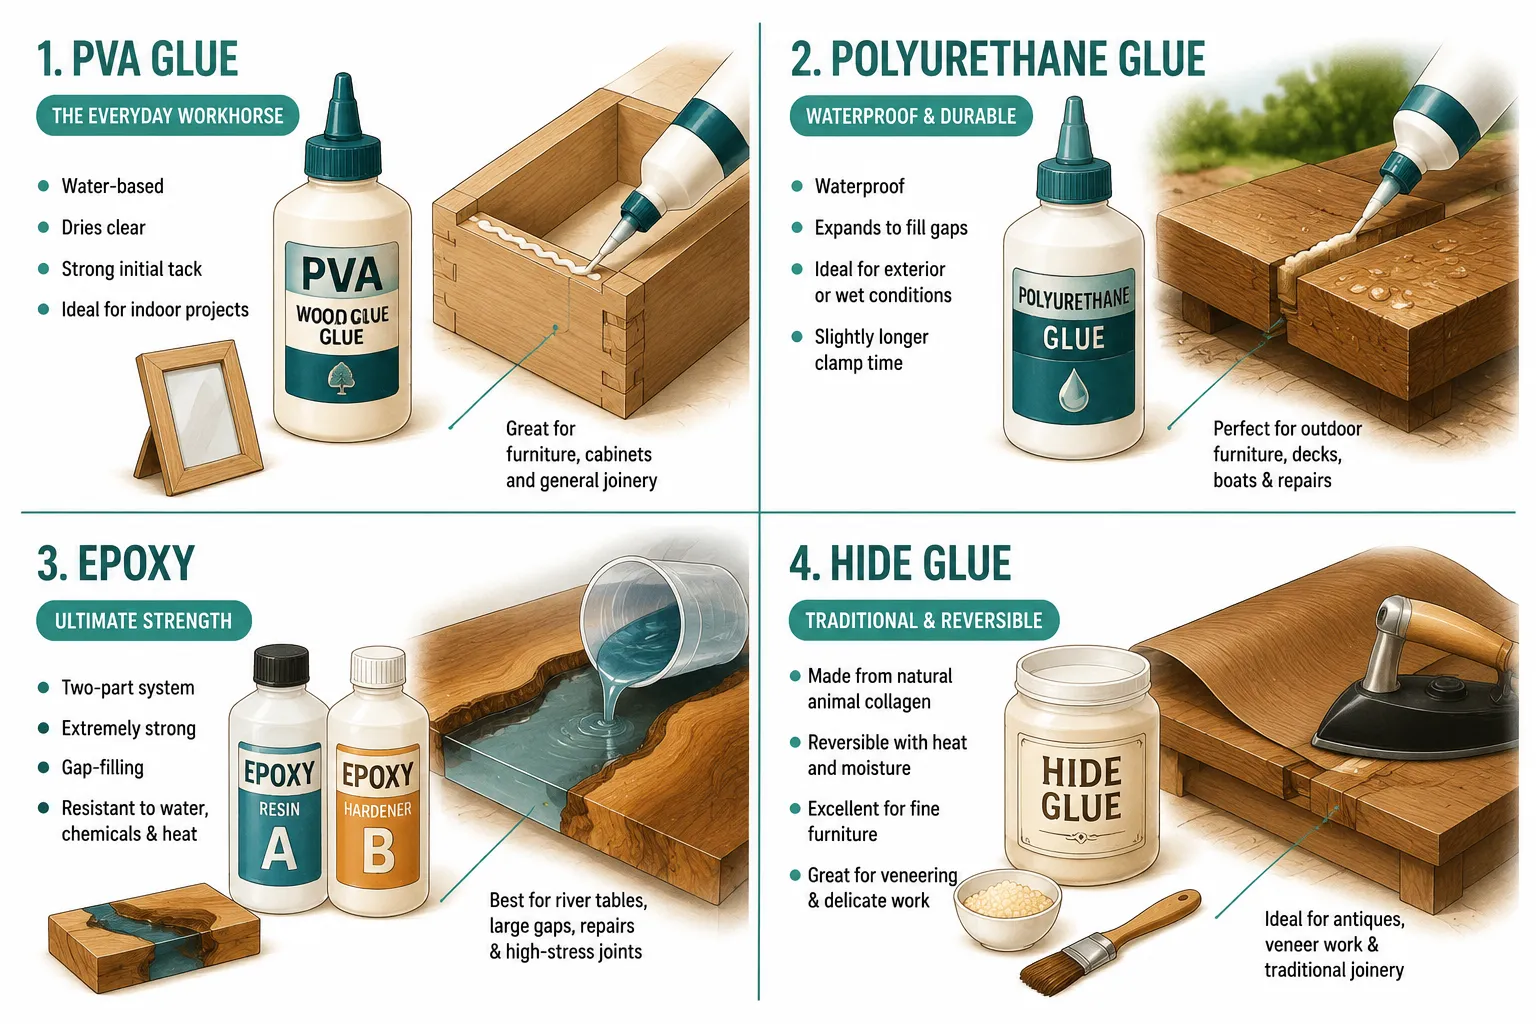
PVA glues are the most common type used in woodworking shops today, favored for their ease of use, non-toxicity, and strong bonds. They are water-based and cure as the water evaporates, drawing the wood fibers together.
- Yellow Wood Glue (Aliphatic Resin Glue): This is the everyday workhorse for interior projects. It offers good open time, sands easily, and paint/stain generally adheres well. It’s often referred to as “carpenter’s glue.” Examples include Titebond Original.
- Cross-linking PVA (e.g., Titebond II, Titebond III): These advanced PVA glues incorporate chemicals that react to form stronger, more water-resistant bonds.
- Titebond II: Offers increased water resistance, suitable for exterior projects where direct water exposure is minimal (e.g., outdoor furniture under a covered patio).
- Titebond III: Provides maximum water resistance, making it ideal for outdoor projects, cutting boards, and marine applications. It also has a longer open time and cures at lower temperatures than Titebond II.
| Feature | Yellow Wood Glue (PVA) | Cross-linking PVA (Titebond III) |
|---|---|---|
| Water Resistance | Low | High (Waterproof) |
| Open Time | Moderate | Long |
| Cure Time | ~24 hours | ~24 hours |
| Toxicity (Cured) | Non-toxic | Non-toxic |
| Flexibility | Moderate | Moderate |
| Best Use | Interior furniture | Outdoor furniture, cutting boards |
Polyurethane Glues
Polyurethane glues react with moisture in the air and wood to cure, forming incredibly strong and waterproof bonds. They often foam slightly as they cure, which can help fill minor gaps but also requires careful cleanup.
- Key Characteristics:
- Waterproof: Excellent for marine and outdoor applications.
- Bonds various materials: Adheres well to wood, metal, ceramics, stone, and some plastics.
- Requires moisture: A slightly damp surface can accelerate curing and improve bond strength.
- Expands slightly: Fills small voids, but excessive foaming can push joints apart if not clamped properly.
- Application: Requires careful handling as it can stain skin and clothing. Often has a shorter open time than PVA glues.
- Considerations: Can be brittle once cured and doesn’t sand as cleanly as PVA. Some brands are amber-colored, which might be visible on light woods.
Epoxy Glues
Epoxy is a two-part adhesive consisting of a resin and a hardener that are mixed just before application. This chemical reaction creates an extremely strong, rigid, and waterproof bond that can also fill large gaps.
- Key Characteristics:
- Superior gap-filling: Ideal for imperfect joints or repairing damaged wood.
- High strength: Creates incredibly durable and rigid bonds.
- Waterproof and chemical resistant: Excellent for structural applications, boat building, and areas exposed to harsh elements.
- Customizable: Different formulations offer varying open times, viscosities, and flexibility.
- Application: Requires precise mixing of parts according to manufacturer instructions. Can have a long cure time depending on the formulation.
- Considerations: More expensive than other glues. Can be messy to work with and requires good ventilation. Often used for specialized applications like Japanese wood joinery where gap-filling is critical.
Hide Glues
Traditional hide glues, made from animal collagen, have been used for centuries and are still valued by fine woodworkers and instrument makers. They come in two primary forms: liquid and granular (which requires heating and mixing).
- Liquid Hide Glue: Similar to PVA in application but offers a longer open time and the unique property of being reversible with heat and moisture.
- Granular Hide Glue (Hot Hide Glue): Prepared by mixing granules with water and heating them in a glue pot. It offers an extremely strong, rigid bond with zero creep (no movement over time), making it favored for musical instruments and fine furniture. Its reversibility is a key benefit for repairs and future disassembly.
- Key Characteristics:
- Reversible: Bonds can be undone with heat and moisture, invaluable for repairs or disassembling joints.
- No creep: Bonds remain rigid over time, essential for precise joinery.
- Hard and brittle: Sands very well and accepts finishes beautifully.
- Long open time (liquid) / Short open time (hot): Hot hide glue gels quickly.
- Considerations: Liquid hide glue has a shorter shelf life once opened. Hot hide glue requires special equipment (glue pot) and careful temperature control.
Mastering Application Techniques for Stronger Wood Joints
The effectiveness of any wood glue is profoundly impacted by how it is applied. Even the strongest adhesive will fail if the surfaces are poorly prepared or the application is rushed. Achieving stronger joints in woodworking requires attention to detail at every step.
Surface Preparation: The Foundation of Strength
Before applying any glue, the wood surfaces must be meticulously prepared.
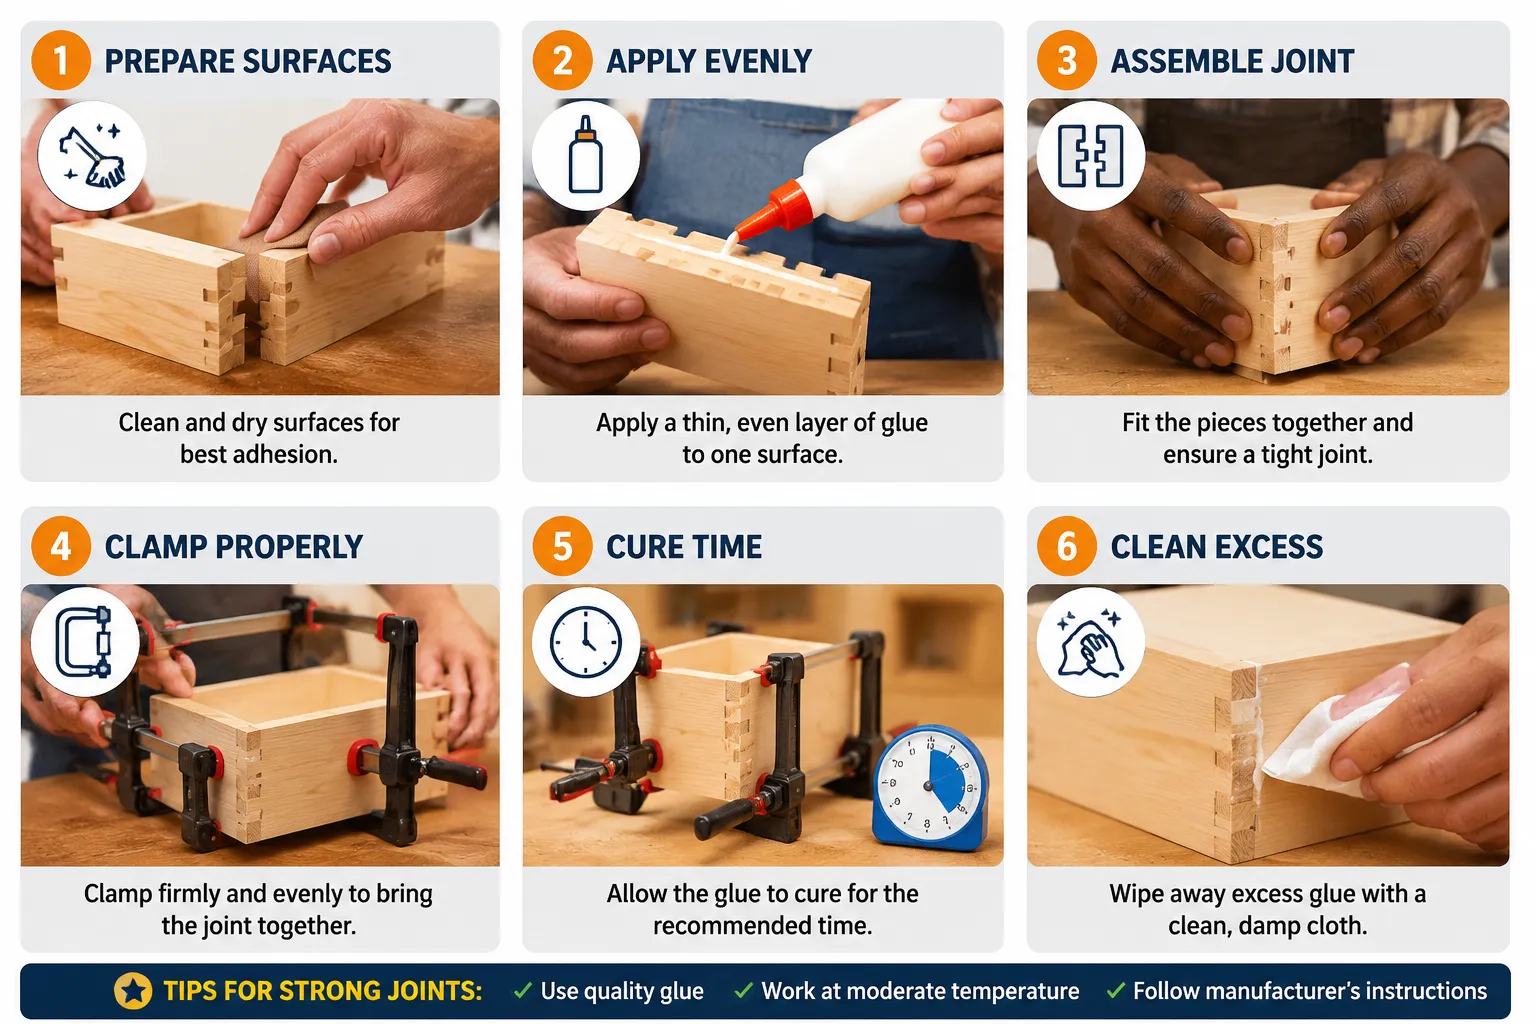
- Cleanliness: Ensure surfaces are free of dust, grease, wax, old finishes, or any other contaminants. A clean, fresh wood surface is paramount.
- Flatness and Fit: Joints should fit together perfectly without gaps. Gaps reduce the effective bonding area and force the glue to act as a filler rather than an adhesive, significantly weakening the joint. Use properly tuned tools to achieve flat, square, and tight-fitting joints. For tips on maintaining your tools, refer to our guide on essential hand tools.
- Moisture Content: Wood should have a stable moisture content, ideally between 6-10% for most interior projects. Excessively wet or dry wood can lead to joint failure as the wood shrinks or expands after gluing.
Applying the Glue: Just Right, Not Too Much or Too Little
The goal is to achieve full coverage of both mating surfaces with a thin, even film of glue.
- Spreaders and Brushes: For general panel glue-ups, specialized glue rollers or spreaders ensure even coverage. For smaller, more intricate joints like mortise and tenons or dovetails, a small brush or a stick can be used to apply glue precisely.
- “Wetting Out” the Fibers: Ensure enough glue is applied to “wet out” both surfaces. This allows the glue to penetrate the wood fibers, creating a mechanical bond in addition to the adhesive bond.
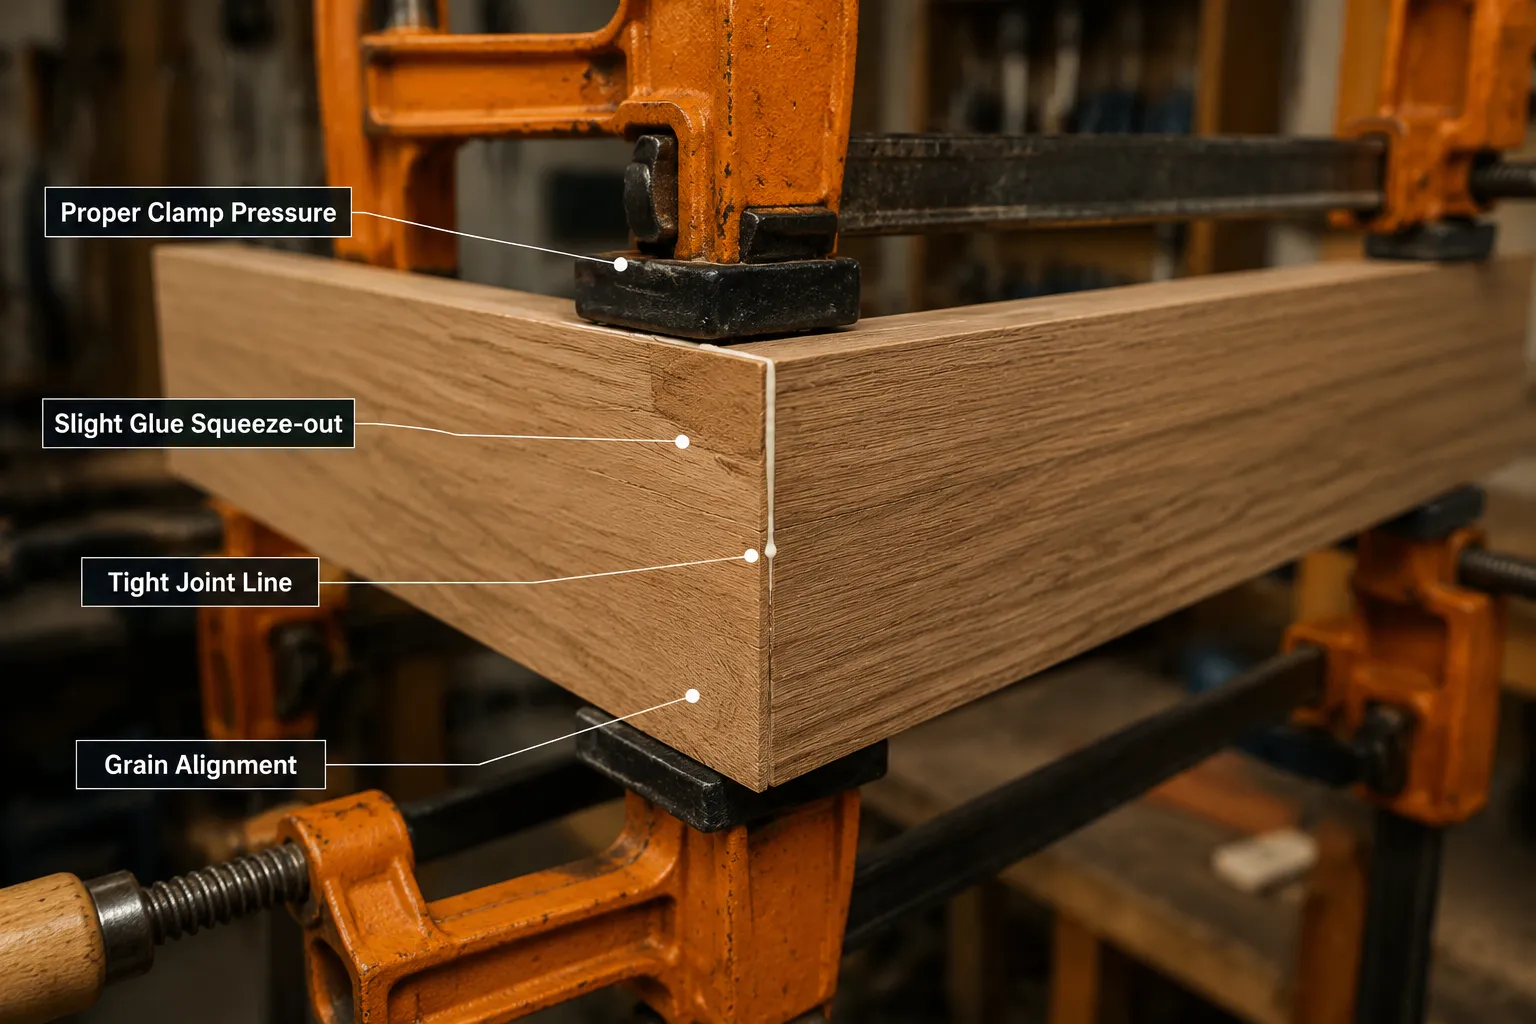
- Squeeze-Out: A slight, even squeeze-out around the entire joint indicates proper glue coverage and sufficient clamping pressure. However, excessive squeeze-out means too much glue was applied, leading to more cleanup.
Clamping Strategy: Pressure and Patience
Clamping is arguably the most critical step after glue application. It holds the pieces together, forcing out excess glue and allowing the remaining film to cure under optimal pressure.
- Appropriate Pressure: Apply firm, even pressure. The exact amount varies by wood species and joint type, but the goal is to bring the surfaces into intimate contact and achieve slight squeeze-out. Over-clamping can starve the joint of glue, while under-clamping results in weak bonds.
- Even Distribution: Use enough clamps to distribute pressure evenly across the entire length of the joint. For wide panels, clamps should be alternated above and below the panel to prevent bowing.
- Cauls: Using cauls (flat, sacrificial pieces of wood) between the clamps and the workpiece can help distribute pressure more evenly and prevent marring the wood.
- Open Time vs. Clamp Time:
- Open Time: The maximum time the glue can be exposed to air before the joint is assembled and clamped. Exceeding this time results in a weaker bond.
- Clamp Time: The minimum time the glue needs to remain under pressure before clamps can be removed. This is typically much shorter than the full cure time.
- Full Cure Time: This is the time required for the glue to reach its maximum strength. Always wait for the full cure time before subjecting the joint to stress, sanding, or finishing. This can range from 24 hours to several days depending on the glue type, temperature, and humidity.
Achieving Stronger Joints in Woodworking: Advanced Tips and Troubleshooting
Beyond selecting the right glue and applying it correctly, several advanced techniques and considerations can significantly enhance joint strength and longevity in your woodworking projects. This section provides an “ultimate guide to wood glue” best practices for maximizing durability.
Optimizing Wood Preparation for Maximum Bond
While basic cleaning is essential, deeper preparation can elevate joint strength.
- Freshly Milled Surfaces: Glue bonds best to freshly planed or jointed surfaces. Within a few hours of milling, the wood pores are most open and receptive to glue penetration. If wood has been sitting for days or weeks, a light sanding or quick pass through a jointer/planer can reactivate the surface.
- Grain Direction: When joining boards edge-to-edge for a panel, alternate the end grain orientation (growth rings facing up, then down). This helps balance internal stresses and reduces warping, leading to more stable glue lines.
- Joint Reinforcement: Incorporating mechanical fasteners or joinery techniques in addition to glue can dramatically increase strength. Examples include biscuits, dominoes, dowels, or traditional mortise and tenon joints. While glue is often stronger than wood, these mechanical elements provide shear strength and alignment.
Environmental Factors and Curing
The ambient conditions in your workshop play a significant role in glue performance.
- Temperature: Most wood glues prefer to cure at room temperature (around 70°F or 21°C). Colder temperatures significantly extend cure times and can weaken the bond. Avoid gluing in extremely cold environments.
- Humidity: High humidity can extend drying times for water-based glues. For polyurethane glues, a little moisture is beneficial, but excessive humidity isn’t ideal. Always follow manufacturer guidelines.
- Airflow: Good airflow helps water-based glues dry by carrying away evaporated moisture. However, excessive airflow directly on the joint might cause the glue to skin over too quickly, reducing penetration.
Dealing with Glue Squeeze-Out
Managing squeeze-out is crucial for a clean finish and strong joint.
- Immediate Wipe-off (PVA): For most PVA glues, wiping away wet squeeze-out with a damp cloth immediately after clamping is effective. Be careful not to dilute the glue inside the joint.
- Scraping After Gelling (PVA/Polyurethane): Allow PVA glue to partially dry (gel) for 30-60 minutes, then scrape it off with a chisel or scraper. This prevents the glue from soaking deeper into the surrounding wood, which can create “ghosting” under finishes. For polyurethane, scrape off before it fully hardens.
- Acetone/Mineral Spirits (Epoxy/Polyurethane): For epoxy and polyurethane, cleanup often requires solvents like acetone or mineral spirits while the glue is still wet. Always test on a scrap piece first to ensure it doesn’t damage the wood or finish.
- Consideration for Finishing: Excess glue, even if scraped, can seal wood pores and prevent stains or finishes from penetrating evenly, leading to blotchy results. Careful cleanup is essential, especially before budget-friendly wood finishing techniques.
Troubleshooting Weak Joints
If joints fail, consider these common culprits:
- Insufficient Clamp Pressure: Not enough pressure allows gaps to form or prevents full glue contact.
- Too Much or Too Little Glue: Starved joints (too little glue) lack adhesive, while over-glued joints can have weak spots where the glue isn’t fully integrated with the wood.
- Dirty or Poorly Milled Surfaces: Contaminants or uneven surfaces prevent proper adhesion.
- Incorrect Open/Clamp/Cure Times: Rushing any stage will compromise the bond.
- Environmental Extremes: Gluing in very cold or very hot conditions, or in excessively humid or dry air.
- Incorrect Glue for Application: Using interior glue for an outdoor project, or a non-gap-filling glue for a gappy joint.
By understanding these nuances and integrating them into your workflow, you can consistently achieve truly stronger joints in woodworking, enhancing the durability and beauty of every project. Whether you’re building a DIY woodworking bench or a delicate piece of furniture, the principles of proper gluing remain paramount.
Conclusion
Mastering the art of wood gluing is a cornerstone of successful woodworking. “The Ultimate Guide to Wood Glue: Types, Application, and Achieving Stronger Joints in Woodworking” has provided a comprehensive overview of the various adhesive options, detailed application techniques, and crucial tips for ensuring lasting durability. From the everyday reliability of PVA glues to the waterproof resilience of polyurethane and epoxy, and the reversible finesse of hide glues, each type serves a specific purpose. The strength of your joints ultimately depends on diligent surface preparation, precise glue application, adequate clamping pressure, and adherence to proper curing times.
By integrating these practices into your woodworking routine in 2026, you will not only create more robust and stable projects but also elevate the overall quality and longevity of your craft. Always choose the right glue for the job, meticulously prepare your surfaces, apply glue judiciously, clamp with care, and allow ample time for curing. Your dedication to these fundamental principles will be evident in the unwavering strength and beauty of your finished pieces.
References
- Forest Products Laboratory. (2010). Wood Handbook: Wood as an Engineering Material. General Technical Report FPL-GTR-190. U.S. Department of Agriculture, Forest Service, Forest Products Laboratory.
Wood glue, woodworking joints, PVA glue, polyurethane glue, epoxy glue, hide glue, clamping wood, wood bonding, joint strength, glue application