

Walk into any high-end furniture showroom and you’ll often encounter pieces whose allure isn’t just in their craftsmanship, but in the exquisite way their wood has been finished. What many don’t realize is that achieving such professional-grade results doesn’t always demand expensive, complex chemical concoctions. In 2026, the pursuit of Budget-Friendly Wood Finishing: Achieving Professional Results with Oils, Waxes, and Shellac has gained significant traction among woodworkers, hobbyists, and DIY enthusiasts alike. These traditional, natural finishes offer a compelling blend of cost-effectiveness, ease of application, and breathtaking aesthetic appeal, making them perfect for bringing out the inherent beauty of your woodworking projects without breaking the bank.
This article delves into the world of oils, waxes, and shellac, demystifying their application and showcasing how these accessible materials can yield finishes that rival, and often surpass, their synthetic counterparts. We’ll explore their unique characteristics, application techniques, and maintenance tips, equipping you with the knowledge to transform ordinary wood into extraordinary pieces.

Key Takeaways
- Cost-Effective Alternatives: Oils, waxes, and shellac provide excellent, high-quality finishes at a fraction of the cost of many synthetic varnishes and polyurethanes.
- Natural Beauty Enhancement: These finishes penetrate the wood or form thin, natural layers, highlighting the wood’s grain and color without creating a plastic-like film.
- Ease of Application & Repair: Generally simpler to apply than film finishes, they are also easier to repair if scratched or damaged, making them forgiving for beginners.
- Eco-Friendly Options: Many oil, wax, and shellac products are derived from natural sources, offering more environmentally conscious finishing choices.
- Versatile Applications: Suitable for a wide range of projects, from furniture and carvings to cutting boards and decorative items, providing durable and beautiful results.
Understanding the Fundamentals of Budget-Friendly Wood Finishing: Oils, Waxes, and Shellac
When considering Budget-Friendly Wood Finishing: Achieving Professional Results with Oils, Waxes, and Shellac, it’s crucial to understand what makes each of these categories unique. They represent a departure from modern film-building finishes like polyurethane, instead focusing on enhancing the wood’s natural properties.
The Allure of Oils: Penetrating Protection and Richness
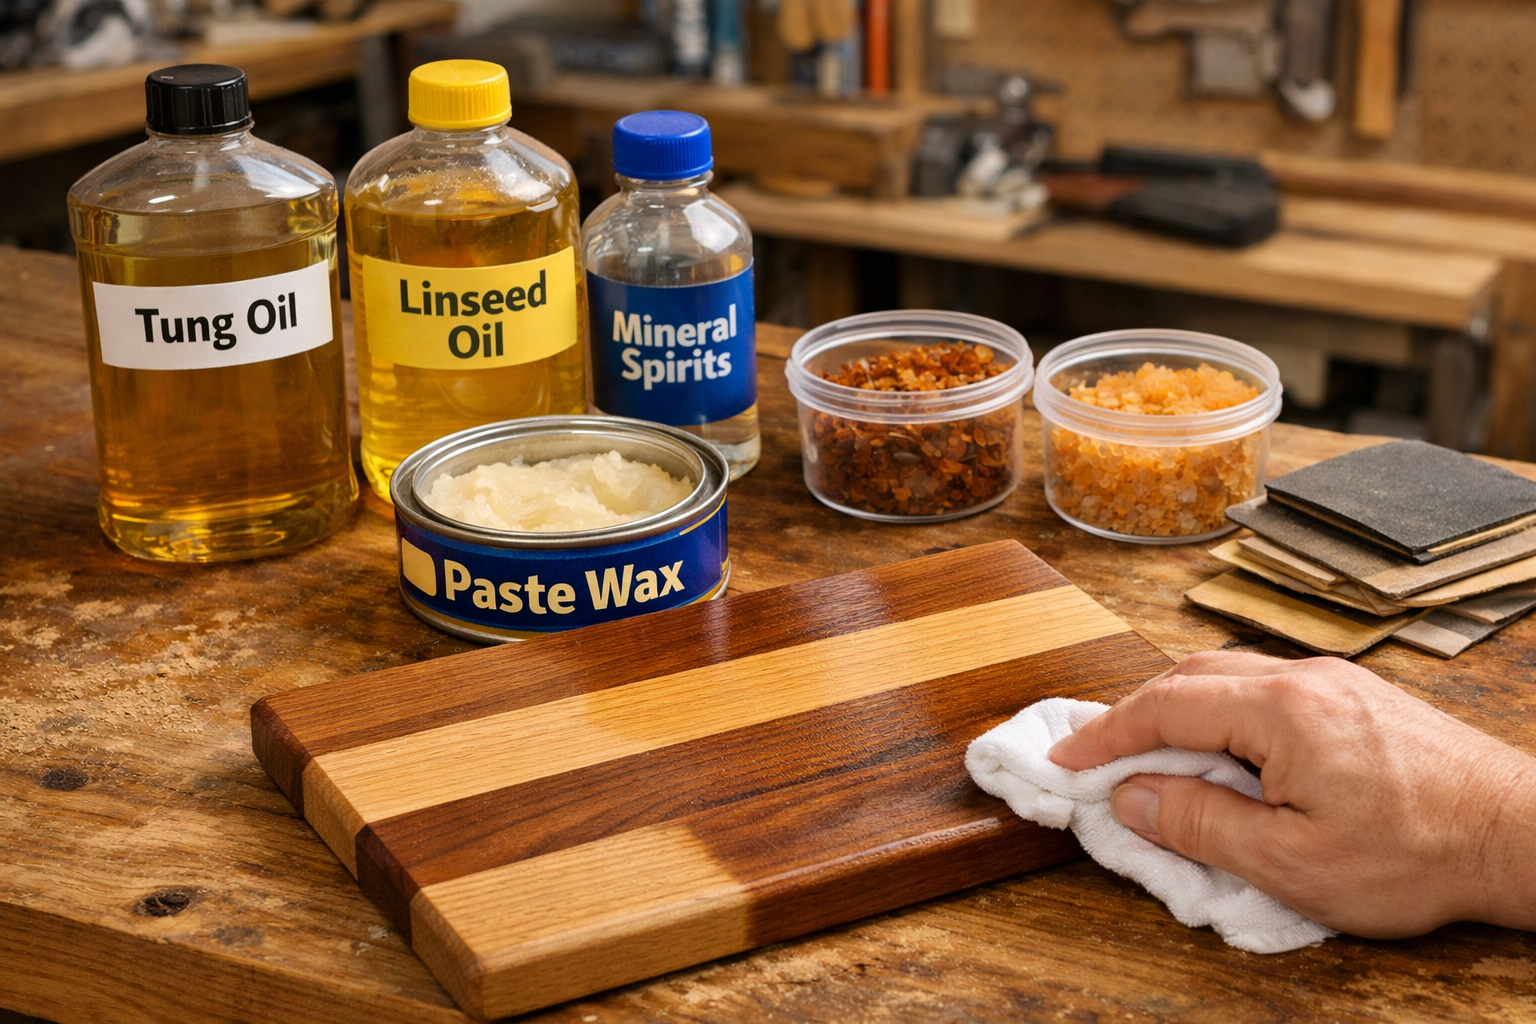
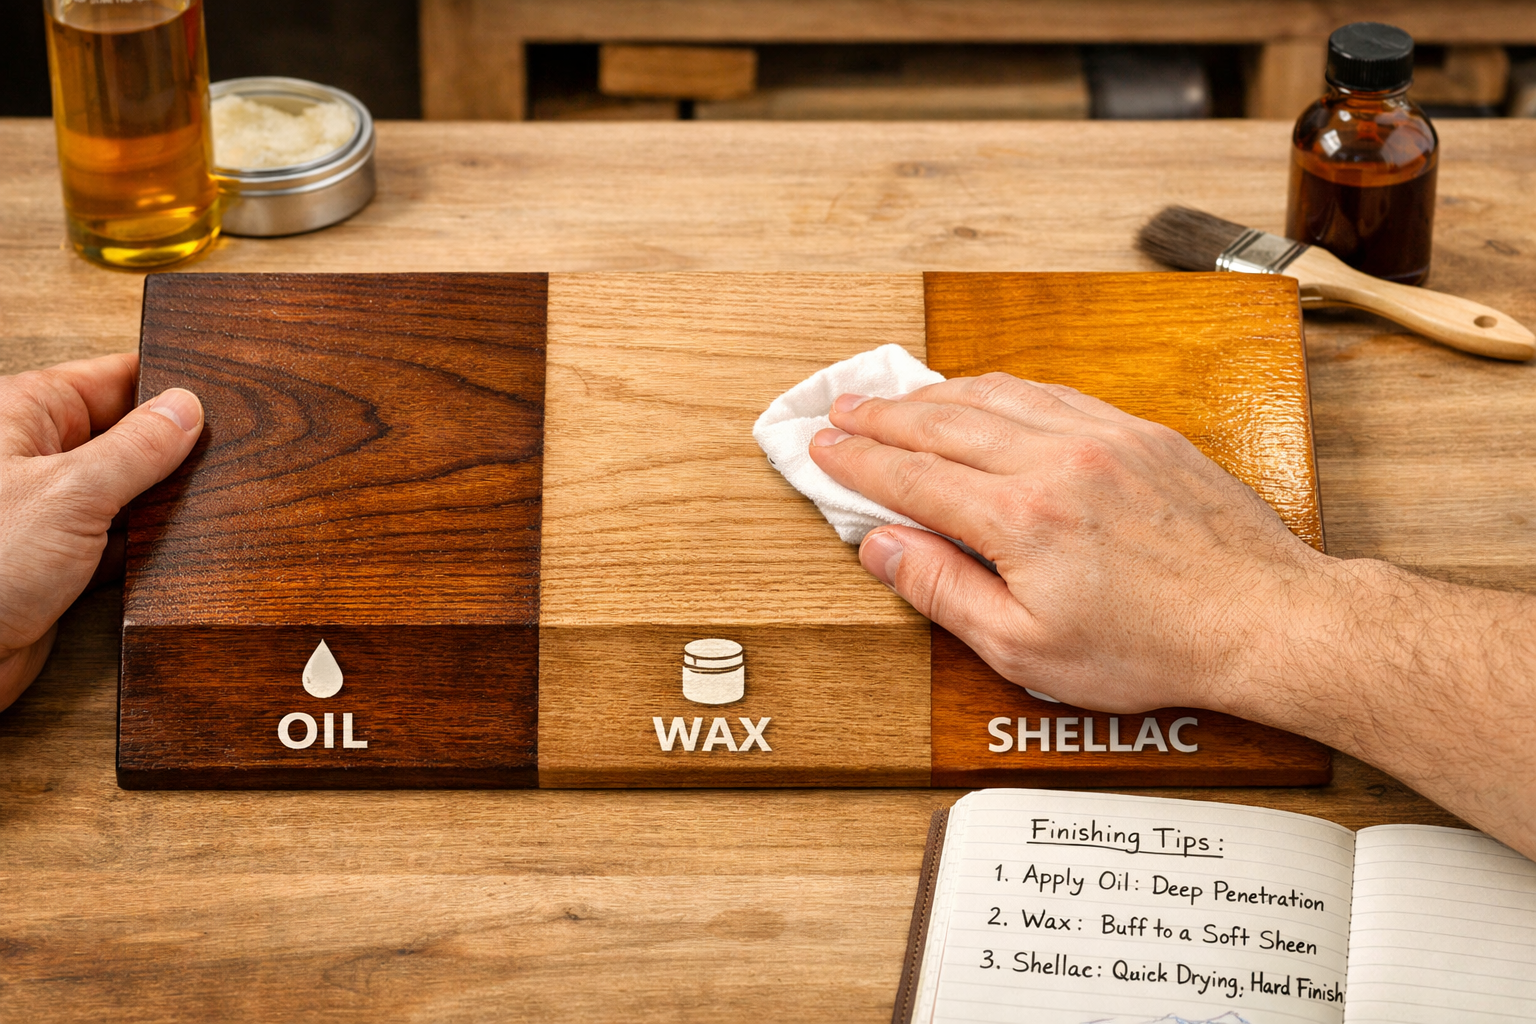
Oil finishes, such as tung oil, linseed oil (flaxseed oil), and various “Danish” or “teak” oils, are celebrated for their ability to penetrate deep into the wood fibers. This penetration offers protection from within, rather than forming a surface layer. The result is a finish that feels natural, allowing you to touch the wood itself, not a plastic coating. Oils excel at bringing out the depth and richness of the wood grain, often imparting a warm, subtle sheen.
Types of Oils and Their Characteristics:
- Linseed Oil (Boiled Linseed Oil – BLO): A classic choice, BLO is linseed oil that has been processed to dry faster. It provides a warm, slightly amber tone and good protection. Raw linseed oil dries very slowly and is generally not recommended for furniture finishes.
- Tung Oil: Known for its excellent water resistance and durability once cured. Tung oil is often preferred for kitchen items like wooden fruit bowls or cutting boards because it’s food-safe when fully cured. It provides a clearer, less amber finish than BLO.
- Danish Oil/Teak Oil: These are often proprietary blends of oil (linseed or tung), varnish, and thinner. They offer the ease of oil application with some of the film-building properties of varnish, resulting in a more protective and slightly more durable finish than pure oil.
Application Tips for Oils:
- Preparation is Key: Always start with finely sanded wood. For most projects aiming for a professional look, sanding up to 220 or 320 grit is recommended. Ensure the surface is free of dust.
- Generous Application: Apply the oil liberally with a cloth or brush, allowing it to soak into the wood for 15-30 minutes.
- Wipe Off Excess: Crucially, wipe off all excess oil thoroughly with a clean, lint-free cloth. Any oil left on the surface that doesn’t penetrate will cure as a gummy, sticky film.
- Multiple Coats: Apply multiple thin coats, allowing each coat to dry completely (as per product instructions) before applying the next. Lightly sand with very fine sandpaper (400-600 grit) or fine steel wool between coats if desired, to remove any raised grain.
- Curing Time: Oil finishes require significant time to fully cure, sometimes weeks. Be gentle with the piece during this period.
Safety Note: Rags soaked in oil can spontaneously combust. Always lay them flat to dry completely outdoors or submerge them in water before discarding.
The Elegance of Waxes: Subtle Sheen and Tactile Smoothness
Waxes, used either alone or as a topcoat over oil or shellac, provide a beautiful, low-luster sheen and a wonderfully smooth, tactile surface. They offer decent protection against moisture and fingerprints but are not as durable or water-resistant as oils or shellac against spills or heavy wear. Their beauty lies in their ability to enhance the natural feel of the wood, making them ideal for decorative items, fine furniture, or pieces that won’t see heavy abuse.
Common Types of Waxes:
- Beeswax: A natural wax, often blended with other waxes or oils. It provides a soft, warm luster and is food-safe, making it excellent for items like wooden candle holders or children’s toys.
- Carnauba Wax: Derived from palm leaves, carnauba is much harder than beeswax and imparts a higher sheen and better durability. It’s often found blended in paste waxes.
- Paraffin Wax: Less common for fine woodworking finishes due to its softer nature and lower melting point, but sometimes used in blends.
- Paste Wax: The most common form for woodworking, paste wax is typically a blend of waxes (beeswax, carnauba) and solvents, making it easy to apply.
Applying Wax for a Professional Look:
- Clean Surface: Ensure the wood is clean, dry, and free of dust. If applying over another finish, ensure that finish is fully cured.
- Thin, Even Coat: Apply a very thin, even coat of paste wax using a clean, lint-free cloth or a waxing brush. Work in small sections, following the grain. Less is more with wax.
- Haze and Buff: Allow the wax to “haze over” for 5-15 minutes (this allows the solvent to evaporate and the wax to harden slightly).
- Buff to a Sheen: Using a fresh, clean, lint-free cloth (a microfiber cloth works wonderfully), buff the waxed surface vigorously until you achieve the desired sheen. Turn the cloth frequently to use a clean section.
- Optional Second Coat: For added depth and protection, a second thin coat can be applied after the first has been buffed.
The Versatility of Shellac: Fast-Drying and Repairable
Shellac is a truly remarkable and underappreciated natural finish, made from the secretions of the lac bug dissolved in denatured alcohol. It’s fast-drying, non-toxic when dry, and offers excellent adhesion to almost any surface. Shellac can be used as a standalone finish, a sealer, or a barrier coat. It imparts a beautiful, warm, amber glow (though clear “blonde” shellac is also available) and is famously easy to repair.
Key Benefits of Shellac:
- Fast Drying: Dries to the touch in minutes, allowing multiple coats in a single day.
- Non-Toxic (when dry): Food-safe and often used for interiors of cabinets or children’s toys like DIY wooden toys and games.
- Excellent Sealer: Blocks odors, prevents bleed-through from knots, and provides a barrier coat between incompatible finishes.
- Repairable: Unlike many finishes, new coats of shellac melt into old ones, making repairs and touch-ups virtually invisible.
- Beautiful Aesthetic: Provides a deep, lustrous finish that enhances wood grain.
Application Techniques for Shellac:
- Preparation: Sand wood to at least 220 grit. Ensure the surface is clean and dry.
- Mixing (if using flakes): Shellac flakes are dissolved in denatured alcohol. The “cut” (ratio of flakes to alcohol) determines thickness. A 2-pound cut (2 lbs of flakes per gallon of alcohol) is common.
- Application Method:
- Brush: Use a good quality natural bristle brush. Apply thin, even coats, working quickly as shellac dries very fast. Avoid over-brushing.
- Pad (French Polish): For the most exquisite, traditional finish, shellac can be applied with a “fad” (a small pad of cloth) using the French polishing technique. This builds up many microscopic layers for incredible depth.
- Spray: Shellac can also be sprayed, thinned appropriately, for very smooth, even coats.
- Multiple Thin Coats: Apply 3-6 (or more) thin coats. Allow 30-60 minutes between coats. Lightly scuff sand with 320-400 grit sandpaper or 0000 steel wool between coats to ensure adhesion and smooth out any imperfections.
- Final Curing: While dry to the touch quickly, shellac takes a few days to fully harden.
Why Choose These Budget-Friendly Wood Finishing Options?
The choice of oils, waxes, and shellac for your projects offers numerous advantages, particularly in 2026 where sustainability and cost-effectiveness are increasingly important.
- Cost Efficiency: Purchasing raw oils, wax blocks, or shellac flakes and denatured alcohol is typically far less expensive than buying specialized varnishes or urethanes, especially in larger quantities.
- Environmental Impact: Many of these products are natural or naturally derived, reducing the exposure to harsh chemicals and volatile organic compounds (VOCs) during application and curing. This aligns well with a growing interest in sustainable wood sourcing for the modern woodworker.
- Ease of Repair: A scratch or ding on an oil or wax finish can often be blended out with more of the same finish. Shellac can be re-amalgamated with alcohol. This is a stark contrast to film finishes which often require sanding back to bare wood for a perfect repair.
- Aesthetic Appeal: These finishes allow the wood’s natural beauty to shine through, offering a classic, timeless look that many find superior to the plastic-like appearance of some modern finishes. Consider how they can enhance projects like a DIY home office ergonomic monitor stand or decorative items.
It’s important to remember that while these finishes are budget-friendly, the “professional results” come from diligent surface preparation and careful, patient application.

Advanced Techniques and Combining Finishes for Enhanced Durability and Beauty
Mastering the basics of oils, waxes, and shellac is the first step. To truly achieve professional results with Budget-Friendly Wood Finishing: Achieving Professional Results with Oils, Waxes, and Shellac, consider advanced techniques and smart combinations that leverage the strengths of each material.
Layering Finishes: A Strategic Approach
Combining these finishes can often yield superior results, providing the aesthetic benefits of one with the protective qualities of another. This is particularly useful for projects that require both beauty and durability.
- Oil Under Shellac: Applying several coats of an oil finish first, allowing it to fully cure, then topping with several thin coats of shellac, is a fantastic combination. The oil enhances the wood’s natural grain and depth, while the shellac provides a harder, more protective, and easily repairable surface. This is a classic approach for fine furniture.
- Shellac as a Sealer/Barrier Coat: Shellac’s excellent adhesion and barrier properties make it ideal for sealing tricky woods or as an intermediate layer. For instance, if you’re working with reclaimed wood that might have contaminants or residues, a coat of shellac can seal it before applying an oil or wax. It also prevents problems when mixing stain and polyurethane by providing a consistent base.
- Oil/Shellac with a Wax Topcoat: A final layer of paste wax over a cured oil or shellac finish adds a silky smooth feel and a subtle, attractive sheen. This topcoat provides an extra layer of protection against minor scratches and fingerprints, making the piece a delight to touch. Reapplication of wax is simple and keeps the finish looking fresh.
Table: Finish Combination Guide
| Base Finish | Top Finish | Benefits | Ideal Projects |
|---|---|---|---|
| Oil | Shellac | Deep grain enhancement + Hard, repairable film | Fine furniture, indoor tables, decorative boxes |
| Oil | Wax | Deep grain enhancement + Smooth, natural feel | Carvings, wooden jewelry organizers, accent pieces |
| Shellac | Wax | Fast drying, durable shellac + Silky, protective wax | Cabinets, DIY wooden birdhouses, picture frames |
| Shellac | (as Sealer) | Blocks bleed-through, evens absorption, quick dry | Under any film finish (polyurethane, lacquer), knotty woods |
Achieving a Mirror-Smooth Surface: Sanding and Rubbing Out
A truly professional finish isn’t just about the coating; it’s about the surface beneath and how the finish interacts with it.
- Progressive Sanding: Start with coarser grits (80-120) for shaping and flattening, then systematically move through finer grits (150, 180, 220, 320, 400). For an exceptionally smooth surface, you might even go up to 600 or 800 grit before applying your first finish coat. Always sand with the grain. Proper sanding preparation is just as important for natural finishes as it is for maple wood finishing techniques.
- Water Popping (for oils/shellac): After sanding to 220 or 320 grit, lightly wipe the wood surface with a damp (not wet) cloth. This raises the grain. Once dry, lightly sand again with your final grit (e.g., 320 or 400). This helps prevent the first coat of finish from raising the grain and causing a rough texture.
- Rubbing Out (for shellac): Once shellac is fully cured (a few days to a week), you can achieve an even smoother, more refined sheen by “rubbing out” the finish. Use very fine abrasives like 0000 steel wool or fine abrasive pads with a lubricant (mineral oil or water with a drop of soap). Work gently and evenly, then clean the surface and buff with a soft cloth. This removes tiny imperfections and can adjust the sheen from gloss to satin.
Maintenance and Repair: Keeping Your Finishes Pristine
One of the greatest advantages of natural, budget-friendly finishes is their ease of maintenance and repair.
- Regular Cleaning: For oiled or waxed surfaces, a damp cloth is usually sufficient for cleaning. Avoid harsh chemical cleaners.
- Re-oiling: Oiled finishes benefit from occasional re-application, especially on high-use items like tabletops. Every few months to a year, simply wipe on a thin coat of oil, let it penetrate, and wipe off the excess. This revitalizes the finish and restores protection.
- Re-waxing: Wax finishes wear down over time. When the sheen dulls or water no longer beads, simply clean the surface and reapply a thin coat of paste wax, then buff. This can be done every few months as needed.
- Shellac Repairs: Scratches or minor damage to shellac can often be repaired by simply wiping the area with a small amount of denatured alcohol. The alcohol will re-dissolve the existing shellac, allowing it to flow back together and level out. Once dry, you can apply a fresh thin coat of shellac to the repaired area. For deeper damage, light sanding and multiple thin coats may be needed. This ease of repair makes shellac an excellent choice for heirloom pieces or DIY Smart Home Integration with Custom Woodwork where components might need periodic maintenance.
By understanding these advanced techniques and embracing the reparability of these finishes, woodworkers can confidently achieve durable, beautiful, and professional results on any budget.
Maximizing Value: Sourcing Materials and Budget-Wise Practices

Achieving Budget-Friendly Wood Finishing: Achieving Professional Results with Oils, Waxes, and Shellac isn’t just about the types of finishes; it’s also about smart sourcing and efficient practices. In 2026, there are more avenues than ever to acquire high-quality finishing materials without overspending.
Smart Sourcing for Cost-Effective Materials
- Bulk Purchase for Oils: For common oils like Boiled Linseed Oil or Tung Oil, buying in larger containers (e.g., gallon sizes) often provides a significant cost saving per ounce compared to smaller quarts or pints. If you plan to do a lot of finishing, this is a wise investment.
- Shellac Flakes vs. Pre-Mixed: Buying shellac in flake form and mixing it yourself with denatured alcohol is considerably cheaper than purchasing pre-mixed liquid shellac. Flakes also have an indefinite shelf life, whereas pre-mixed shellac starts to degrade within a few months of opening. Denatured alcohol can be purchased economically at hardware stores.
- Beeswax Direct: For pure beeswax, consider sourcing directly from local beekeepers or craft suppliers. This can often be cheaper than specialized woodworking stores and ensures a pure, natural product. Many paste waxes also use readily available ingredients, making them excellent choices for reclaimed wood finishing techniques.
- DIY Wax Blends: You can create your own paste wax by melting beeswax and/or carnauba wax and mixing with mineral oil or turpentine. This offers complete control over the ingredients and can be very cost-effective.
- Sanding Supplies: Look for bulk packs of sandpaper, especially in the finer grits (220-400) that are heavily used for finishing. Consider using sanding sponges or abrasive pads which can be rinsed and reused multiple times. For fine finishing, you might even consider methods from our ultimate guide to sharpening woodworking chisels and planes for edge tools to prepare surfaces precisely.
Budget-Wise Application Practices
- Thin Coats are Economical: With all three finish types, applying thin, even coats is not only key to a beautiful finish but also conserves material. Excess material simply gets wiped off or builds up too thickly, leading to problems.
- Reusing Rags (for non-oil finishes): For wax or shellac application, cloths can often be washed and reused, reducing waste and cost. (Remember the safety warning for oil-soaked rags!).
- Proper Storage: Store your finishing materials correctly. Oils should be sealed tightly to prevent skinning. Shellac flakes should be kept dry and cool. Denatured alcohol should be in a tightly sealed, appropriate container to prevent evaporation. Proper storage extends the life of your products, preventing premature spoilage.
- Utilizing Scraps: Before committing to a finish on a large project, always test your chosen finish and application method on a scrap piece of the same wood. This prevents costly mistakes and ensures you’re happy with the final look before it’s too late. This also aligns with the principles of turning shop scraps into design features.
- Tool Maintenance: Keeping your brushes and application tools clean and in good condition means they’ll last longer, saving you money on replacements. Shellac brushes can be cleaned with denatured alcohol.
These natural finishes are not just economical; they also connect you to a long tradition of woodworking, allowing the craftsman’s touch to truly shine through. From a simple wooden fruit bowl to a complex piece of furniture, the journey of Budget-Friendly Wood Finishing: Achieving Professional Results with Oils, Waxes, and Shellac is rewarding and accessible.
Conclusion
The pursuit of Budget-Friendly Wood Finishing: Achieving Professional Results with Oils, Waxes, and Shellac is a testament to the enduring power of traditional methods and natural materials. As we navigate 2026, the appeal of finishes that are not only economical but also environmentally friendlier, easier to apply, and wonderfully repairable continues to grow. These finishes allow the inherent beauty of wood to be the star, providing depth, richness, and a tactile experience that often surpasses the artificial feel of many modern coatings.
Whether you’re a novice woodworker taking on your first small project or a seasoned craftsman looking for sustainable and cost-effective alternatives, oils, waxes, and shellac offer a versatile and rewarding path. By understanding their unique characteristics, mastering their application techniques, and practicing smart sourcing, you can elevate your woodworking projects to a professional standard without significant financial outlay. Embrace the journey of discovery with these timeless finishes, and watch your creations come to life with a warm, natural glow that speaks of quality and craftsmanship.
Actionable Next Steps
- Start Small: Pick a low-stakes project, like a small box or a piece of scrap wood, to practice applying each type of finish individually.
- Experiment with Combinations: Once comfortable, try layering an oil with shellac, or shellac with a wax topcoat, on different wood species to see the varied effects.
- Invest in Quality Basic Supplies: Purchase a small amount of pure tung oil, shellac flakes, denatured alcohol, and a good paste wax. These form the foundation of versatile finishing.
- Read Product Instructions: Always follow the specific drying and curing times recommended by the manufacturer for any finish you use.
- Prioritize Safety: Remember to always take precautions with oil-soaked rags and ensure good ventilation when working with solvents.
